We bought our home in Plymouth, MA, in March 2021, commenced a massive renovation a couple months later, and awoke for the first time in our new-to-us place on New Year’s Day 2022. This has … well it’s been a journey! It’s ending sooner than we expected – we went into contract on Friday, Feb 13th – and we’re relocating back to CA. We’ll get some content around that together soon. Meanwhile, here are some nuggets about our soon-to-be-former 6000 square foot “casita” and the adventures we had renovating her. There are some GREAT pics of her here.
Here’s what I would have written for our MLS listing, were it up to me:
“location, Location, LOCATION! Halfway between Hingham and Hyannis, and nearby to popular beach enclave Manomet, and affluent Pine Hills, Plymouth is up and coming, and this house is very well situated.
Completely renovated, design-forward home offering modern efficiency, flexible living, and a prime Plymouth location on over an acre of land. Walkable to downtown Plymouth, Long Beach, and the beautifully redone Stephens Field coastal park — just one mile to Route 3, the hospital, and police station — all with none of the associated noise.
Formerly low upstairs ceilings have been vaulted, creating dramatic volume and light. Extensive upgrades include spray-foam insulation, all-new plumbing and electrical, 5-zone HVAC, instant hot water, solar panels, and a relatively new roof. The efficiency is remarkable: summertime electric costs $10 monthly on average; winter gas bills average around $500, again for six thousand square feet.
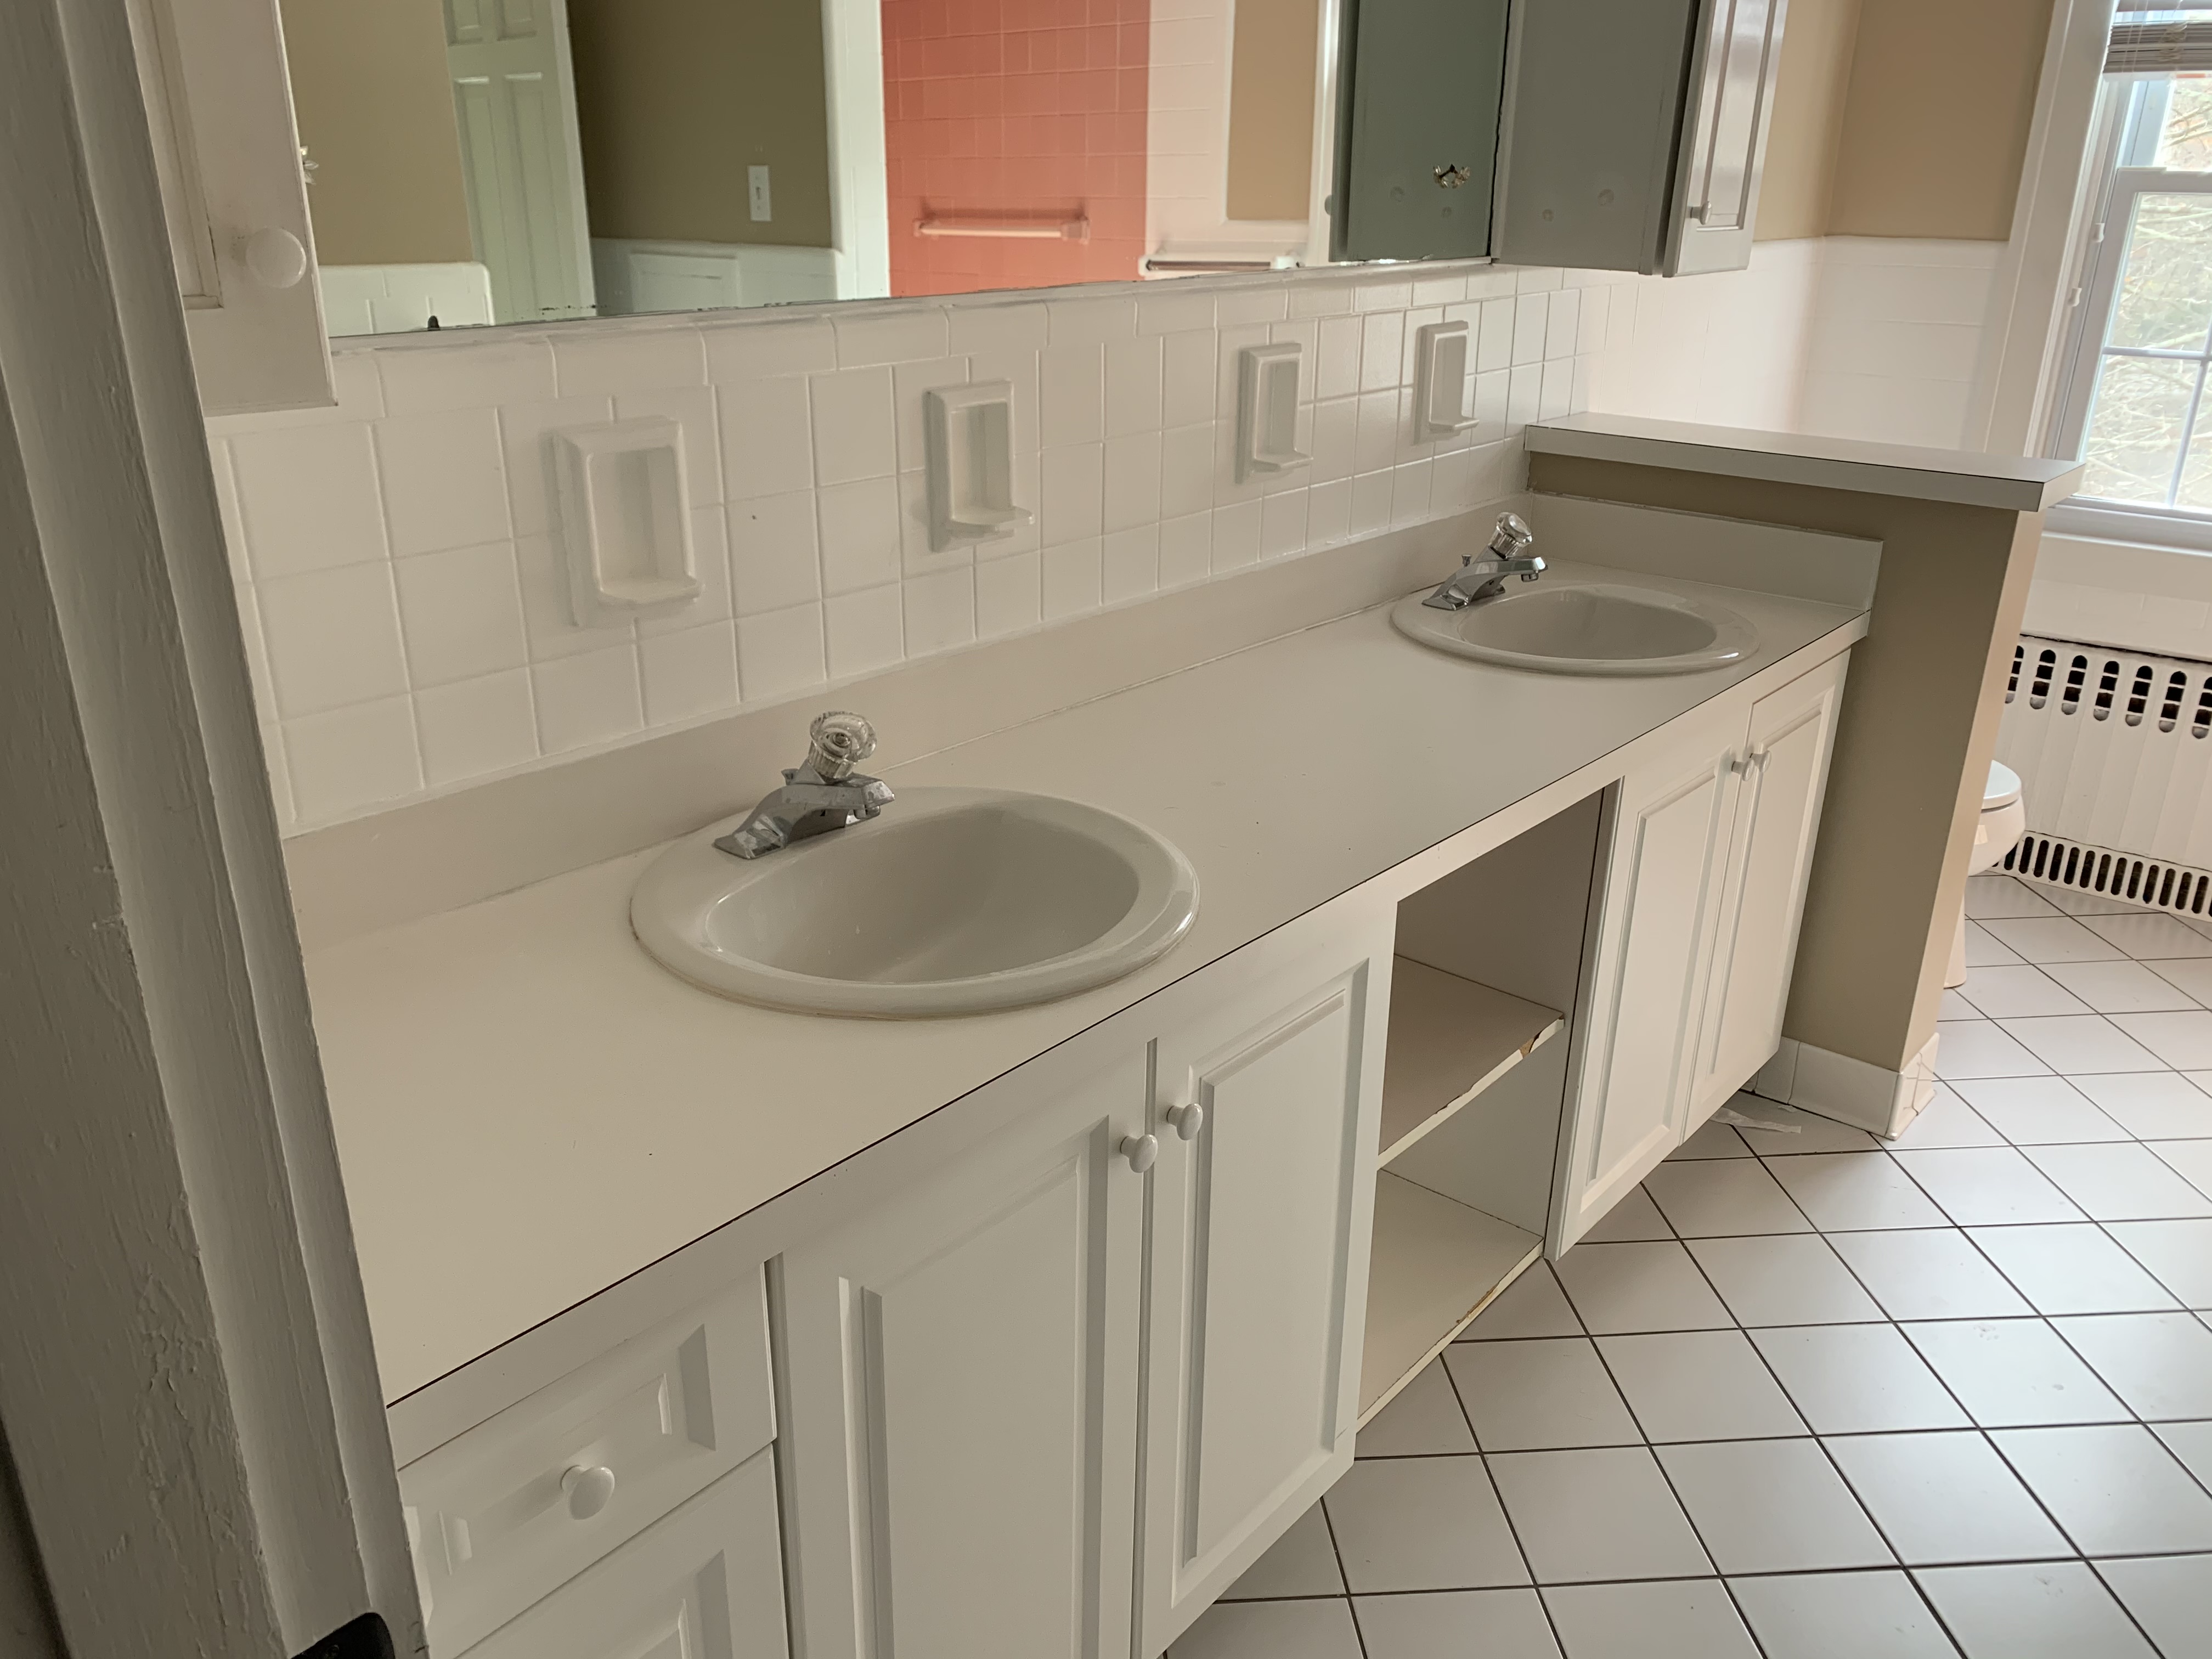
The fully remodeled and expanded chef’s kitchen anchors the home, complemented by transitional and mid-century modern finishes throughout. Fully revamped laundry, spacious pantry with all new wood shelving. Three palatial primary en-suite bedrooms, three fully renovated full baths (one with soaking tub), plus two updated half baths. Abundant storage throughout.
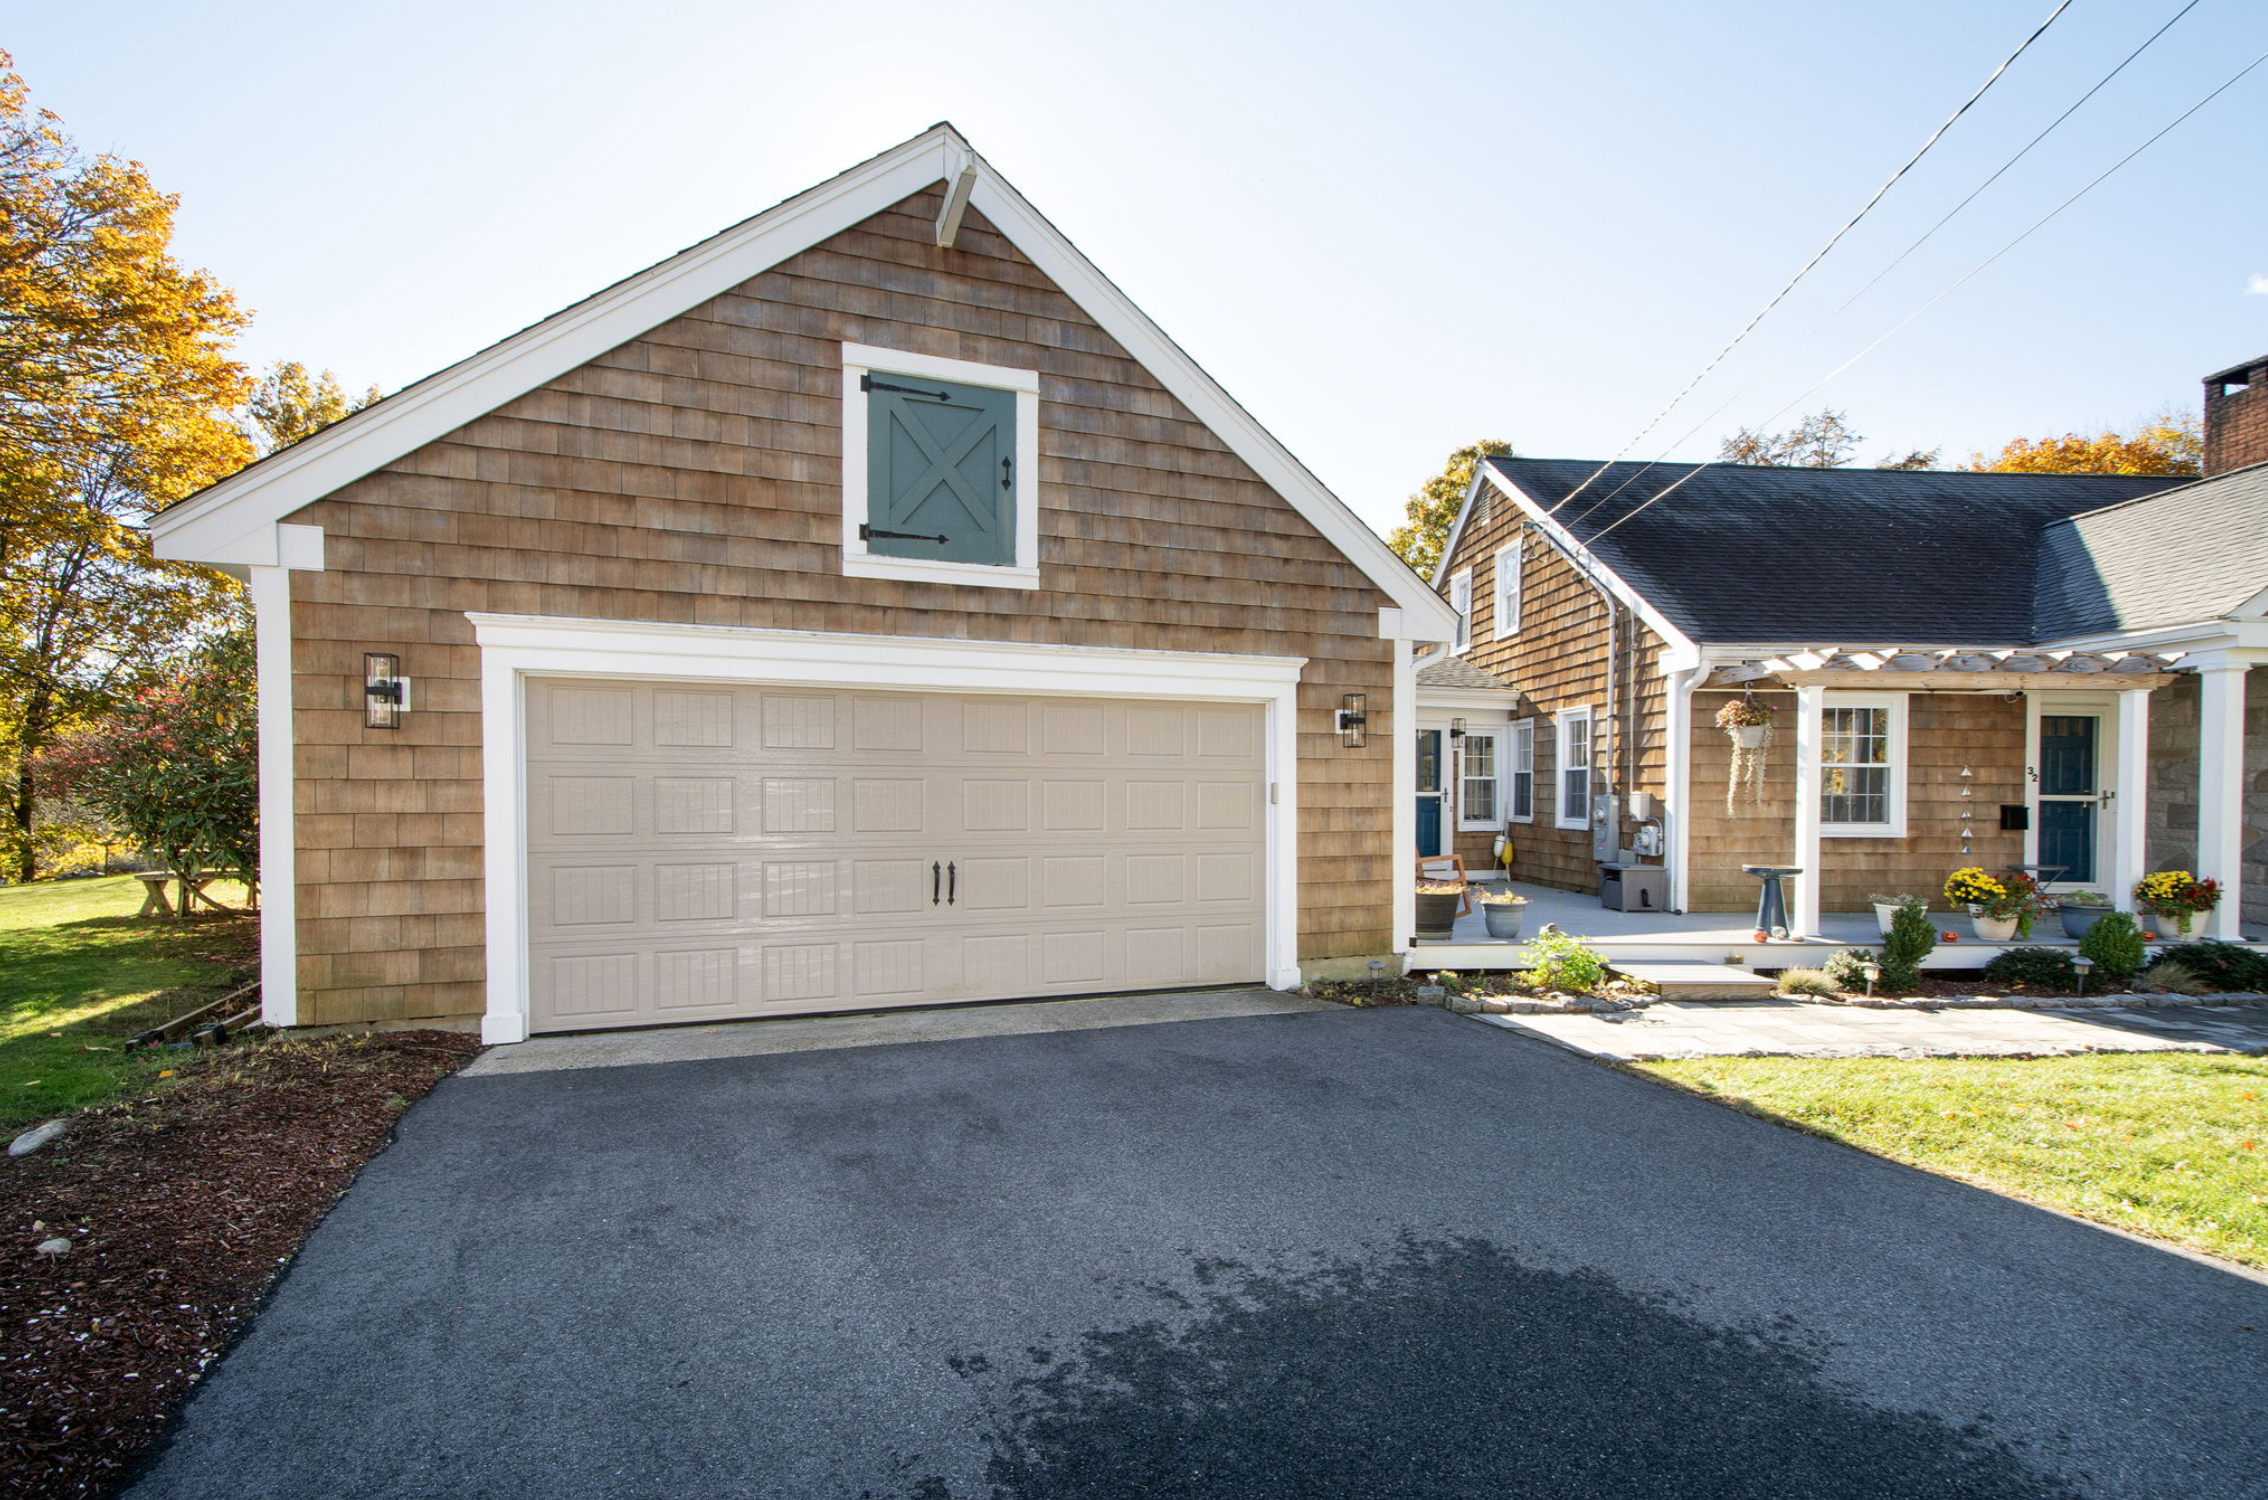
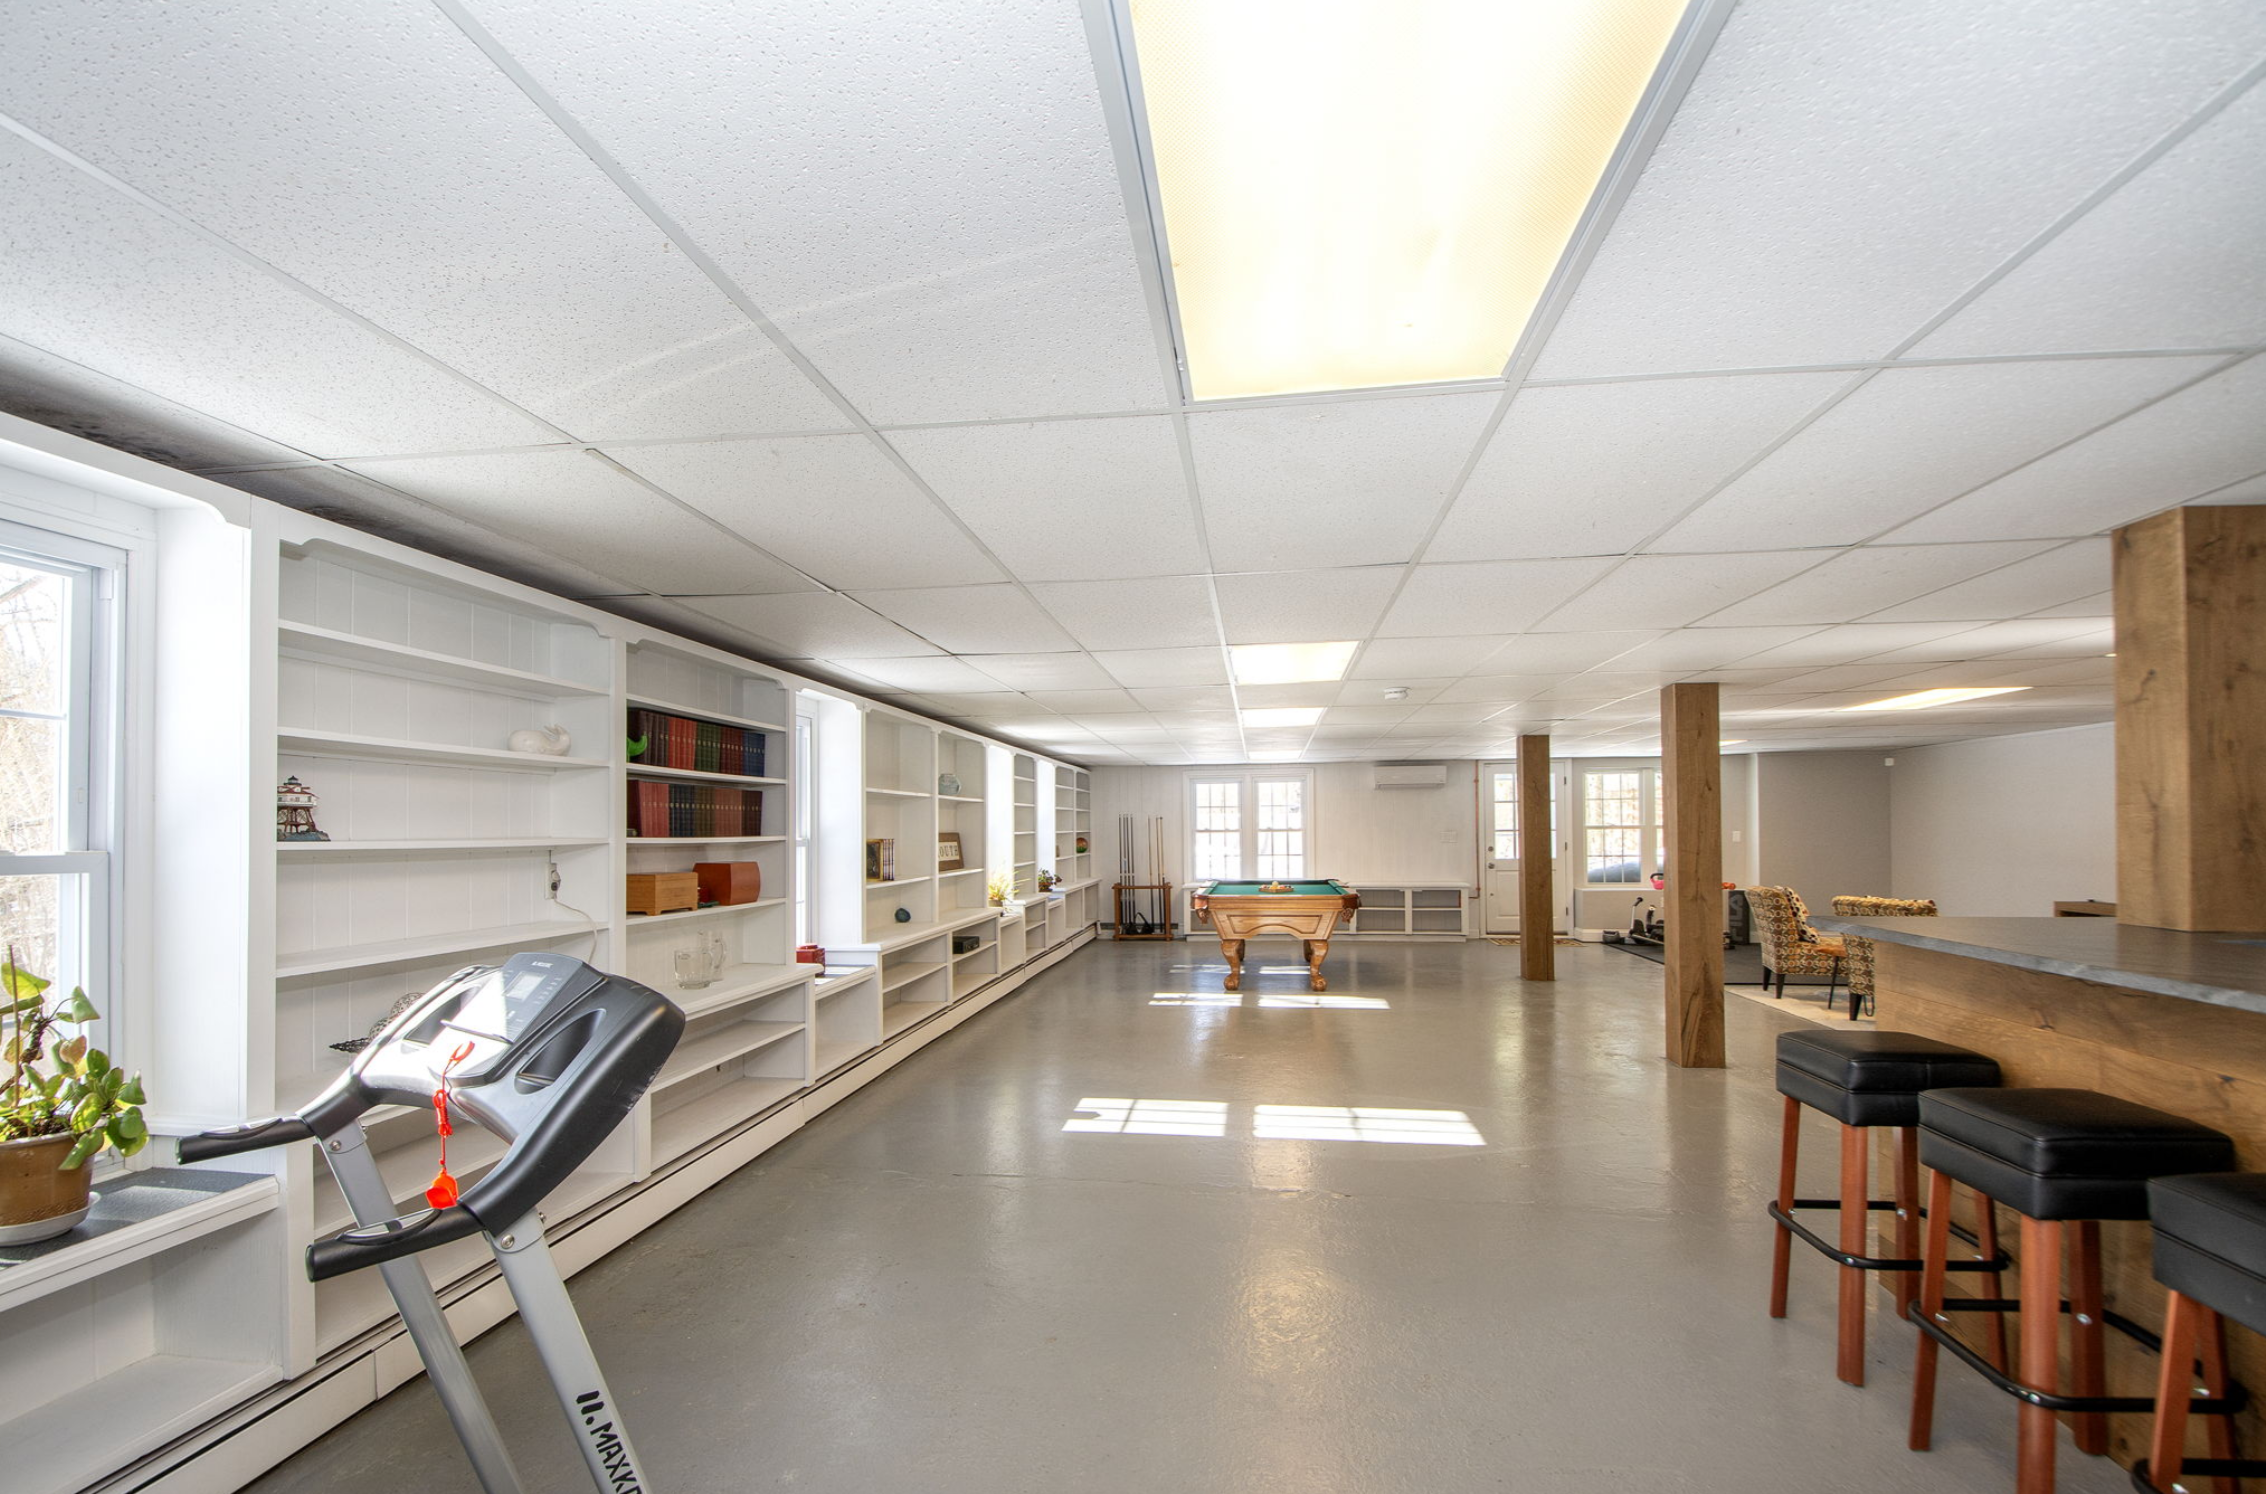
Finished walk-out basement offers additional living and entertaining space with wet bar, pool table, and massive storage. Completely remodeled two-car garage, newly paved driveway with parking for three additional cars, and extensive front and rear soft- and hardscaping create beautiful, low-maintenance outdoor spaces. Truly move-in ready with no deferred maintenance.”

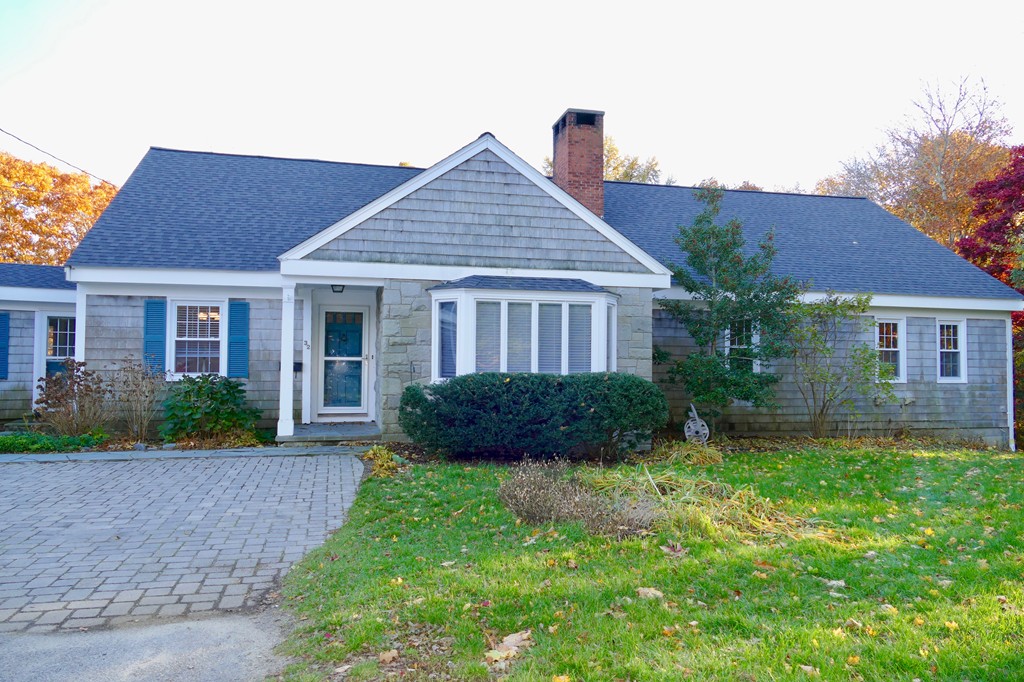
Originally, we found this ideally located spot in a wonderful downtown neighborhood together with my sister-in-law, whose husband had just gone into care. And, since names are important, we dubbed the house our Cape Casita de Tres Chicas – it’s a cape style home, and large tho it is, cozy enough for us 3 Mujeres.


At 6000 square feet, she afforded 3 working adults plenty of corners to which to retreat, as well as common spaces aplenty. With 2 primary bedroom suites, a full guest suite, a mudroom bridging the entry to the home from the garage, and a 1400 square foot finished ground floor walk-out basement with completed storage space, a half bath, gym, wet bar and gaming room, spacious is the key word.
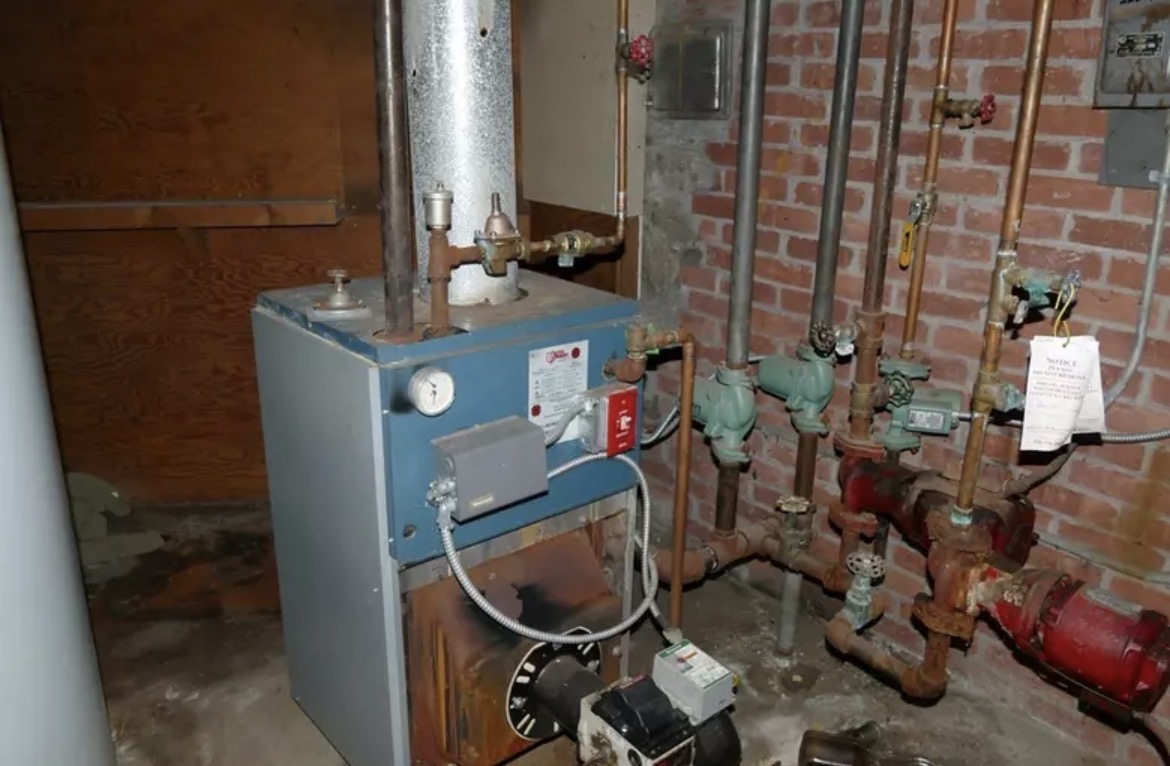
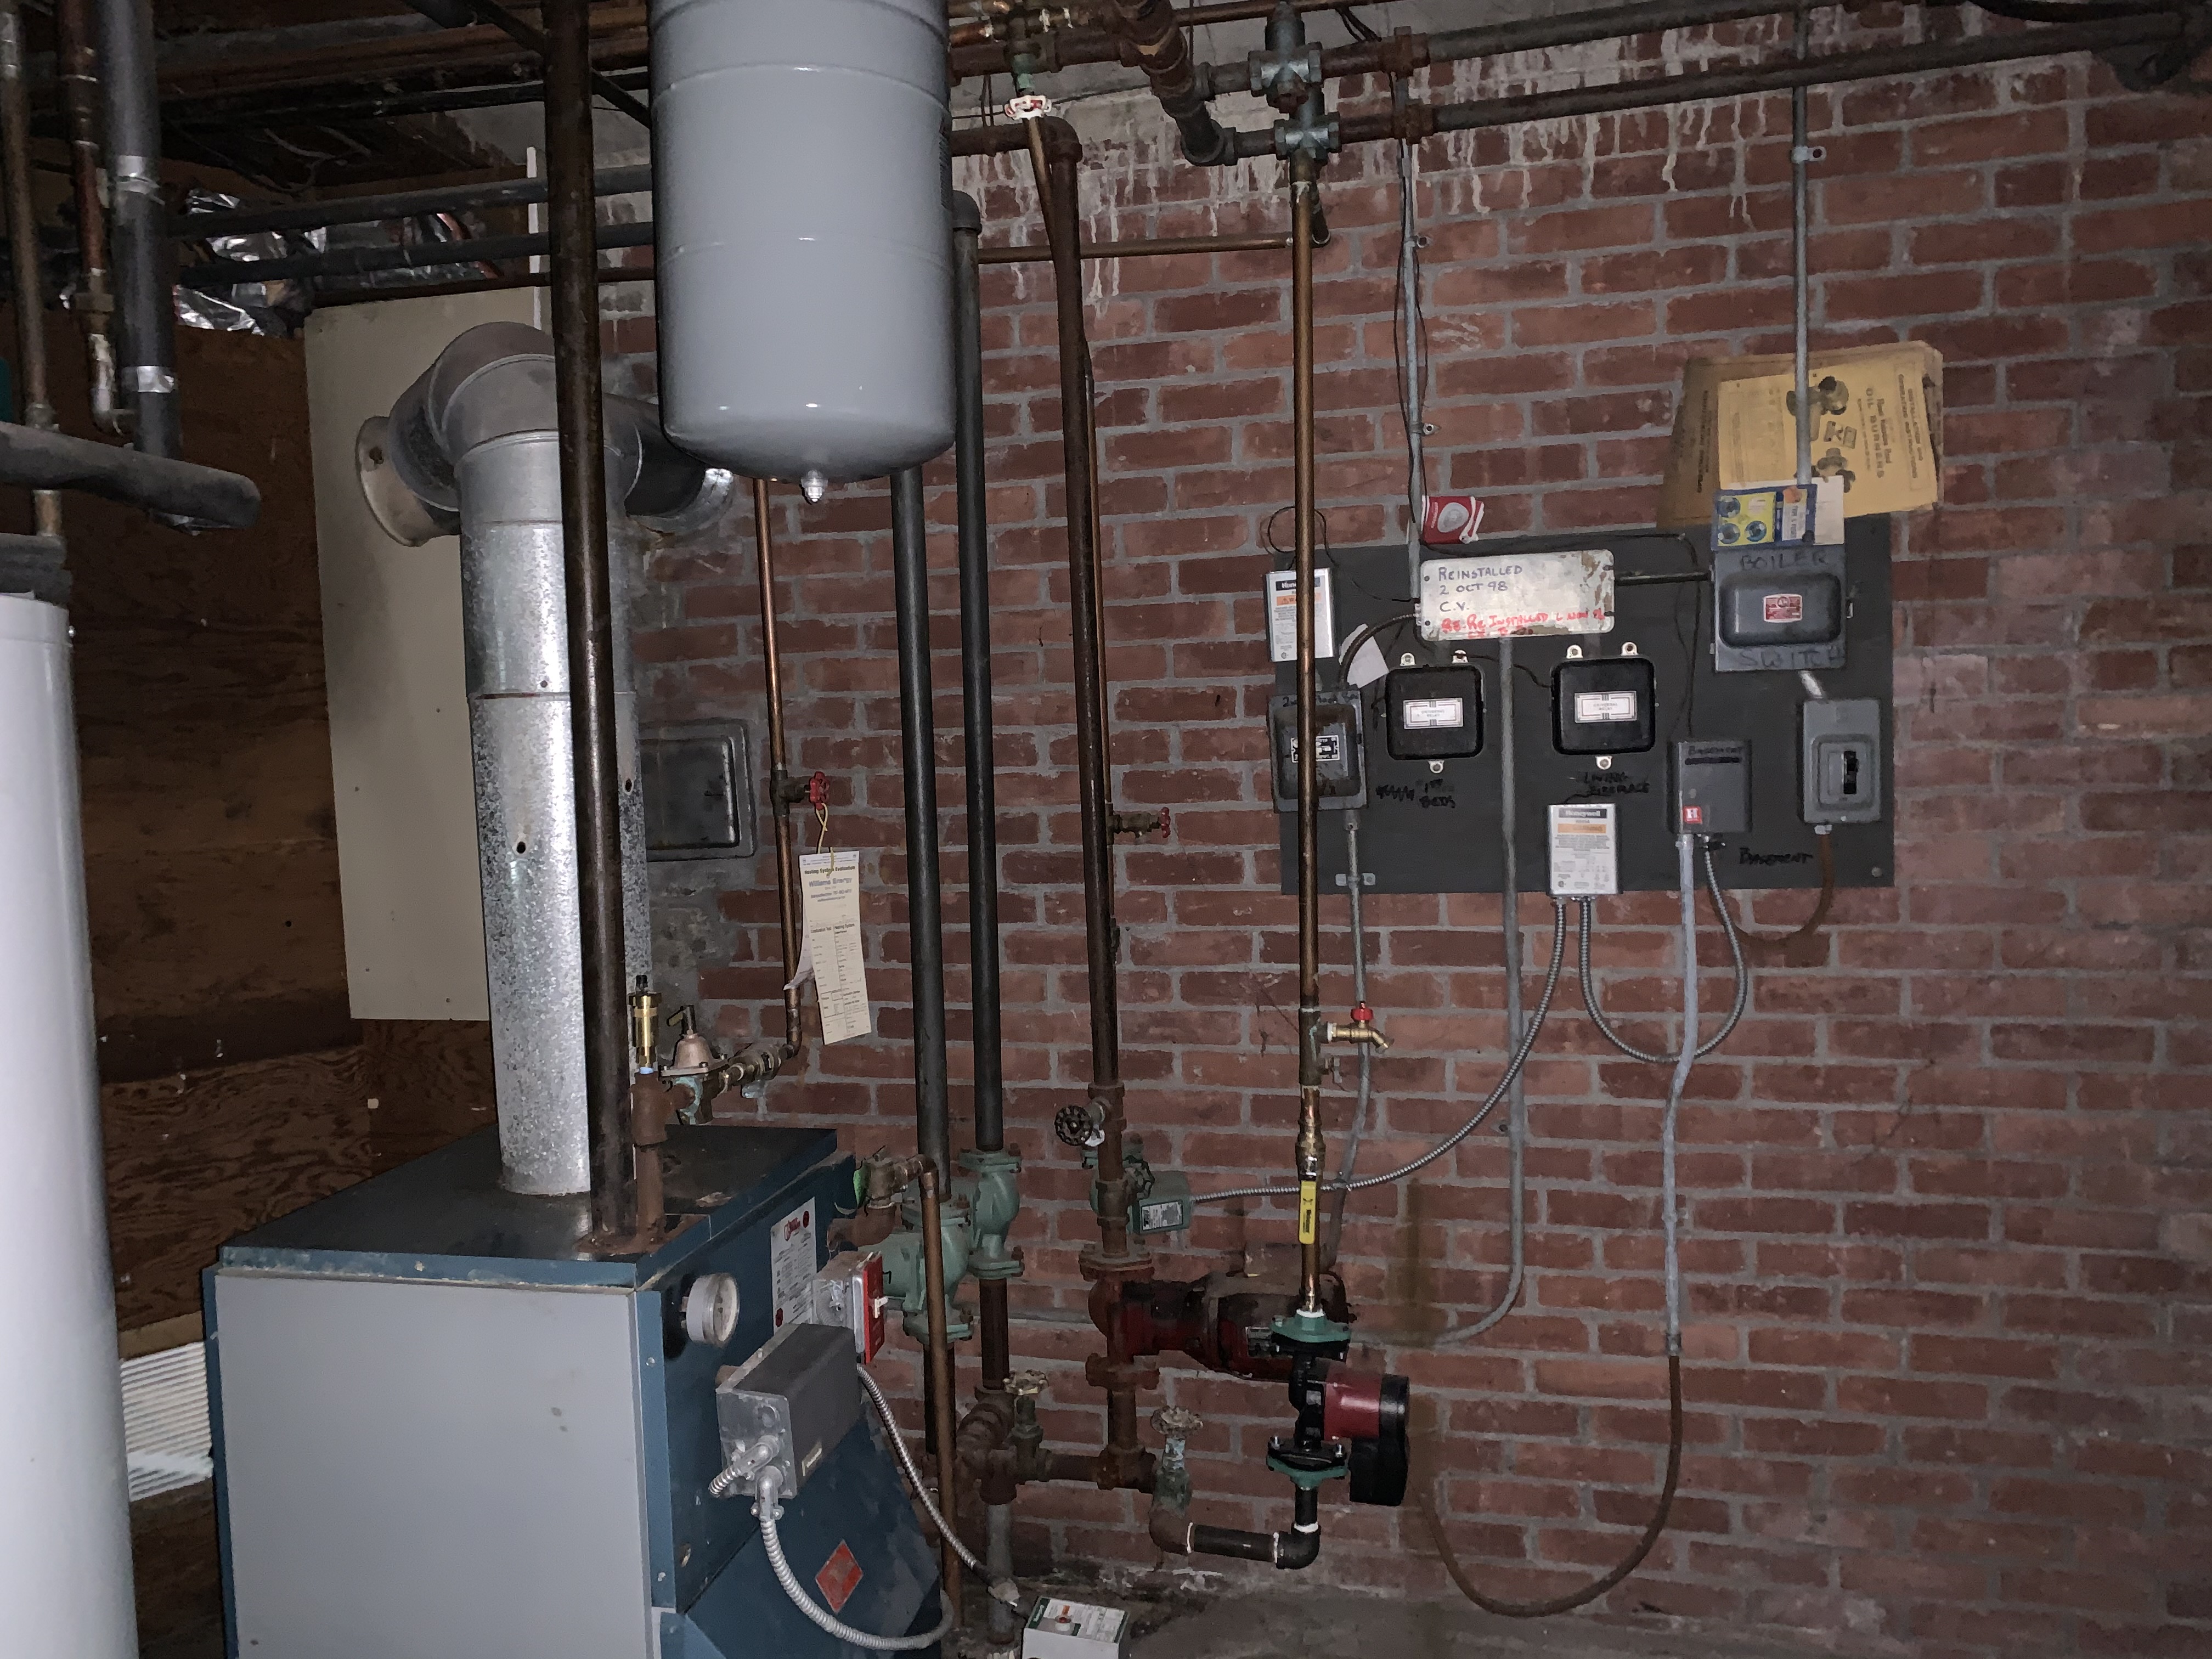
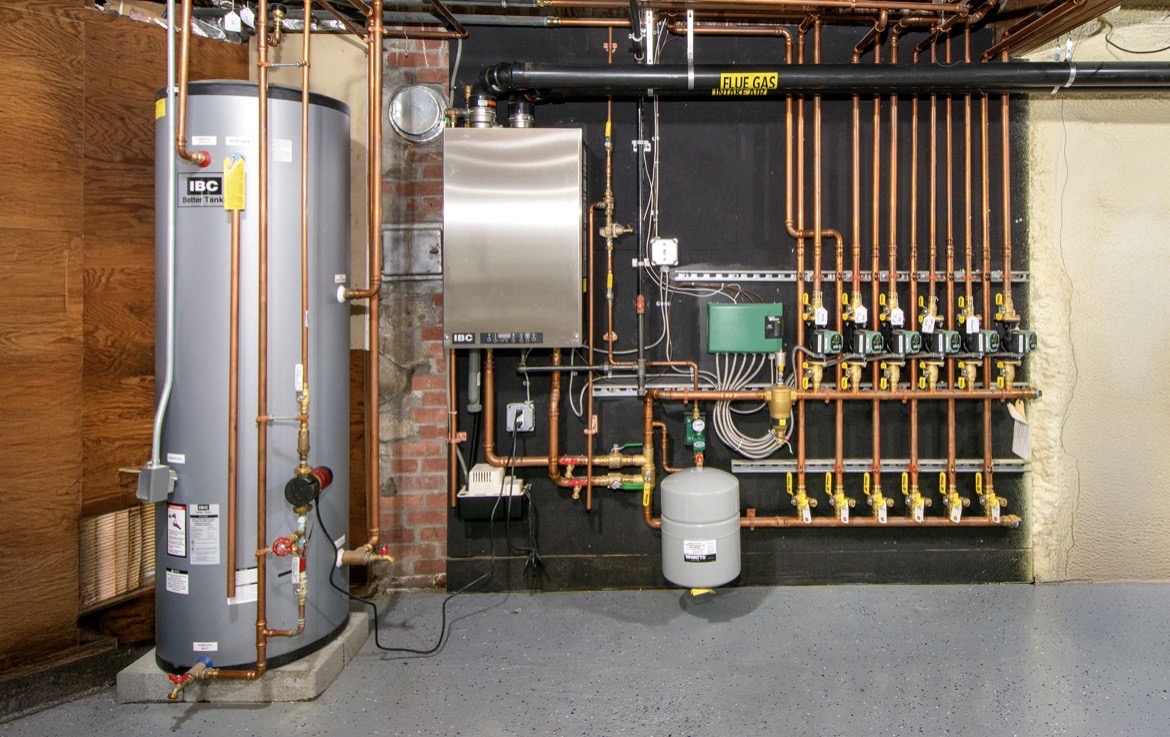
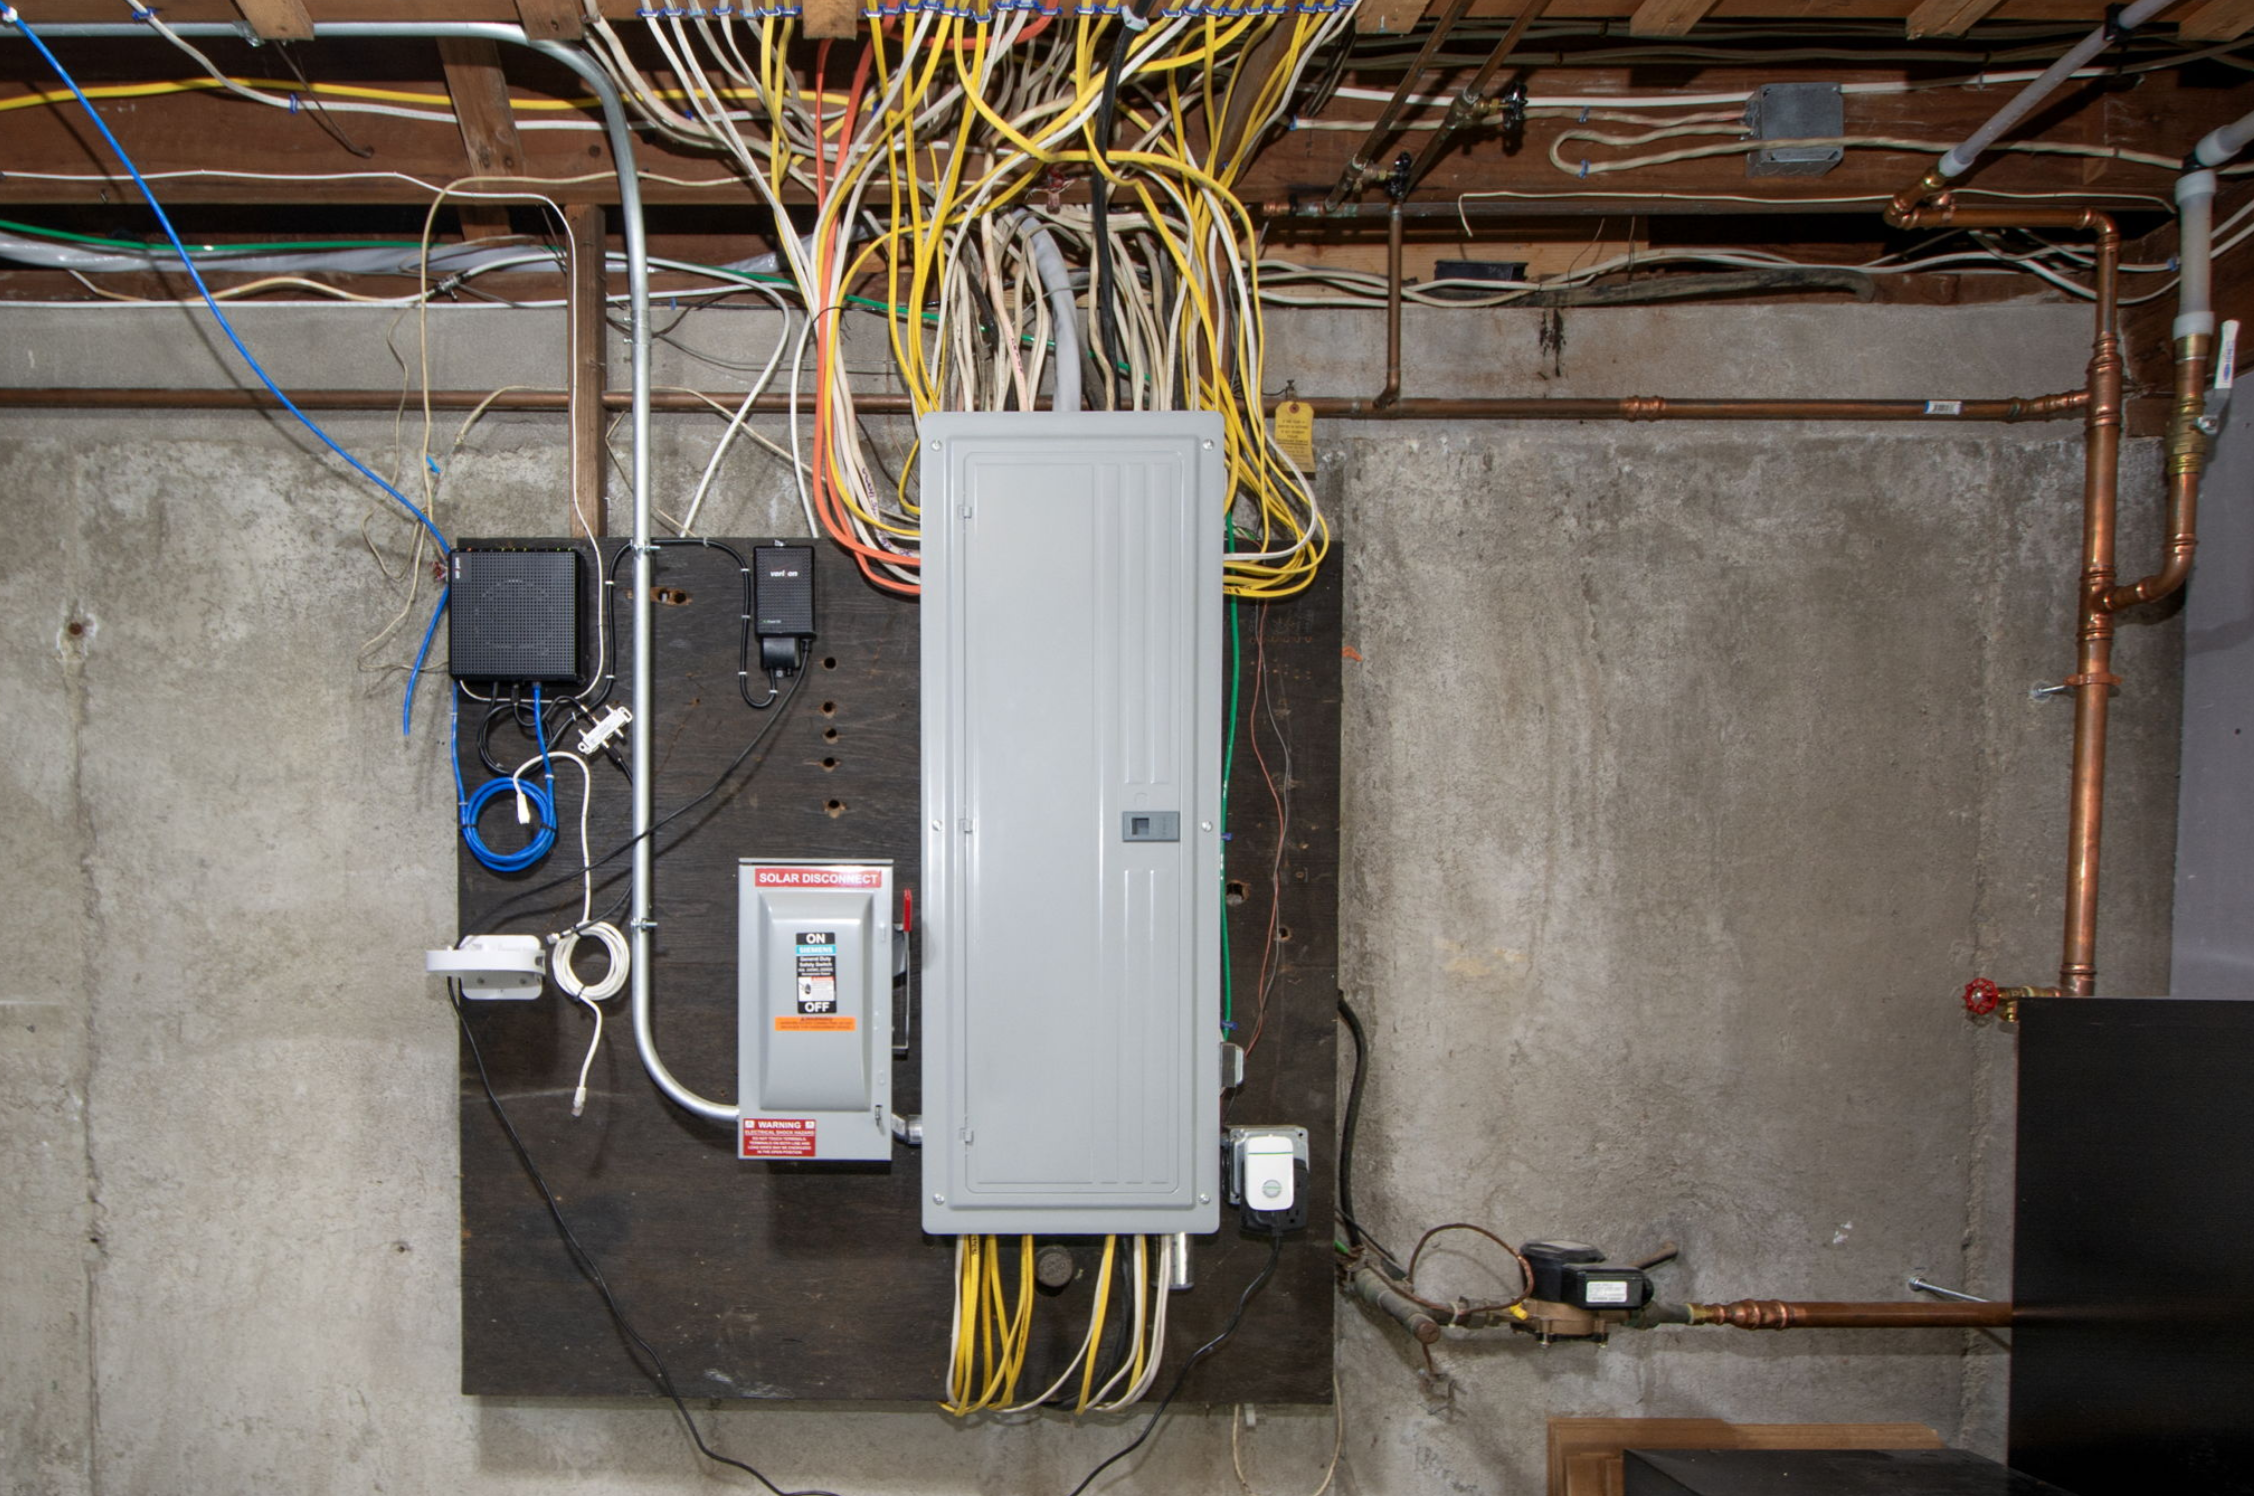
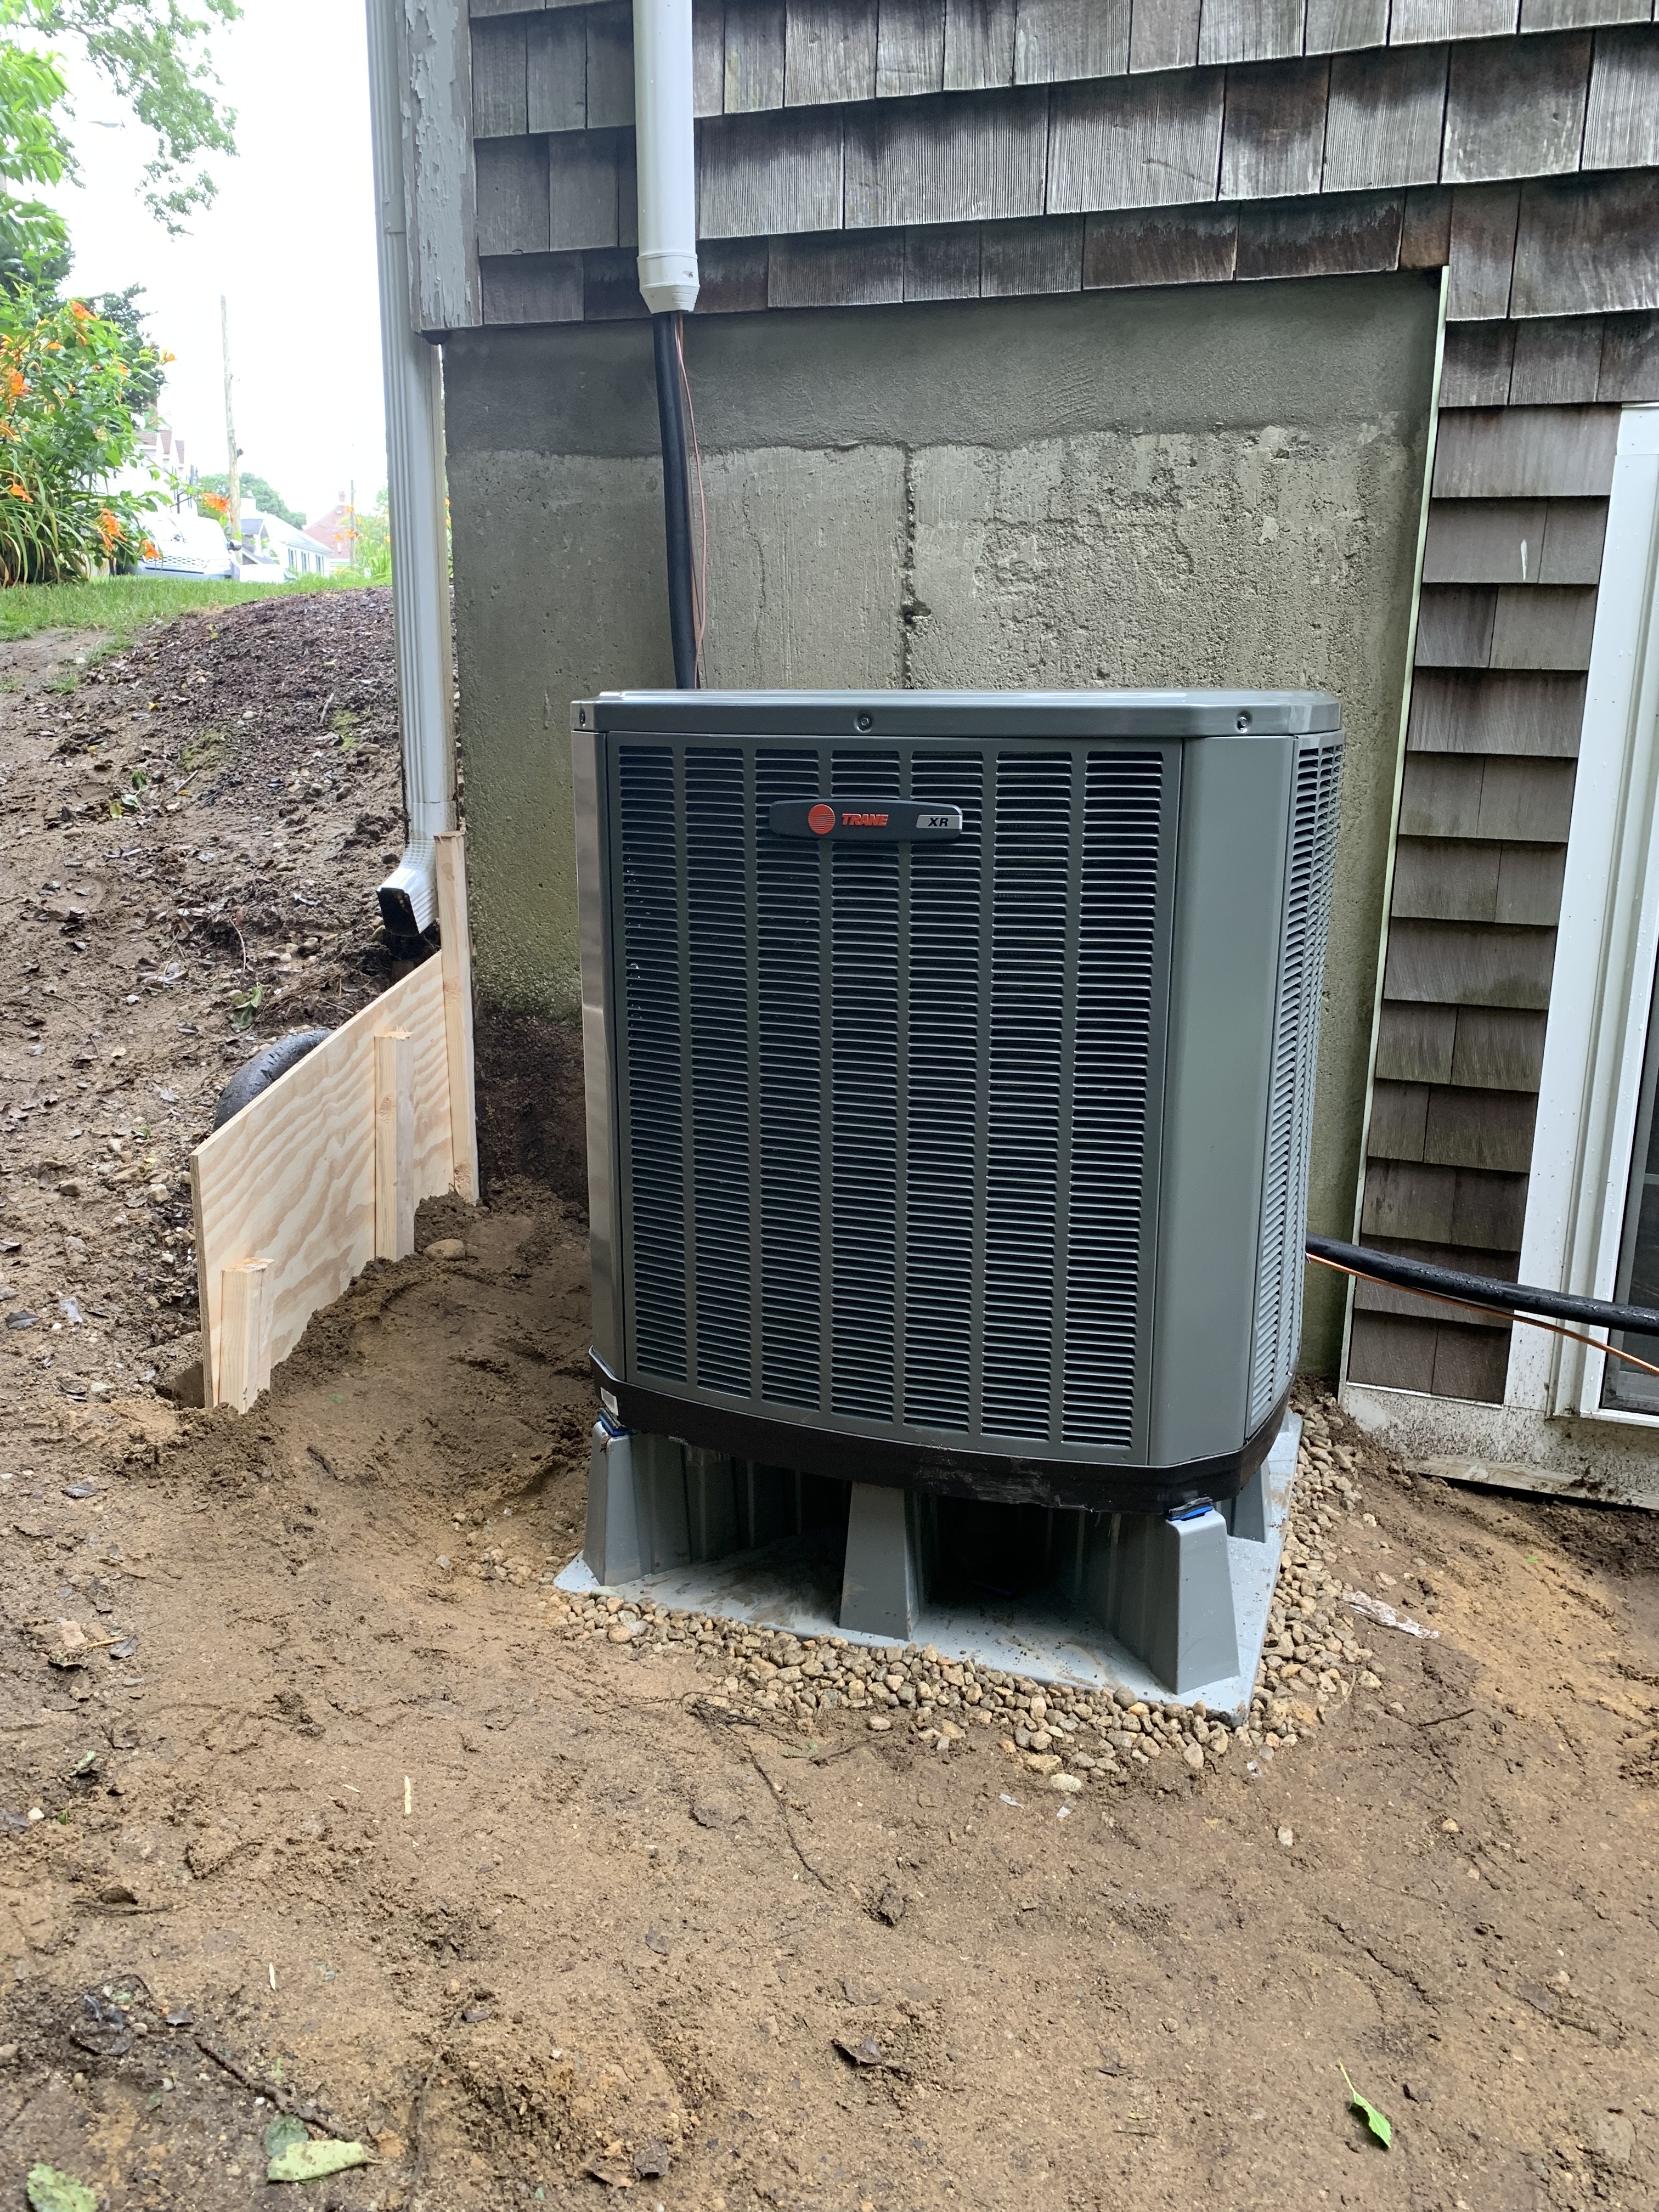
BUT: She needed love. A lotta love! Starting with the infrastructure, we completely overhauled what turned out to be deeply neglected plumbing and electrical systems – our Realtor dubbed the new HVAC “the Bugatti of HVAC systems”. 😂😤 We converted from oil to gas heating, thoroughly insulated, and mitigated the flooding exacerbated by the town’s seeming disinterest in public safety measures. She is now much more safe and efficient.
We gutted most of the main and 2nd floors, opening up the kitchen to create a continuously flowing space amidst the living and dining rooms. We opened up the terrifyingly cramped, curving stairwell from main to 2nd floor, making it safer, bringing it to code, and beautifying it. Our builder even added a cleverly hidden entry to an attic storage space mid-railing, which would otherwise have been nightmarish to move further back, given the elongated stairwell.
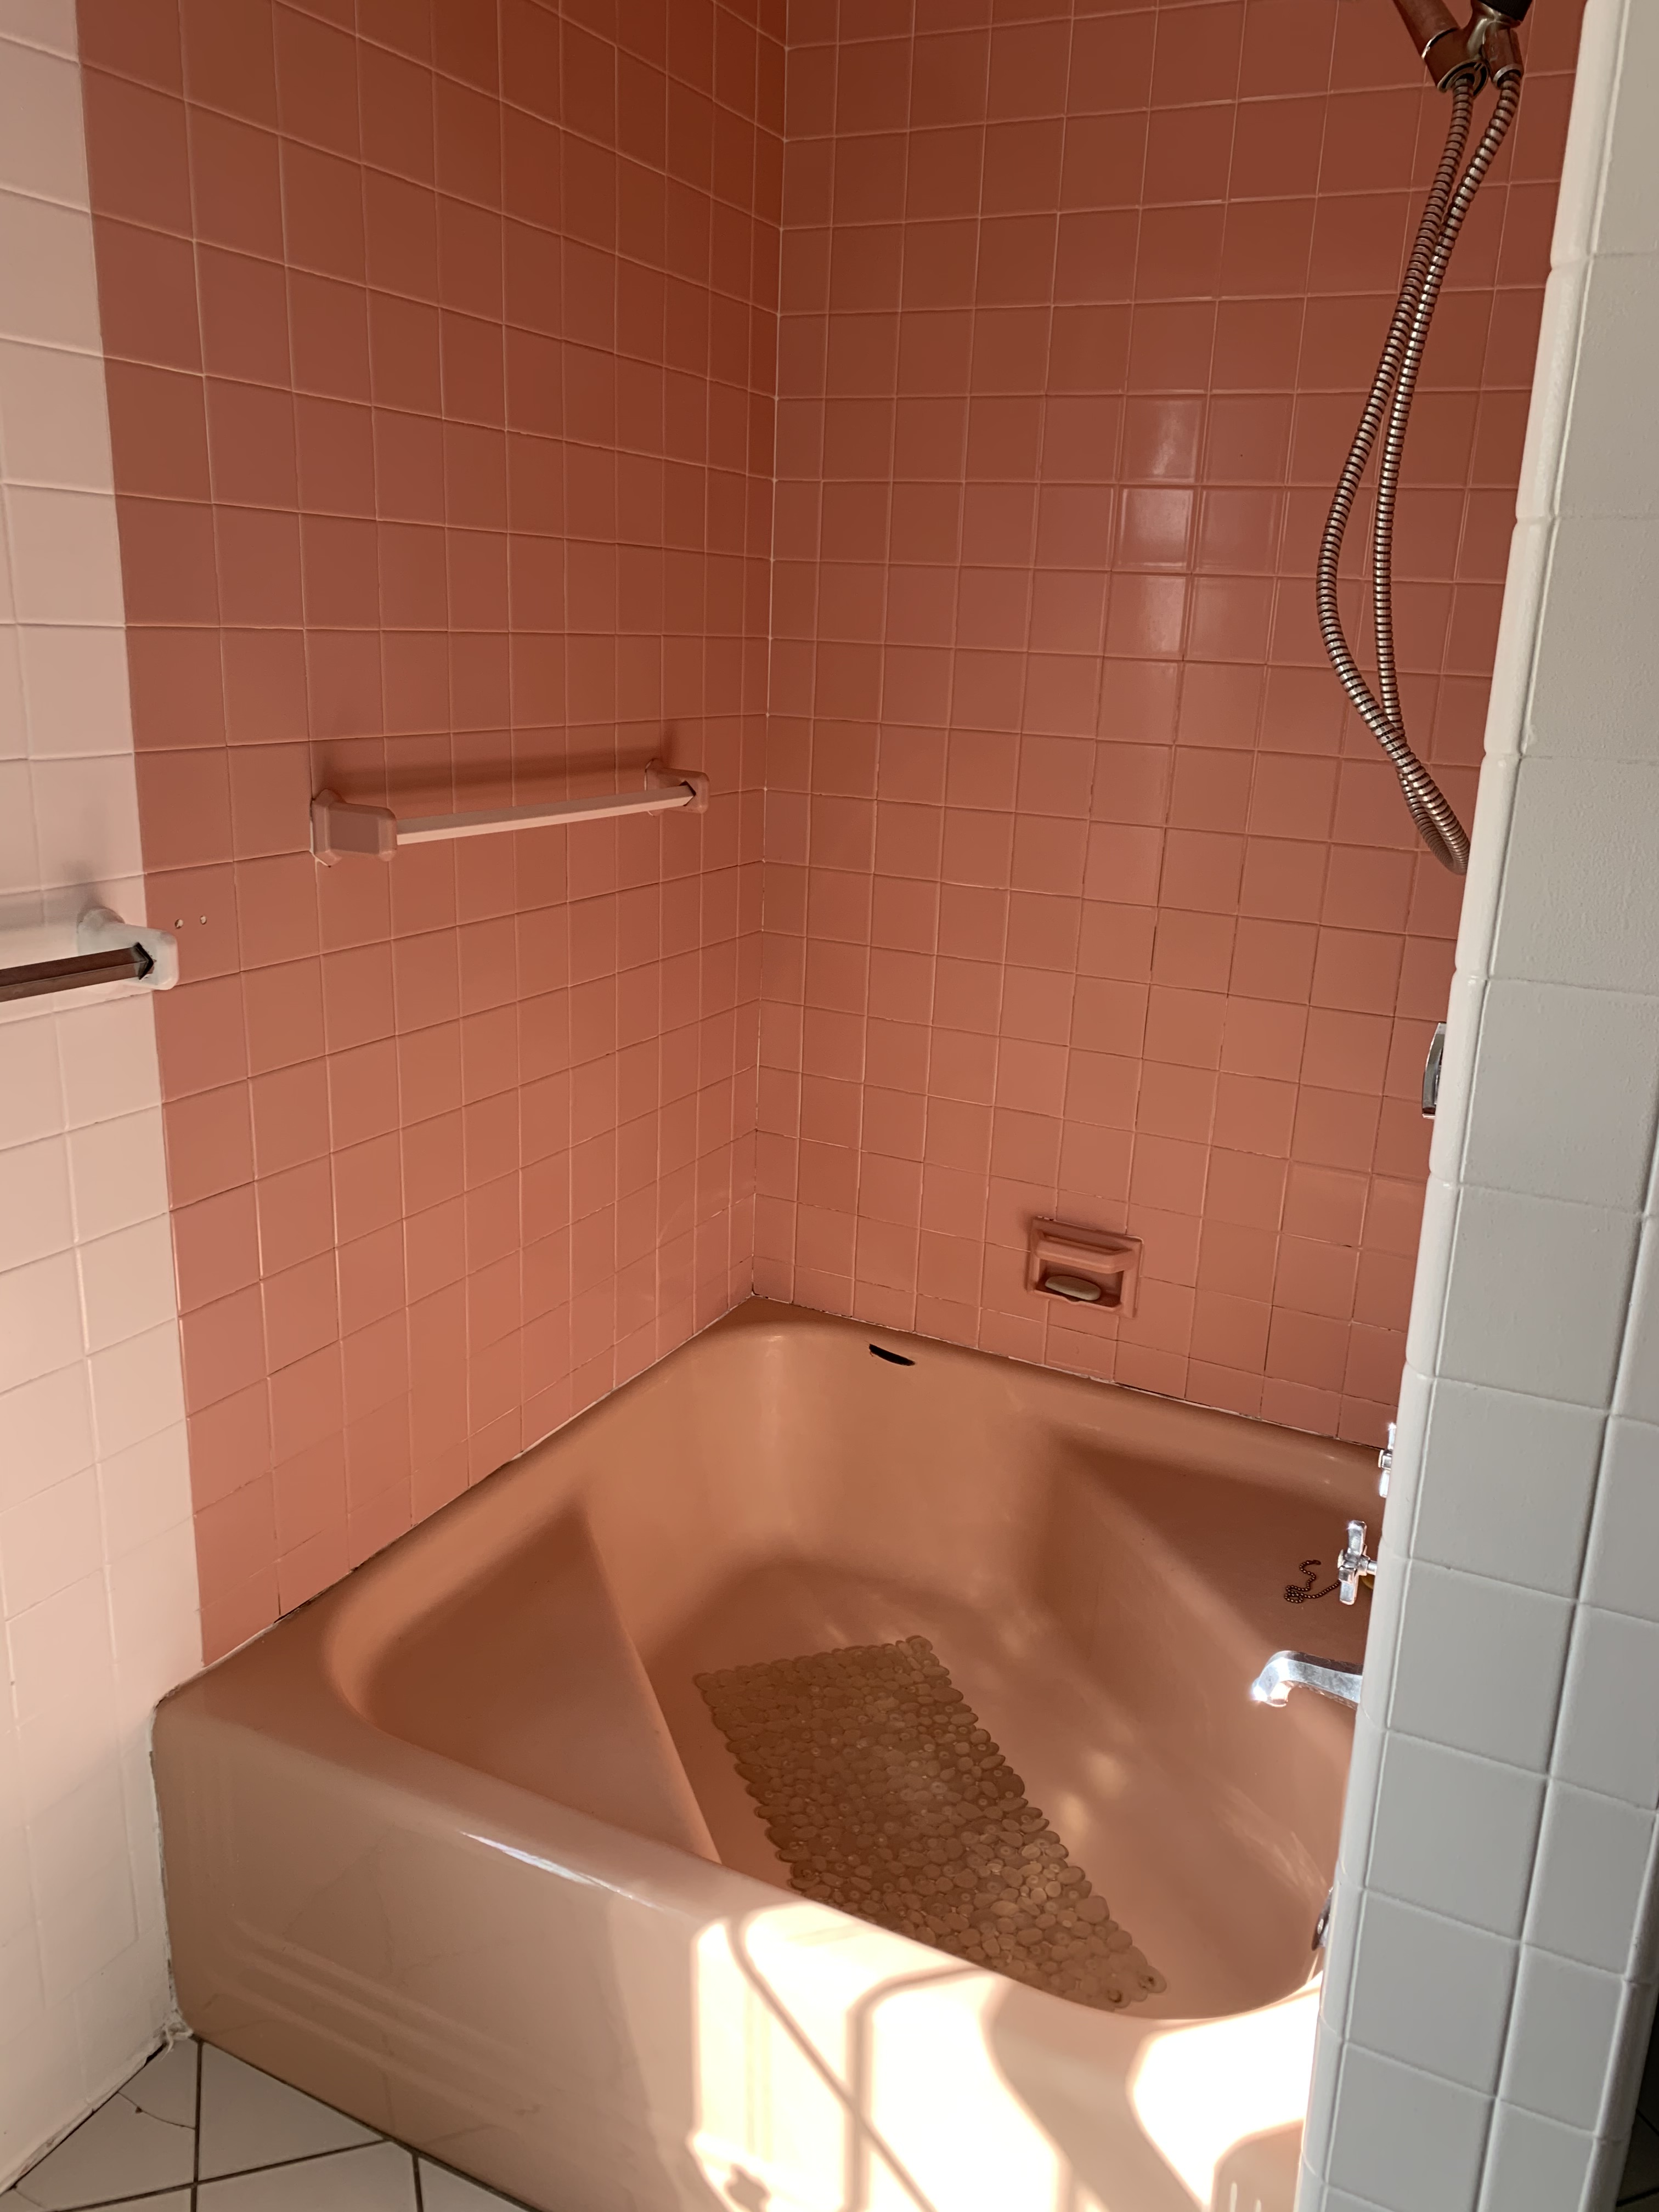
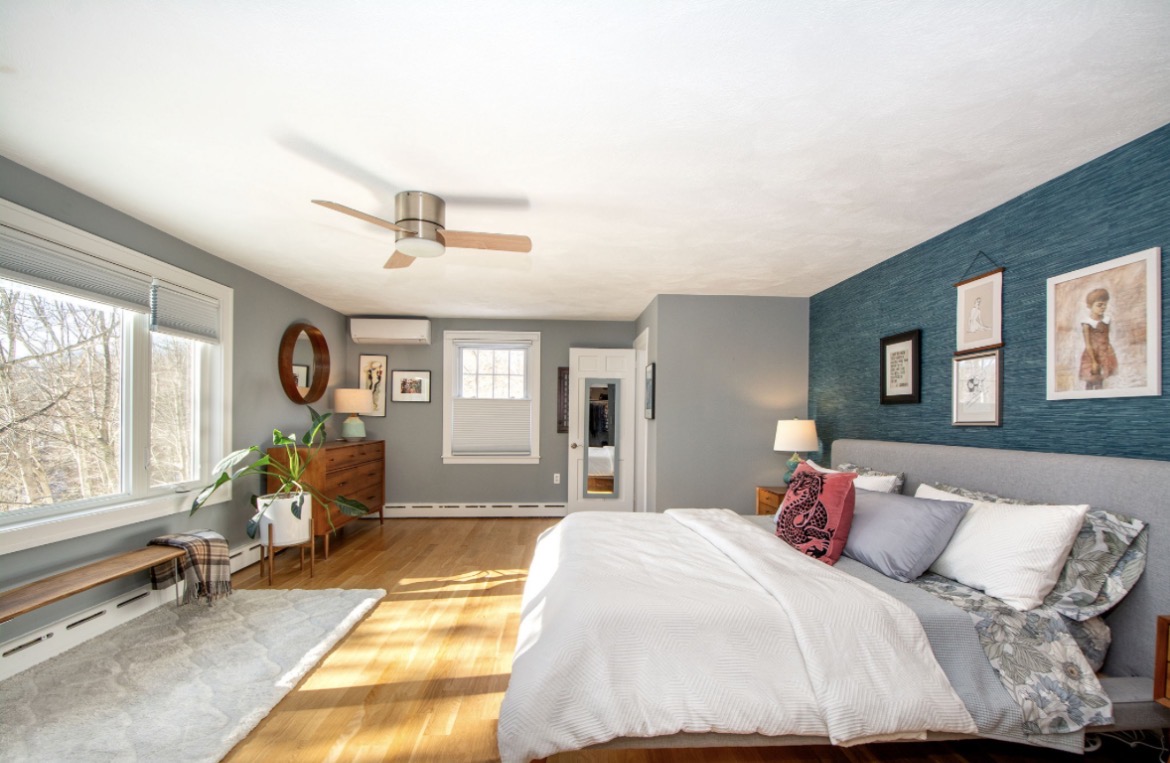
We expanded the primary bath on the main floor, converting the shower stall to a curbless entry with infinity drain, and adding a freestanding soaking tub, a custom walnut vanity, a washlet and mid-century mod finishes. We cathedralled the ceilings of both upstairs suites, gutted both baths, and refinished the wood floor in the primary upstairs bedroom. To bring in more light, we added transom windows to all three en-suite showers. No square footage was added, but it feels much more bright, expansive and open now.
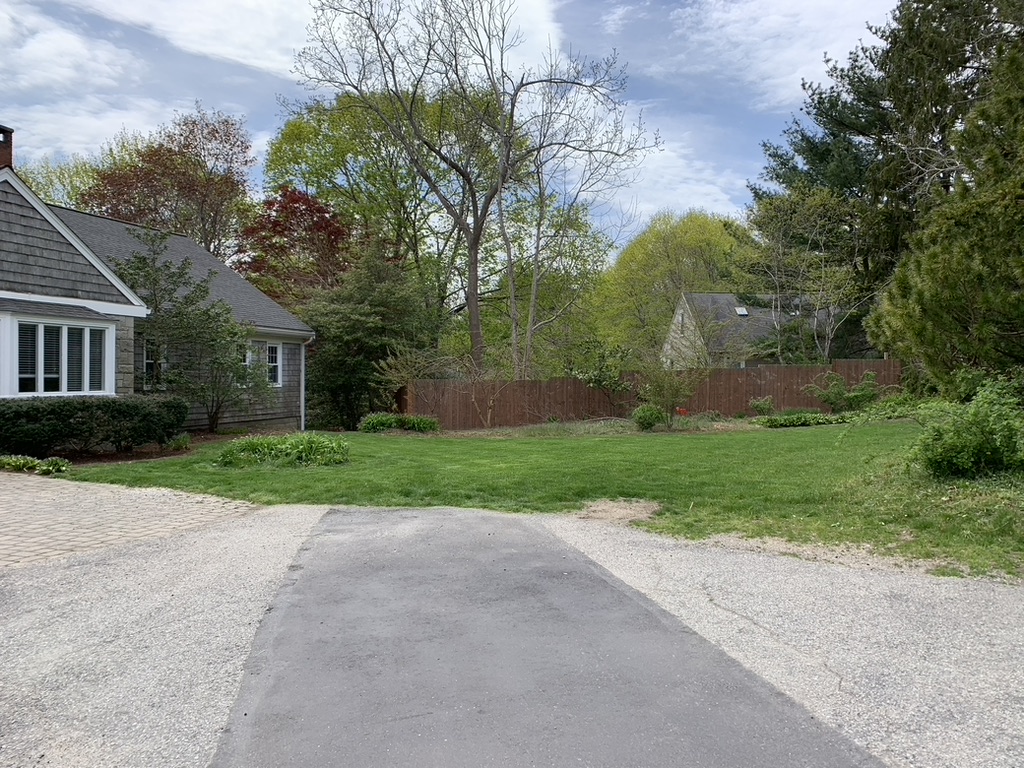
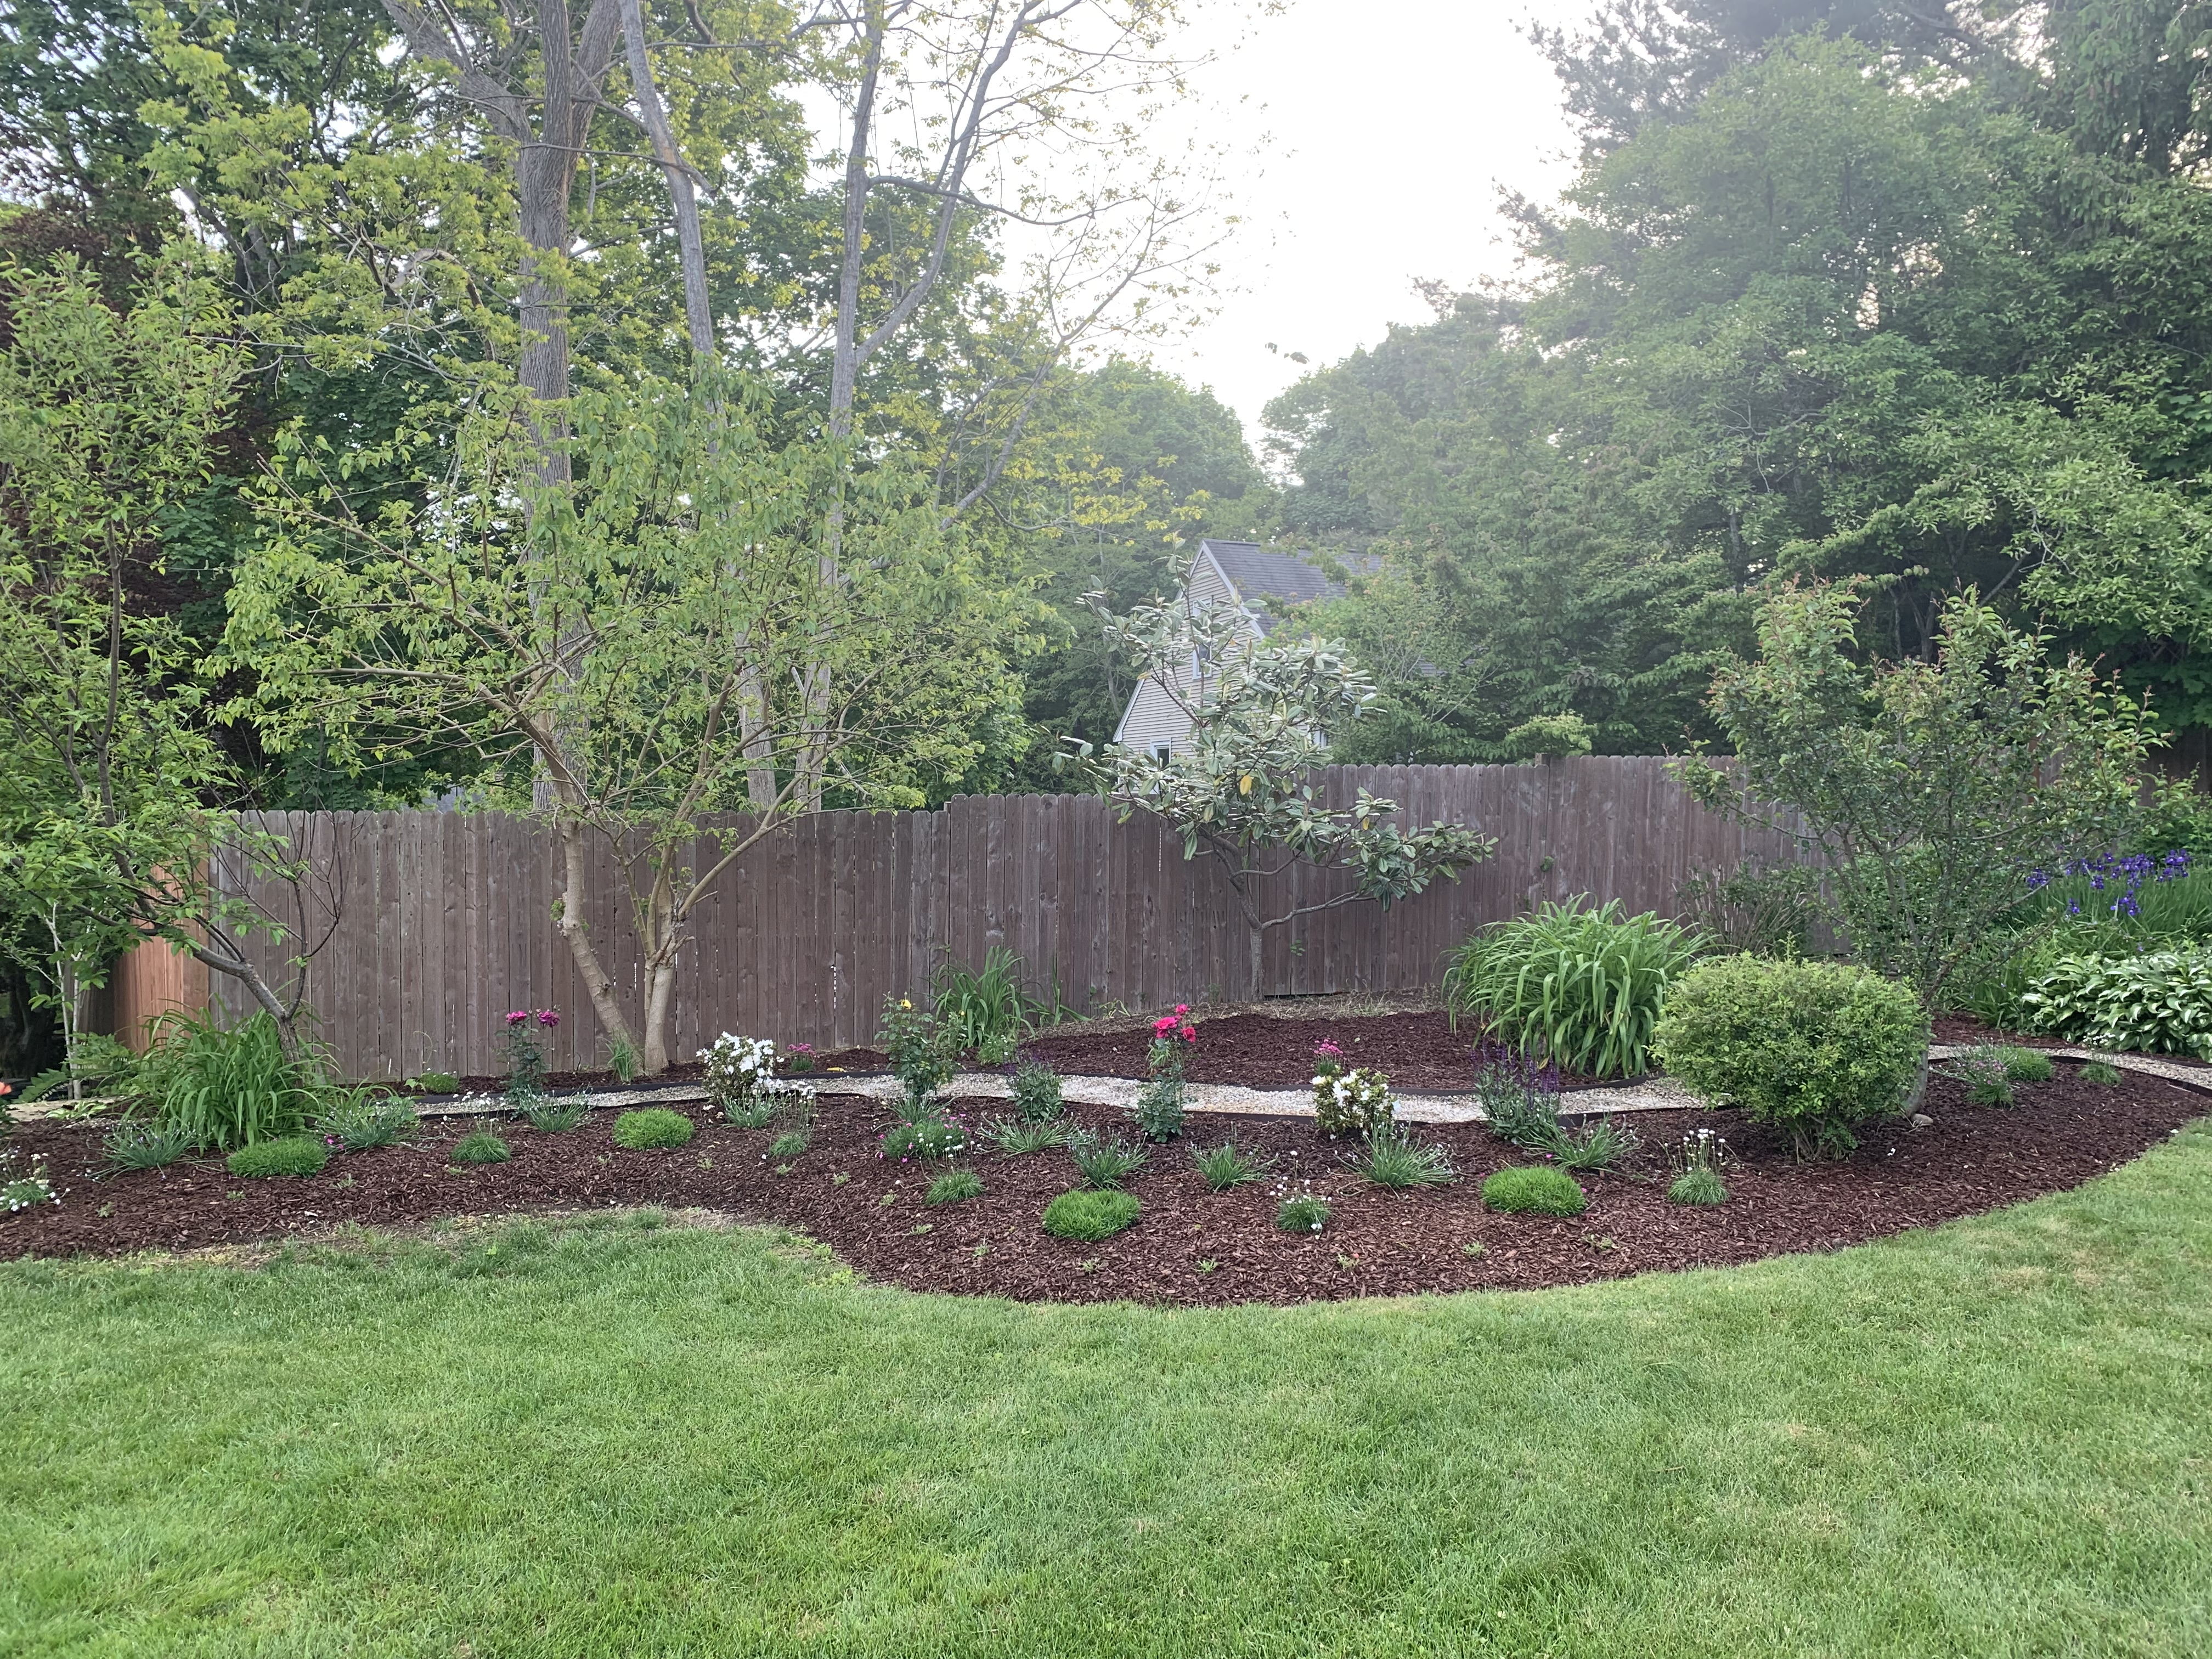
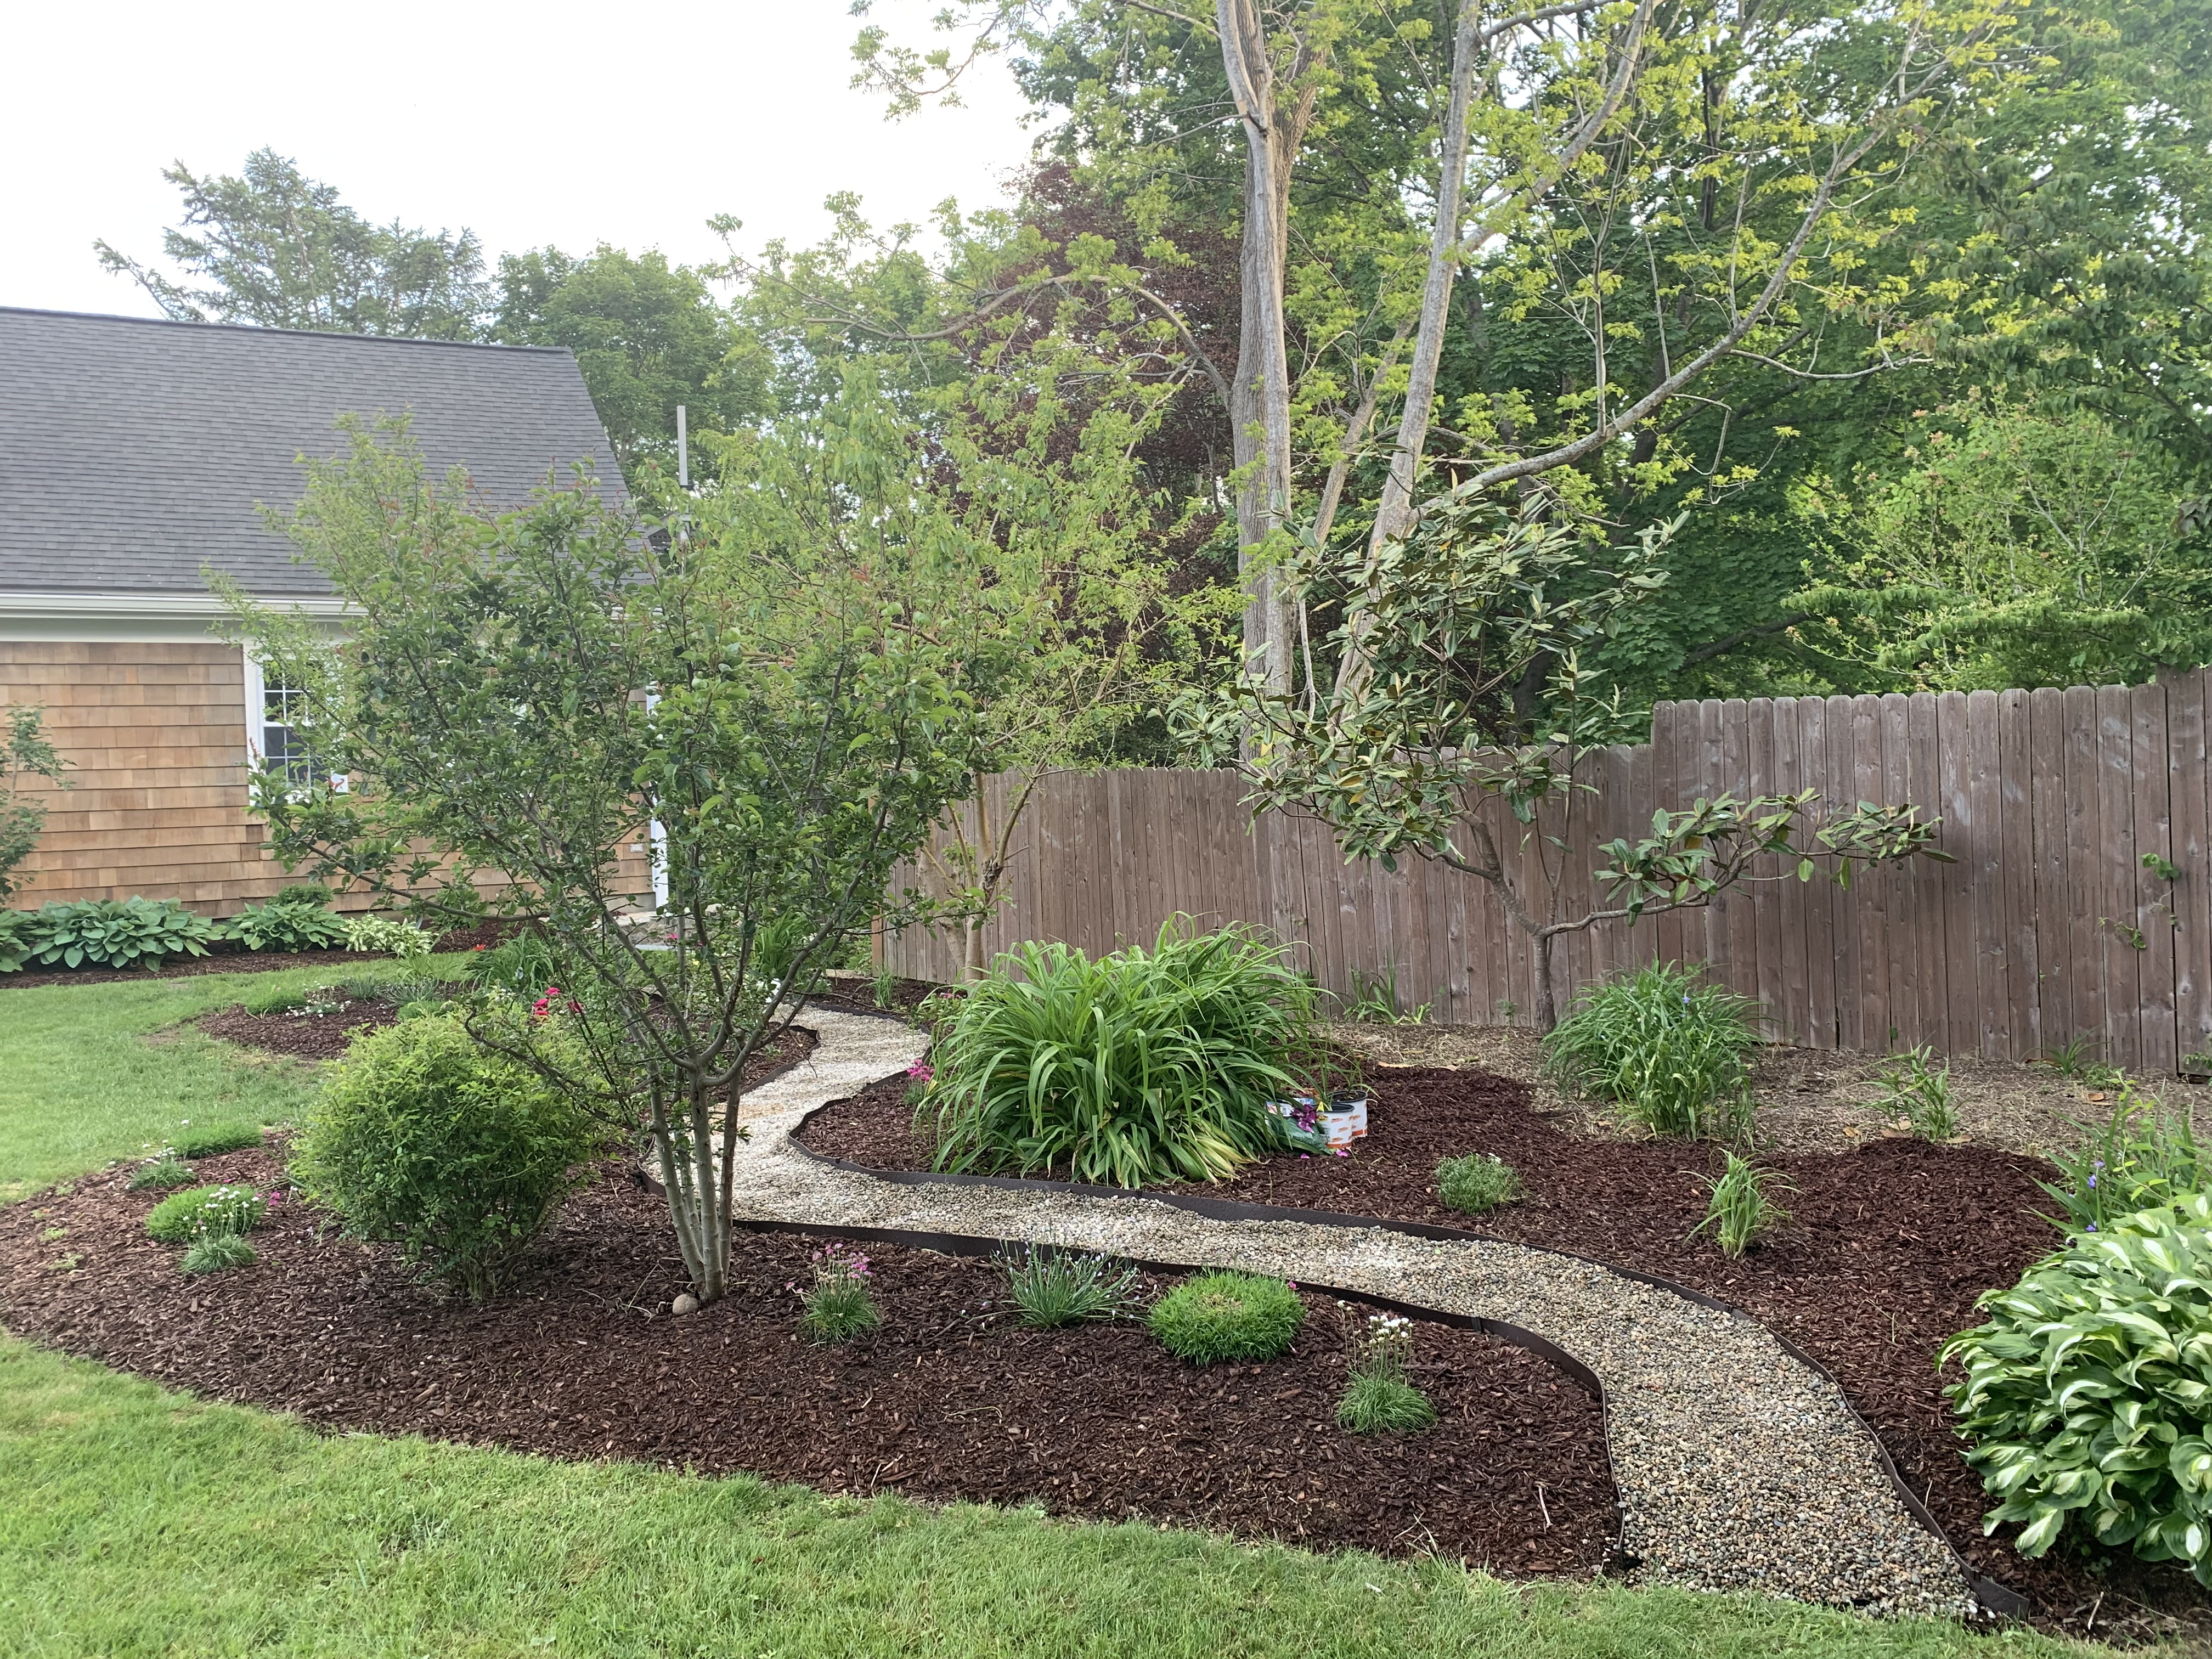
We modernized the finishes throughout – removed or streamlined ornate built-ins, painted over outdated pine wainscoting, favoring a transitional look to bridge between co-owners’ modern and traditional sensibilities. The landscaping on 3 of the 4 outdoor areas were updated, but the backyard and hillside will be a blank palette for the new owners. Overall the home is cozy, peaceful, solid. We were quite happy and felt so fortunate.
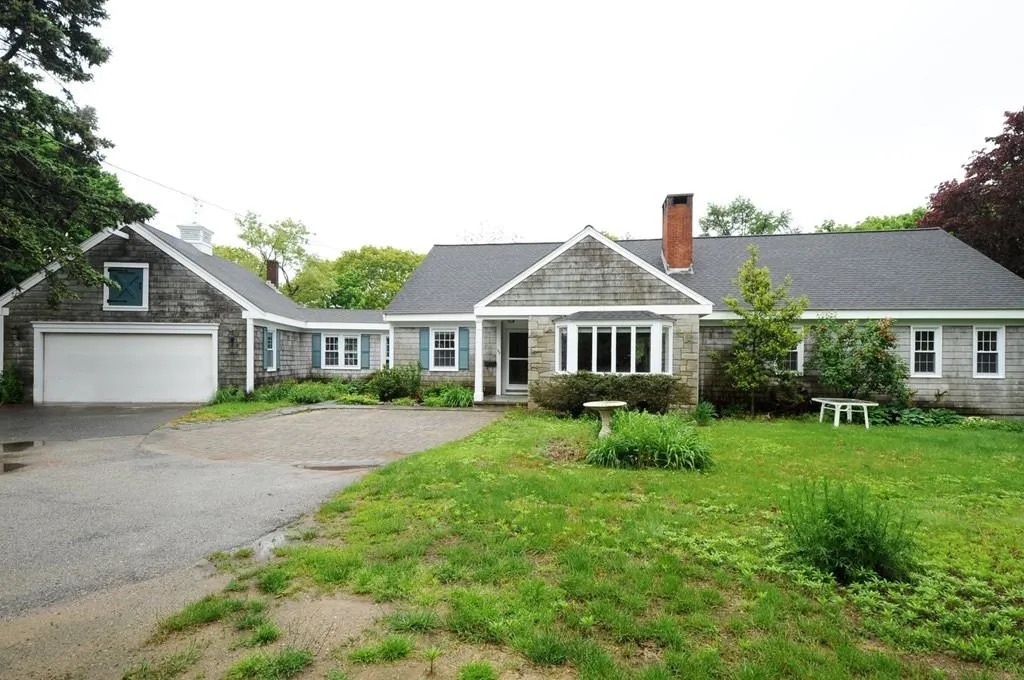
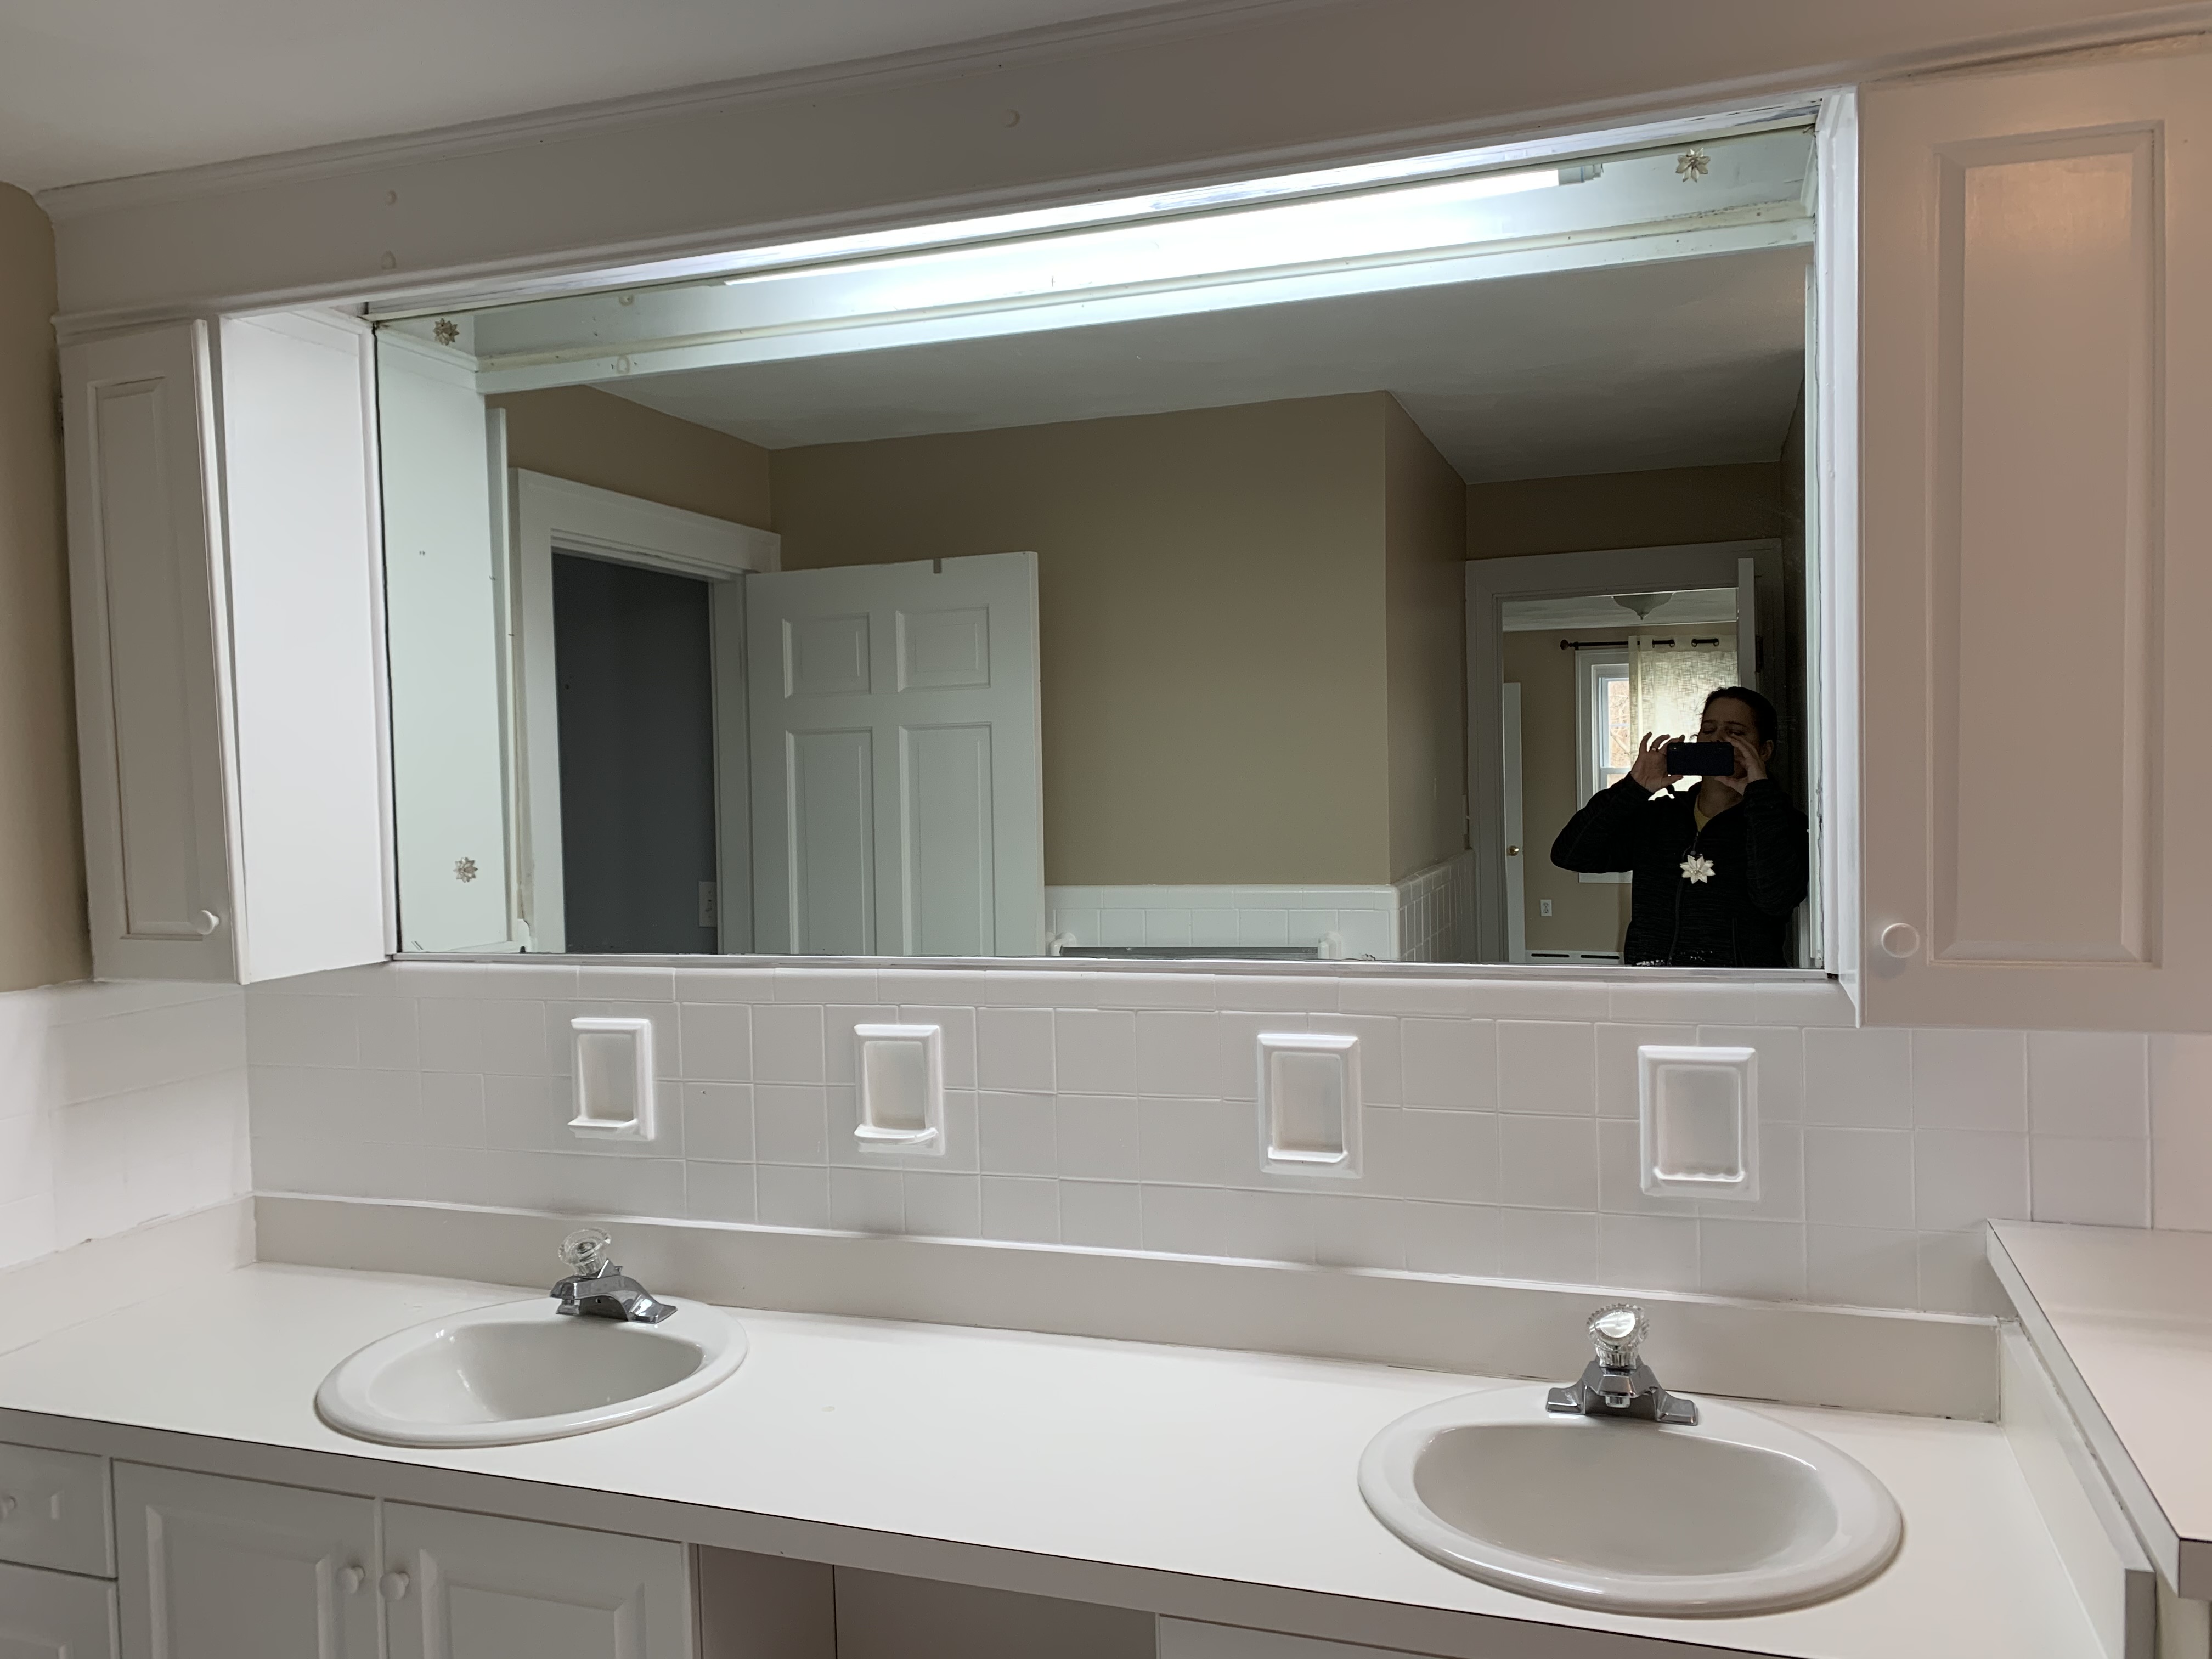
We’ll elaborate the befores and afters later, but here are a few glimpses of the before state of the place, to provide some context:
She really was just sort of forlorn.


UPDATES!
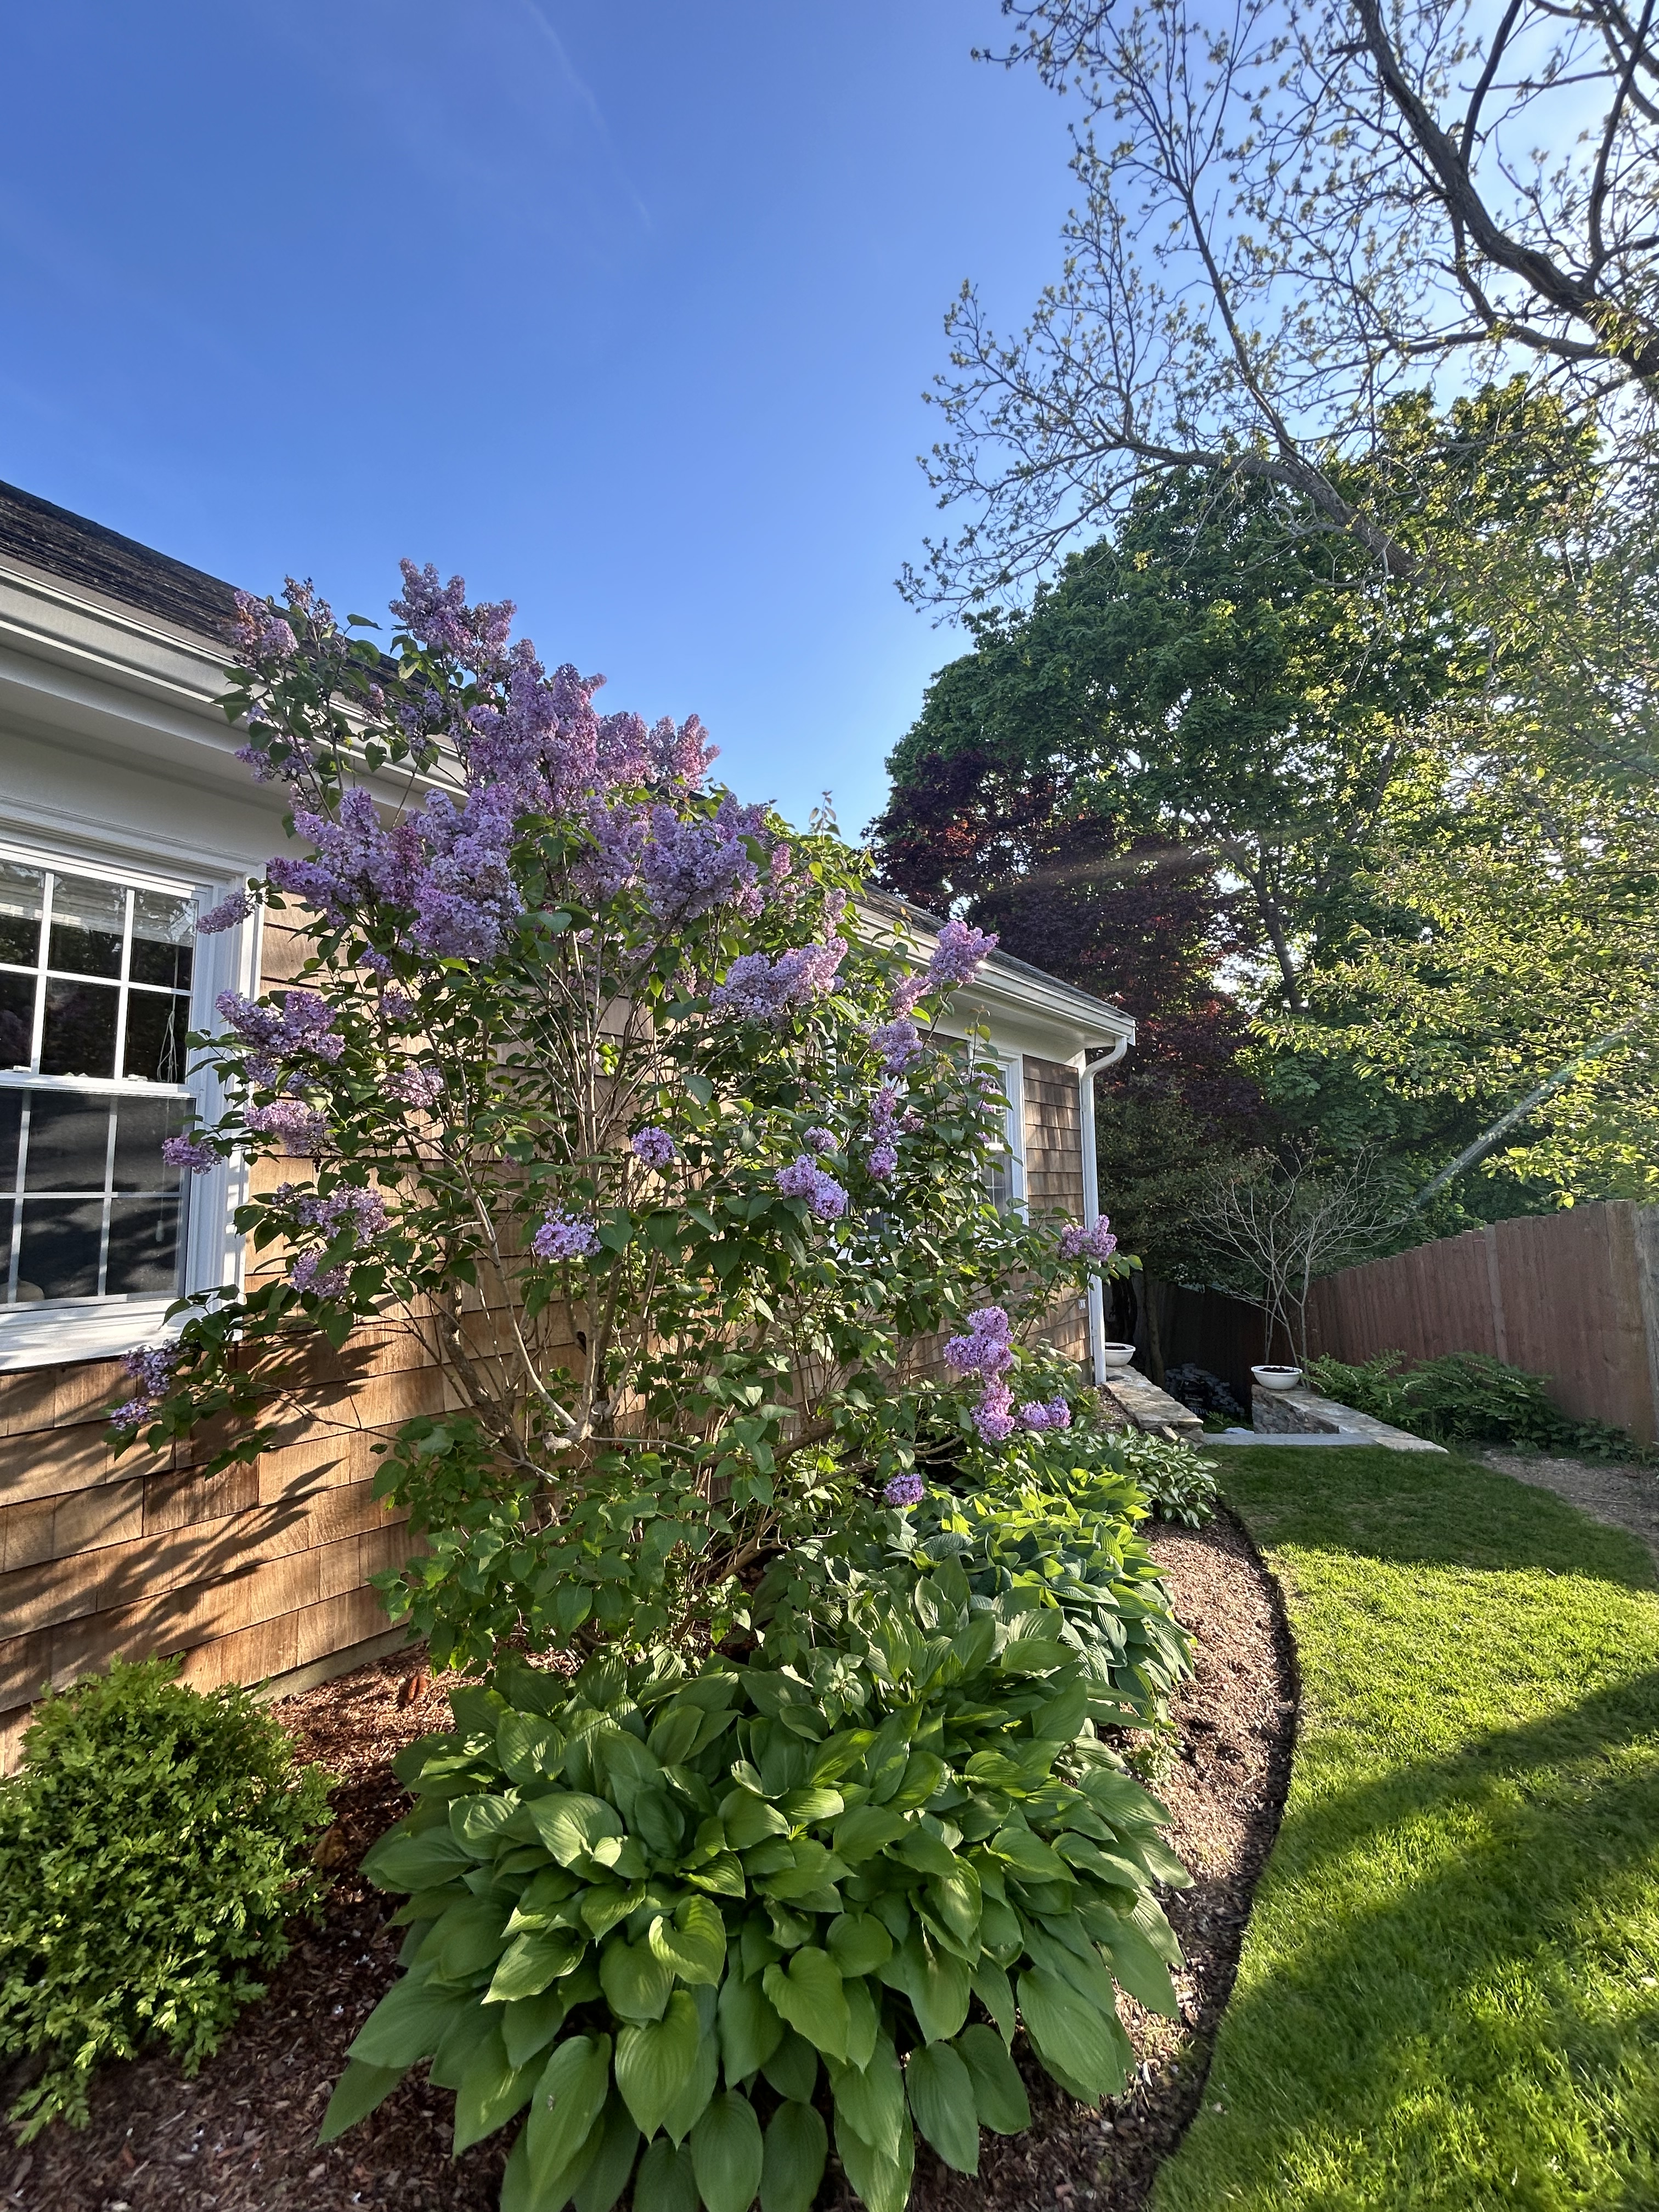
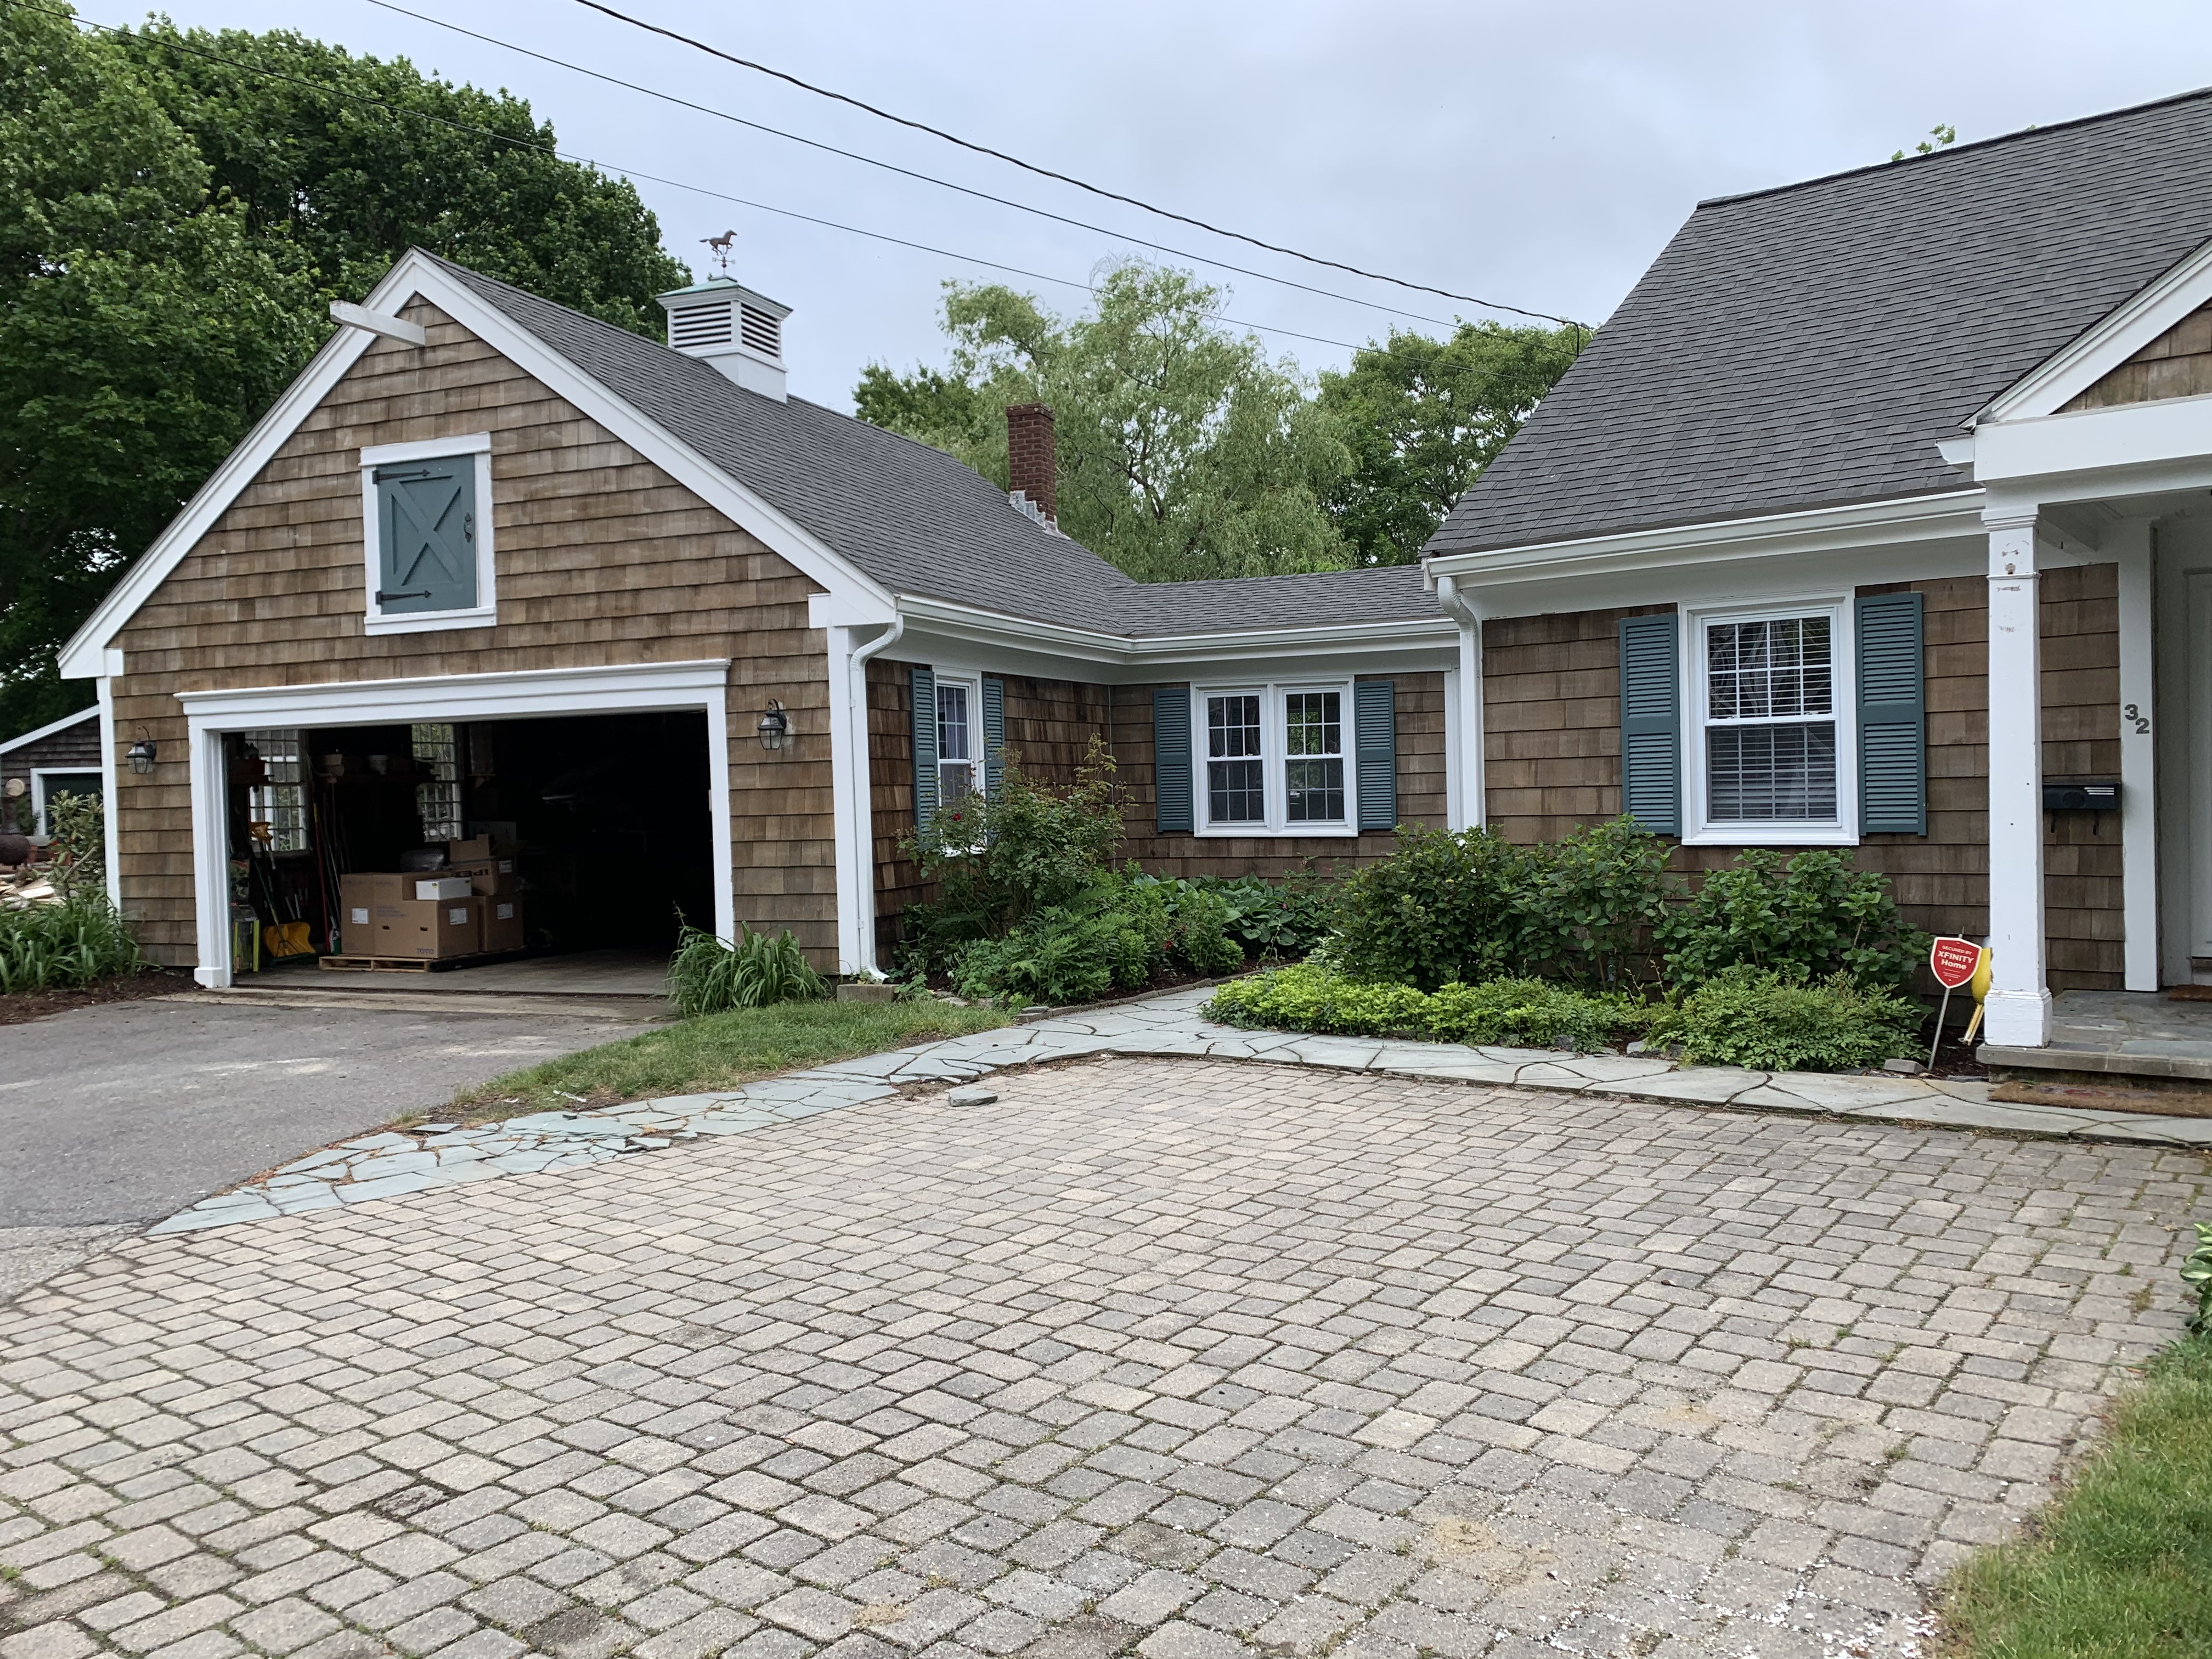
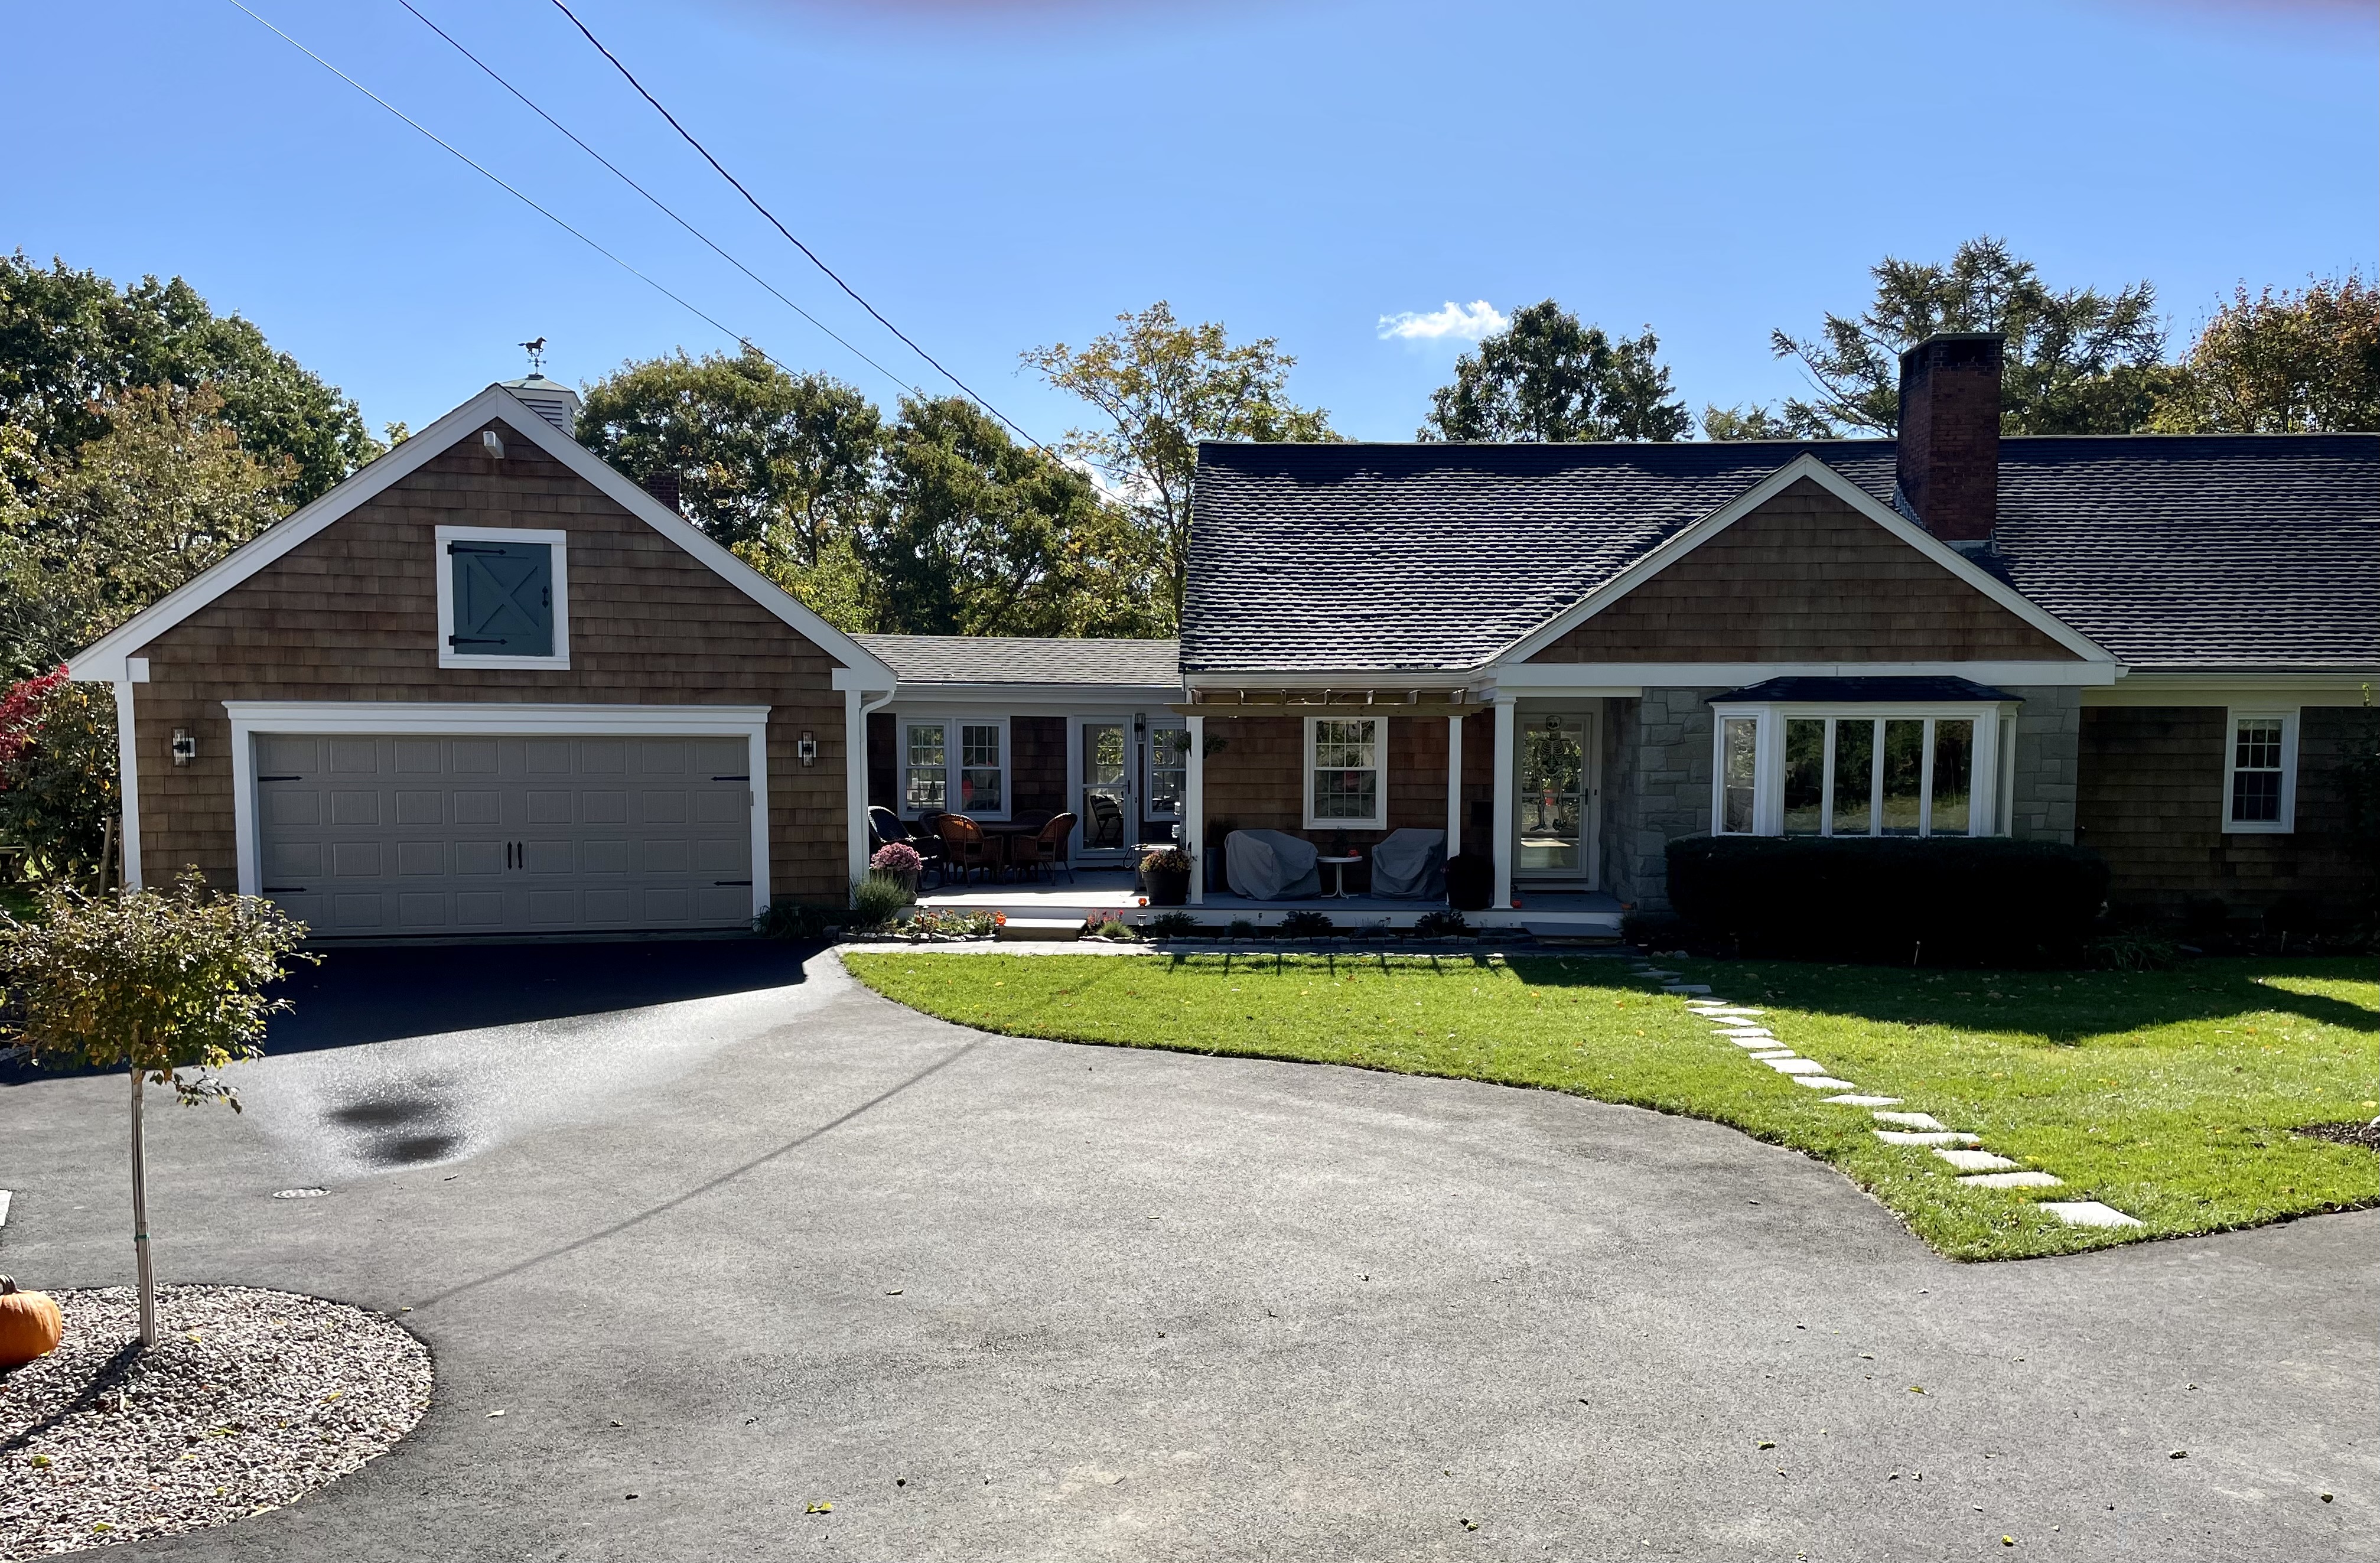
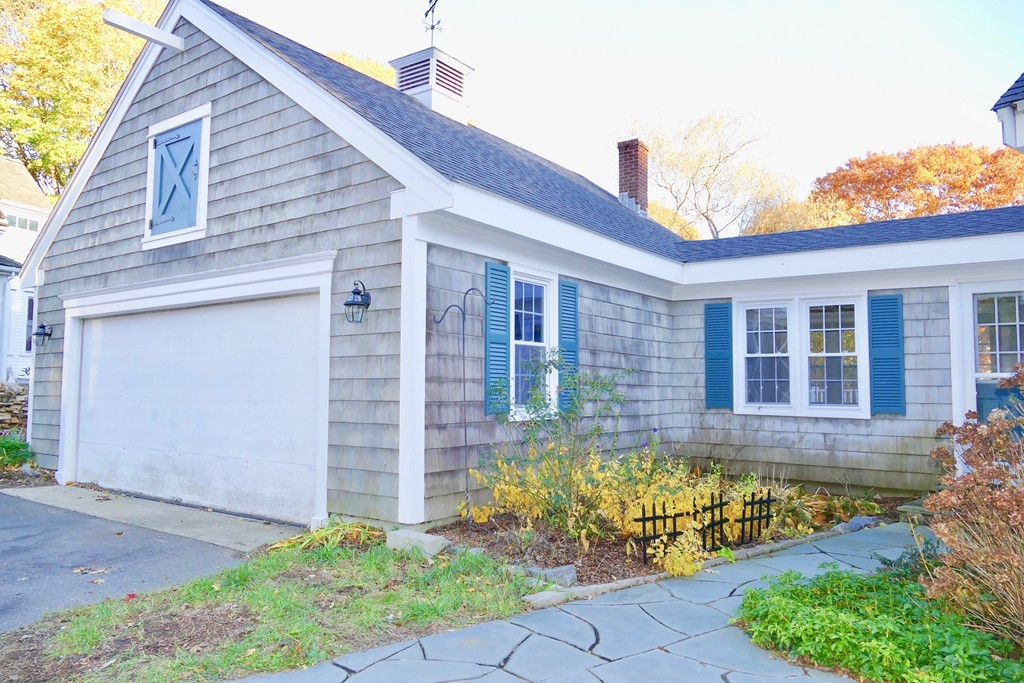
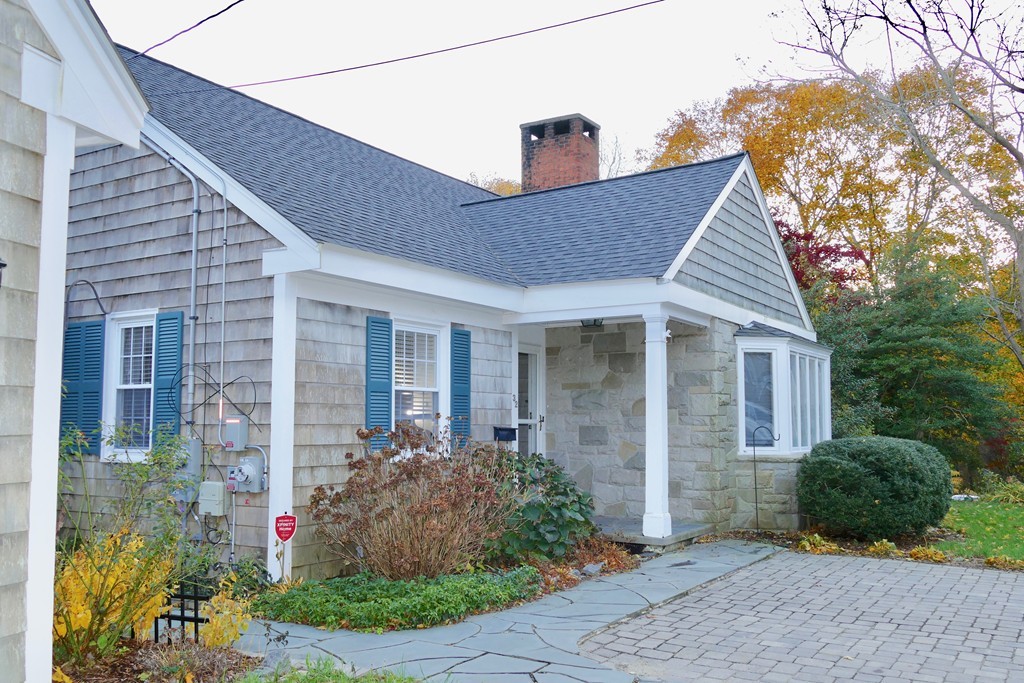
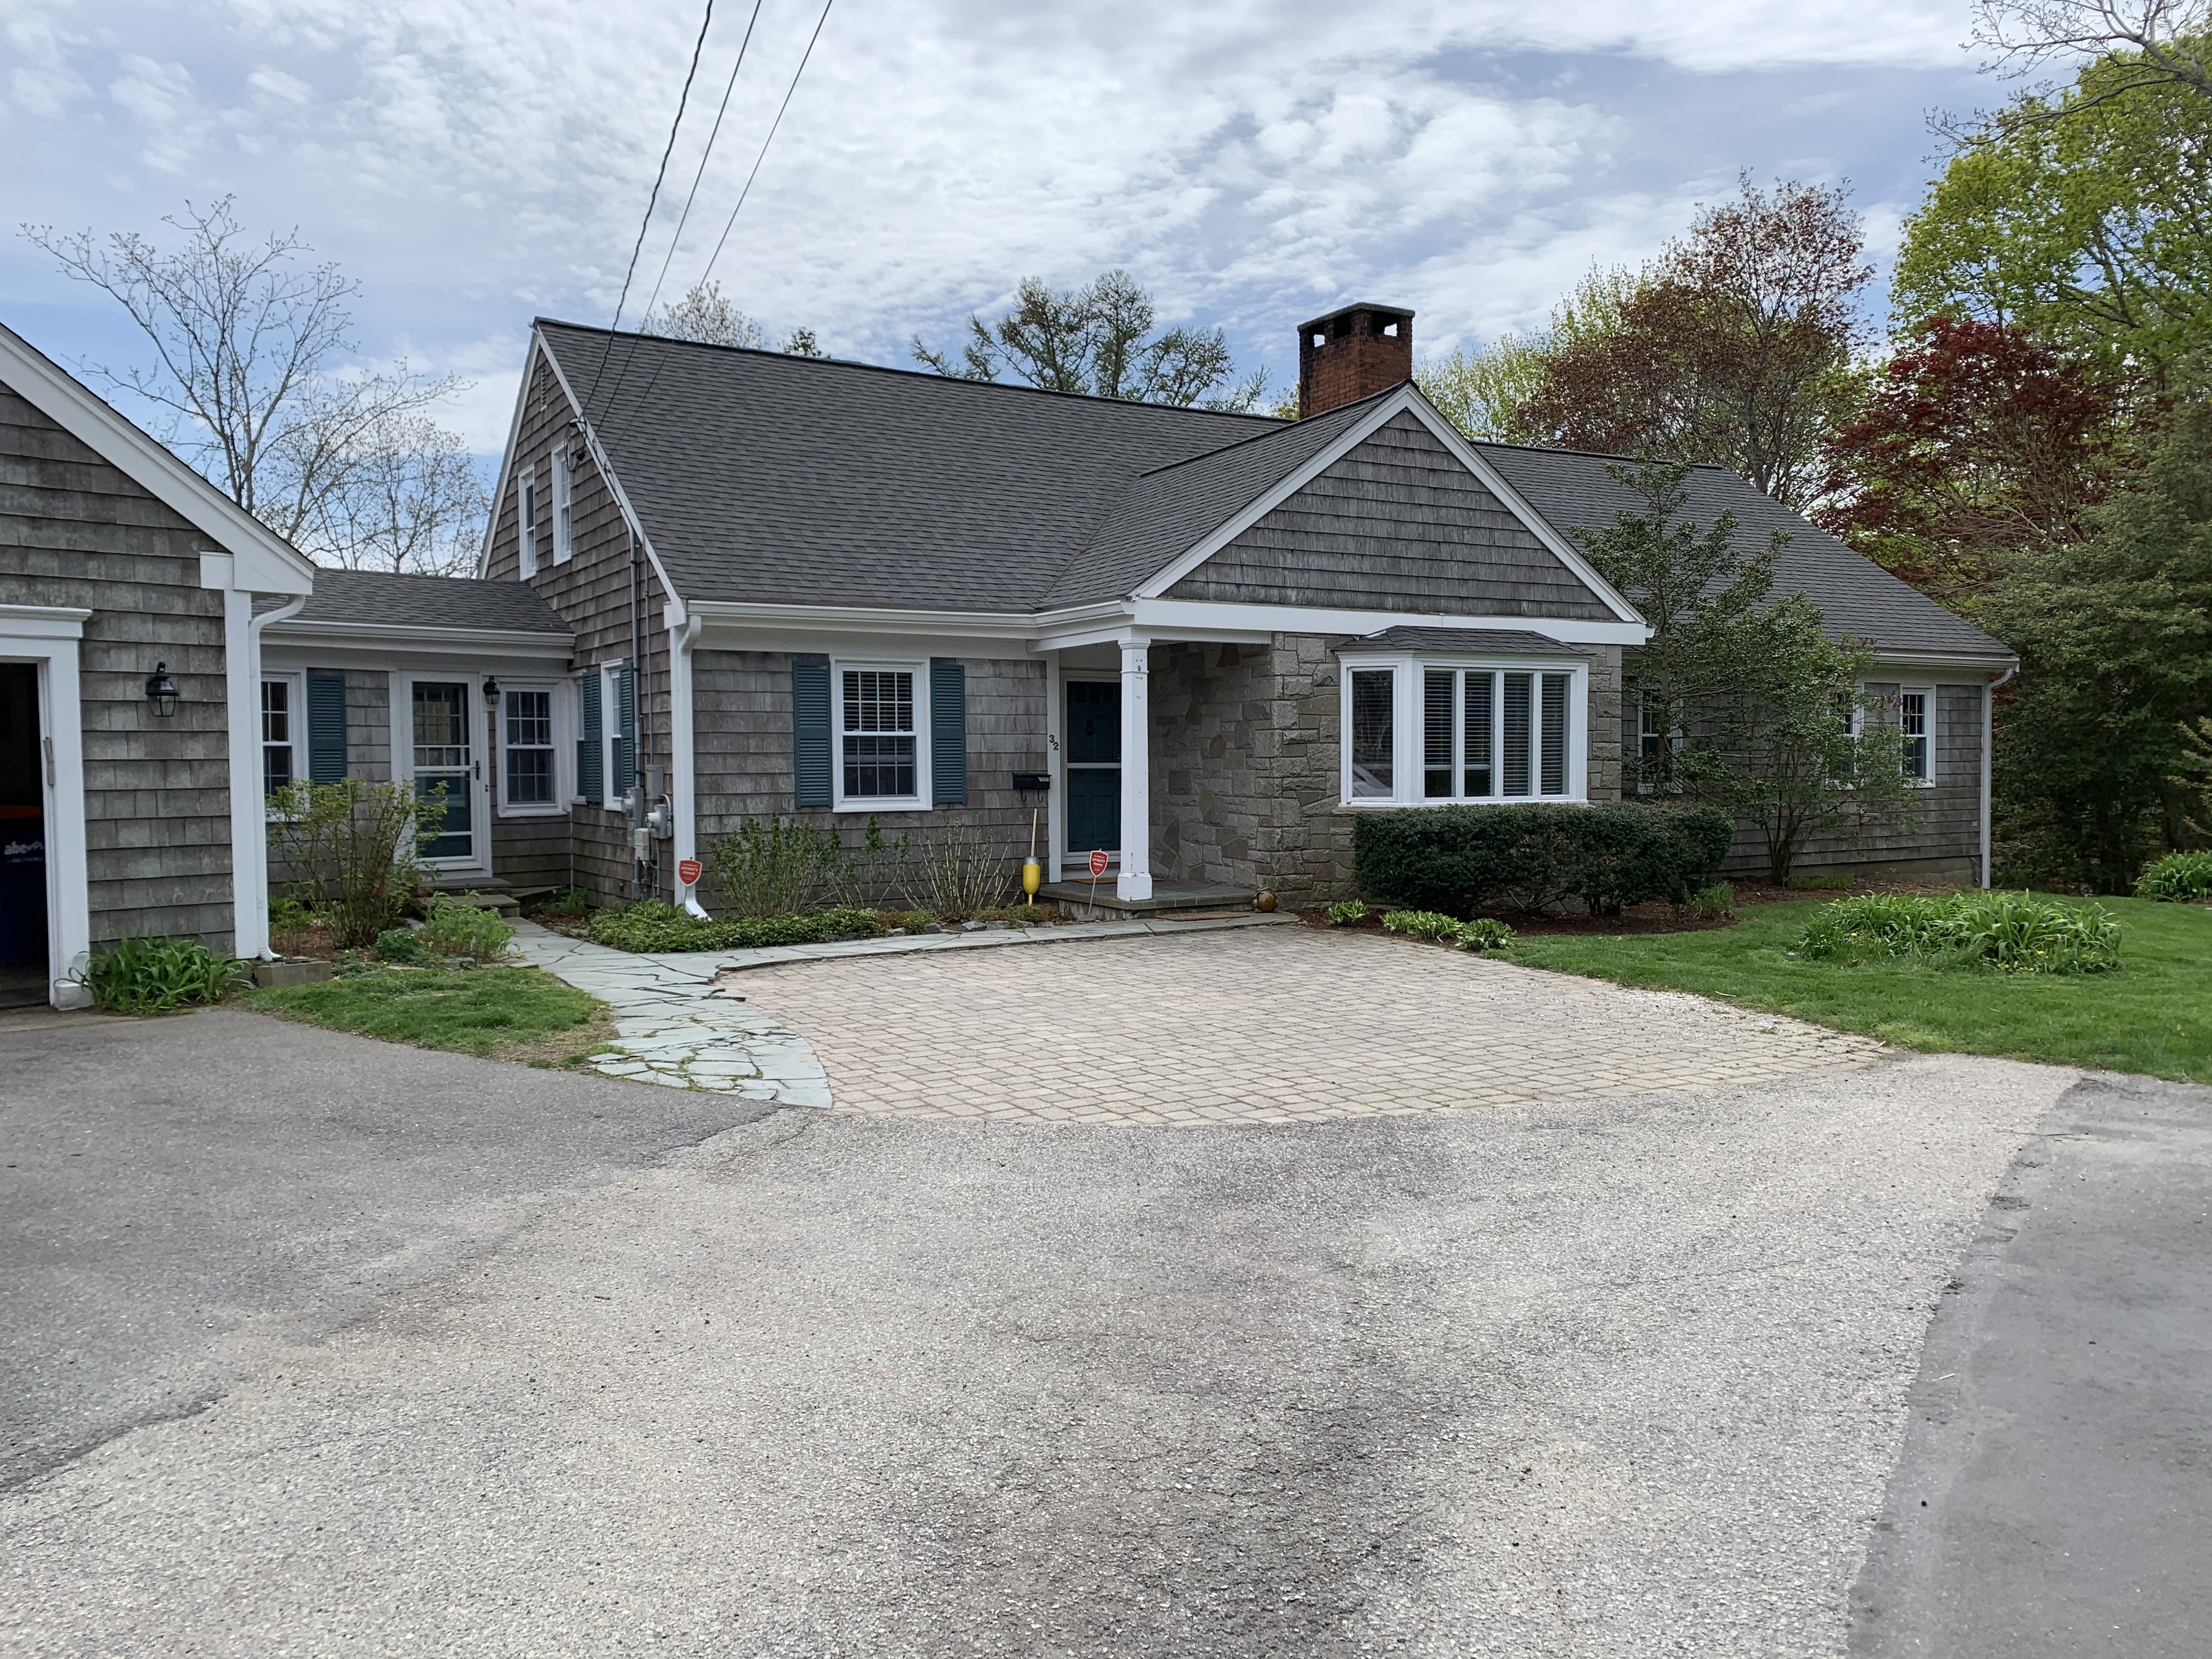
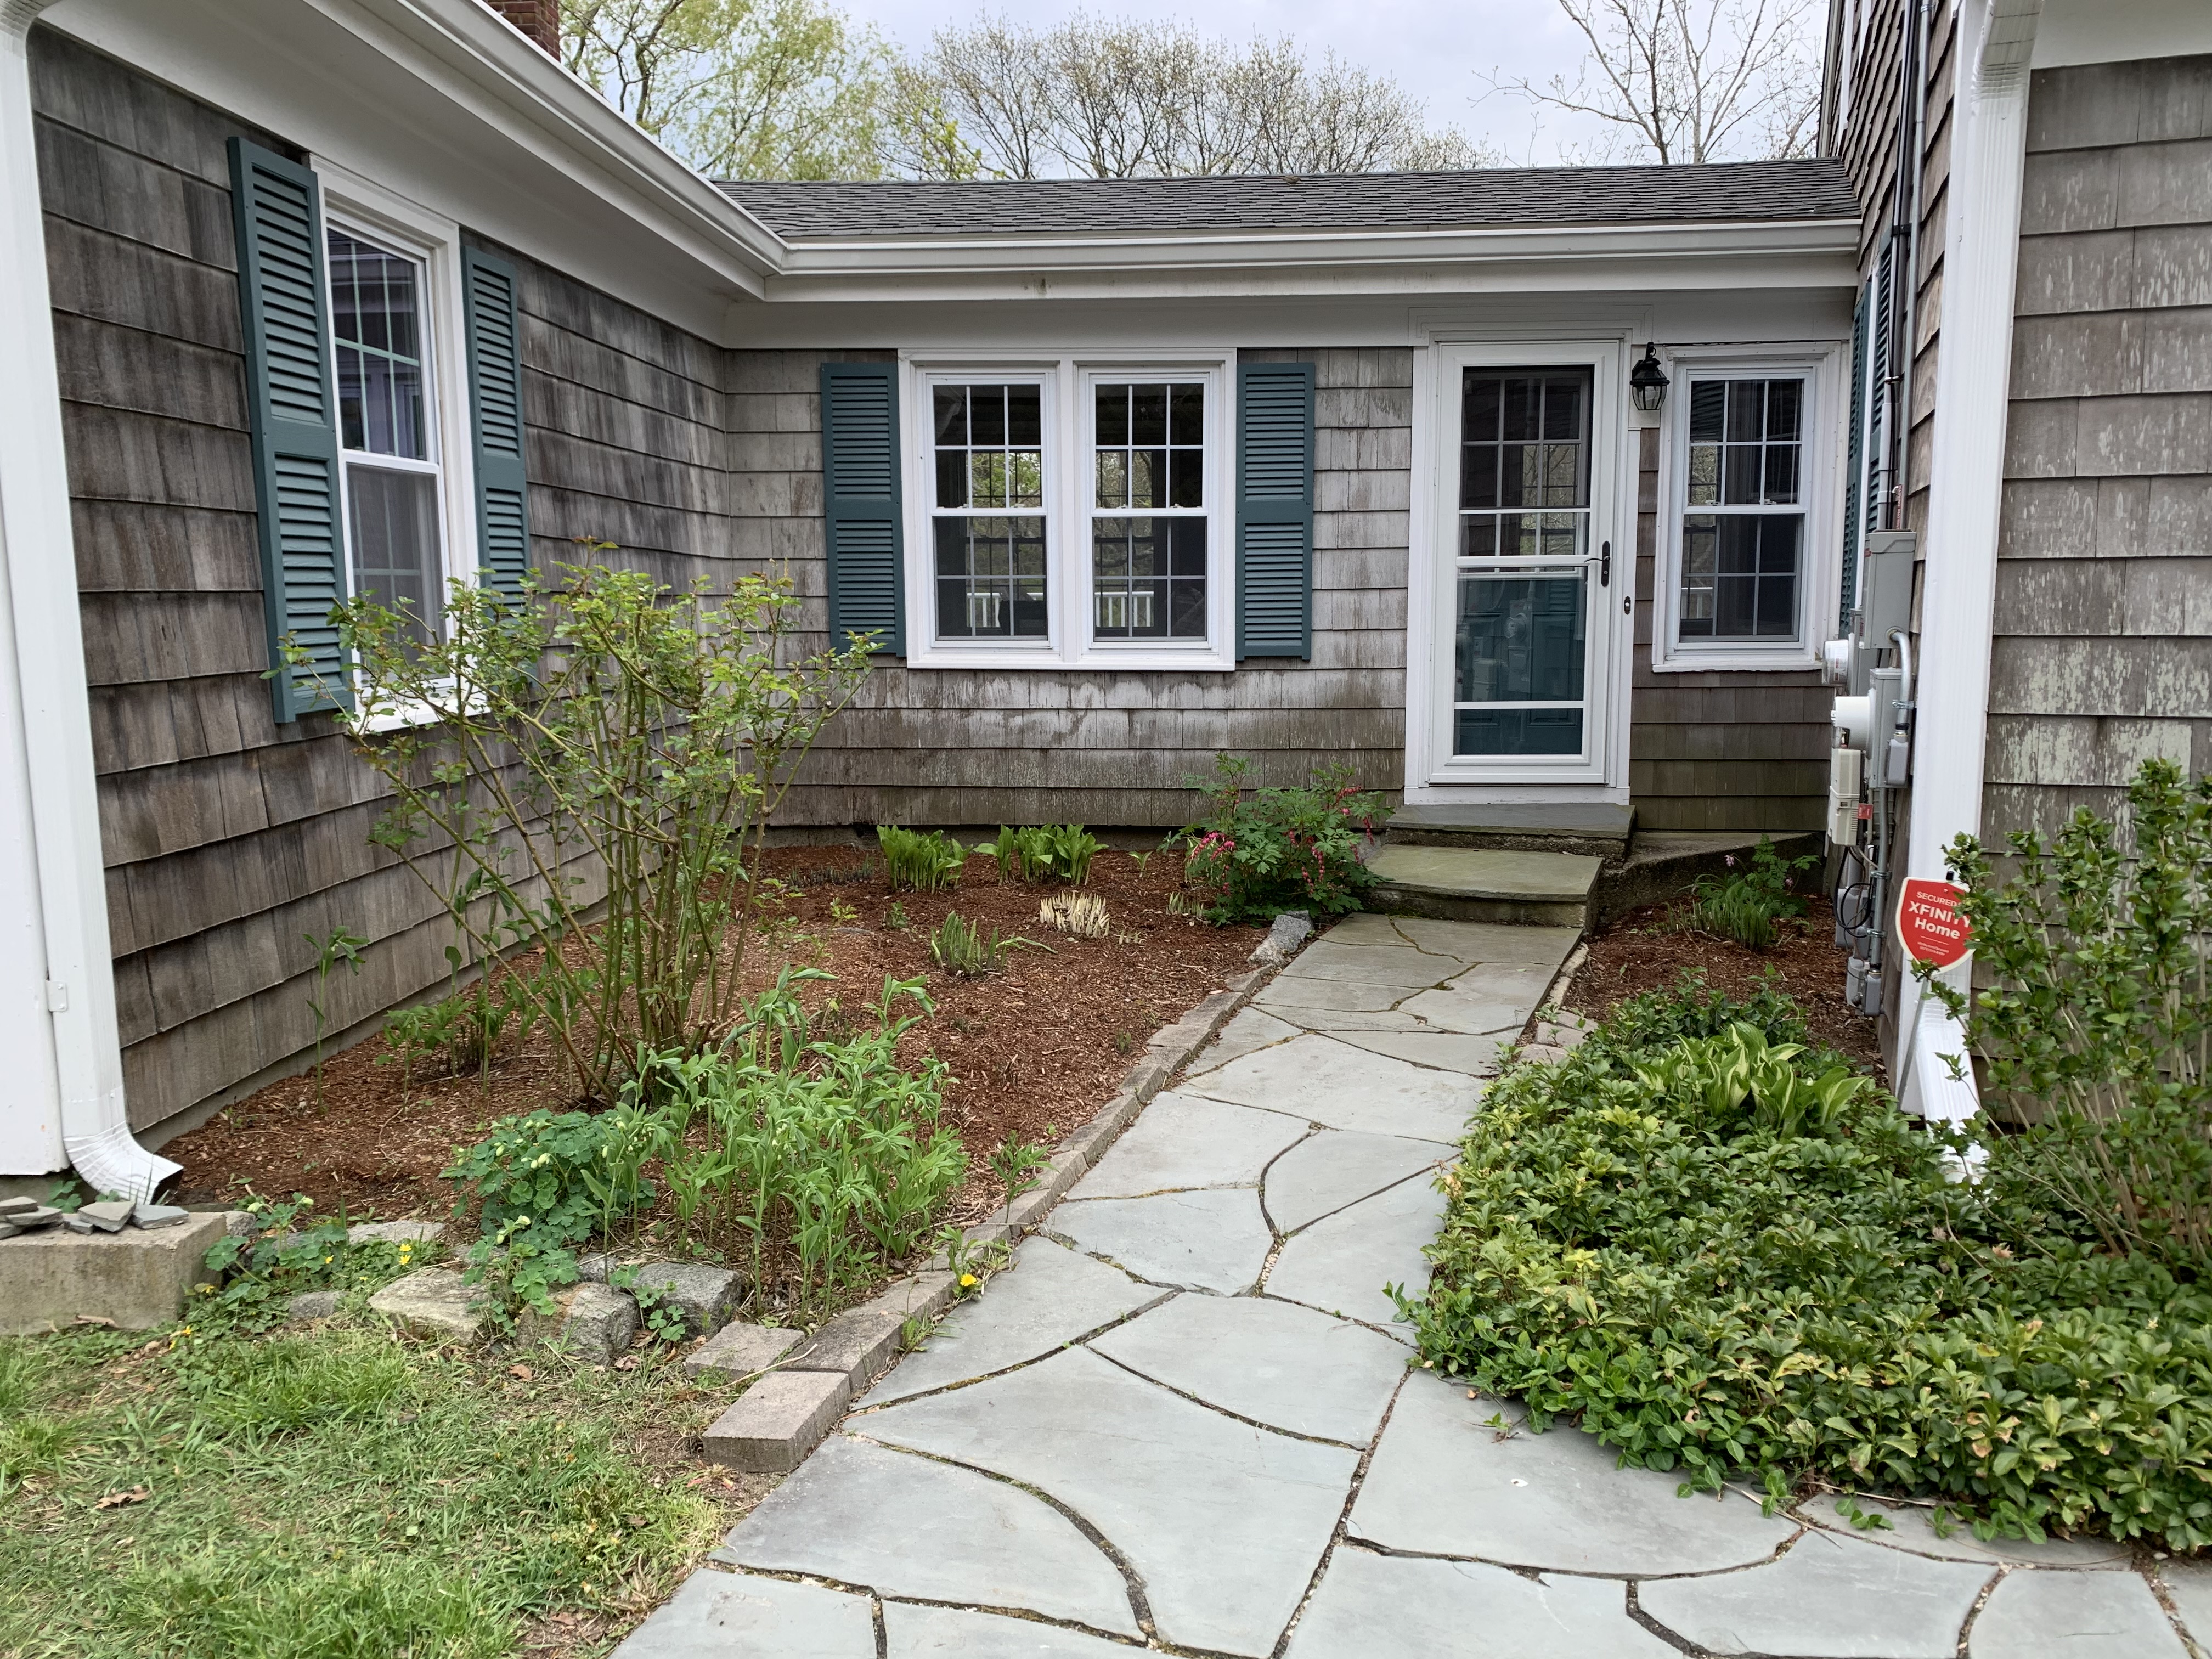
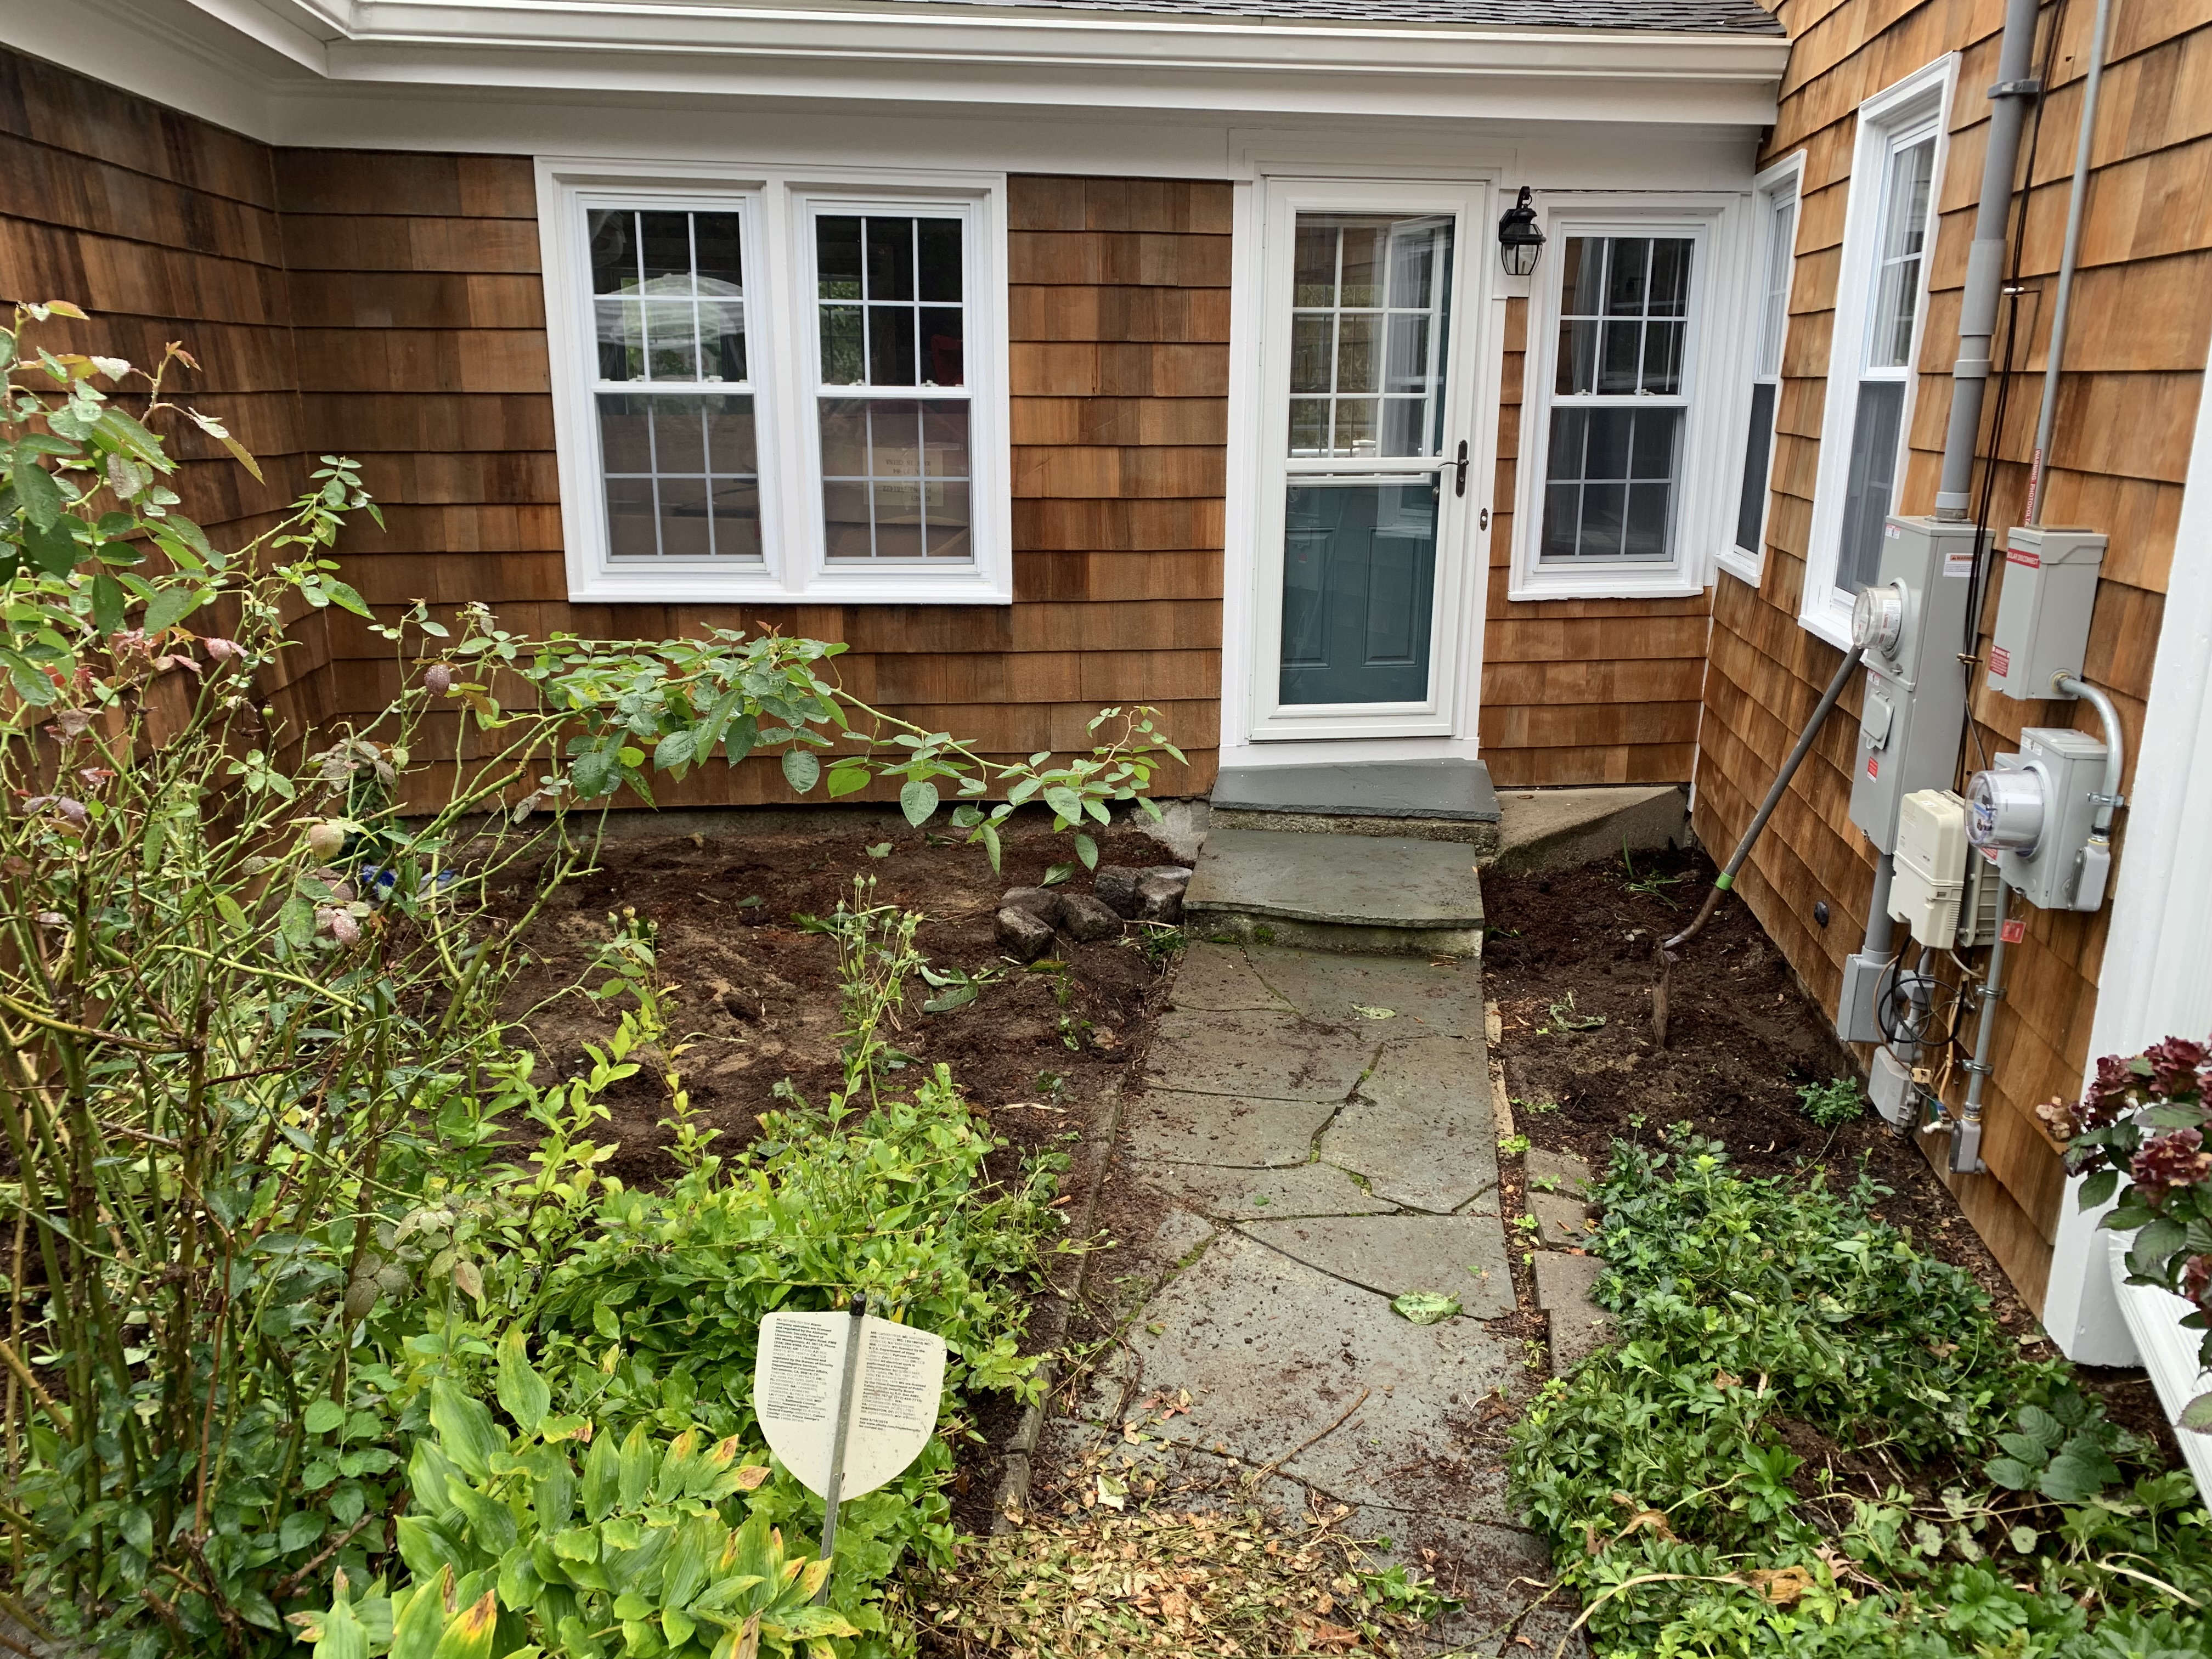
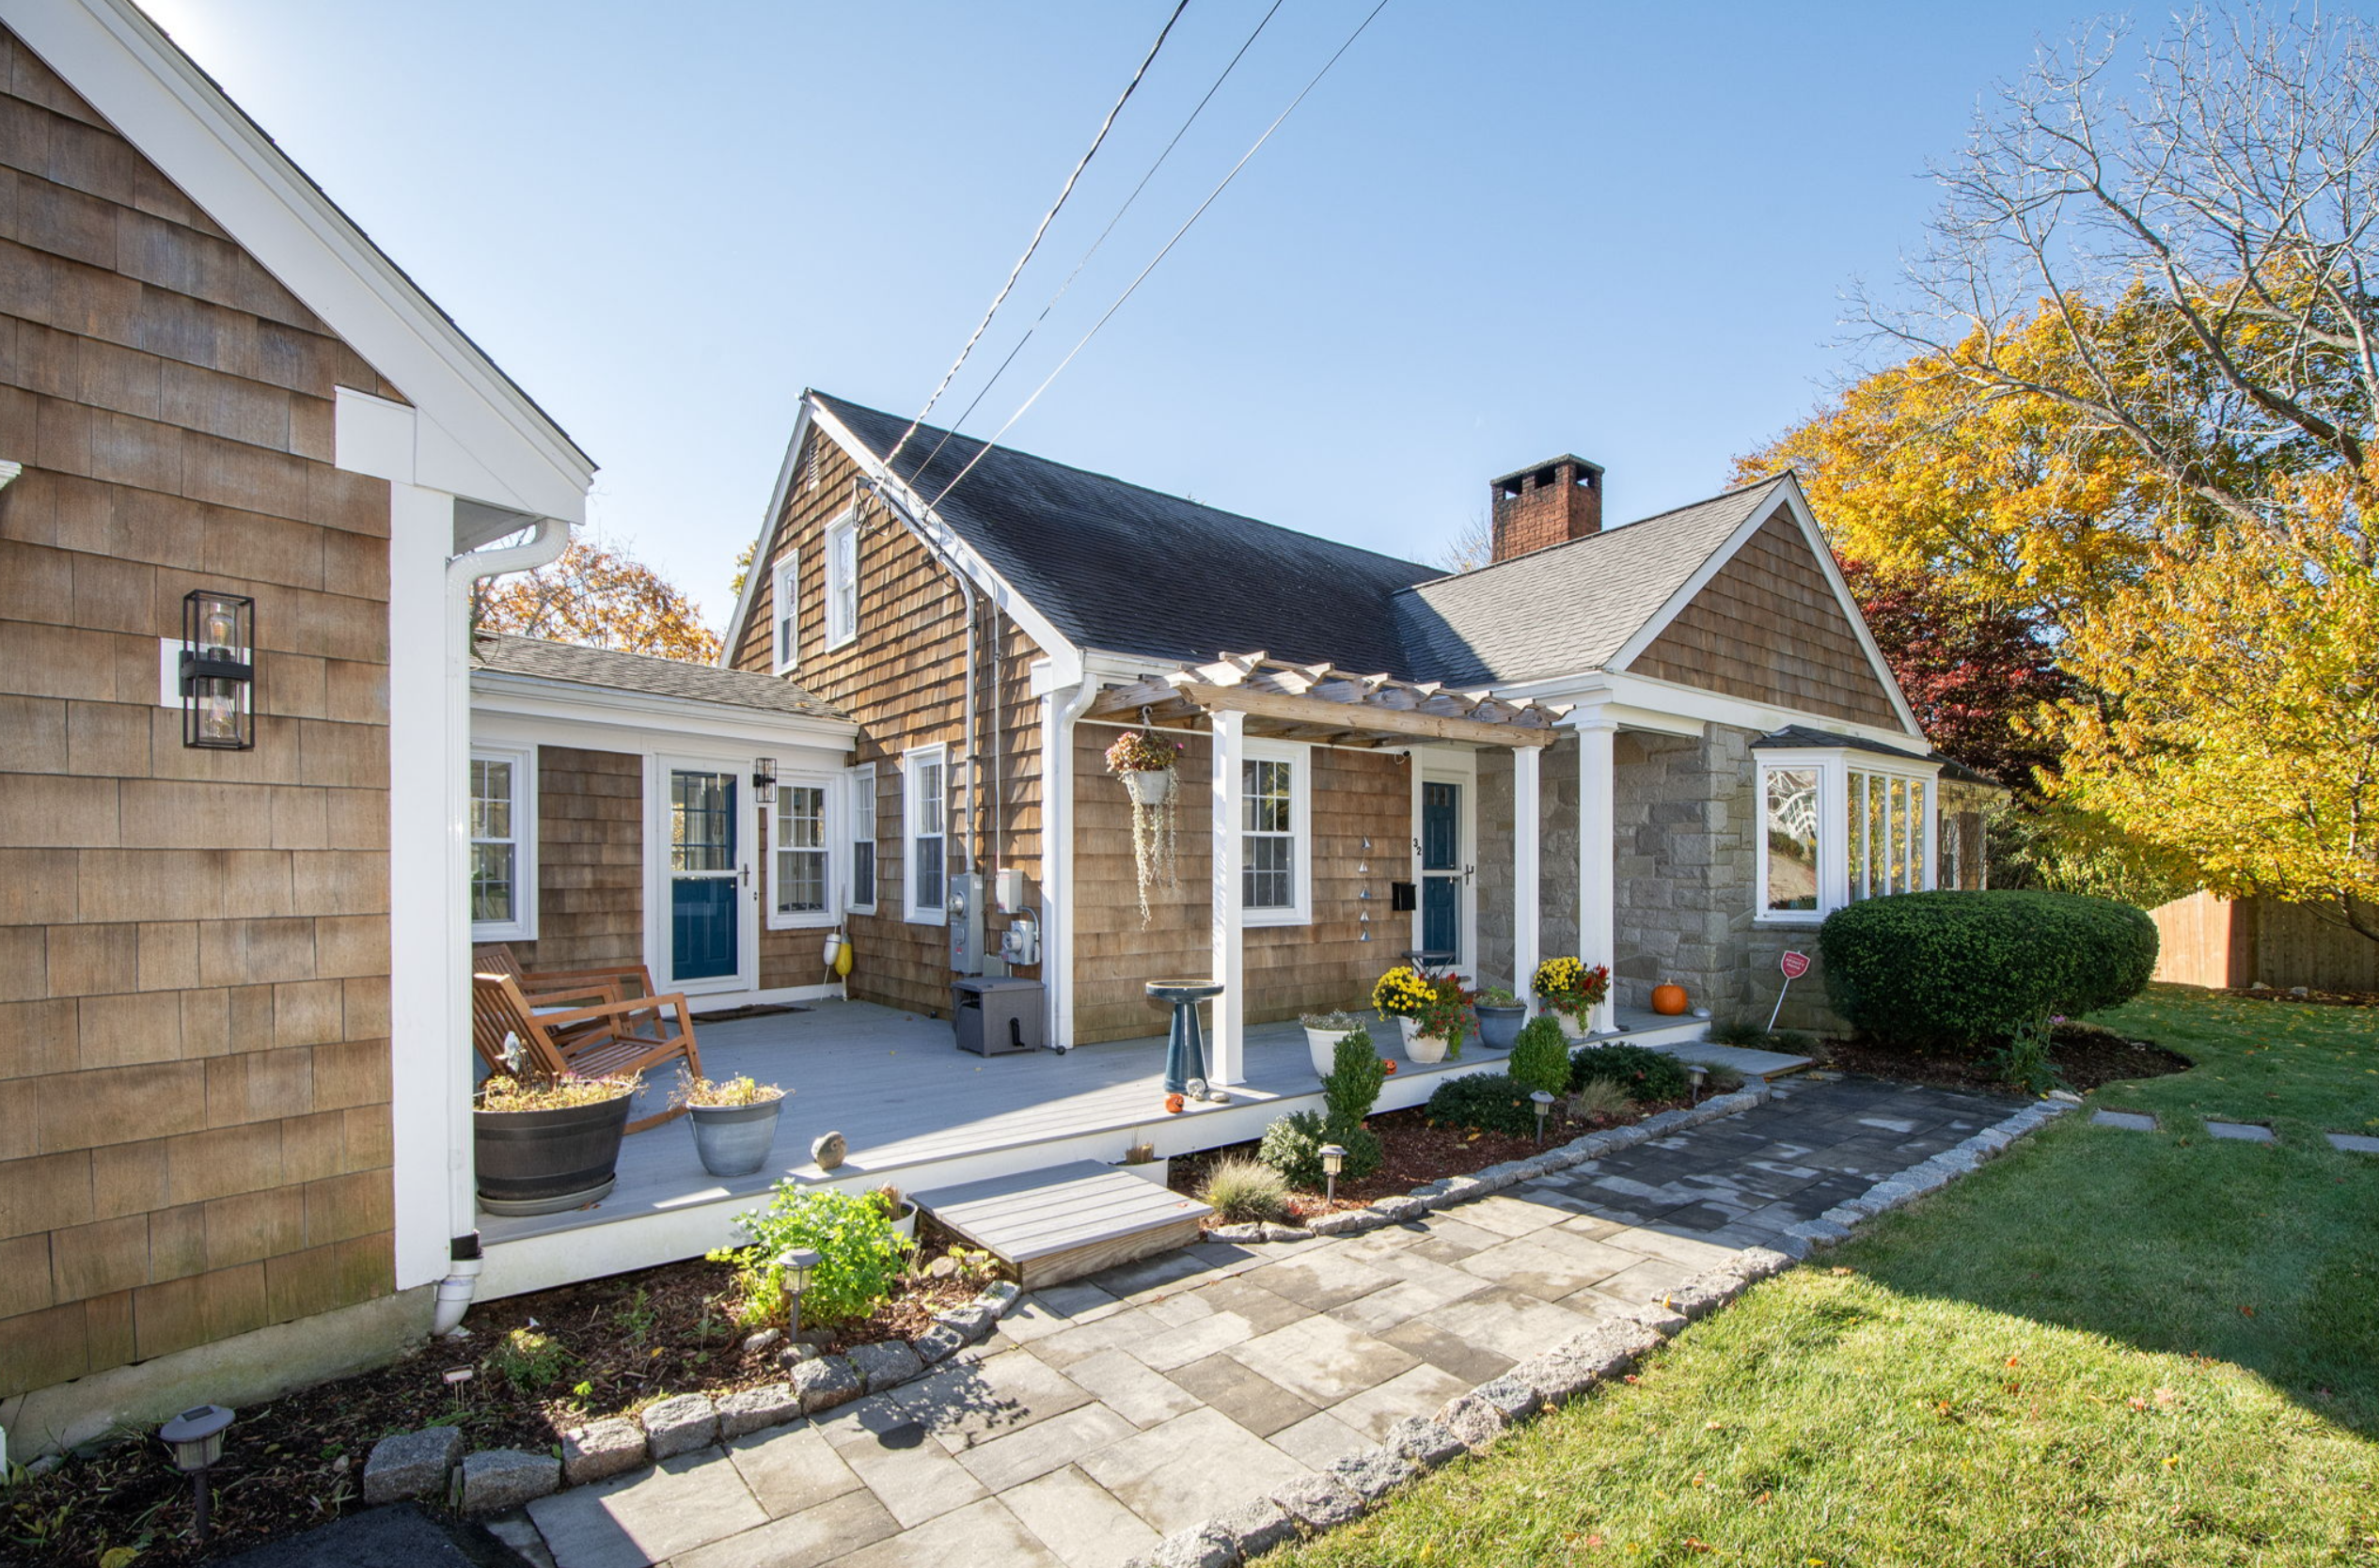
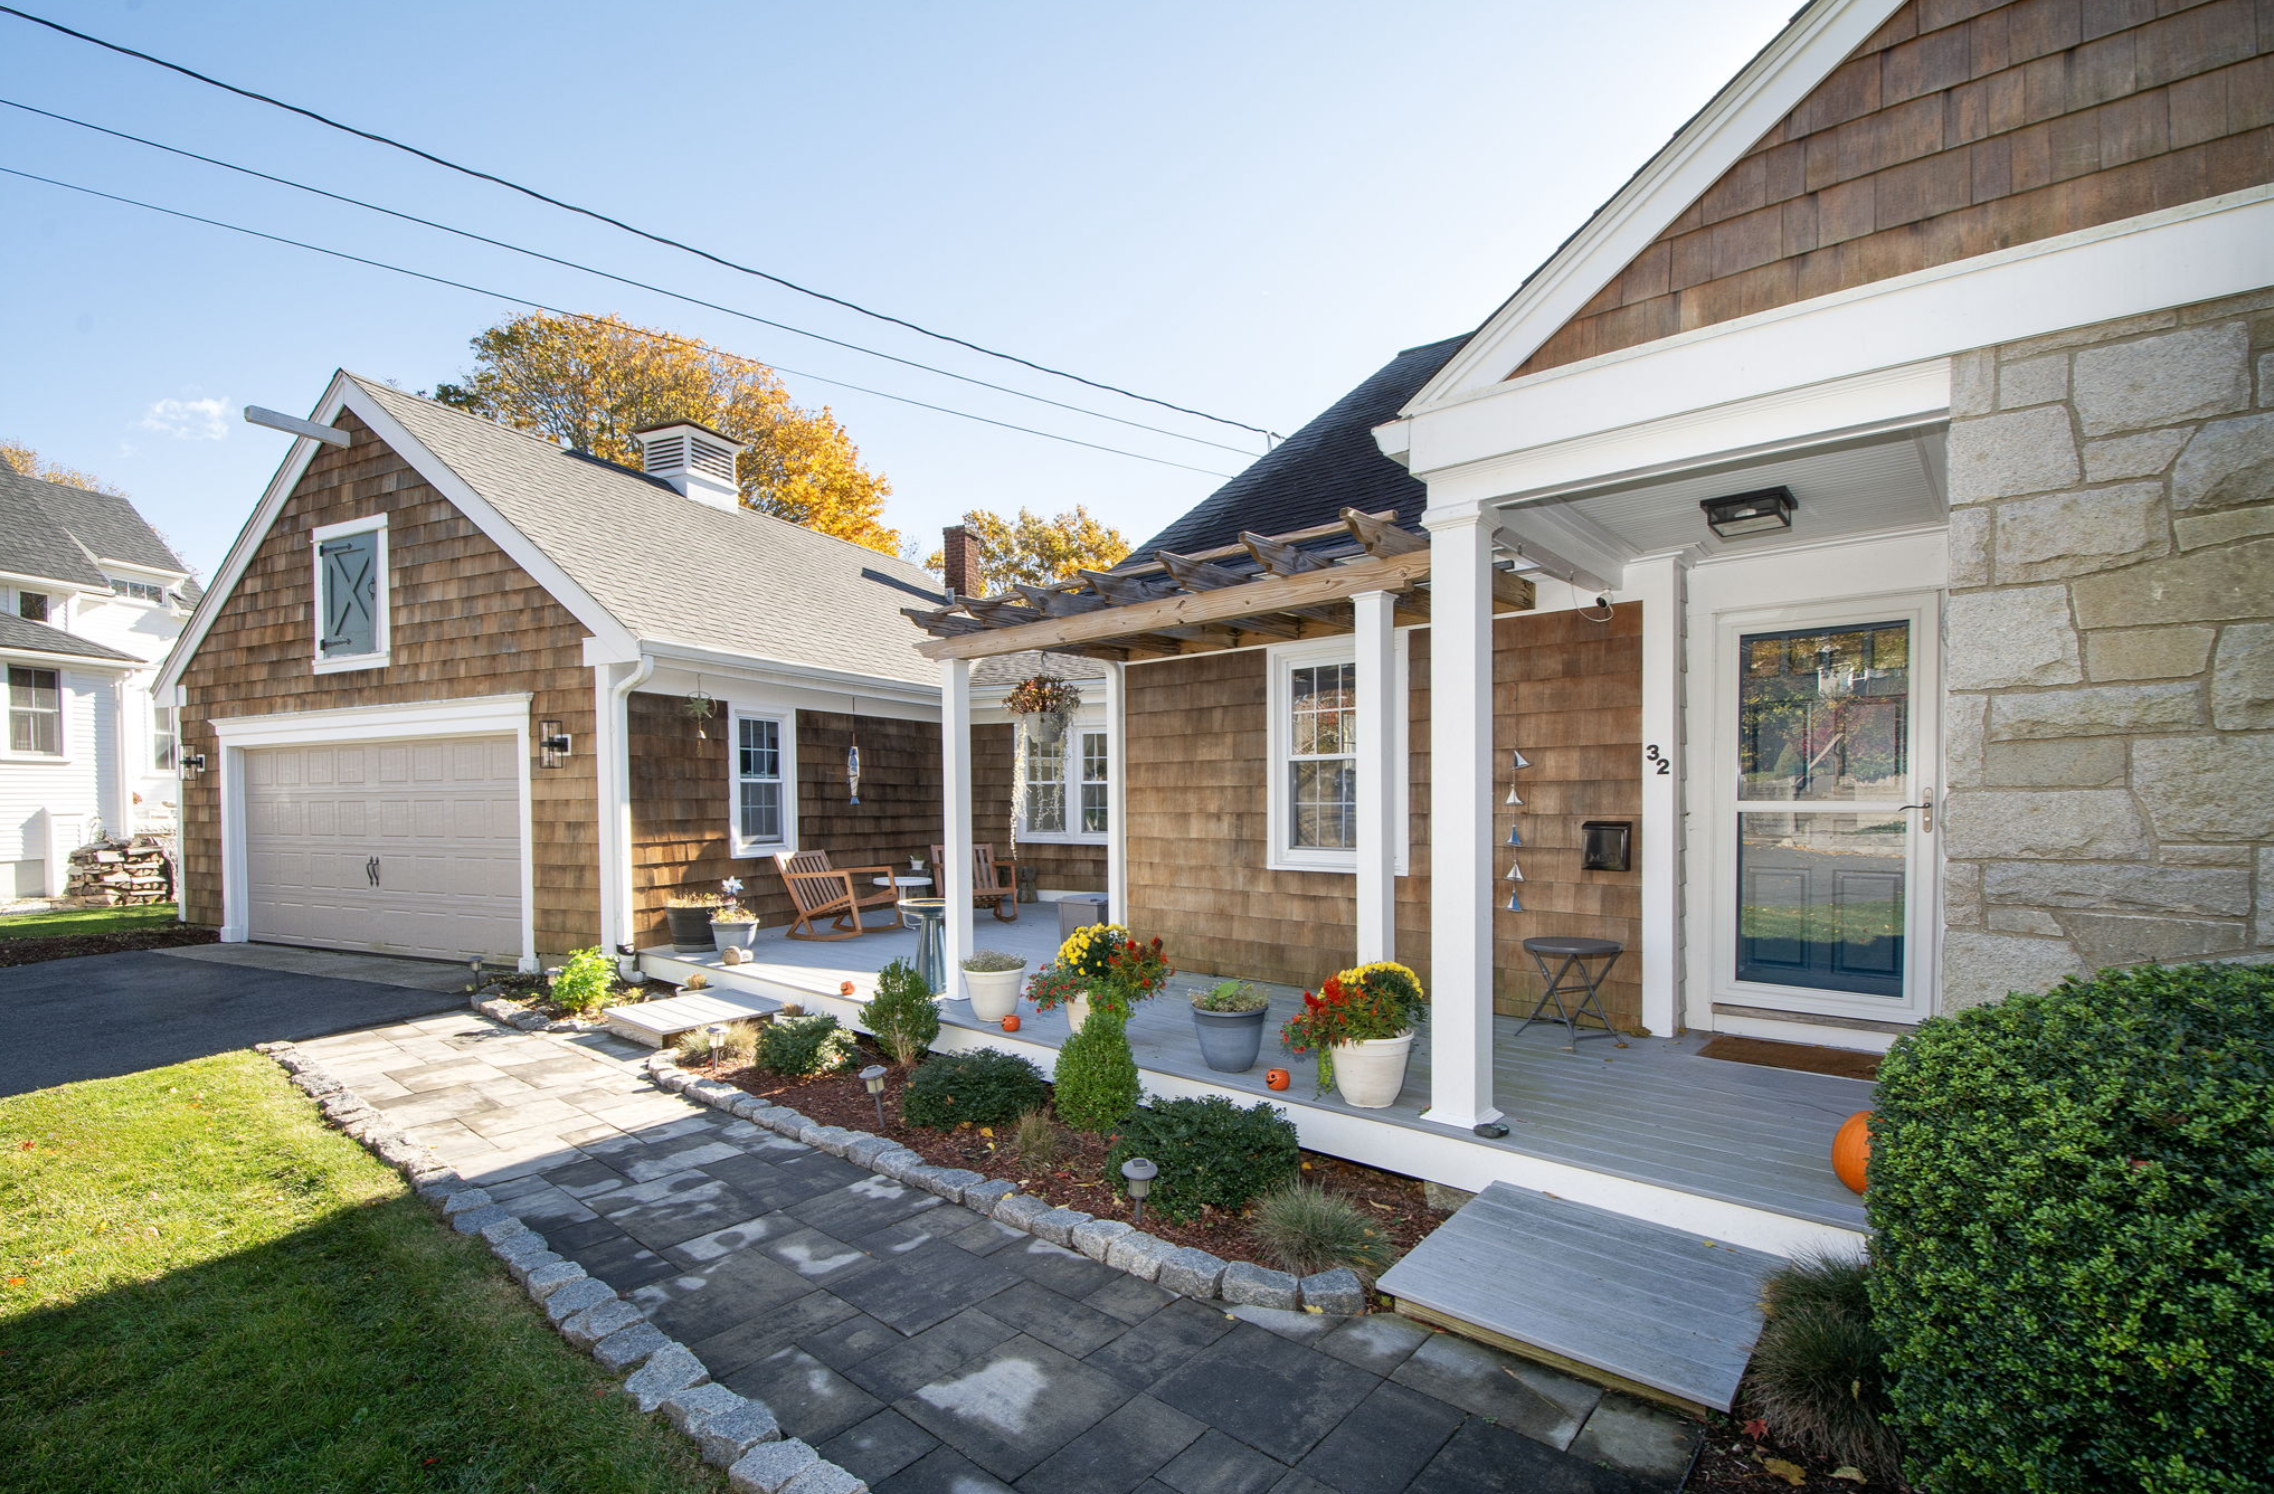
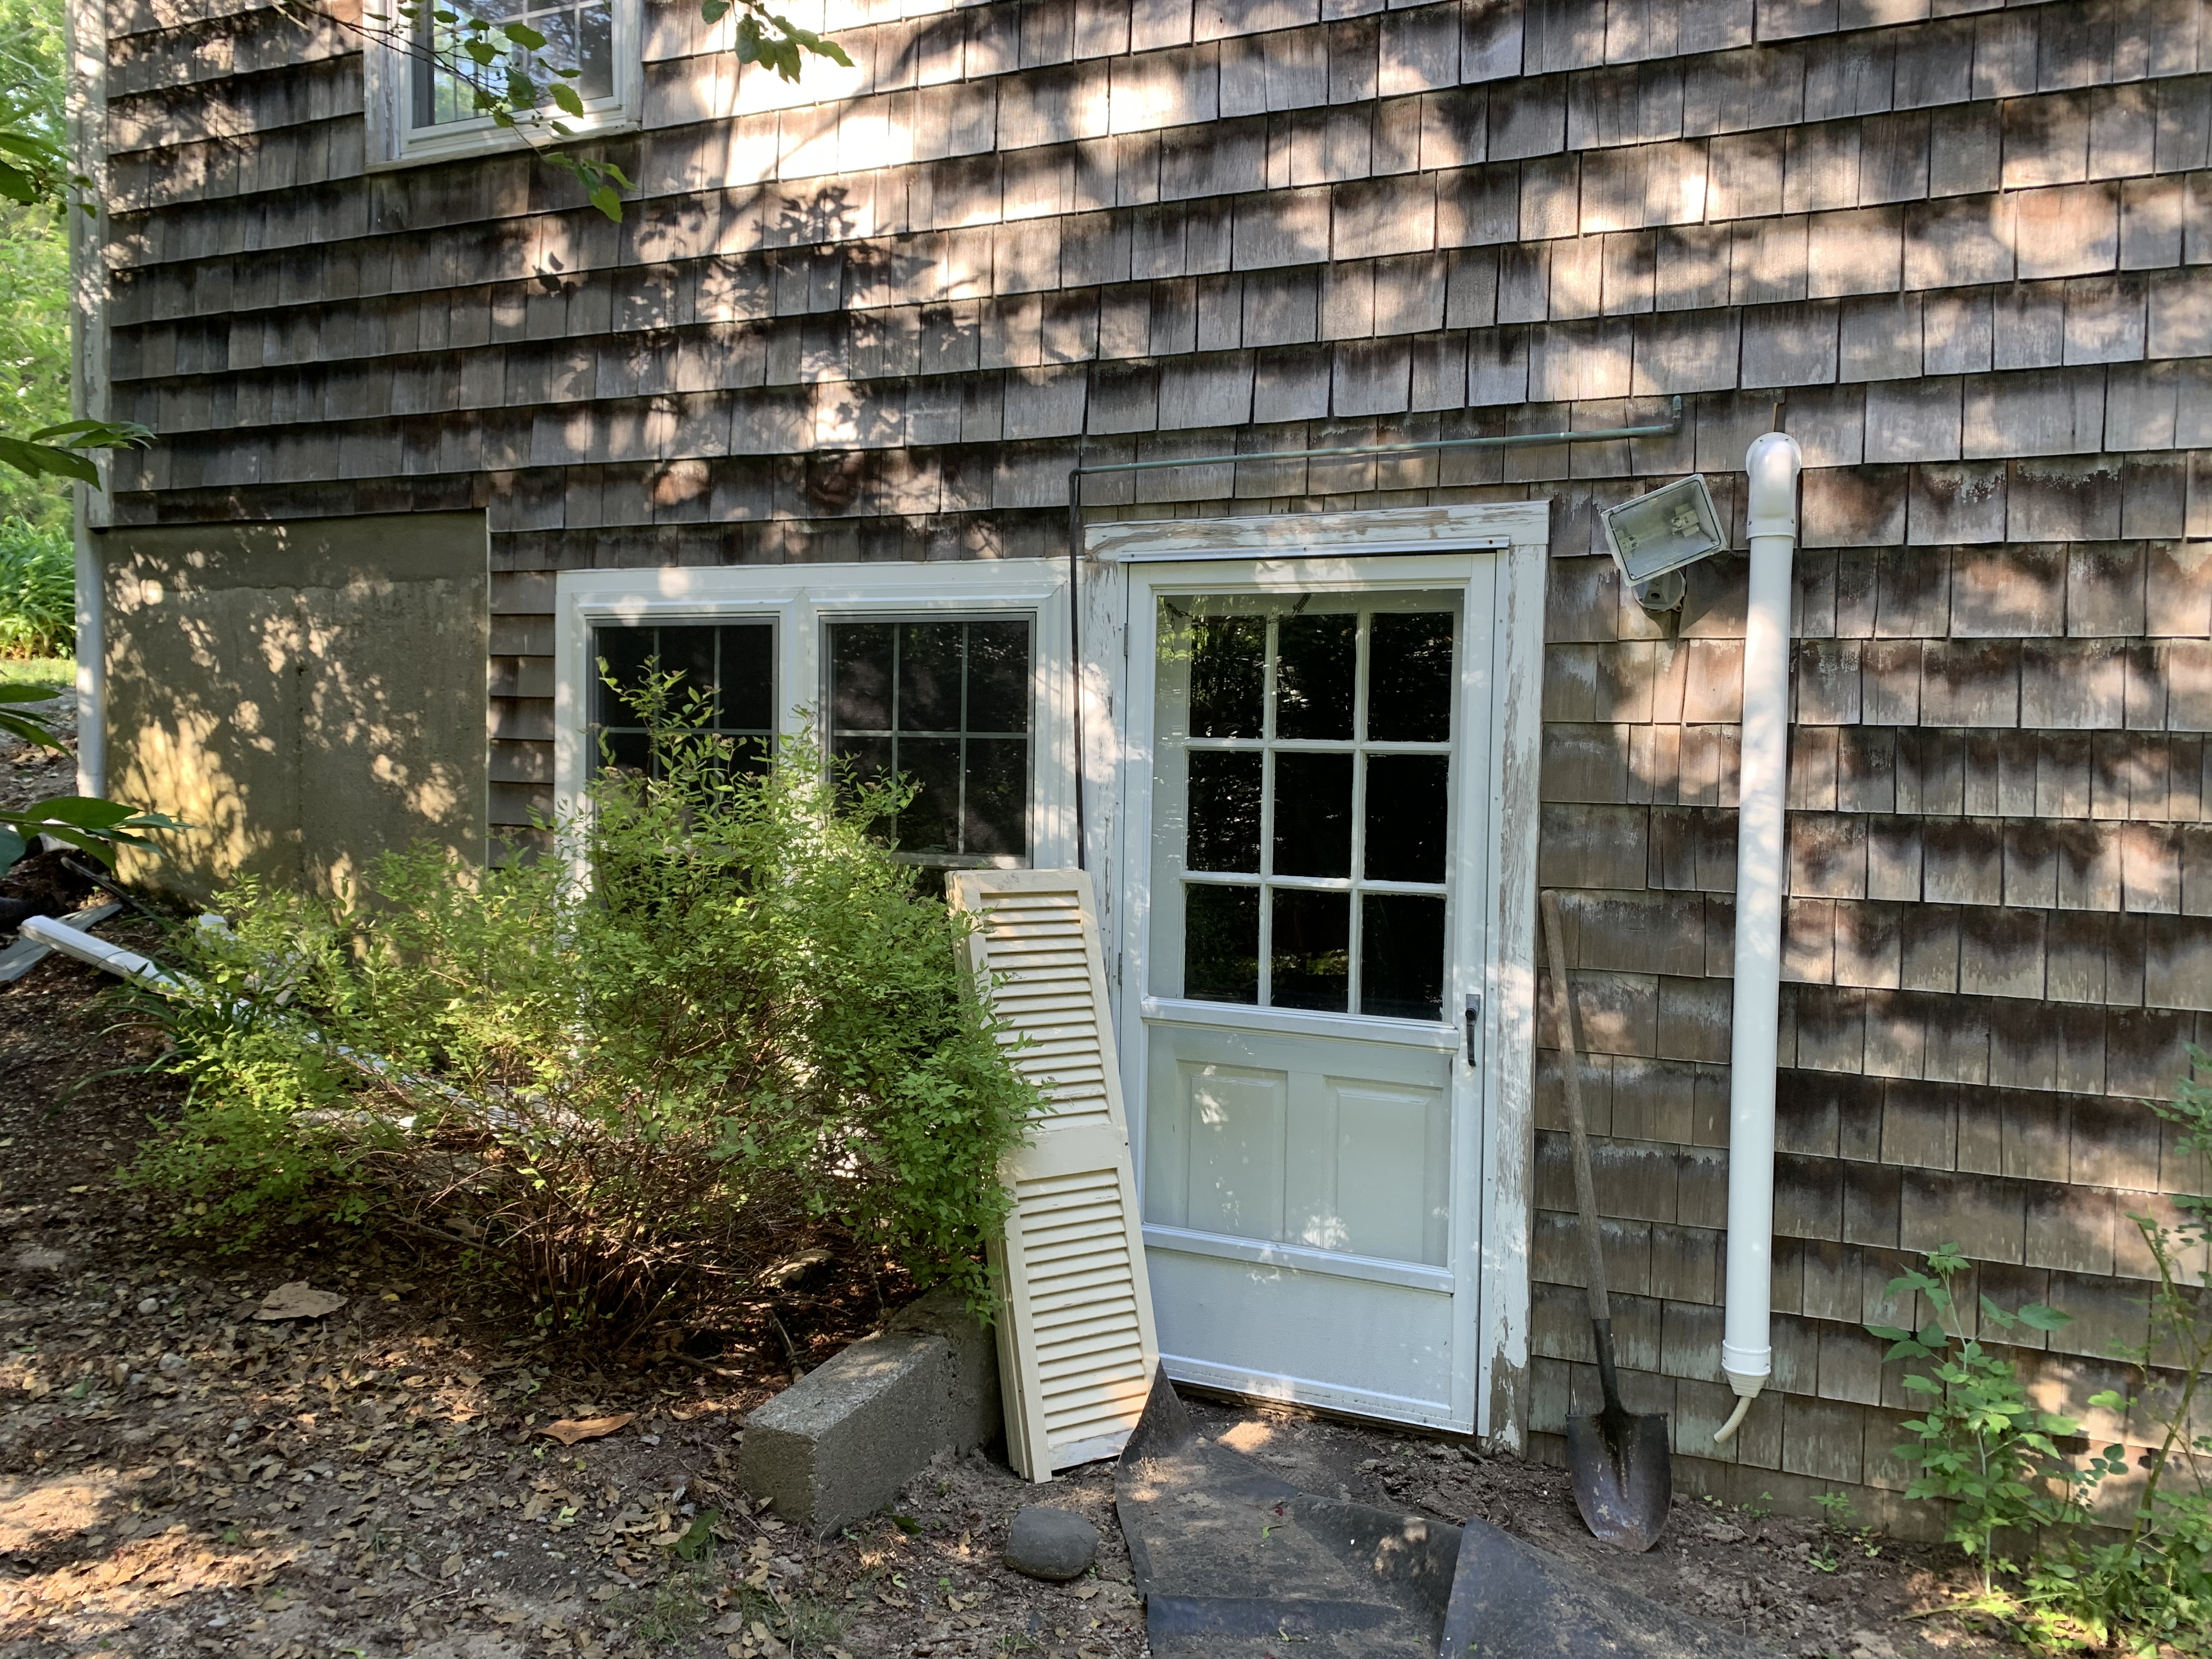
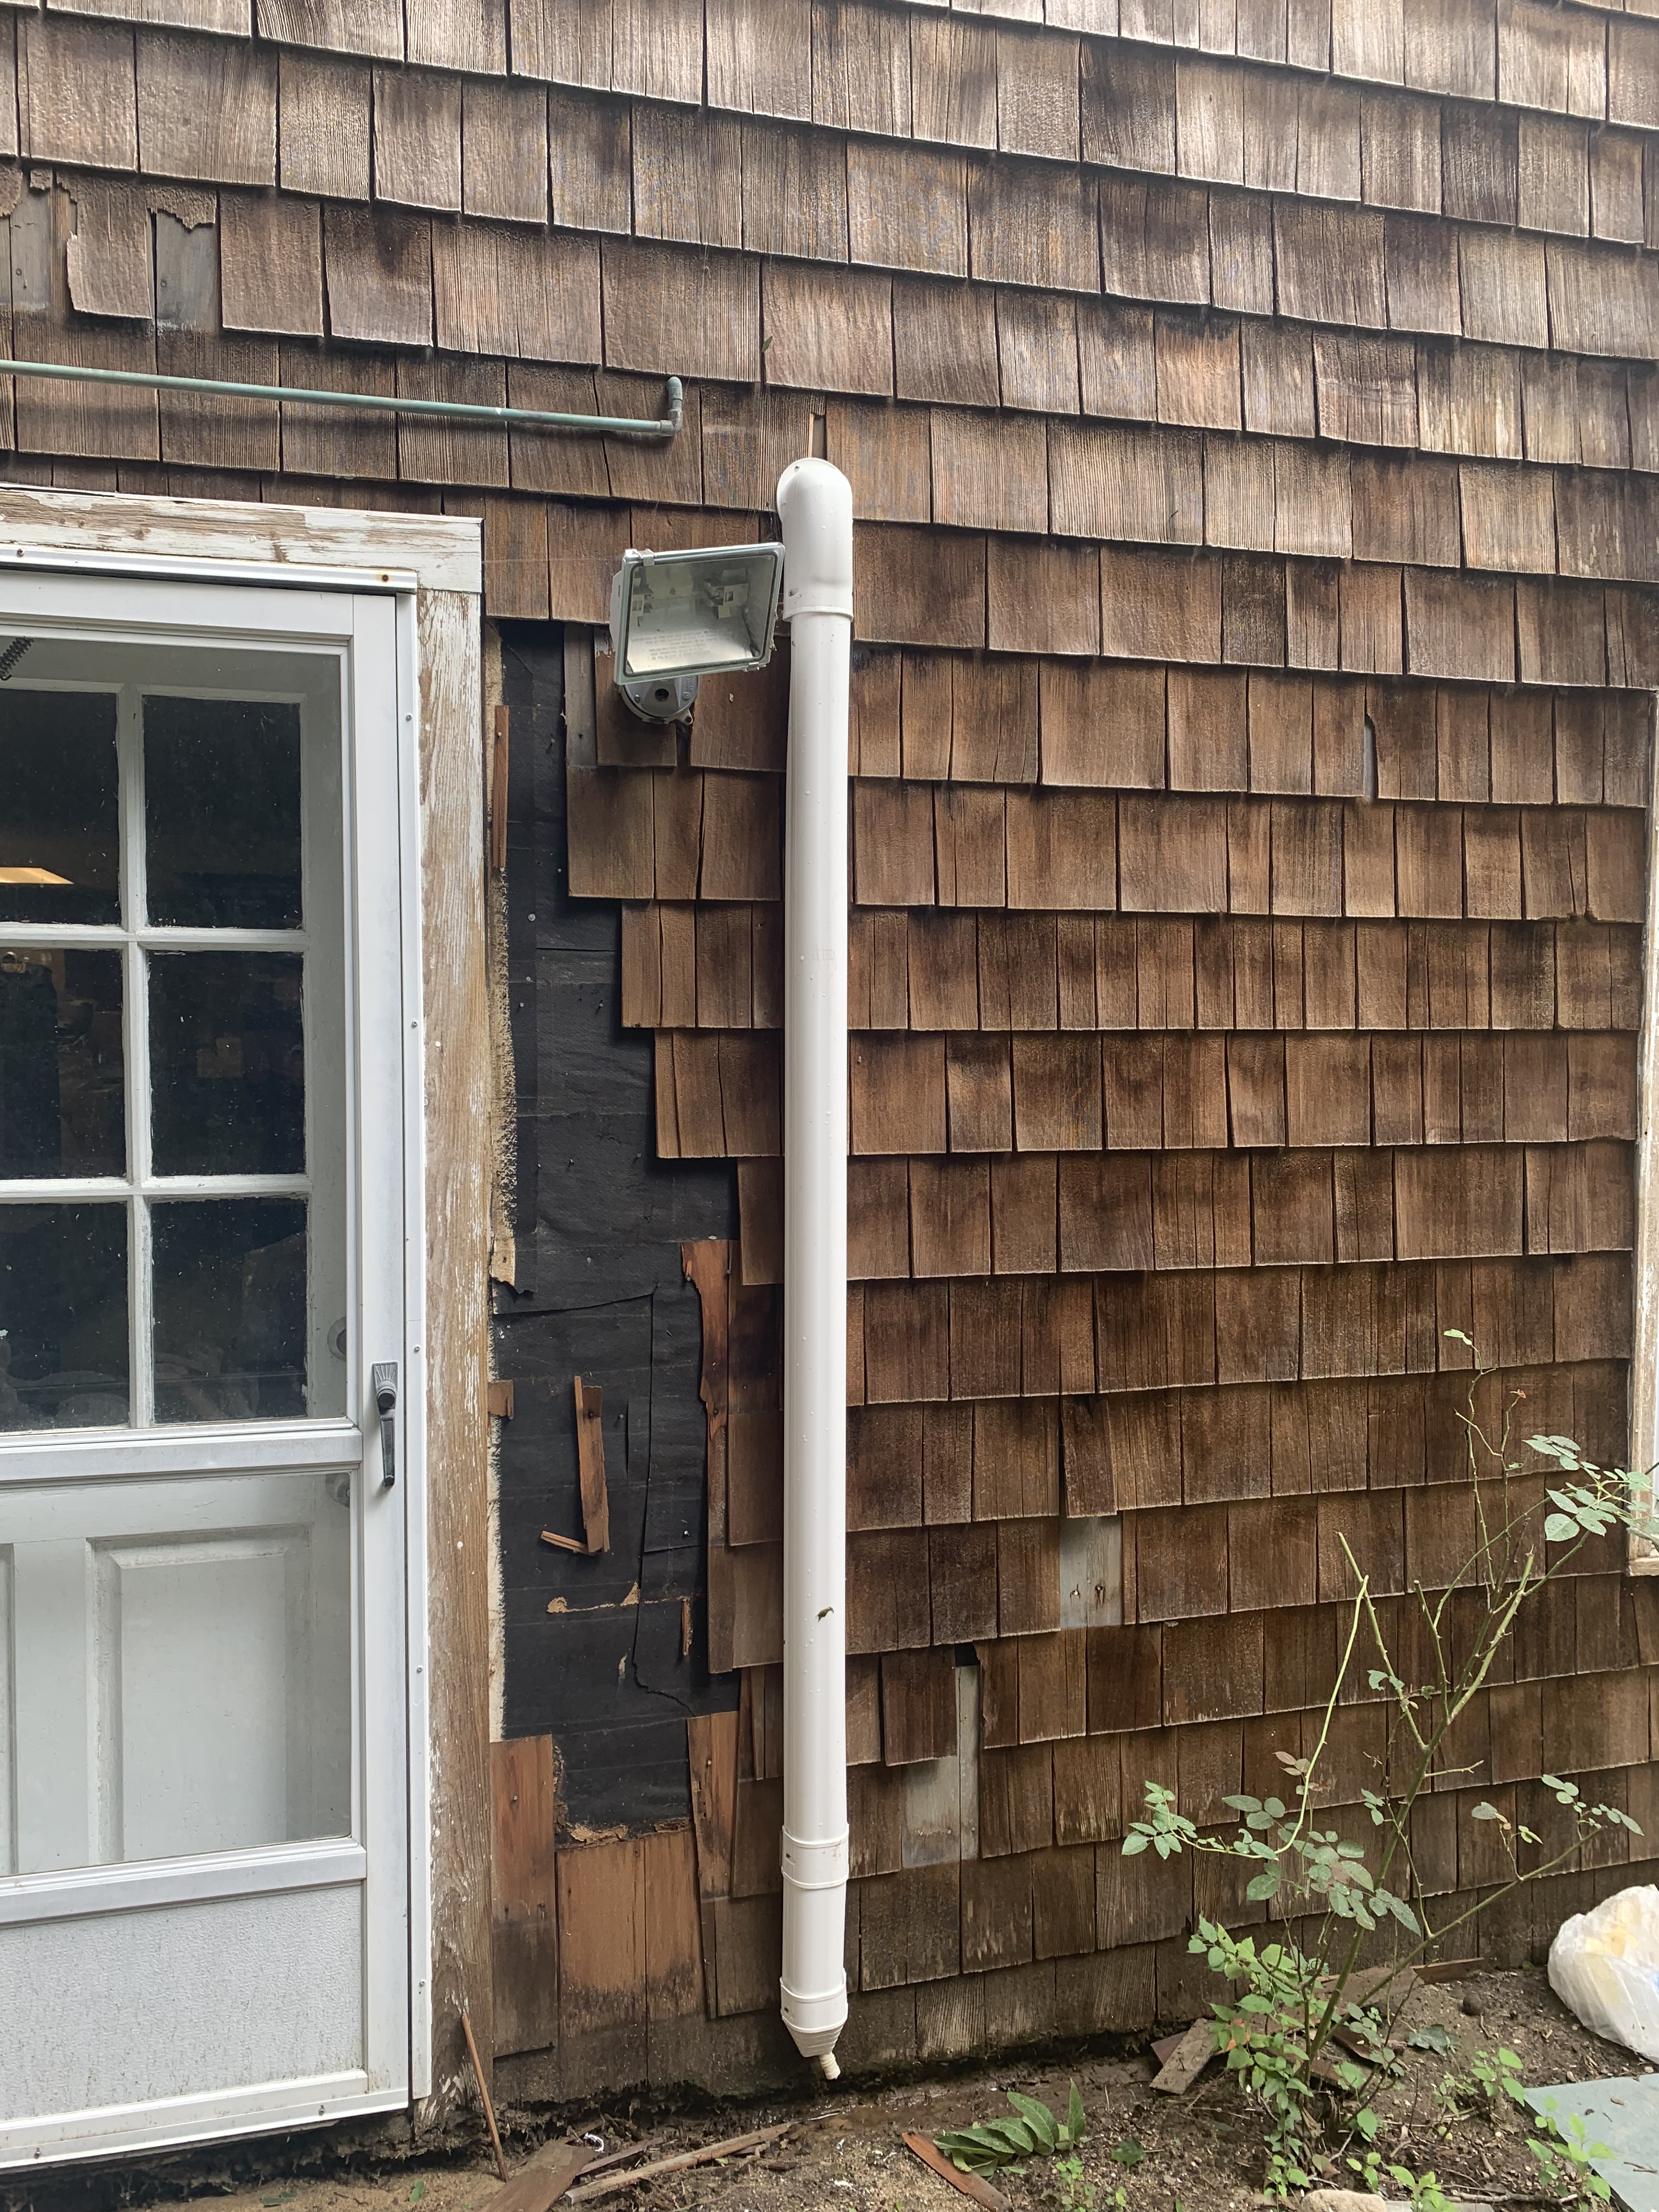
Let’s start with curb appeal! Originally the house had traditional cape-style shutters and warped, greying shingles. We removed the shutters, power-washed & stained the shingles, and painted the exterior doors. To mitigate flooding, we added a granite apron across both entries to the driveway, effectively driving water streaming downhill into drains.
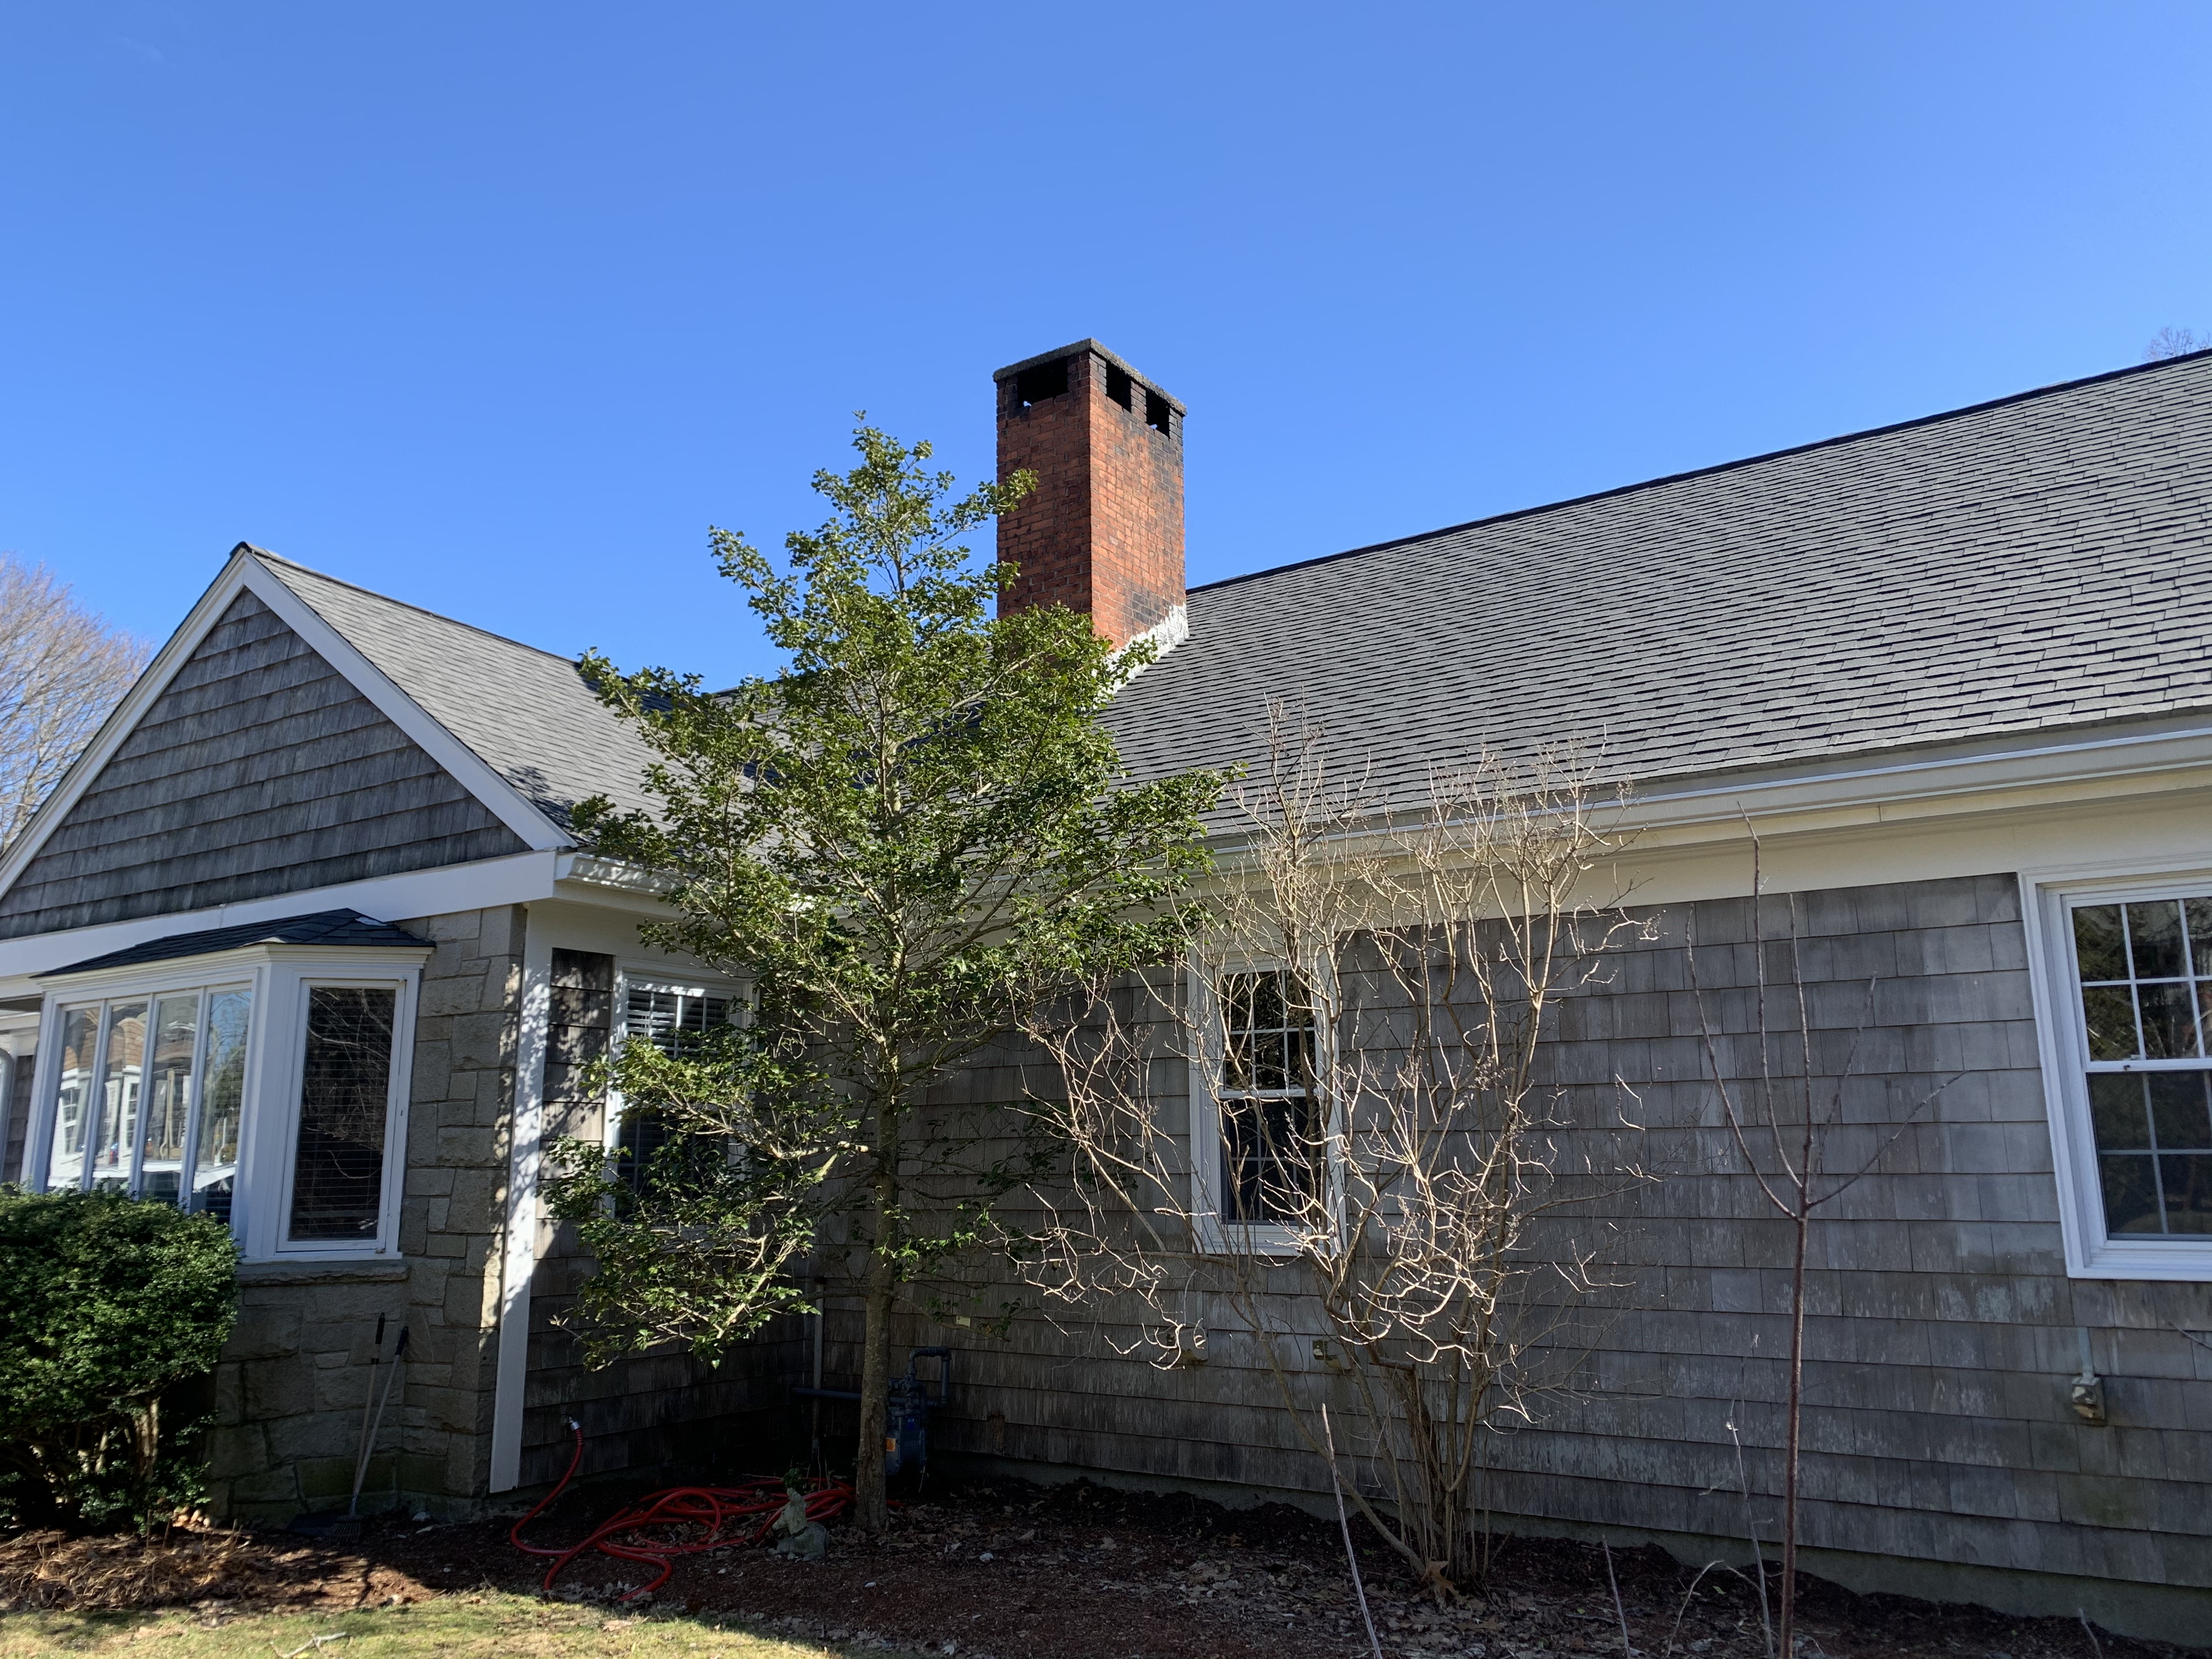
There were trees dangerously crowding and even overhanging the house – we trimmed and removed several to prevent mold build-up and avoid snow-bound disasters, things we never would’ve considered in CA.
There was a brambly, tangled mess of a garden at the entry to the home, an ill-considered hodgepodge of walkways, and a weird paver-covered parking spot right in front of the entry. We cleared that out, and added a front deck for a welcoming effect.
Finally, we repaved the driveway, creating a channeling effect for waterflow, added a central tree between the driveway entrances for visual interest (and frankly to signal snowplows not to pile snow up against us!), cultivated garden spaces and landscaped it all to tie in together. What previously appeared to be a parking lot finally looks like a proper front yard.
Improvement pics:
the jumbled walkways in favor of a deck

Above are all befores. YIKES! Below, now let’s enjoy the afters!

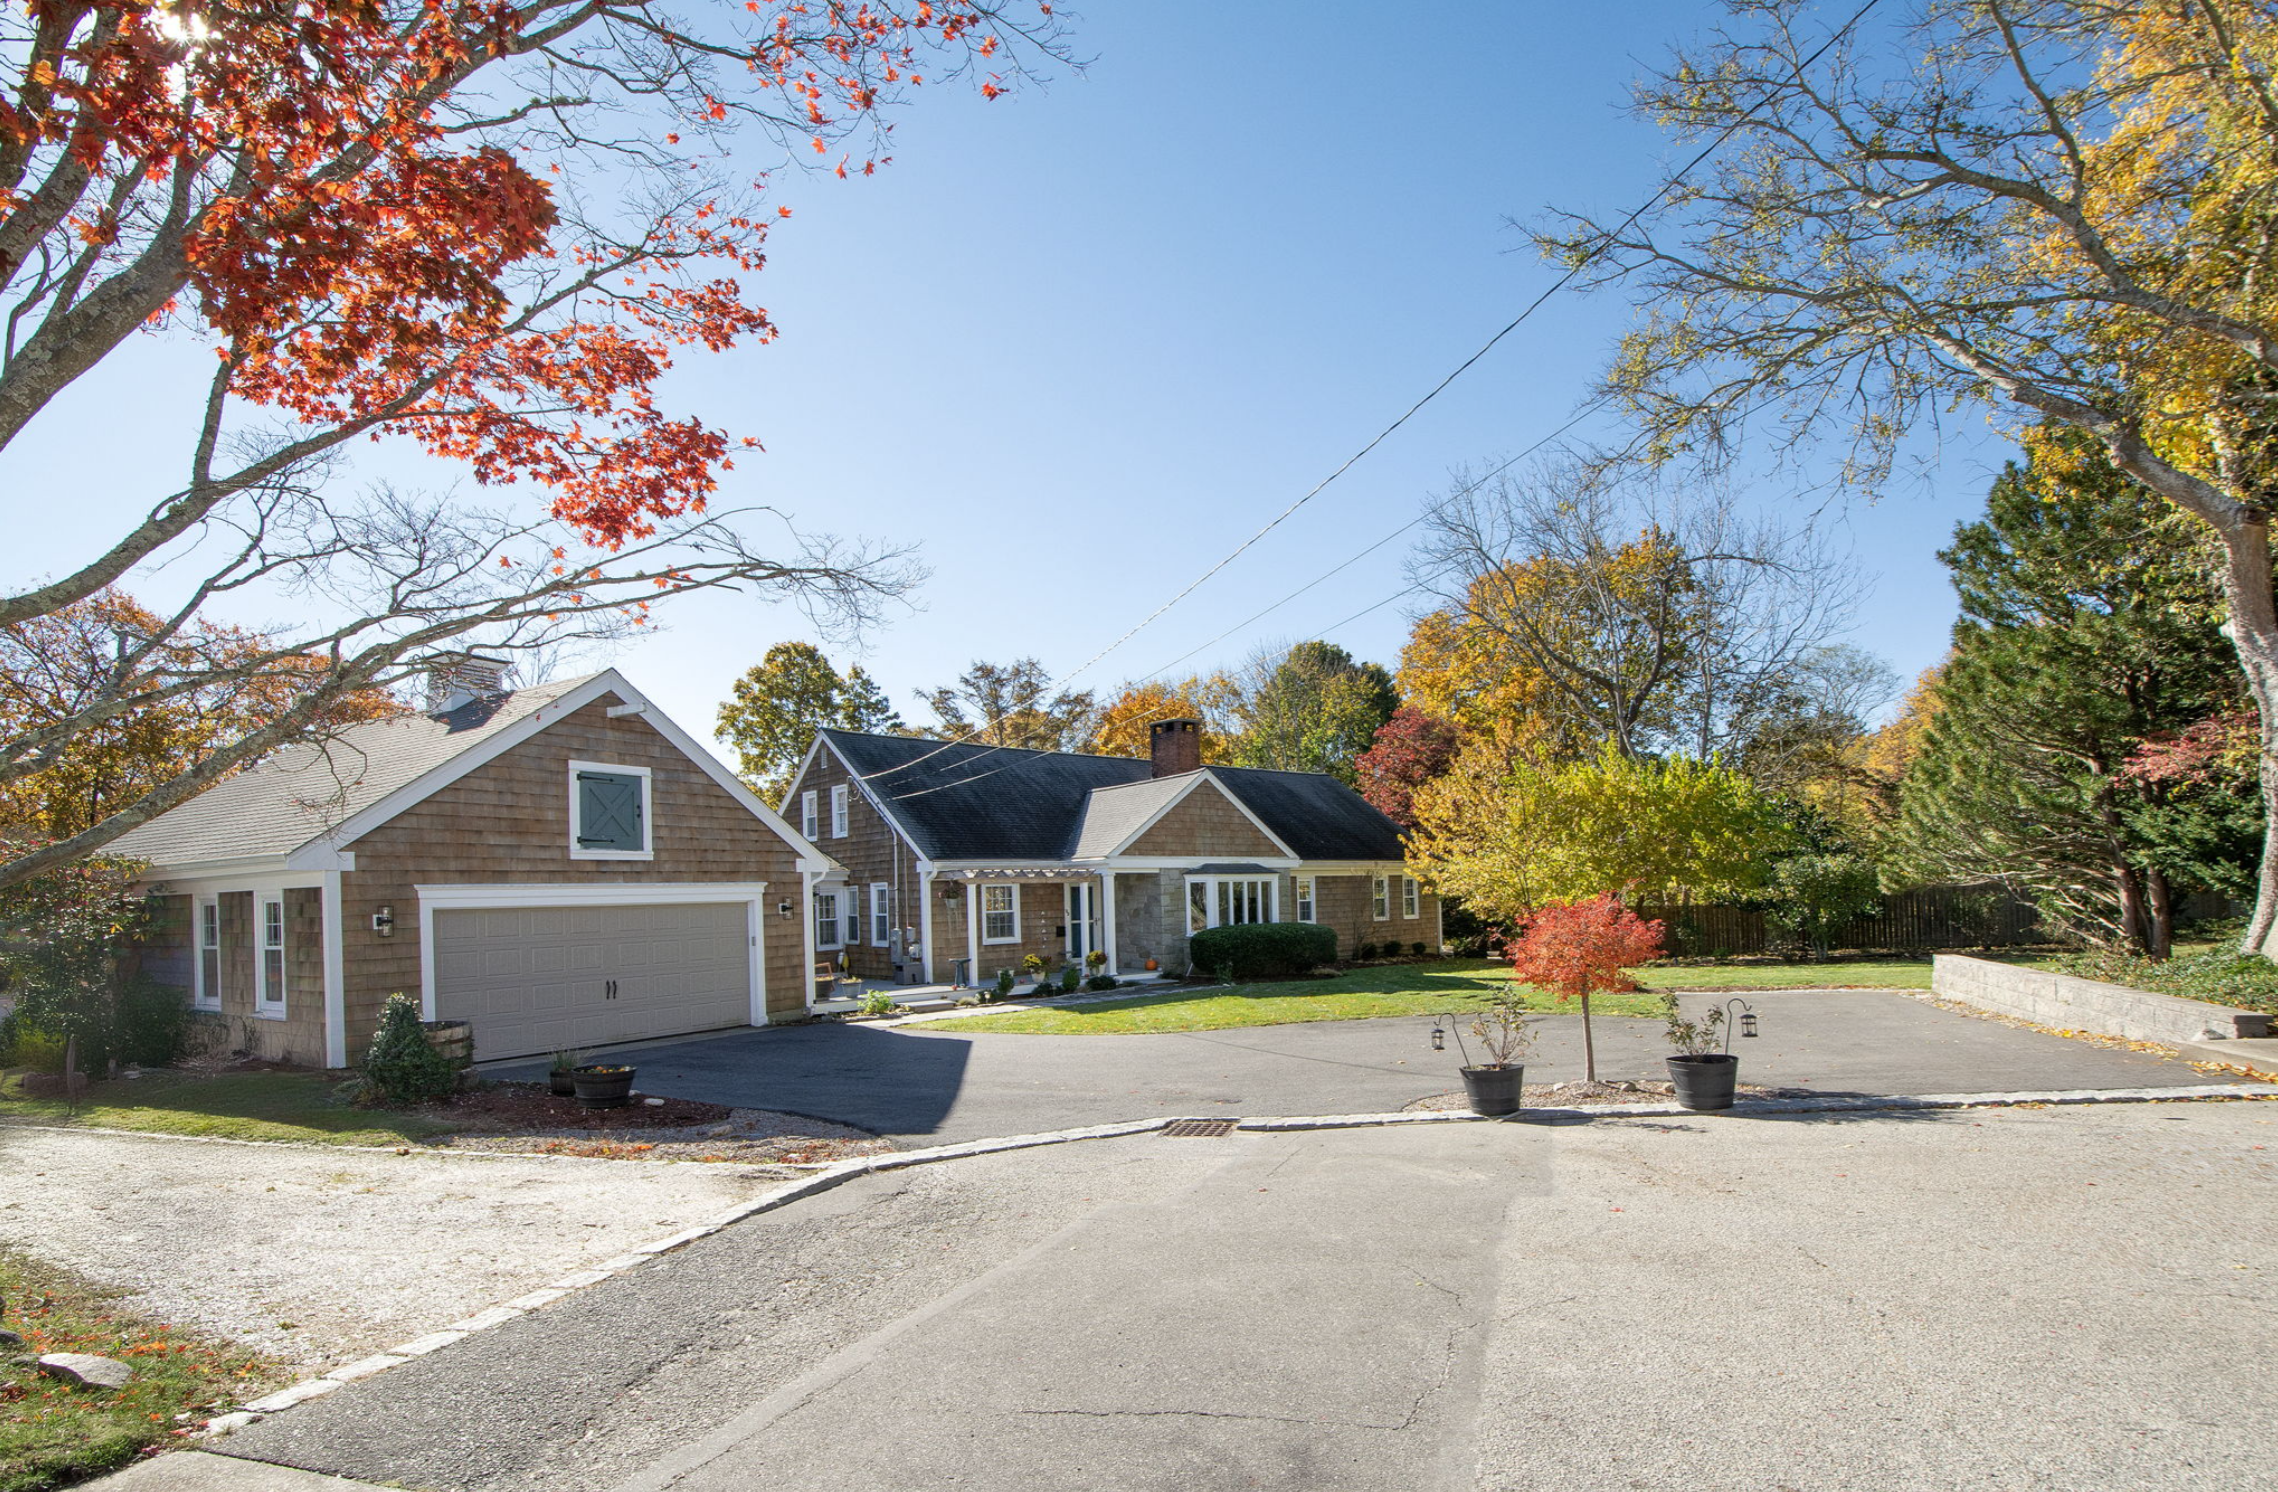
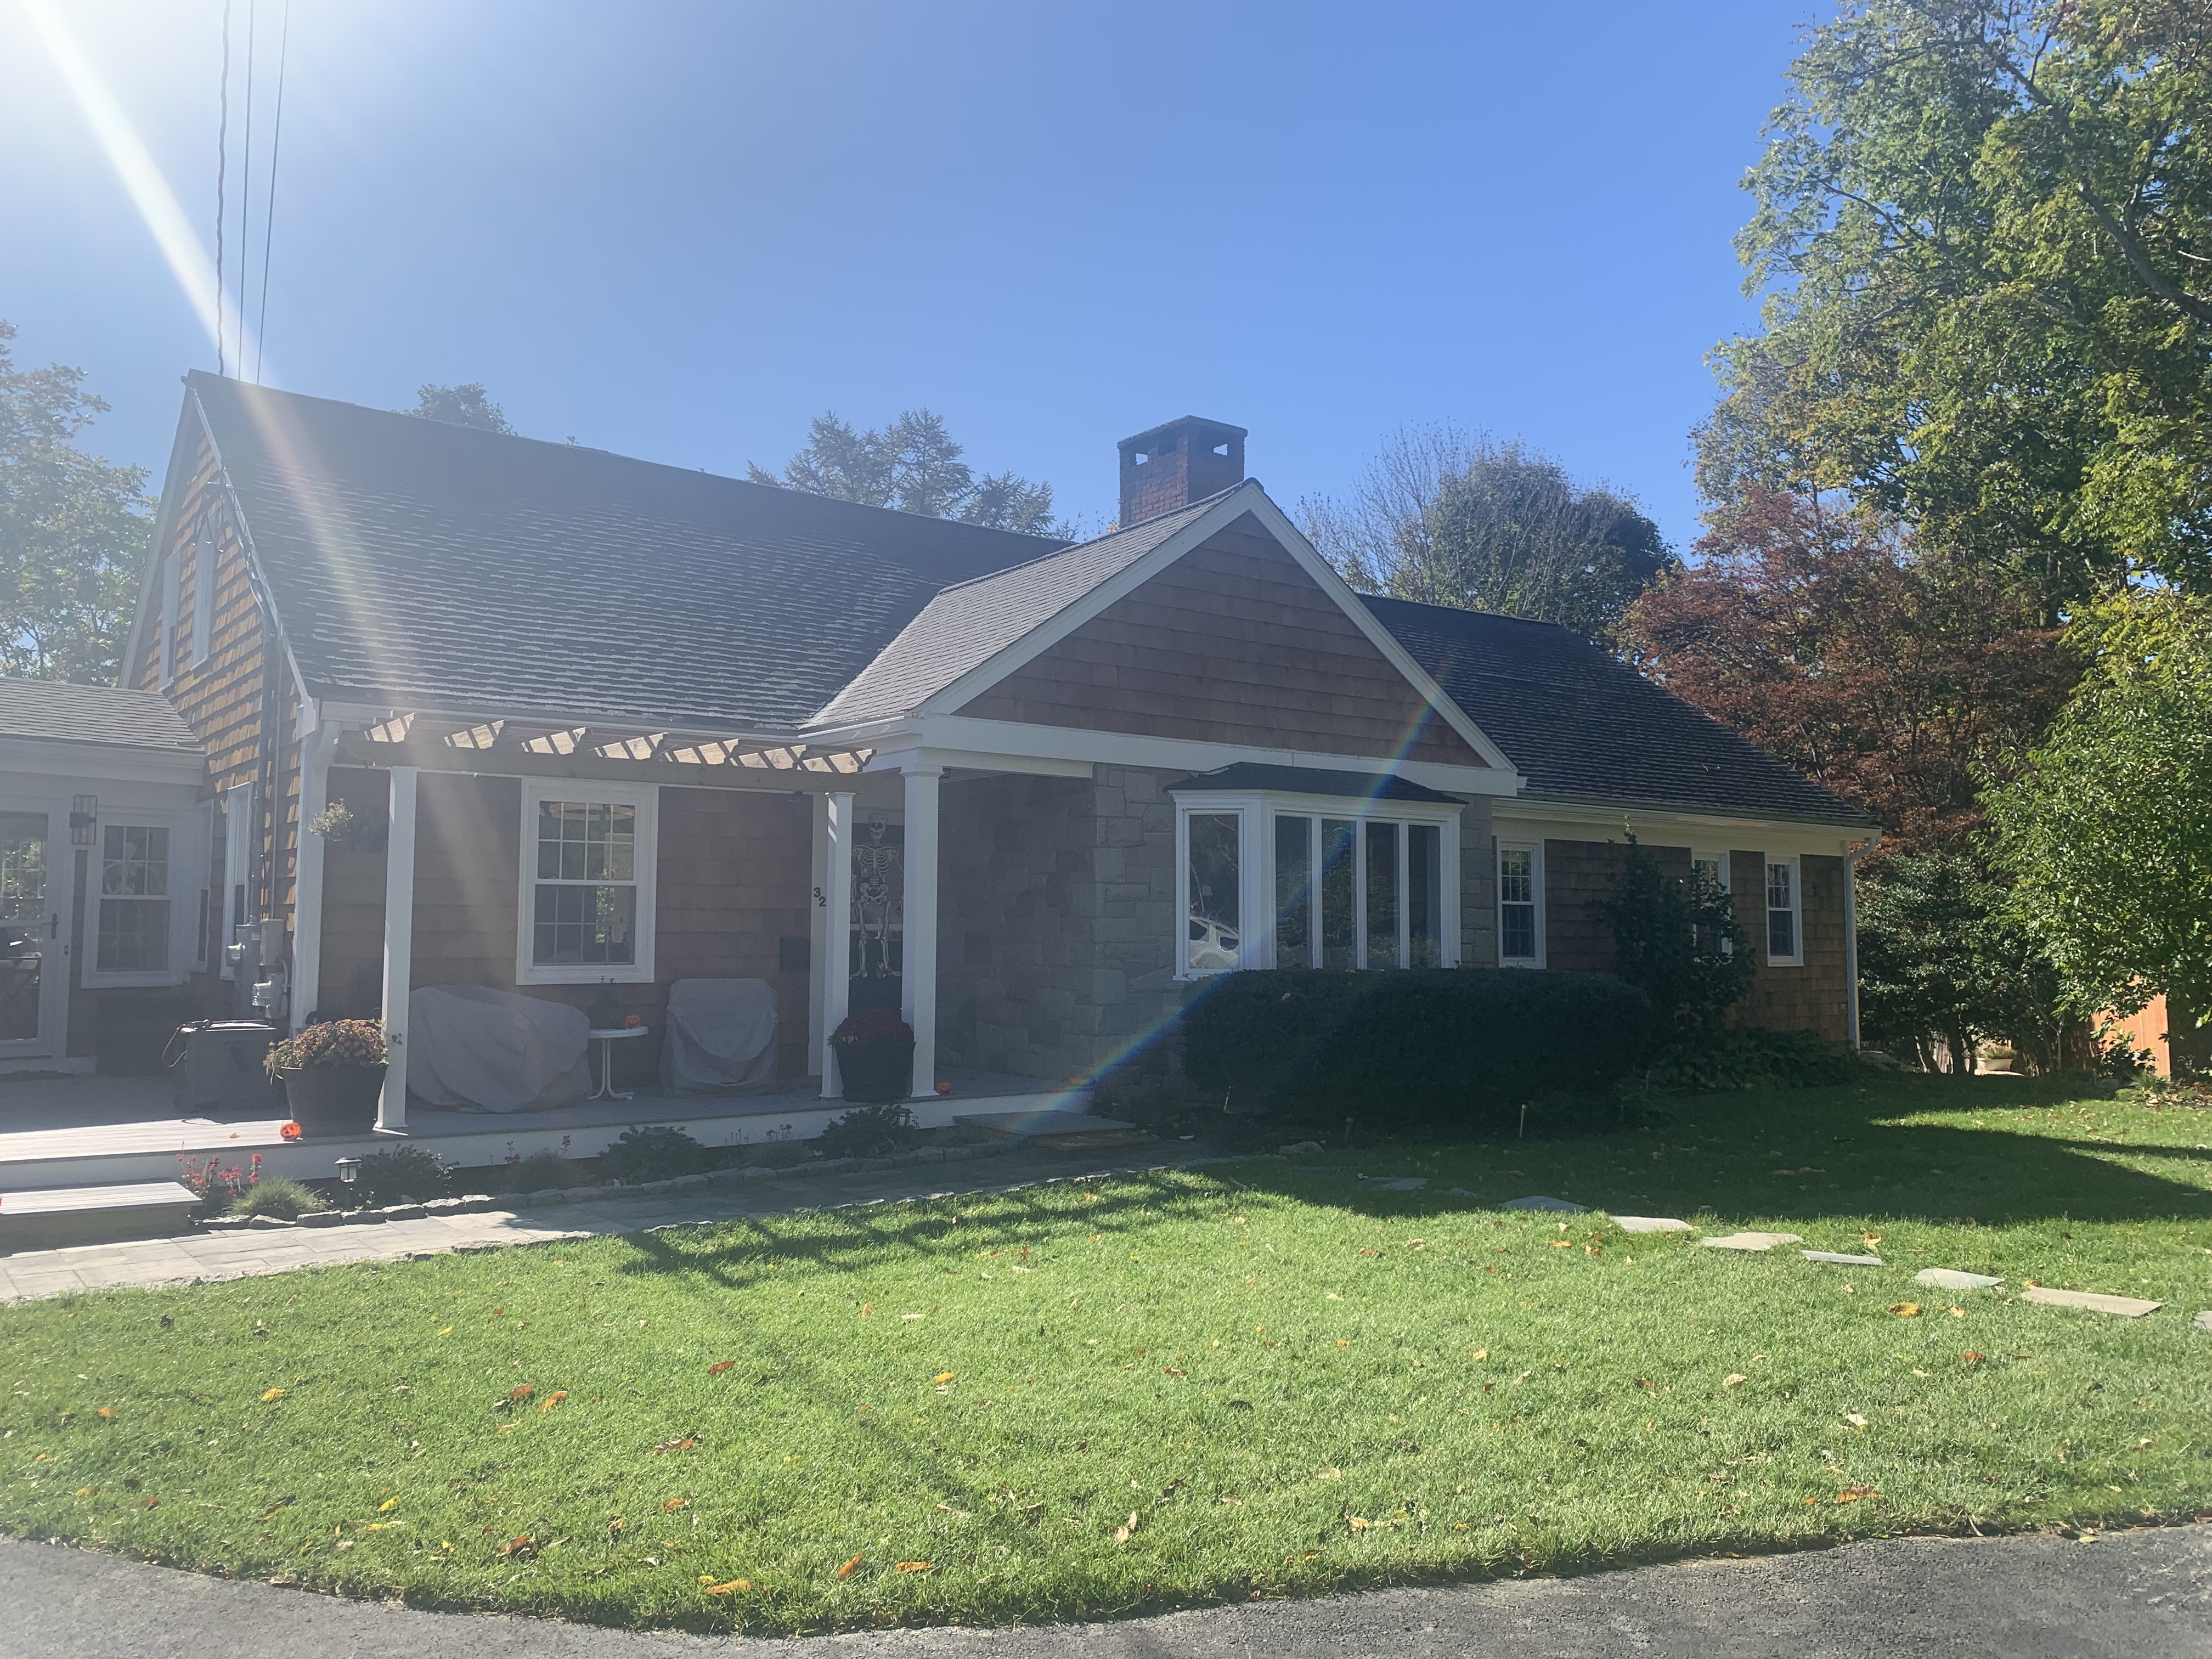
Isn’t she PURDY?! 😍🥹
We of course did all the necessary infrastructure upgrades: there was no A/C, and everything else was old, inefficient, and potentially hazardous.

IDK how folks live w/o AC in MA! 🥵
Completely revamped plumbing, electric, and HVAC. #TheBugattiOfHVAC (and no more nasty oil tank!)
Now for a clever solution to both mudslides and inaccessibility:

from rainwater and snowmelt
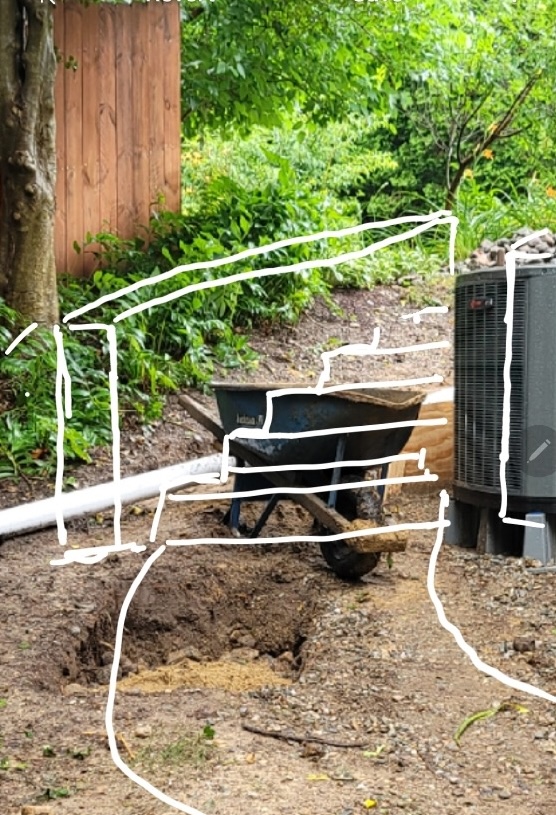

overflow from the front yard

away from the house!
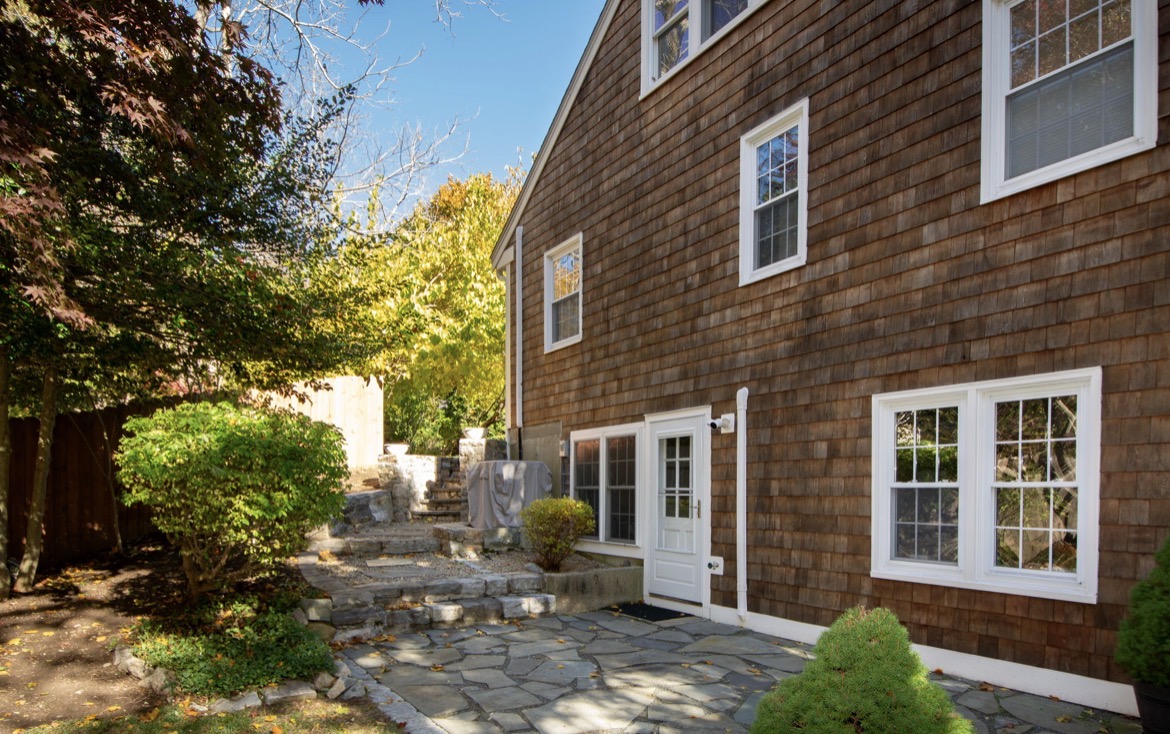
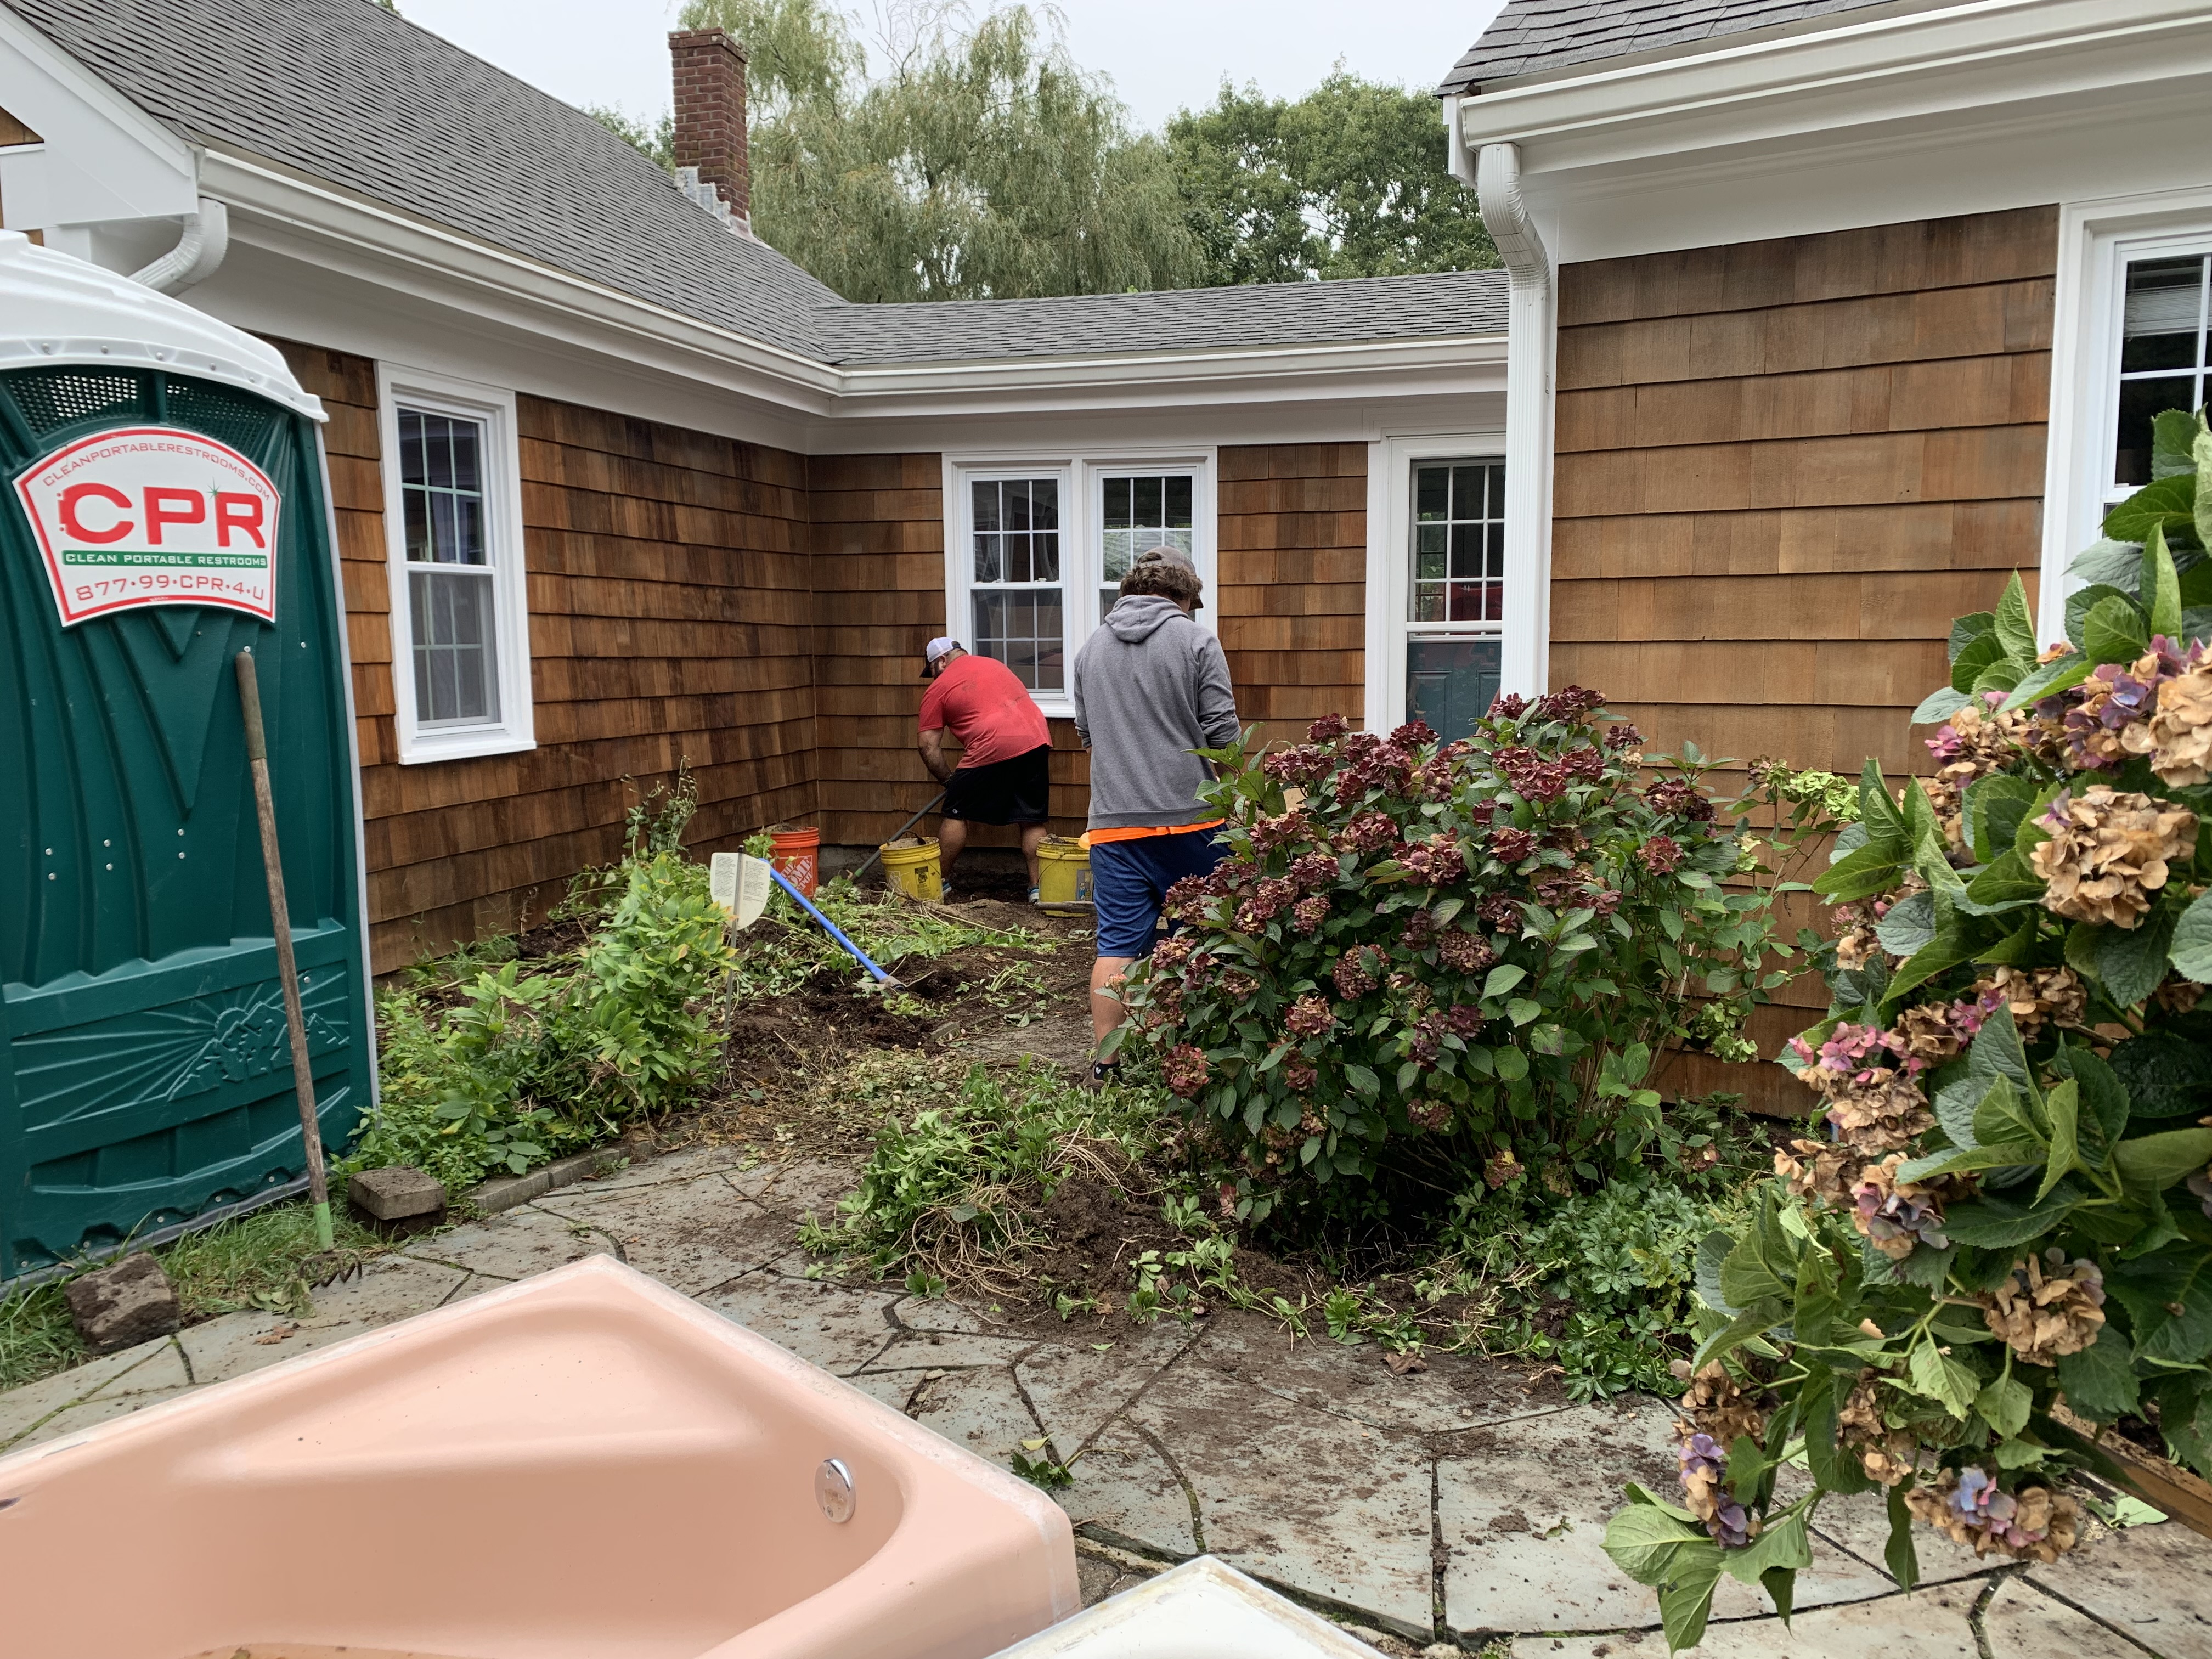
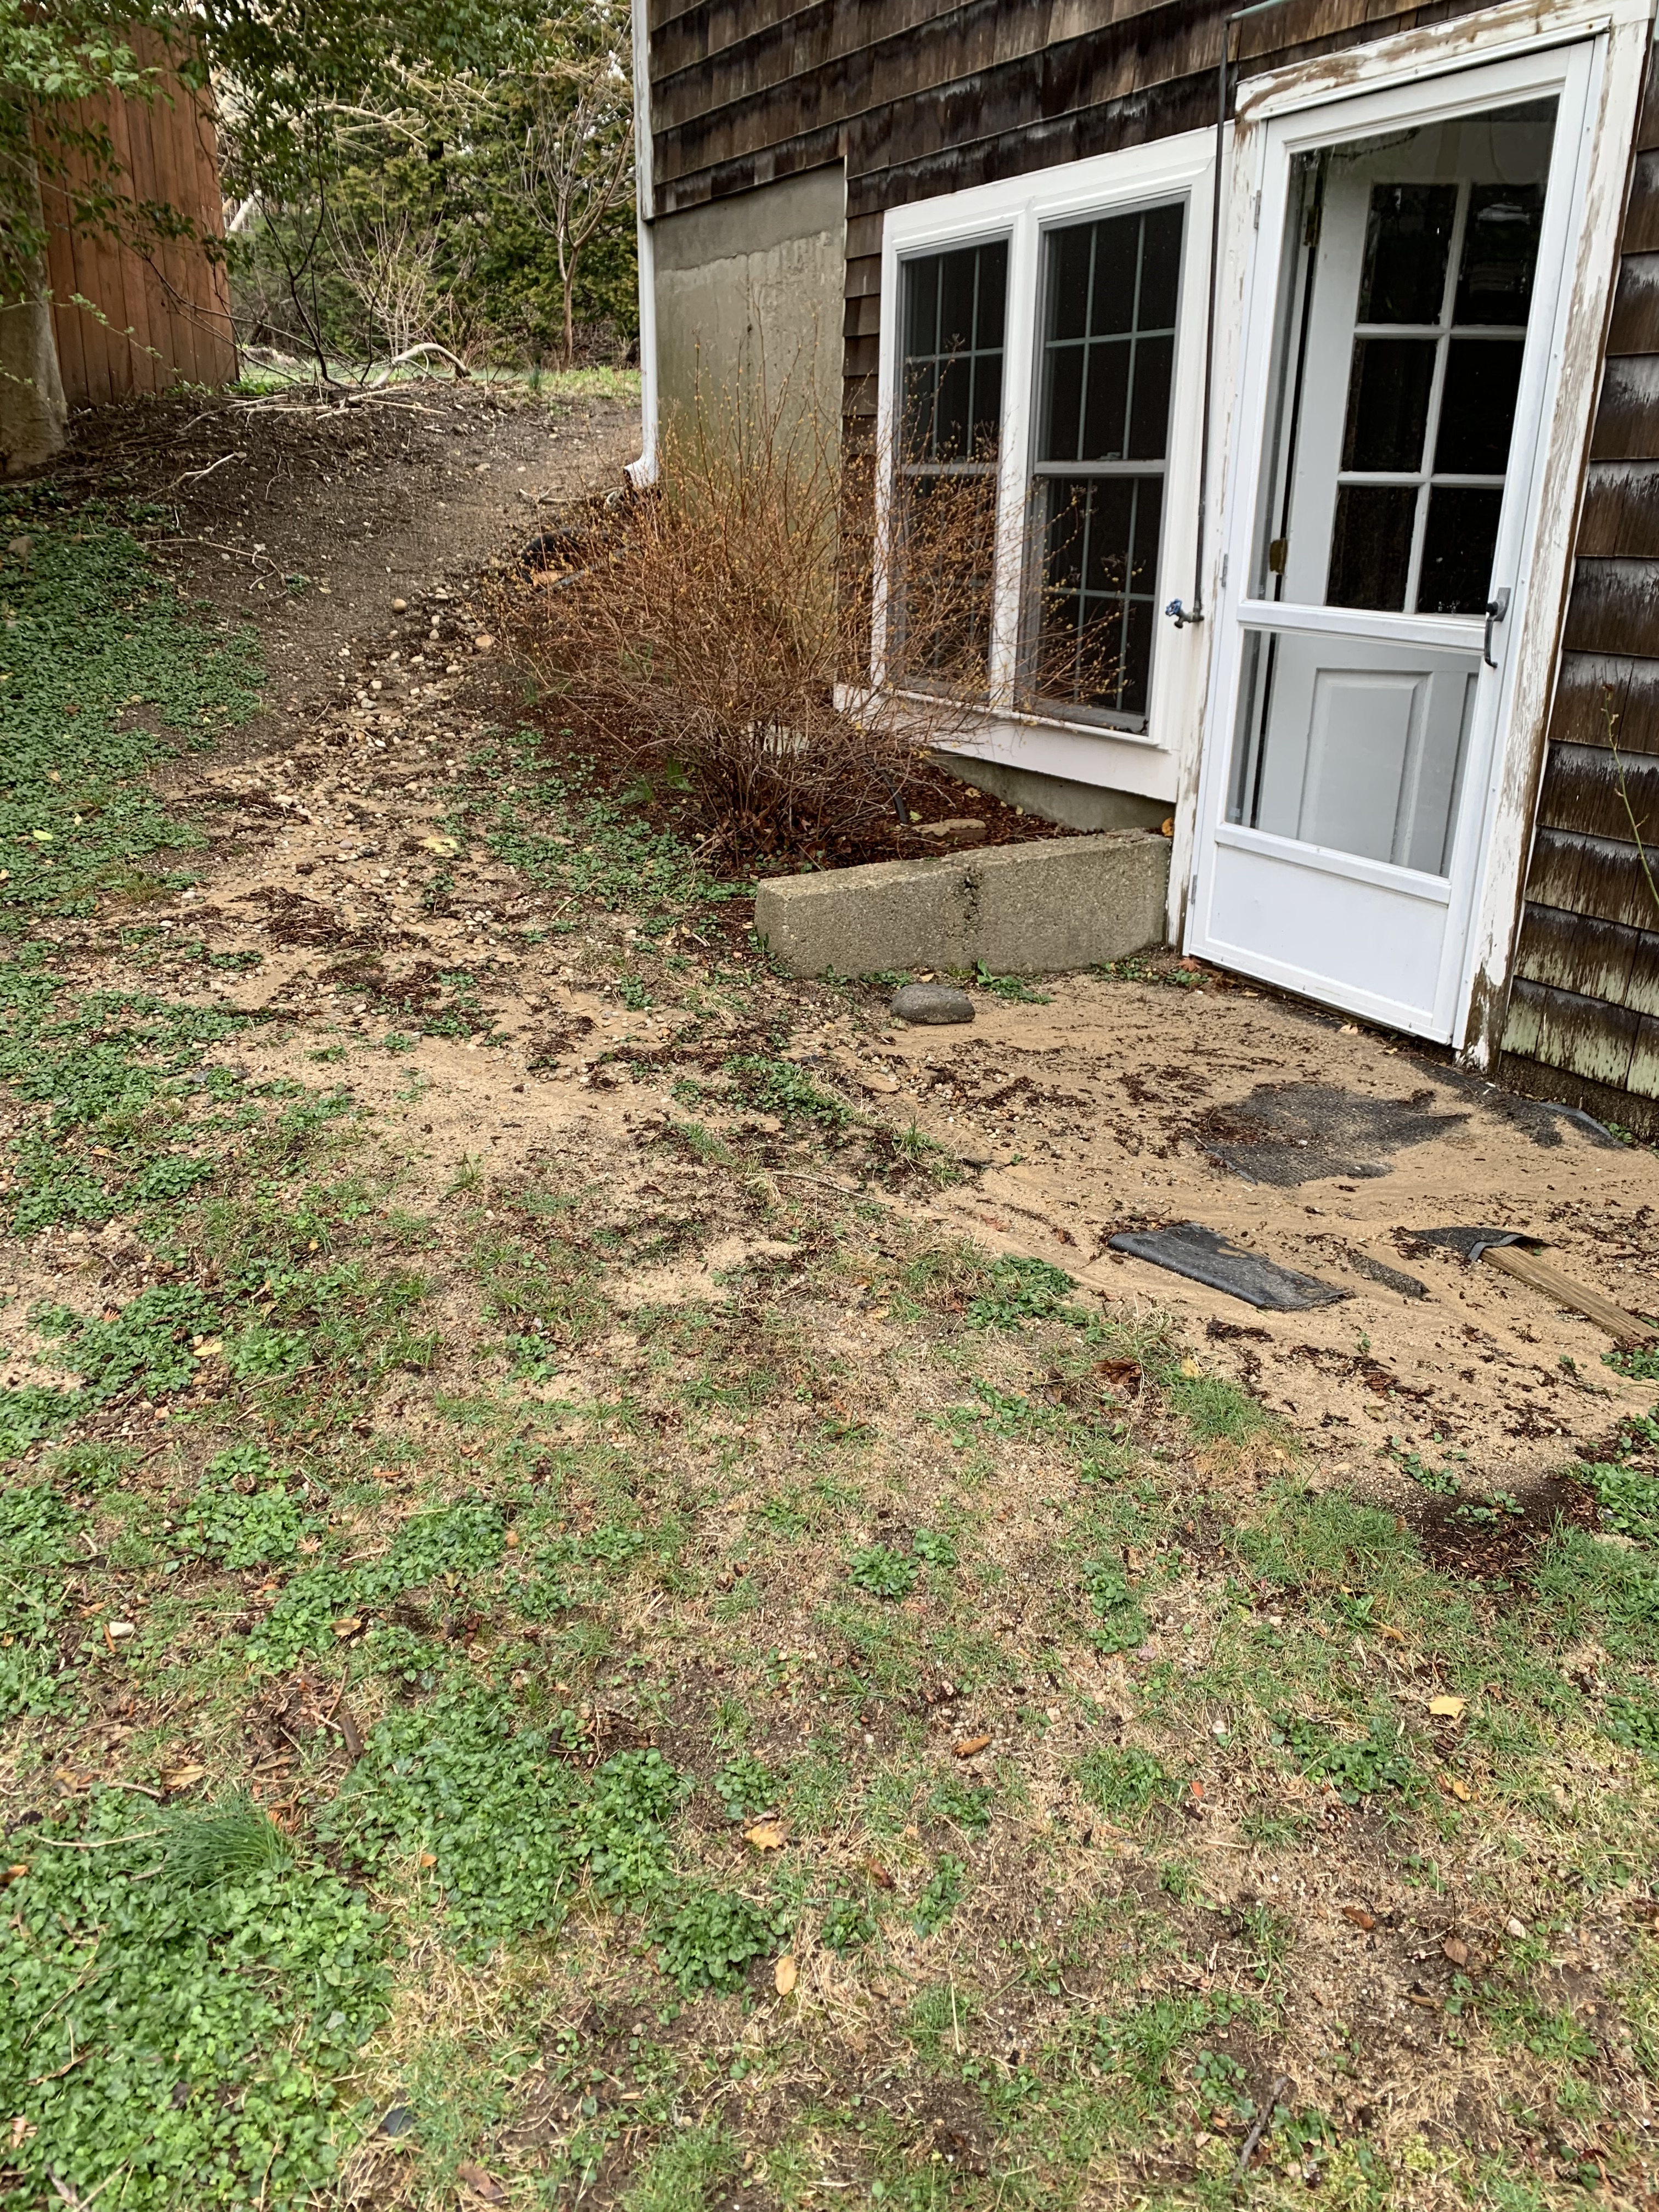
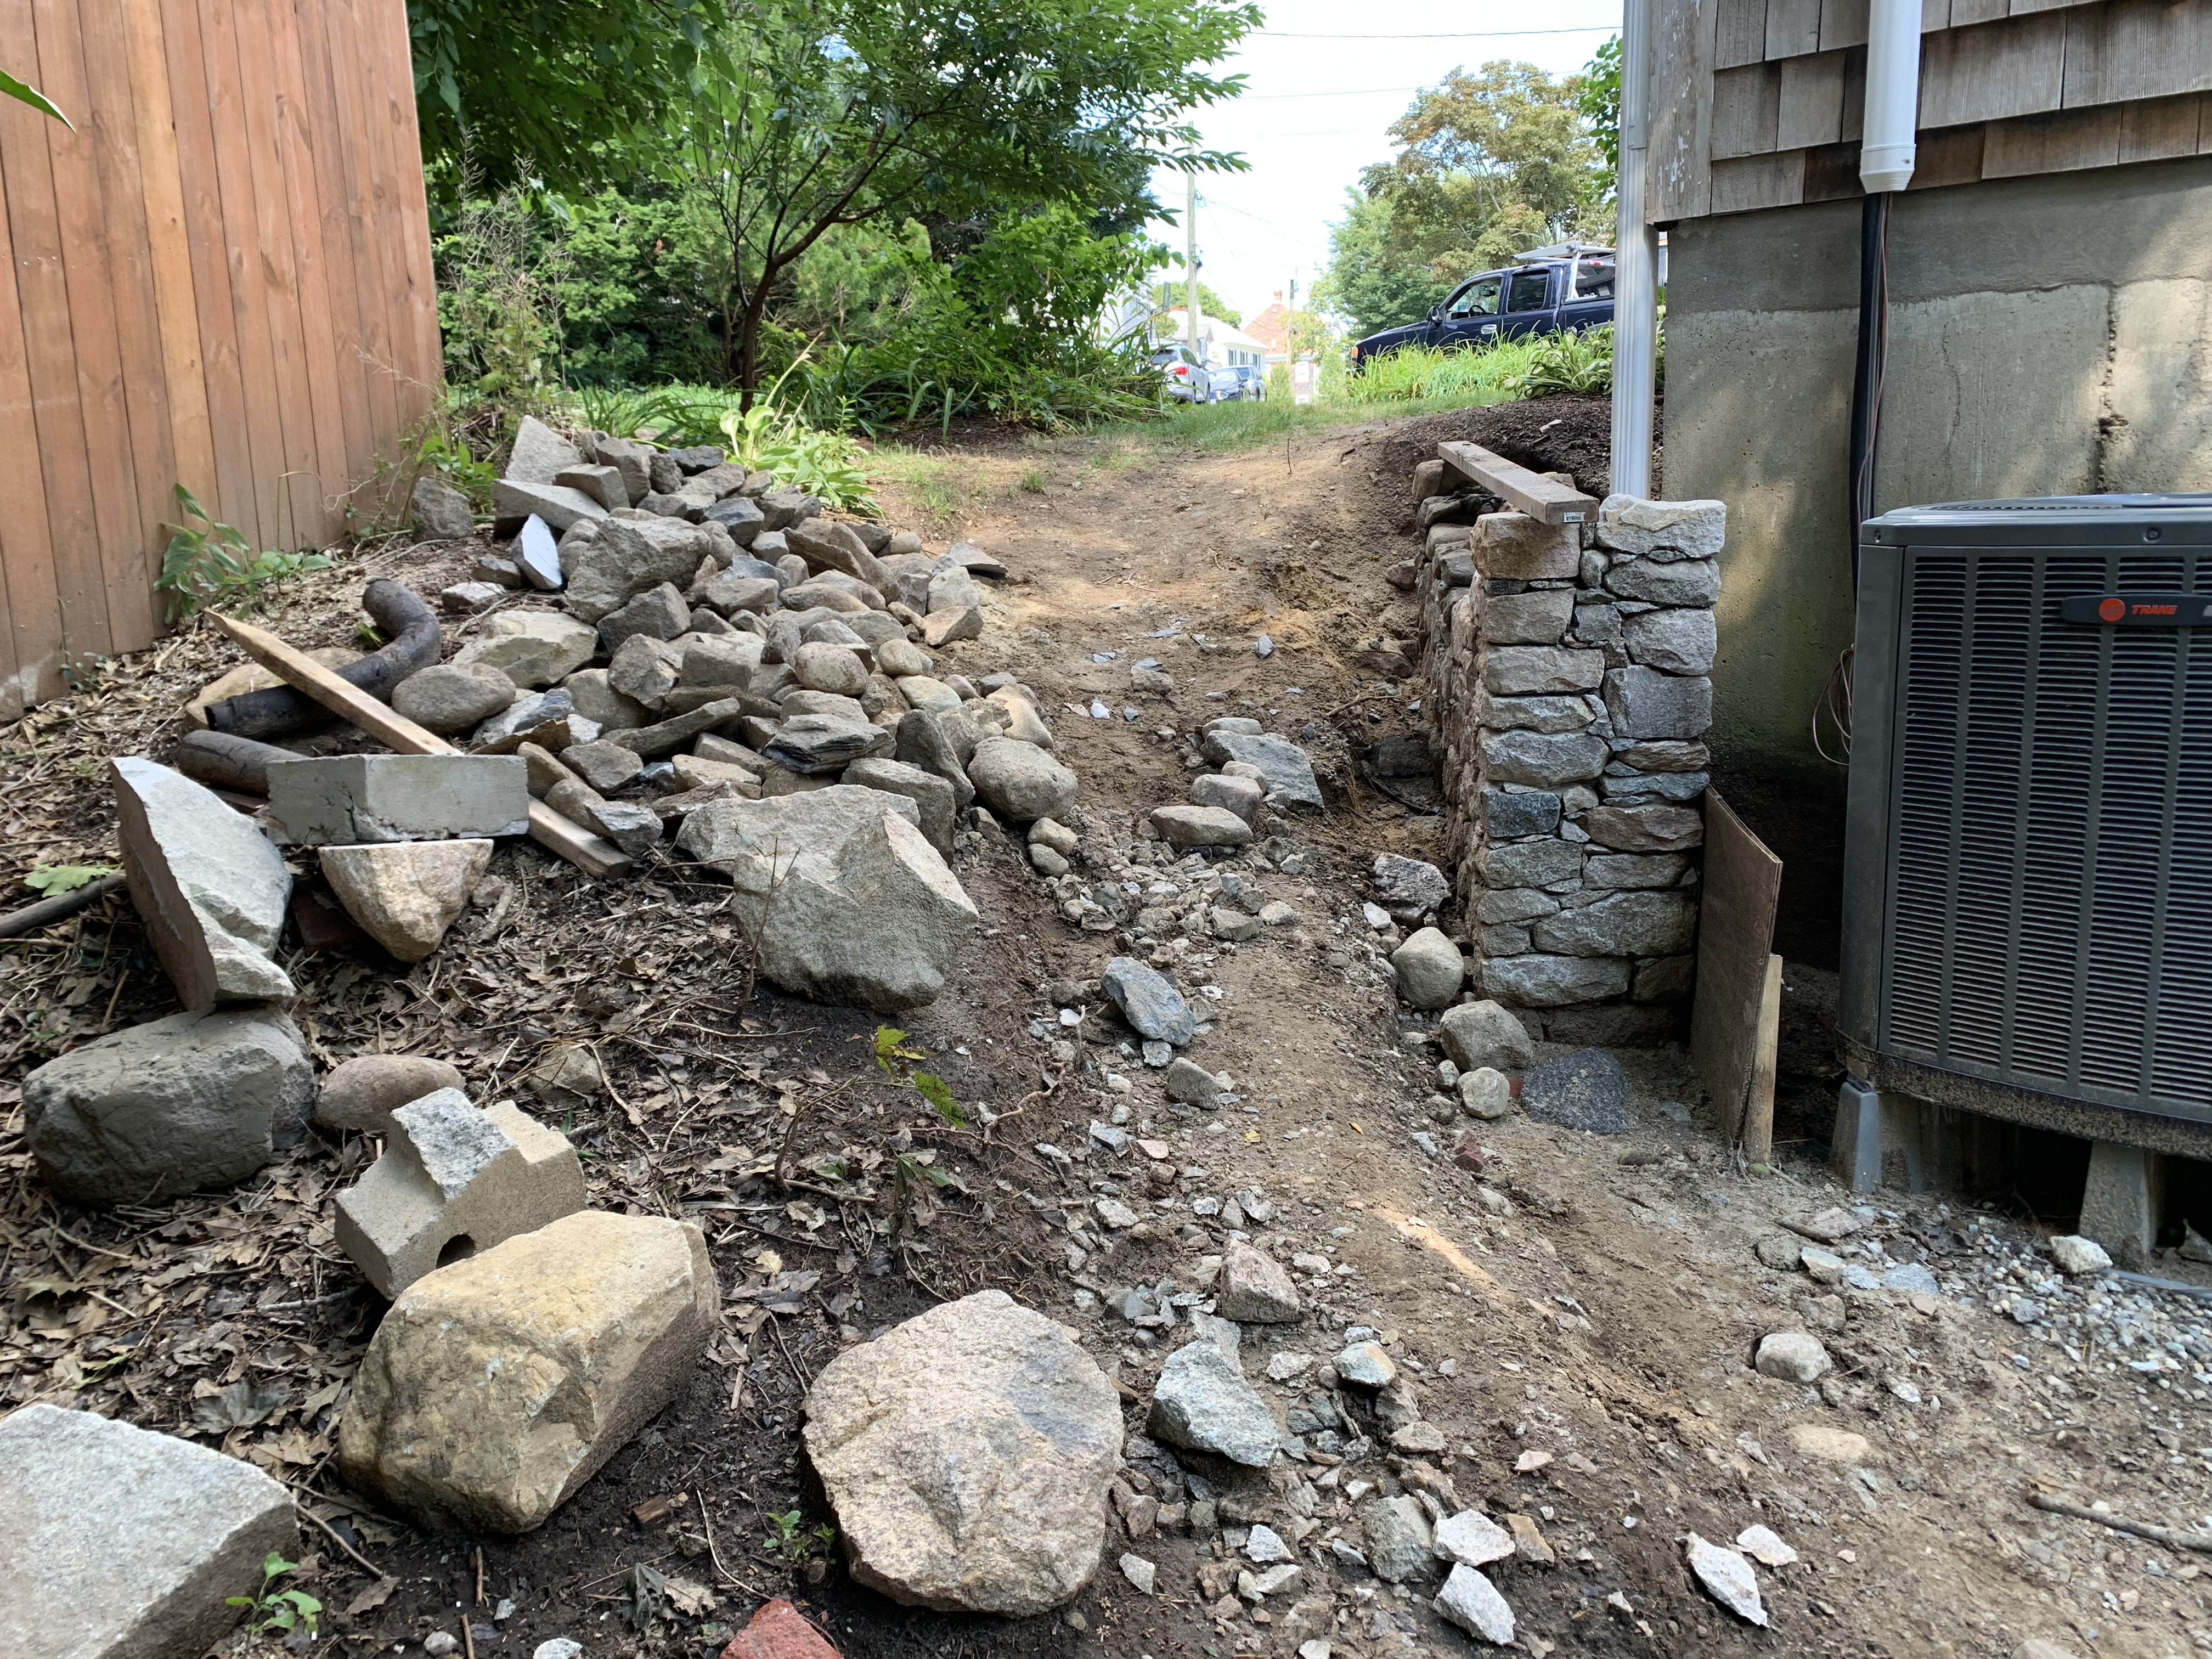
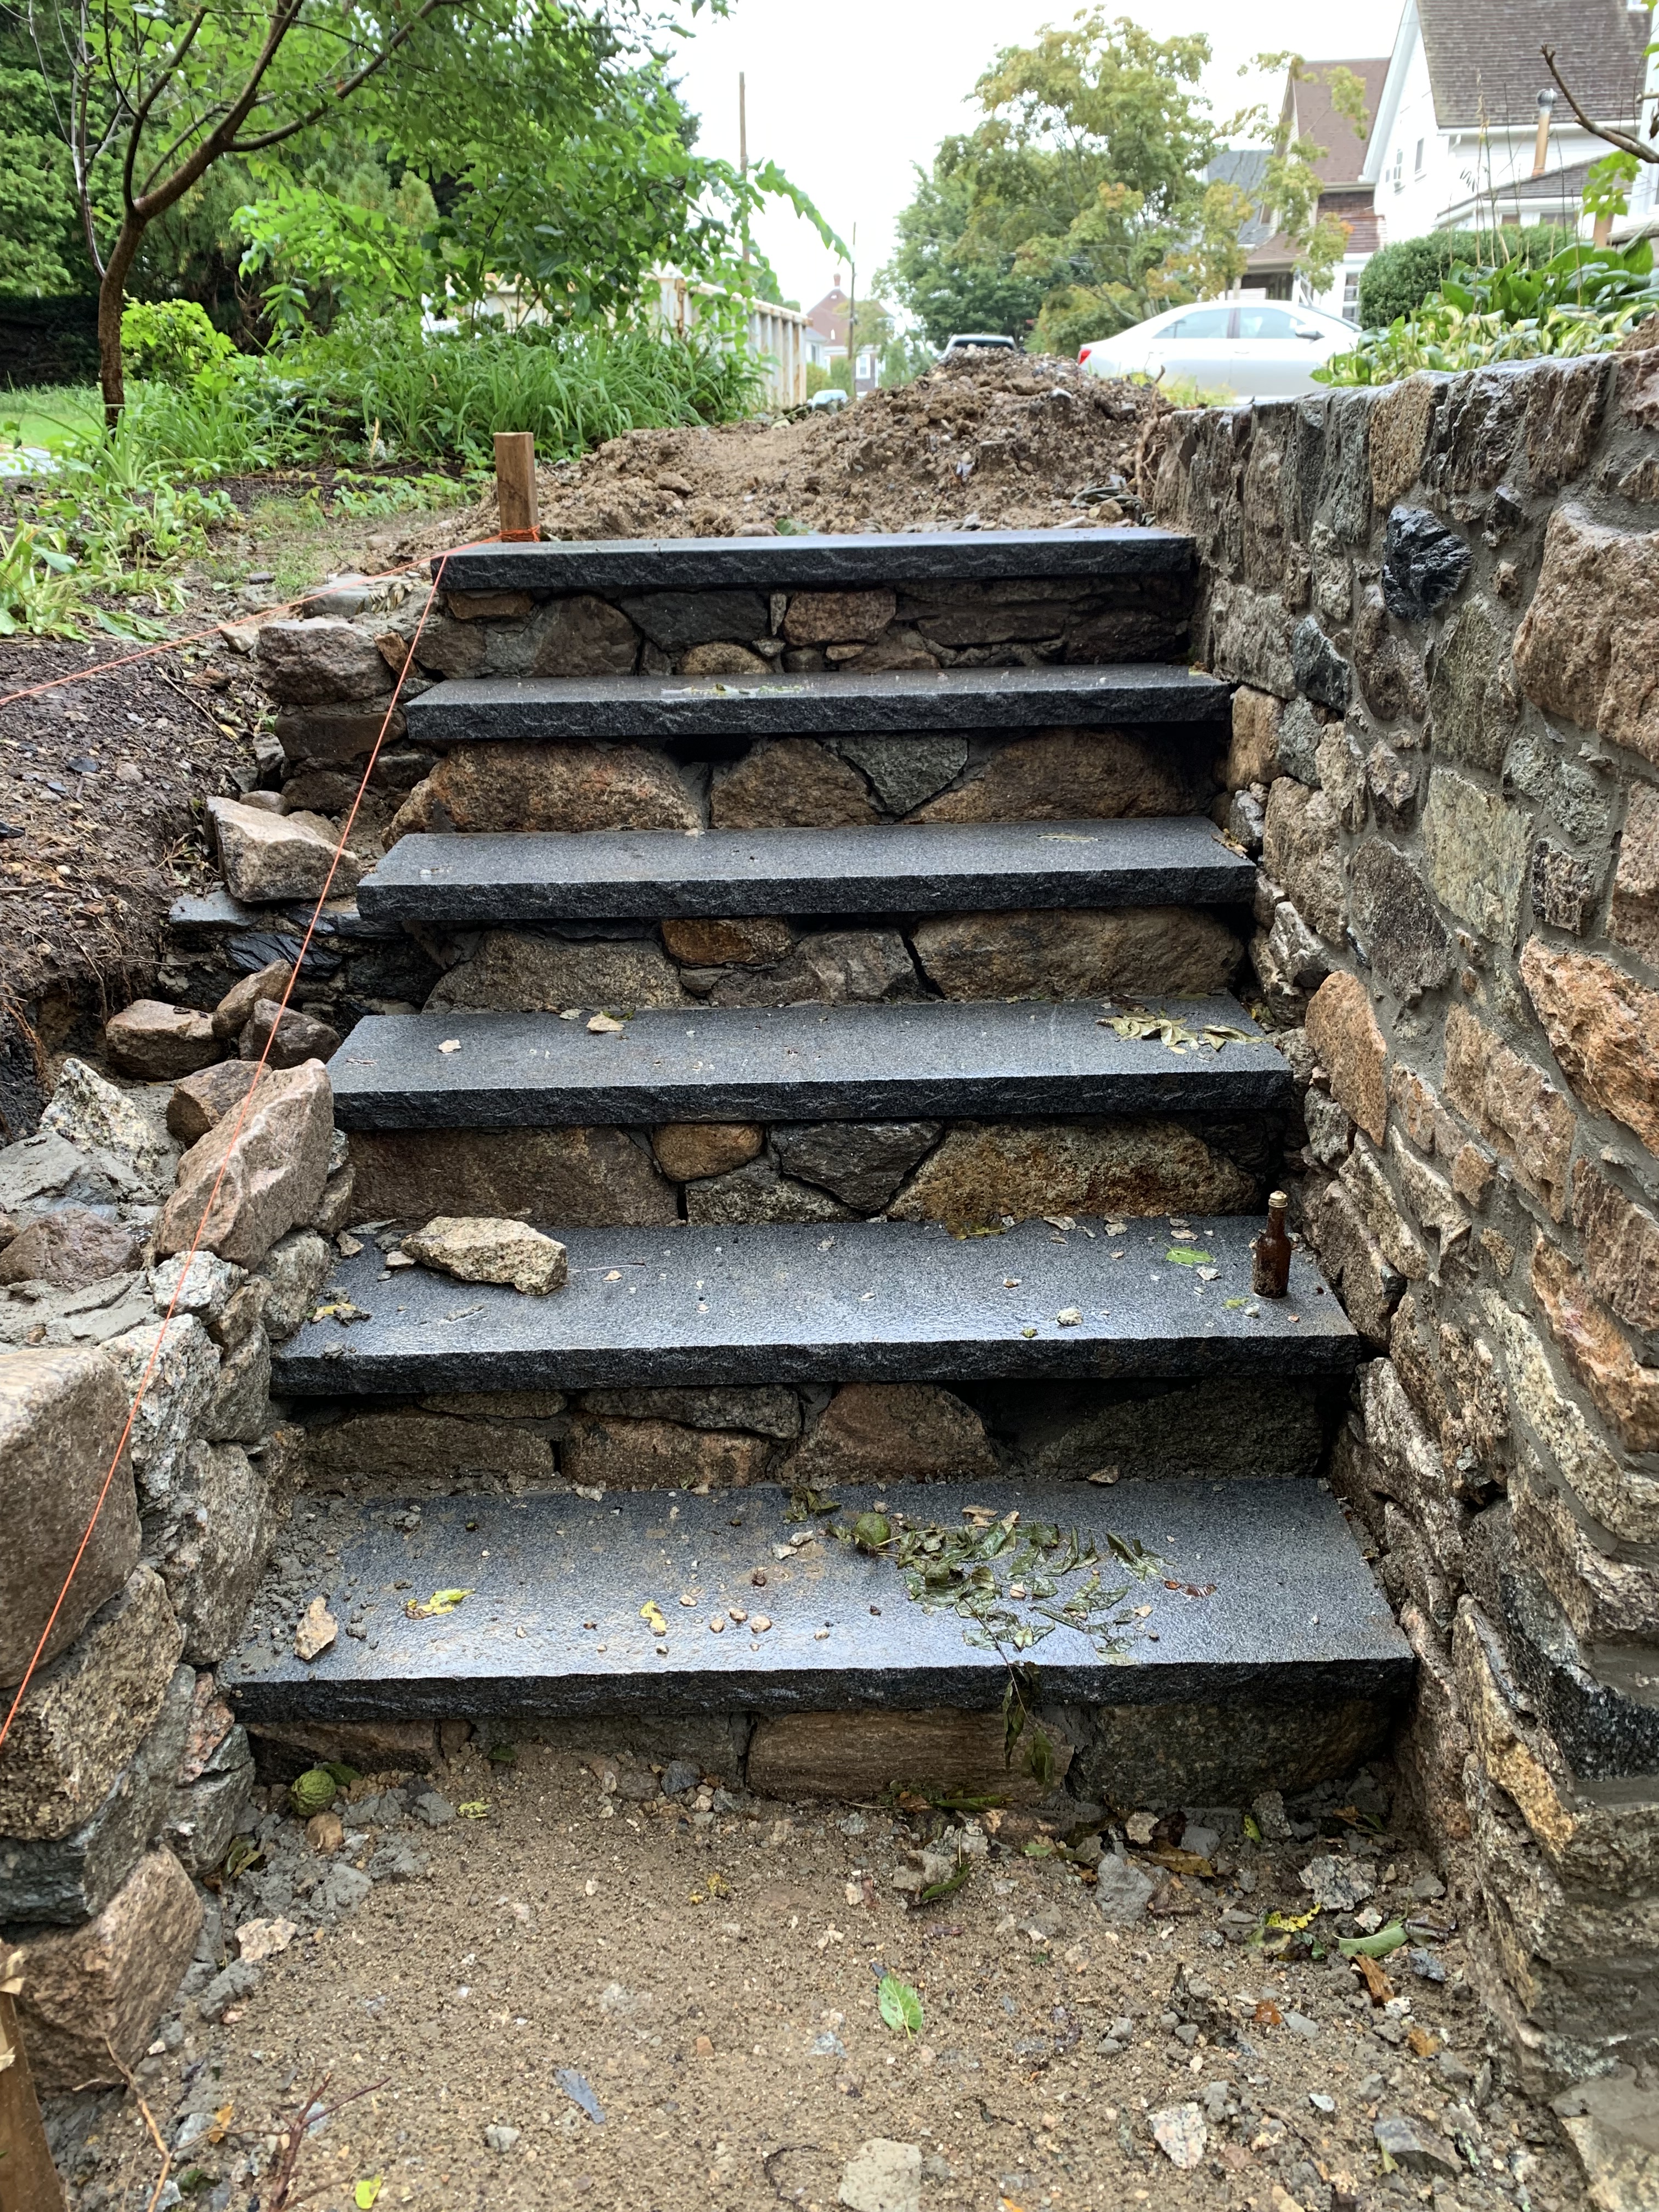
When we bought the house, water from rainfall and snowmelt created an uncontrolled mudslide down the west side of the house, building up against the base of the house and blocking the side entrance to the walkout basement. We dug out from that and installed a retaining wall with stairs for humans and a ramp / pathway for equipment, and later recycled the tile we had pulled out of the haphazard front yard to create a walkout patio.
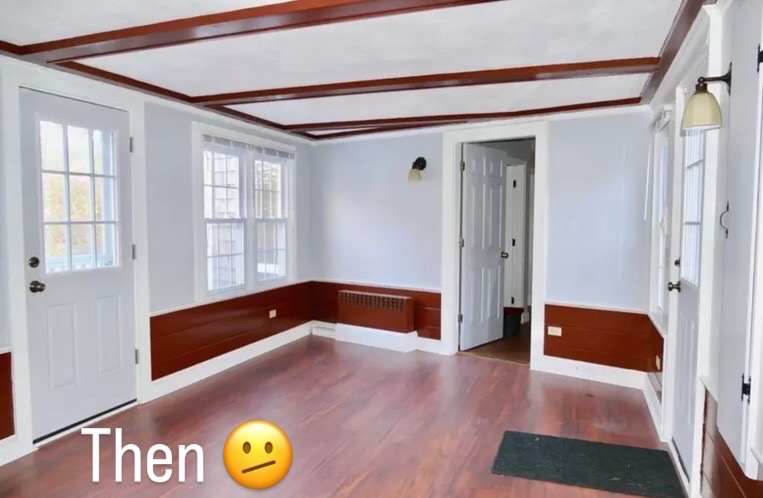
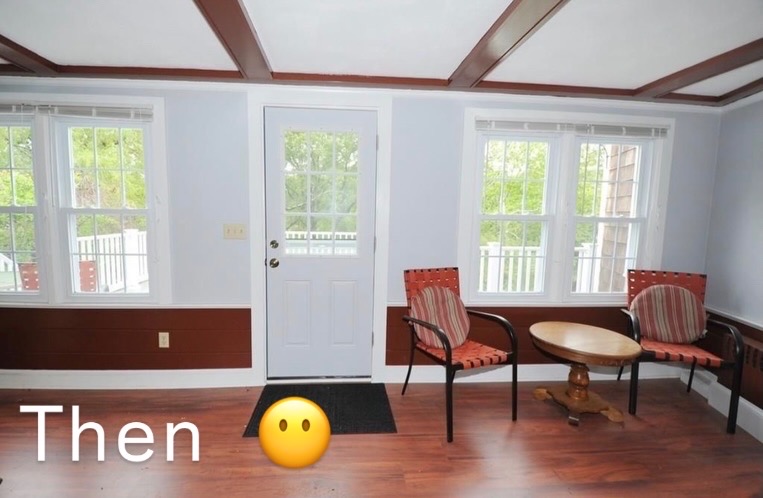
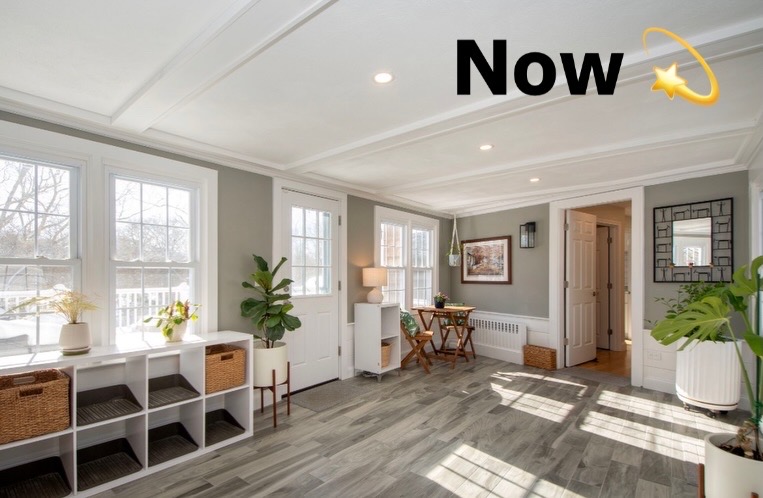
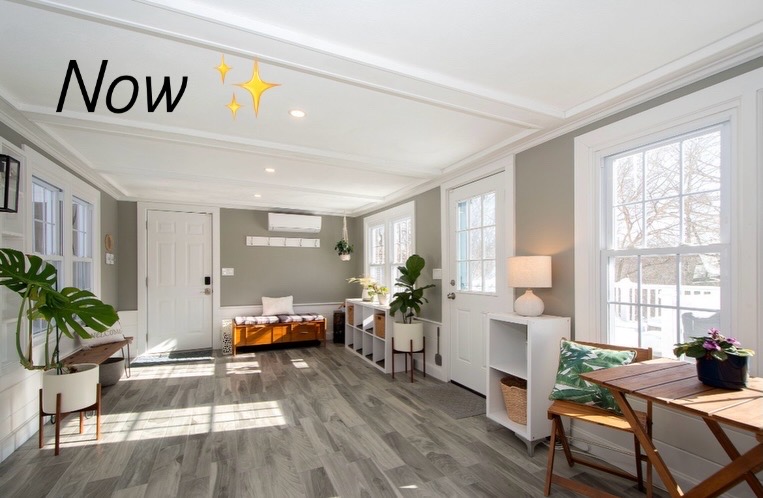
The mudroom / sunroom / causeway / breezeway situation was … well, she was frankly just dark and dank. We spray foamed the ceiling beneath her and replaced the weird vinyl flooring with a driftwood-like tiling, which we then continued in the 1/2 bath and laundry down the hall. A few coats of paint, some updated furnishings, and voilà, she positively shines! As bonuses, we brought in a few plants for greenery, which adore all that sunshine, installed a mini-split for A/C, and converted the ancient fold-out ironing board to a clever little tucked in shelf for things like the sunnies that you’ll need in that room.
Let’s step out the back door for a moment…
disregarded patio area.

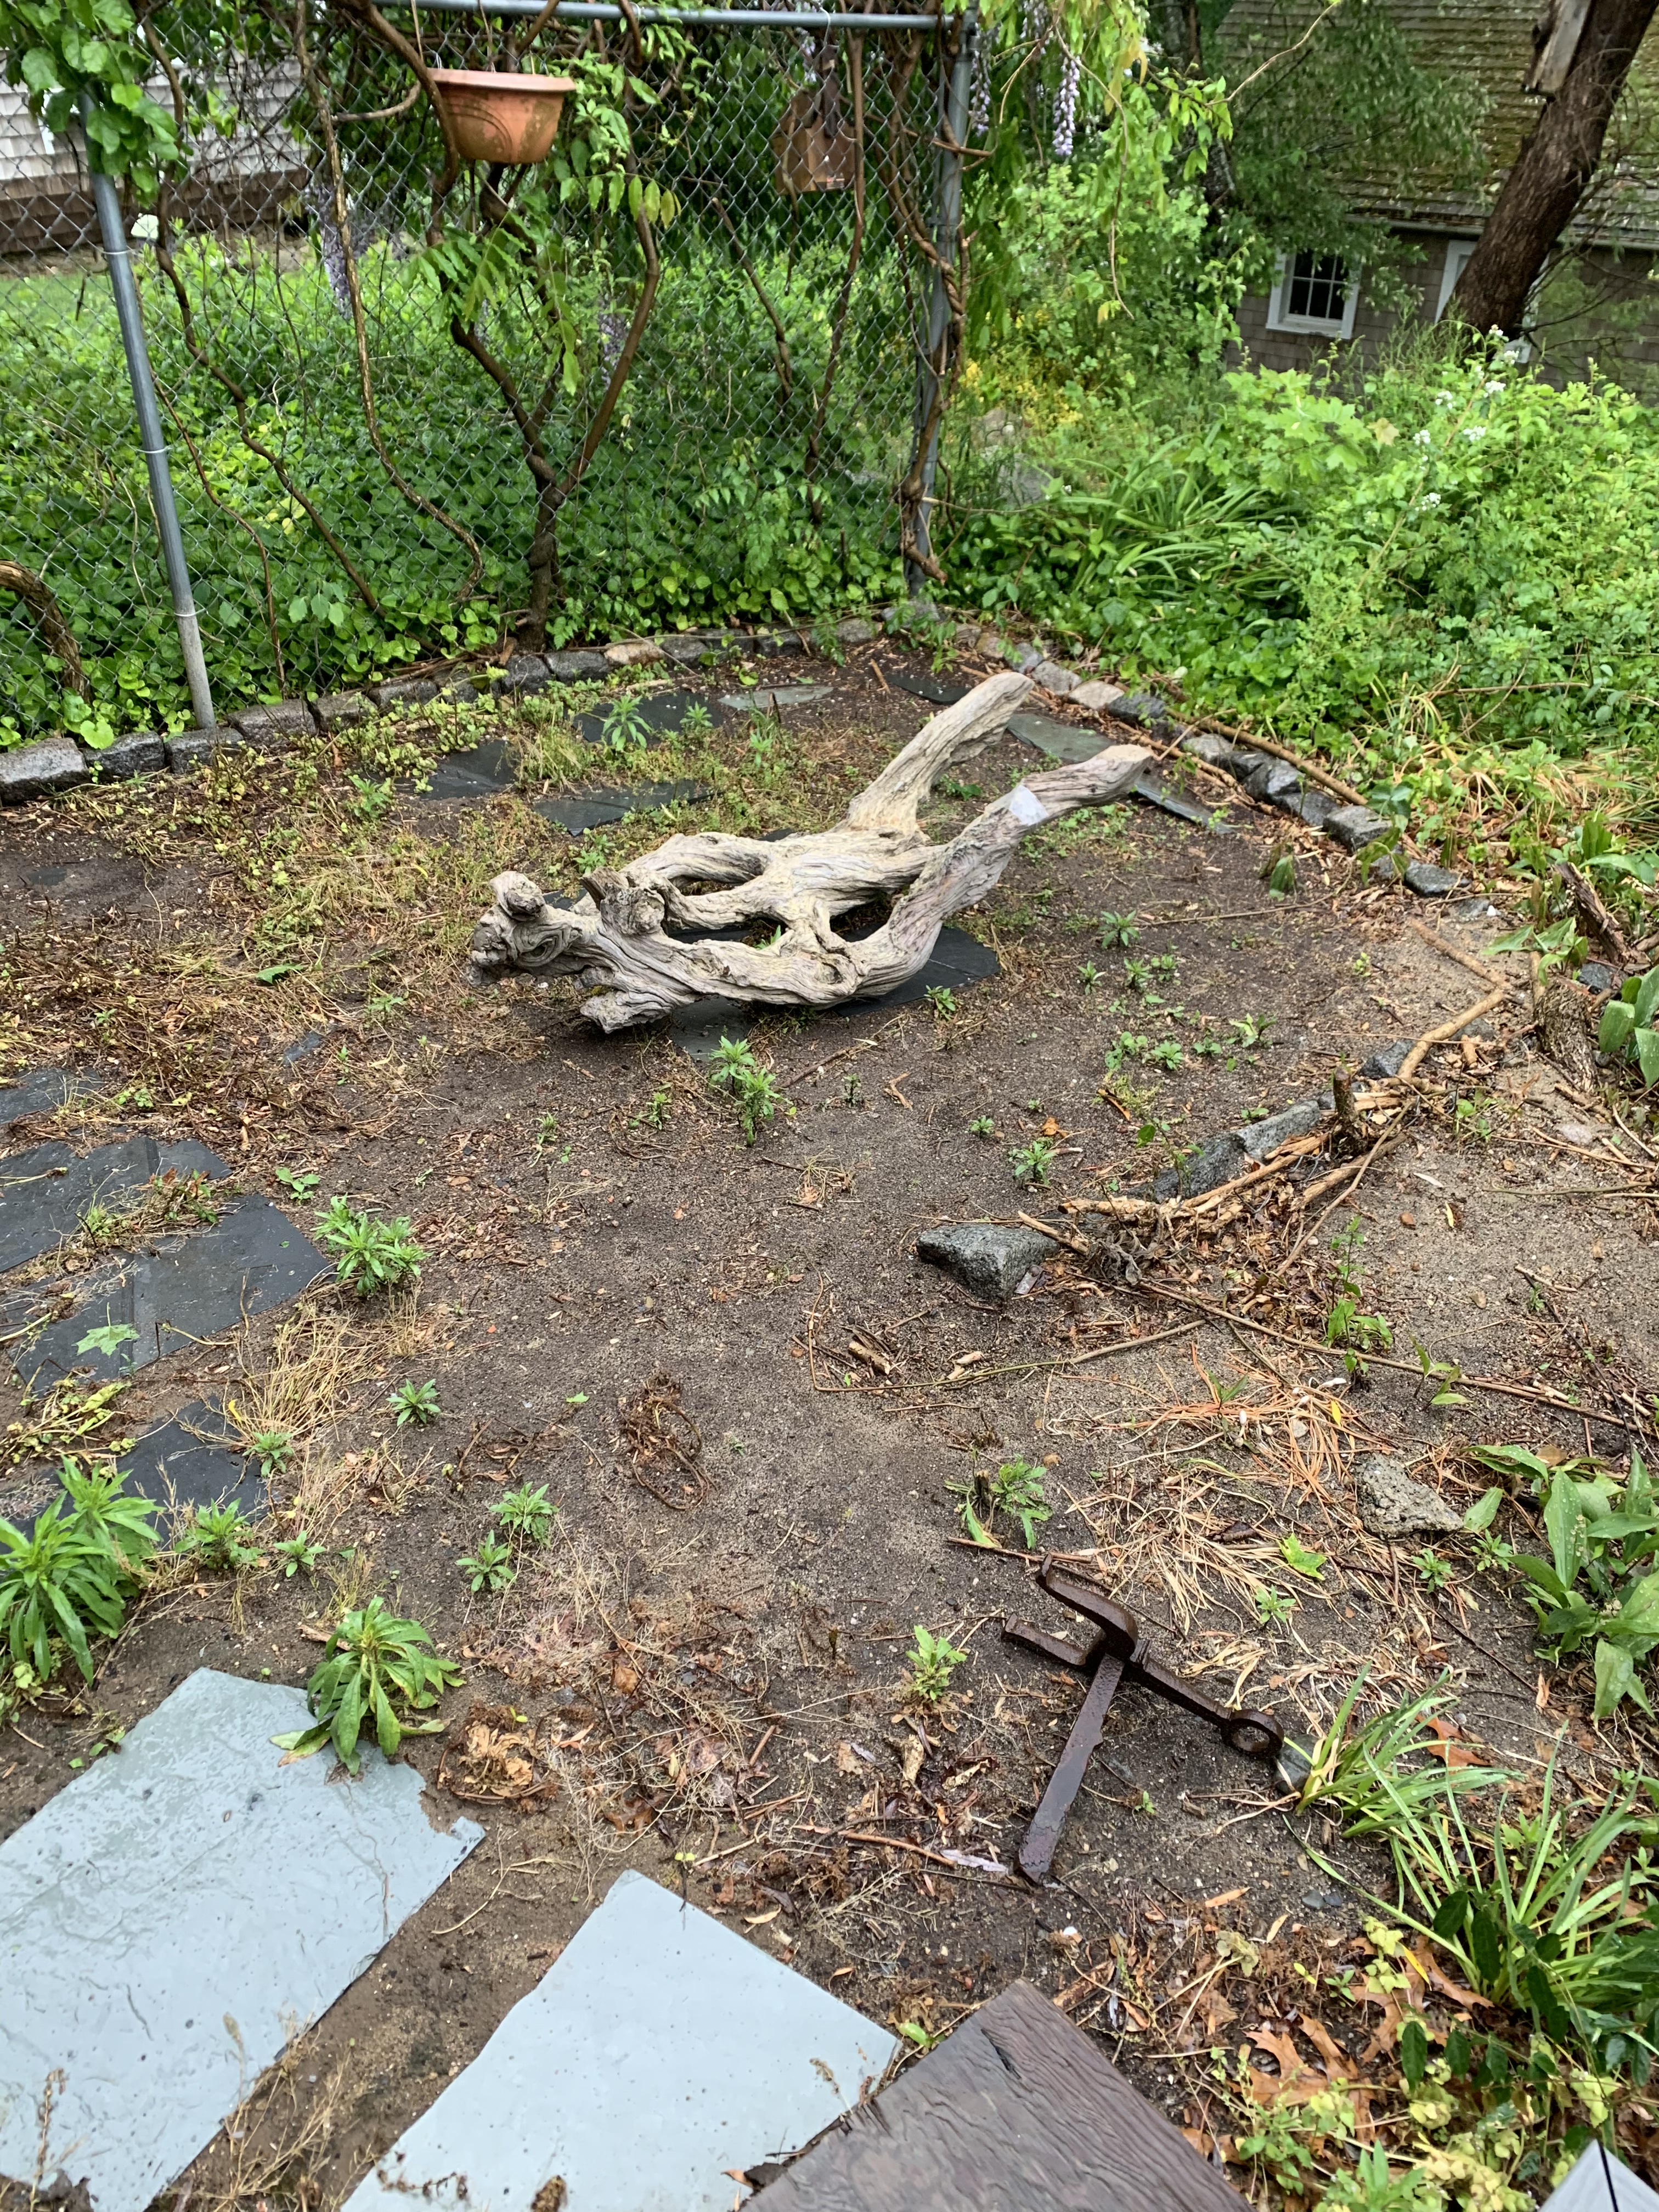
the lovely trumpet vine and wisteria…
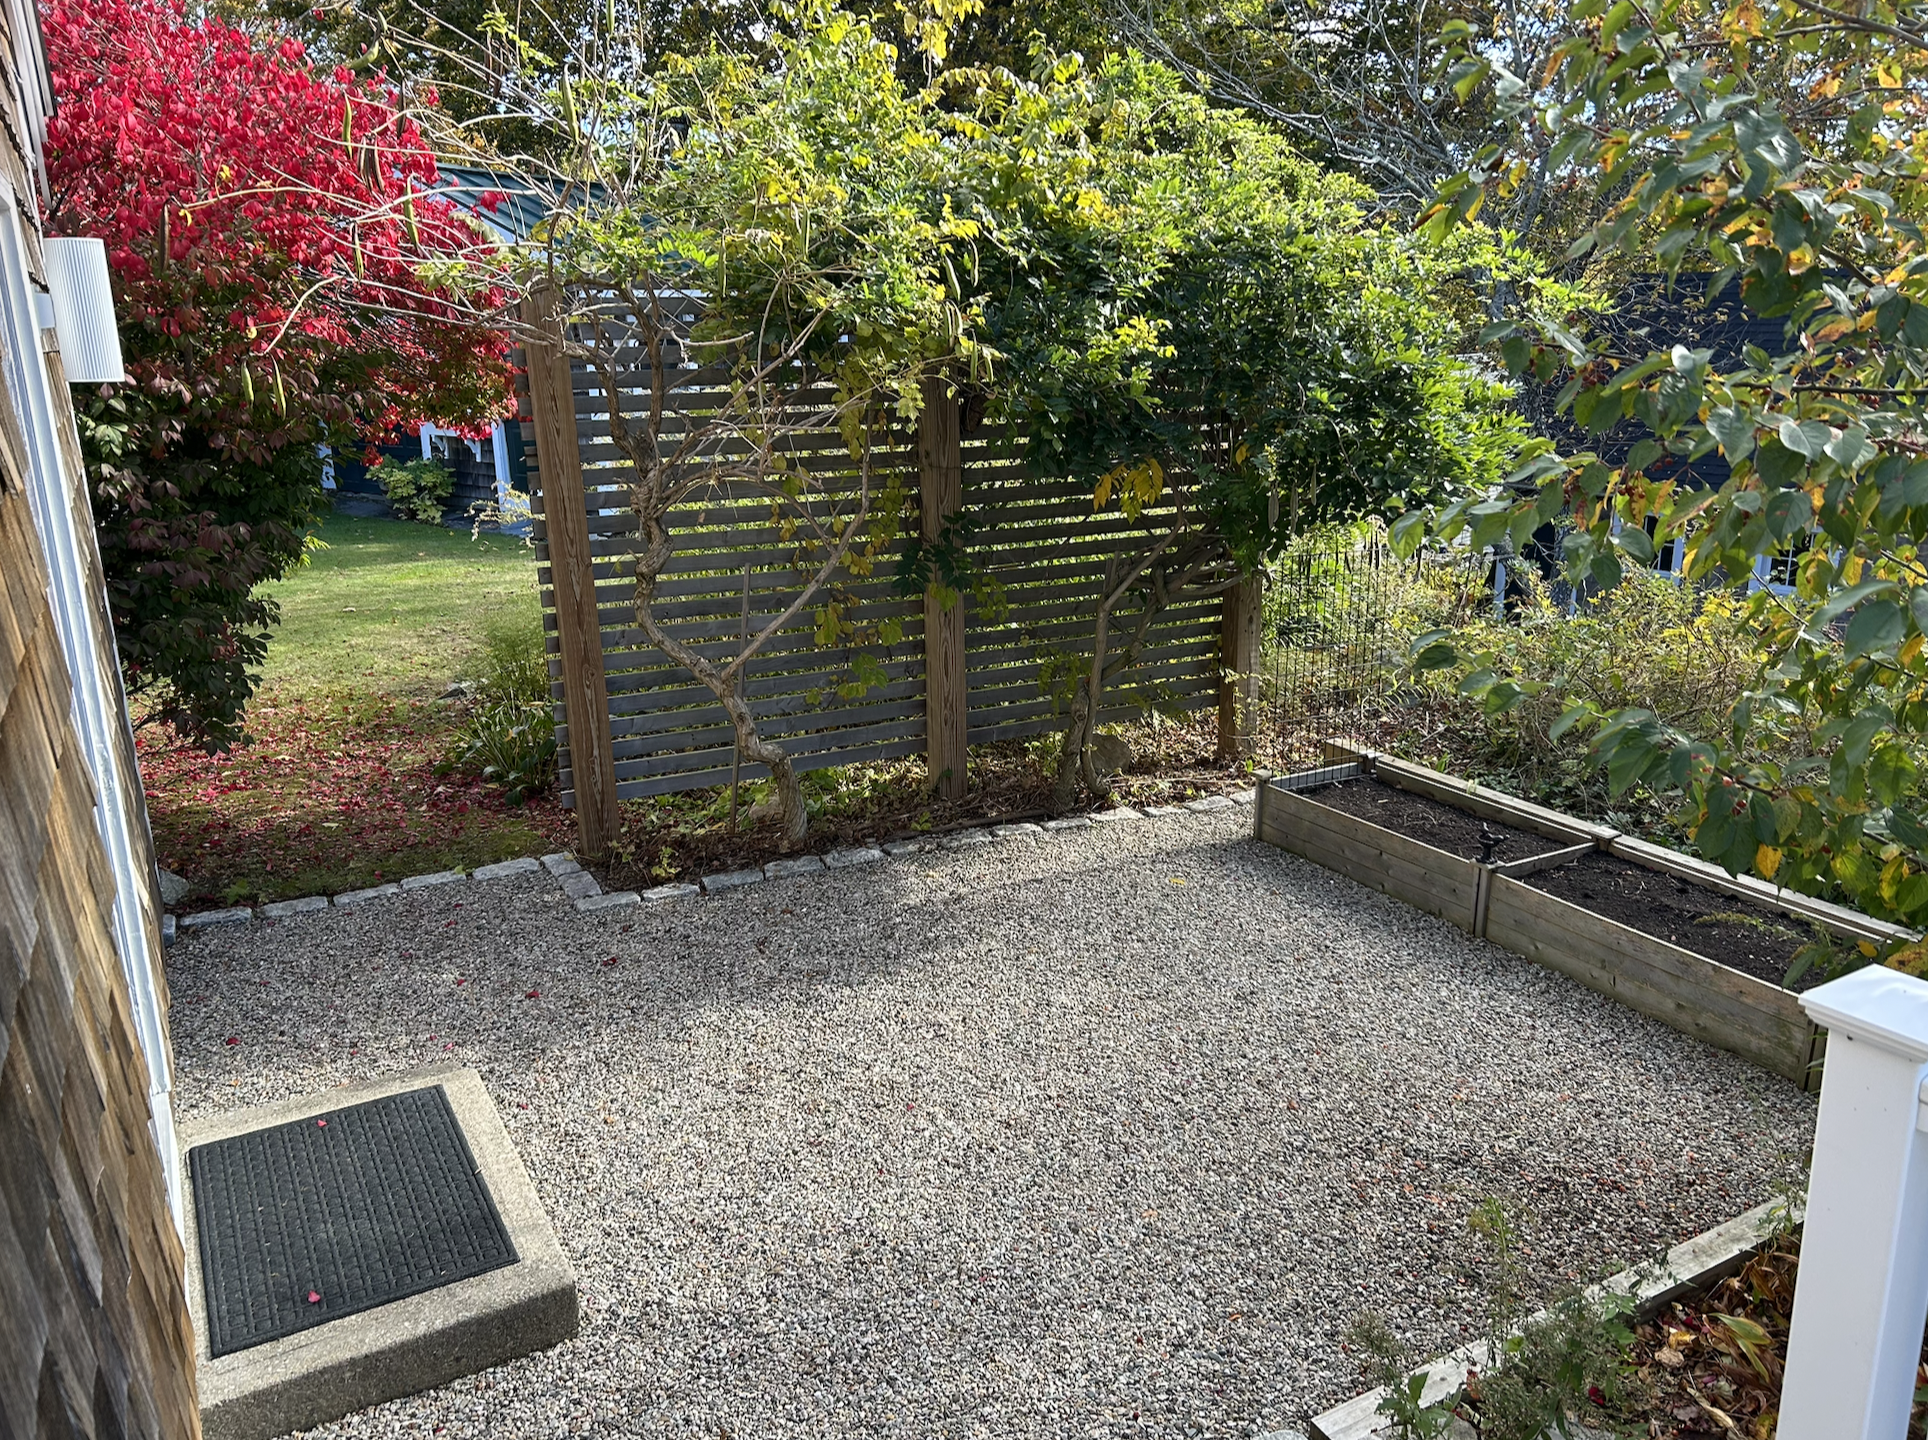
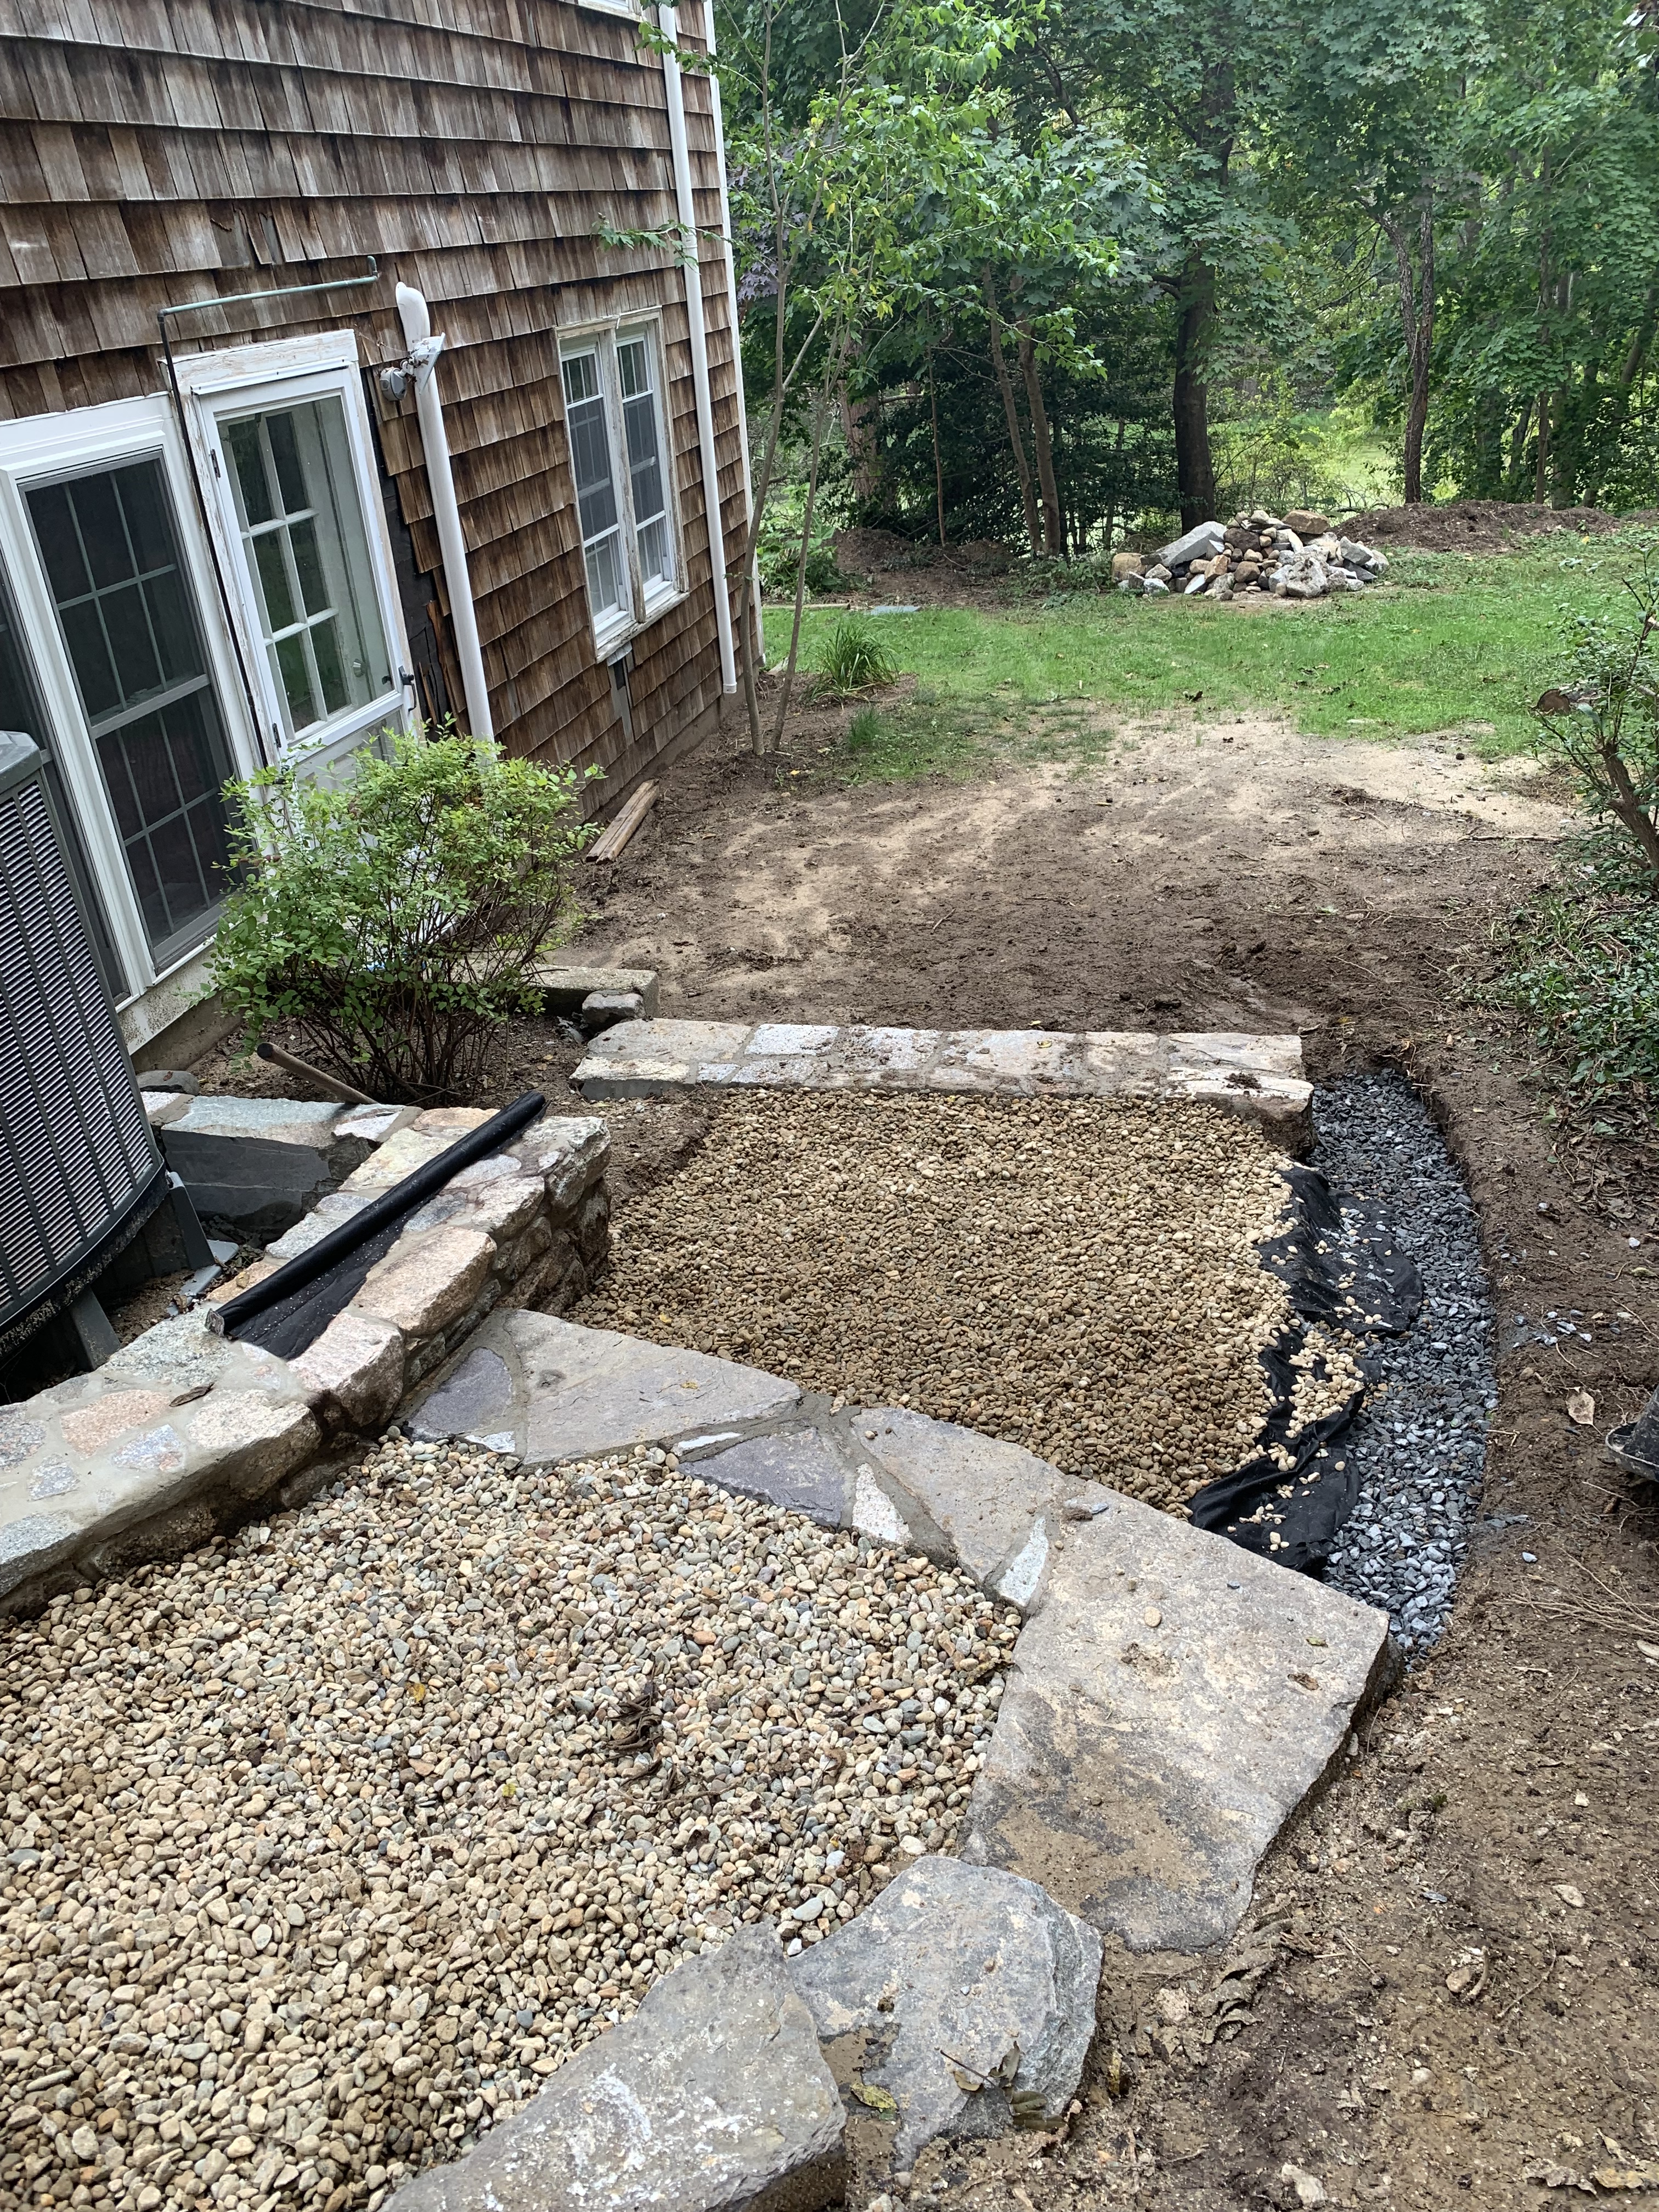
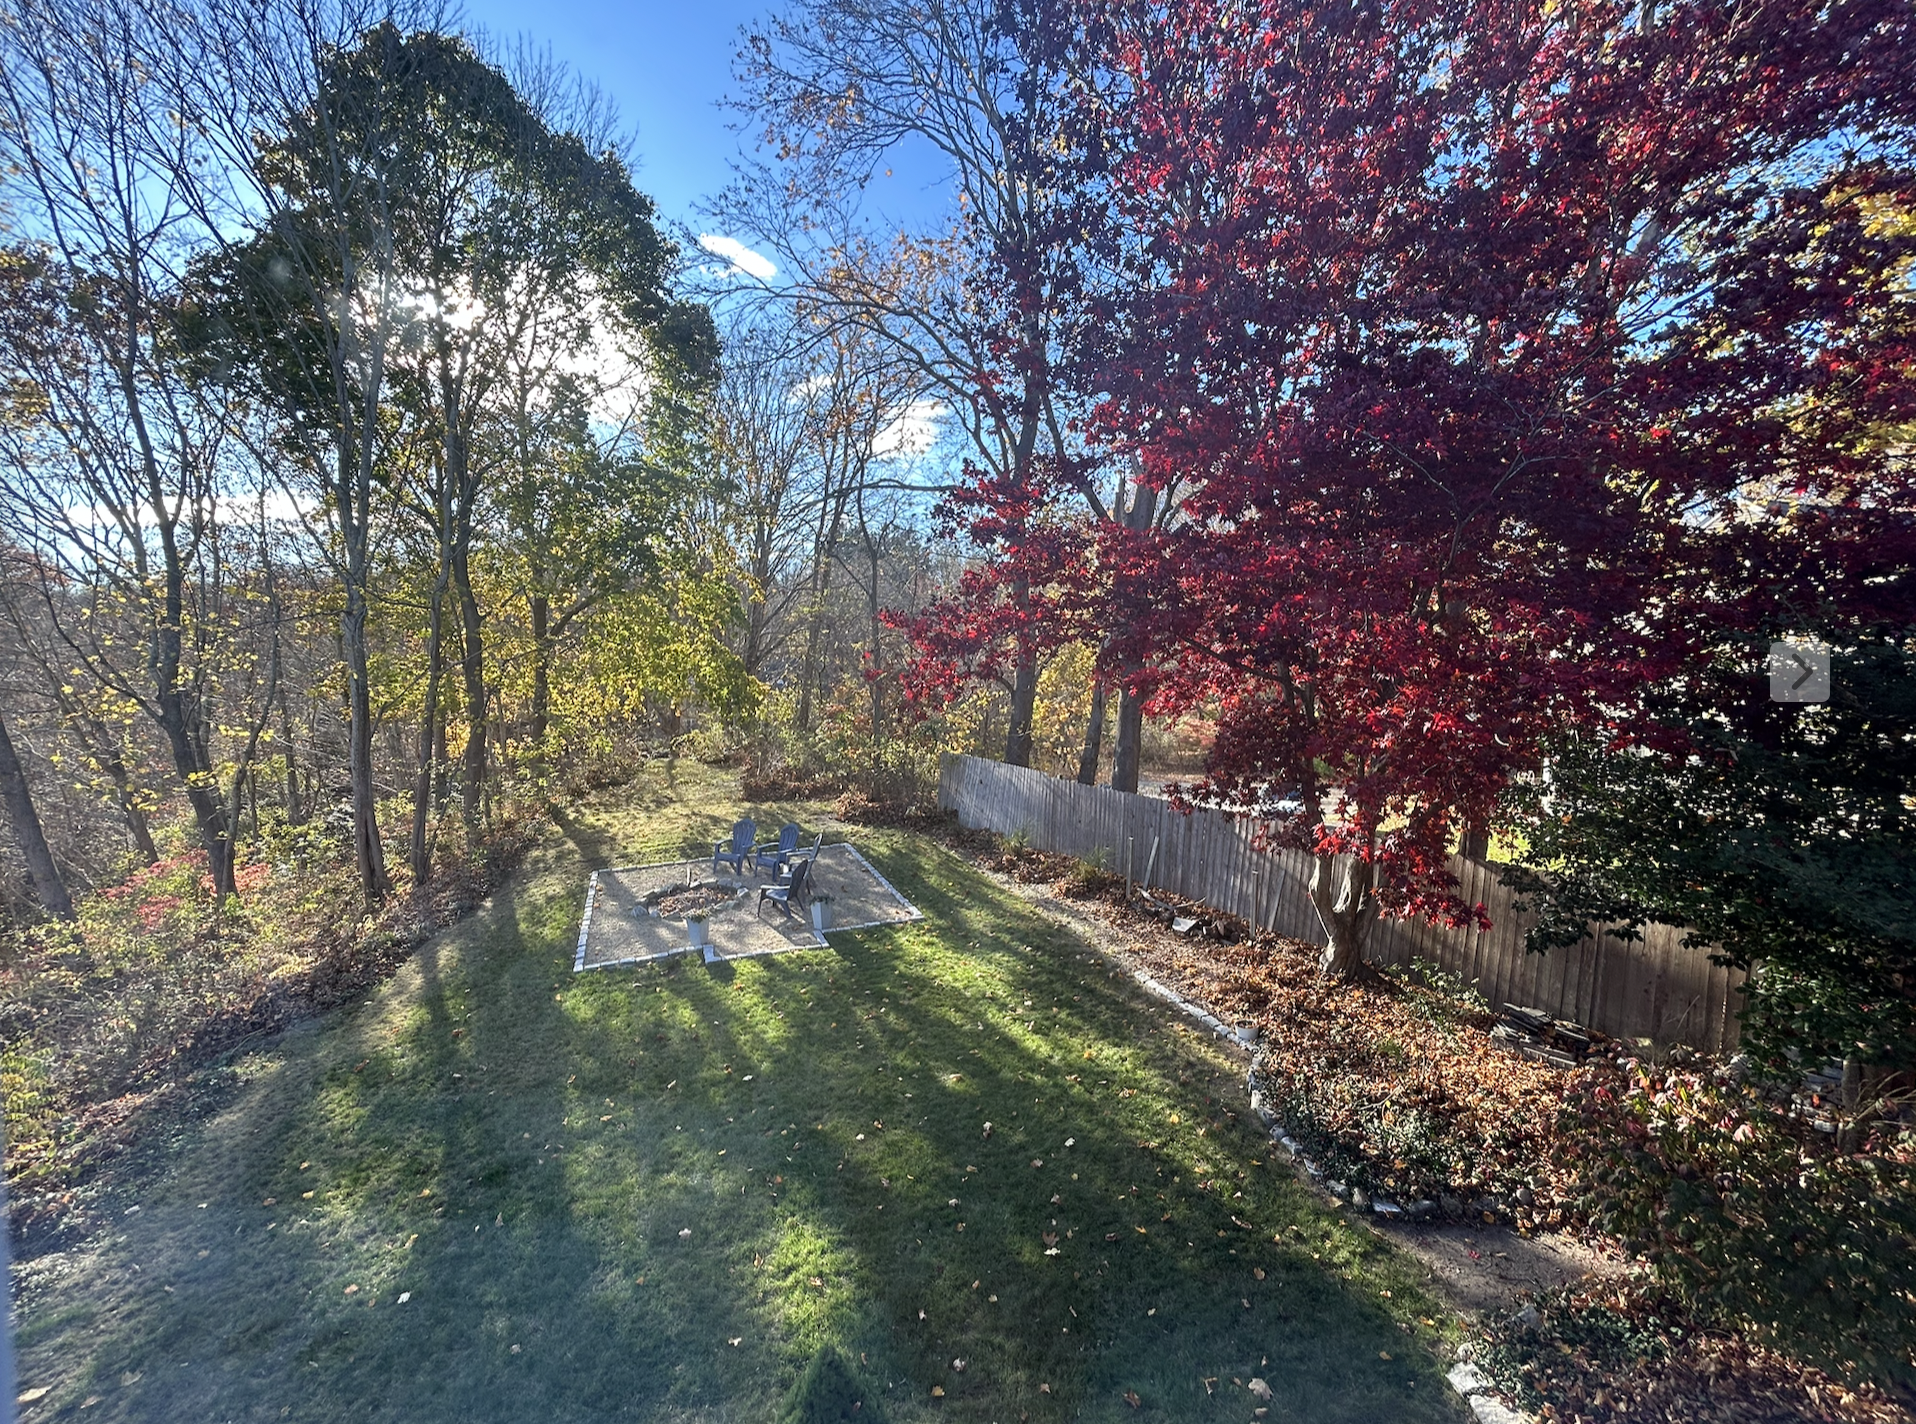
When we bought Cape Casita, there was a chainlink fence in the back yard as a support for the beautiful vines at left, and a clear (if overgrown) view to the neighbor’s yard. So we took the chainlink down, and then, in order both to support the vines and afford a little privacy, we built a trellis, leveled out the patio area and added gravel to make it uniform, and finally installed a raised garden bed to take advantage of all the summer sunshine the area enjoys.
Now, stepping back inside…
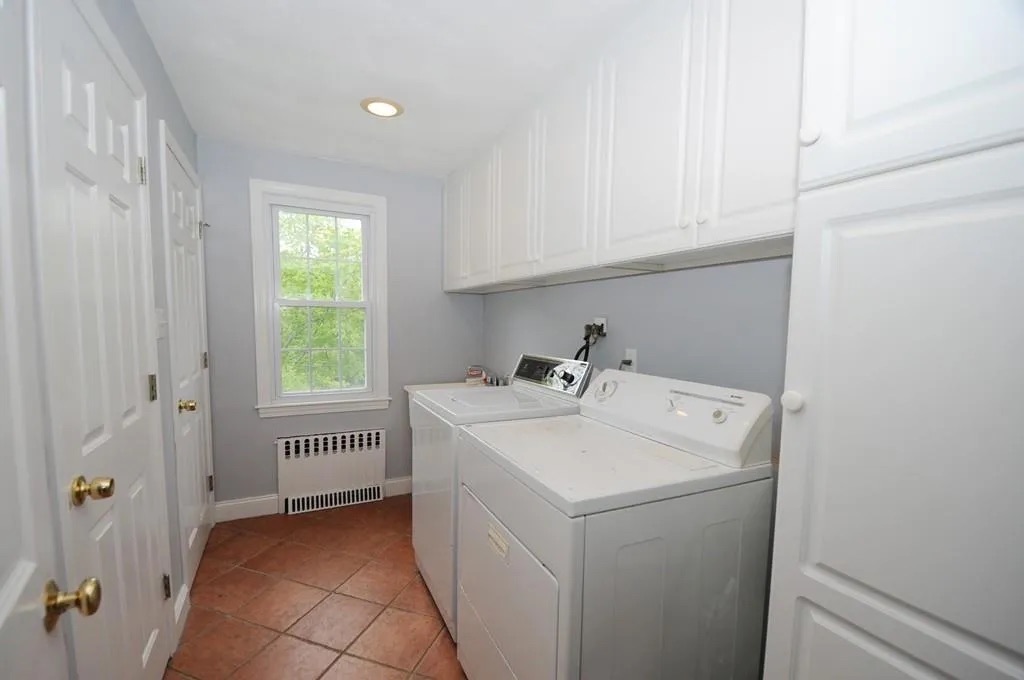
tiled floor made for unhappy laundry days.
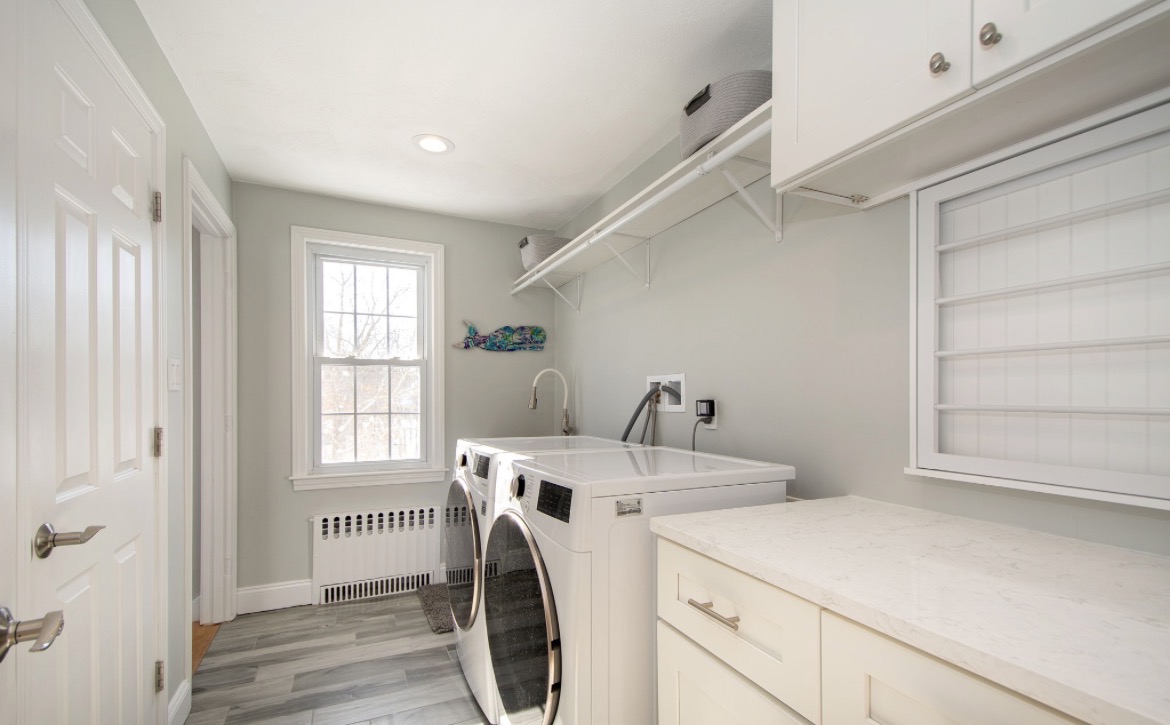
for drying dainty garments!
The laundry room was sad. We zhuzhed her up – took her back to the studs and made a brighter, more efficient space. (I’ll add pantry pics soon…)
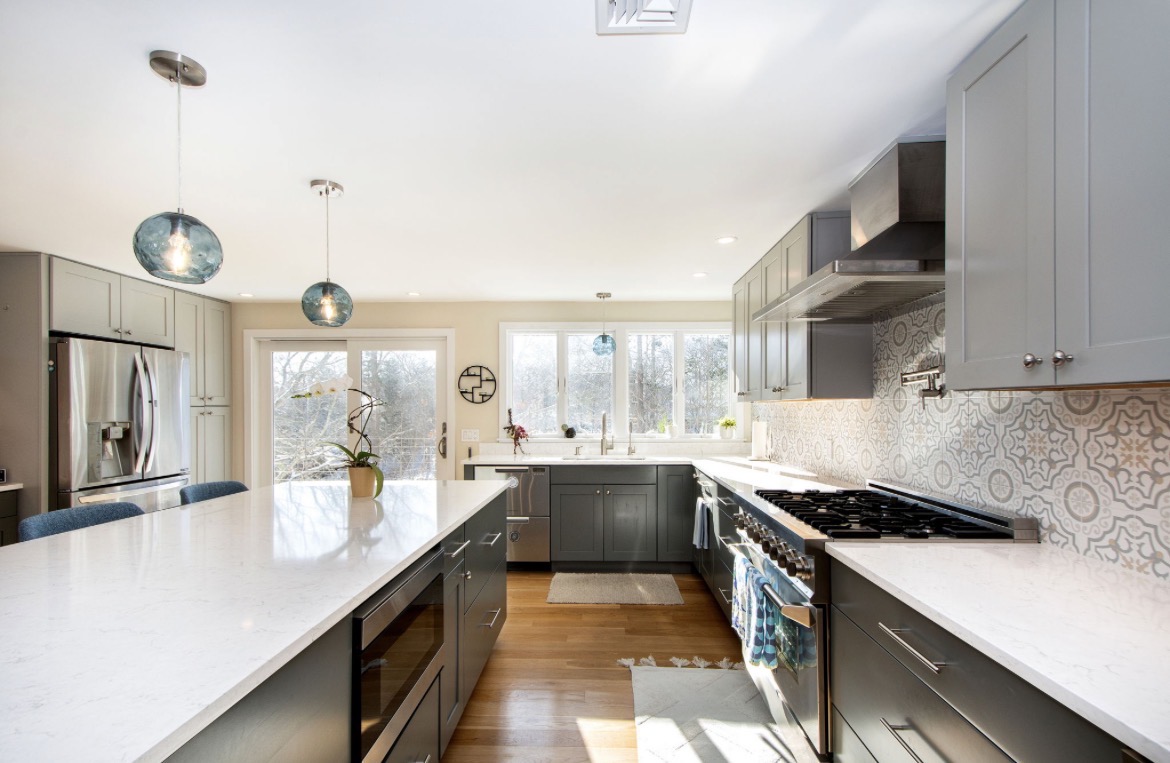
Moving onto one of my fav rooms: THE KITCHEN! (hollered in my best Oprah voice 😭)


and with a pot filler!
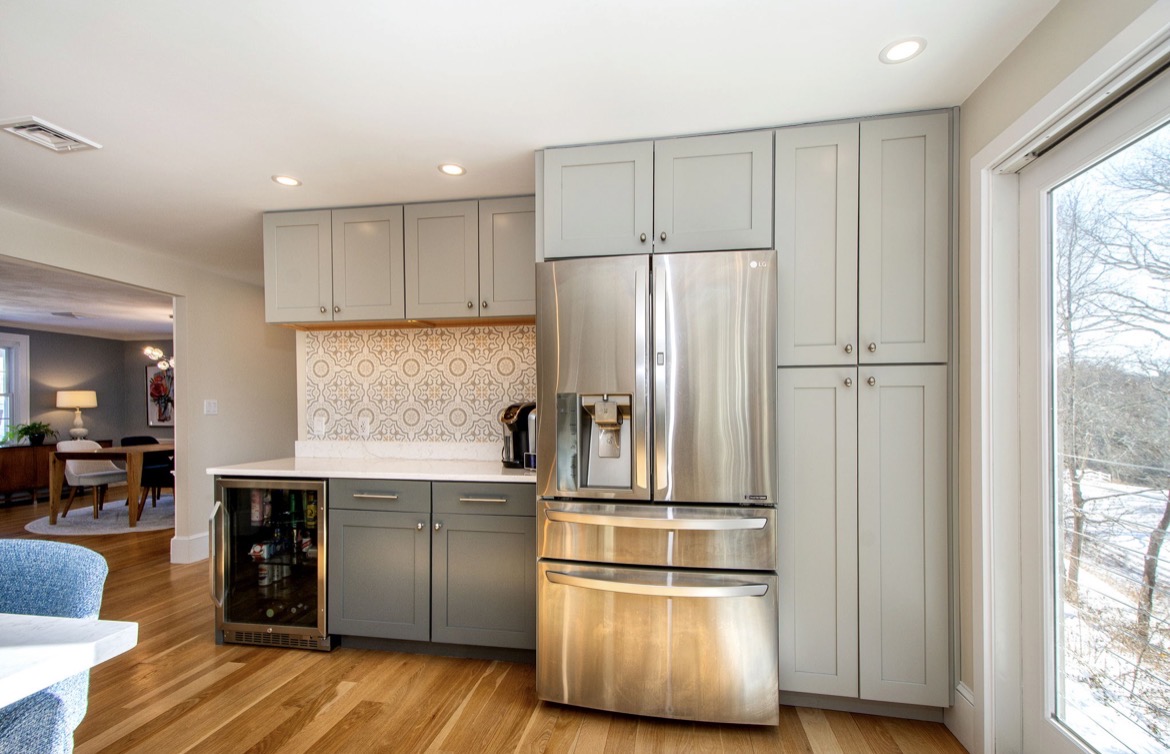
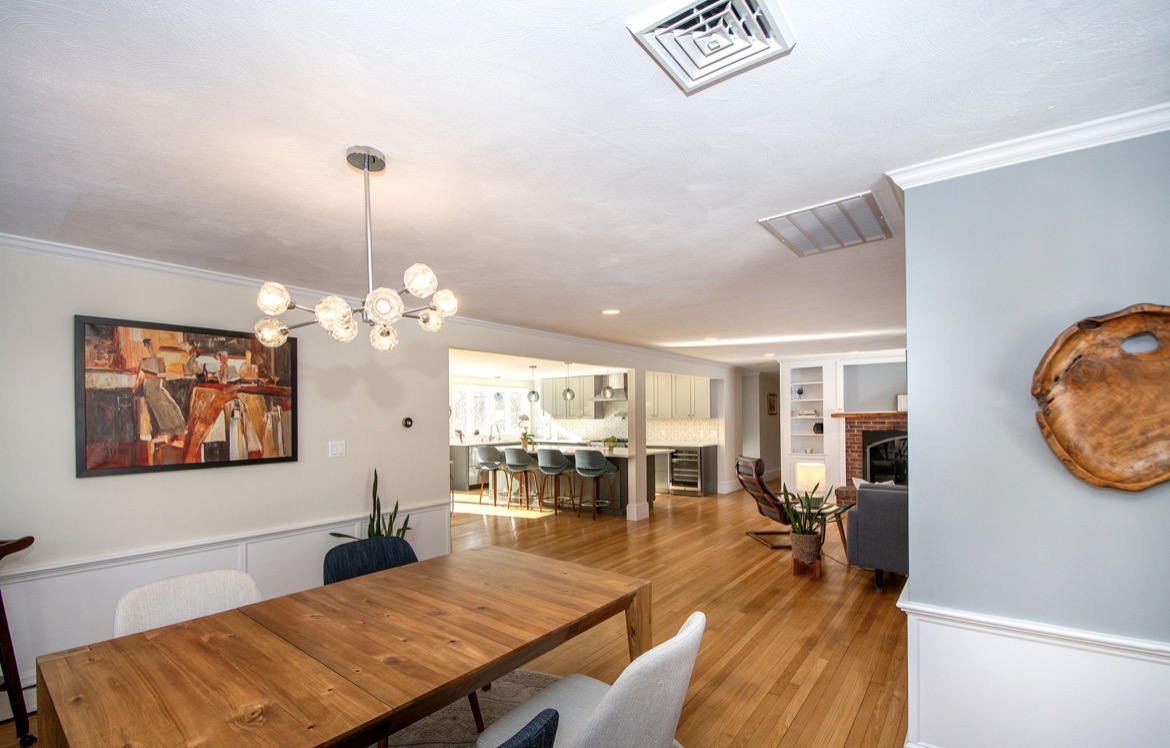
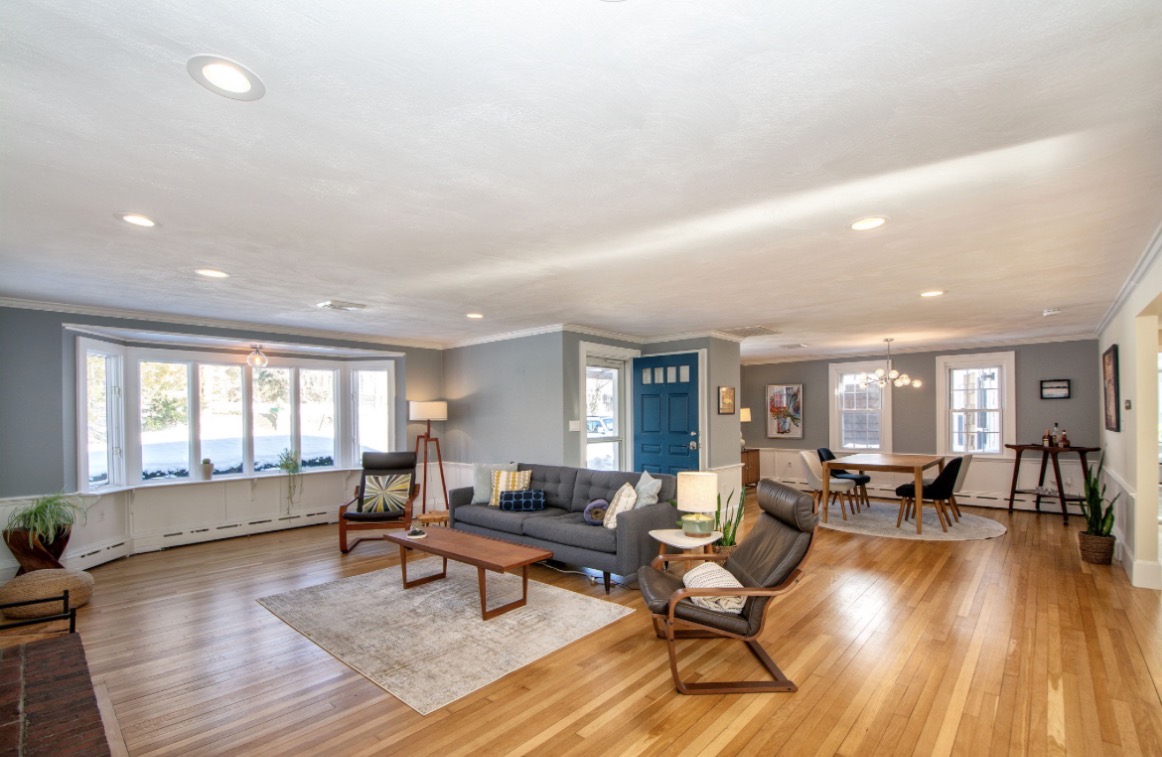
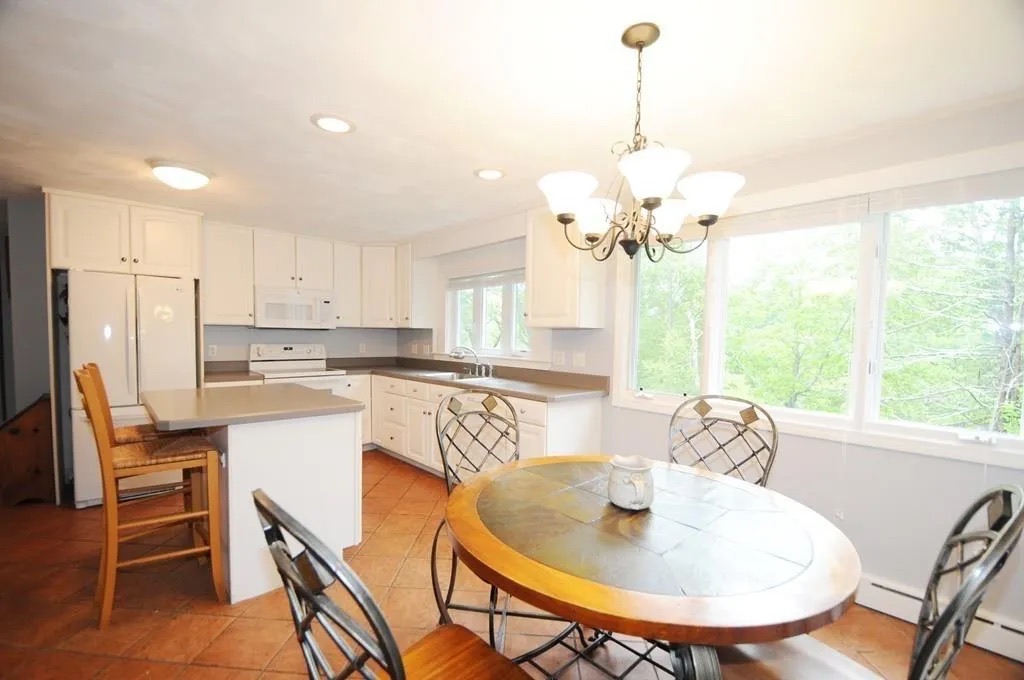
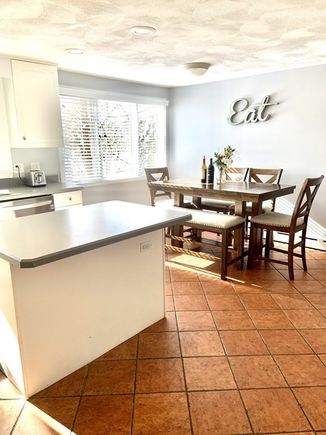
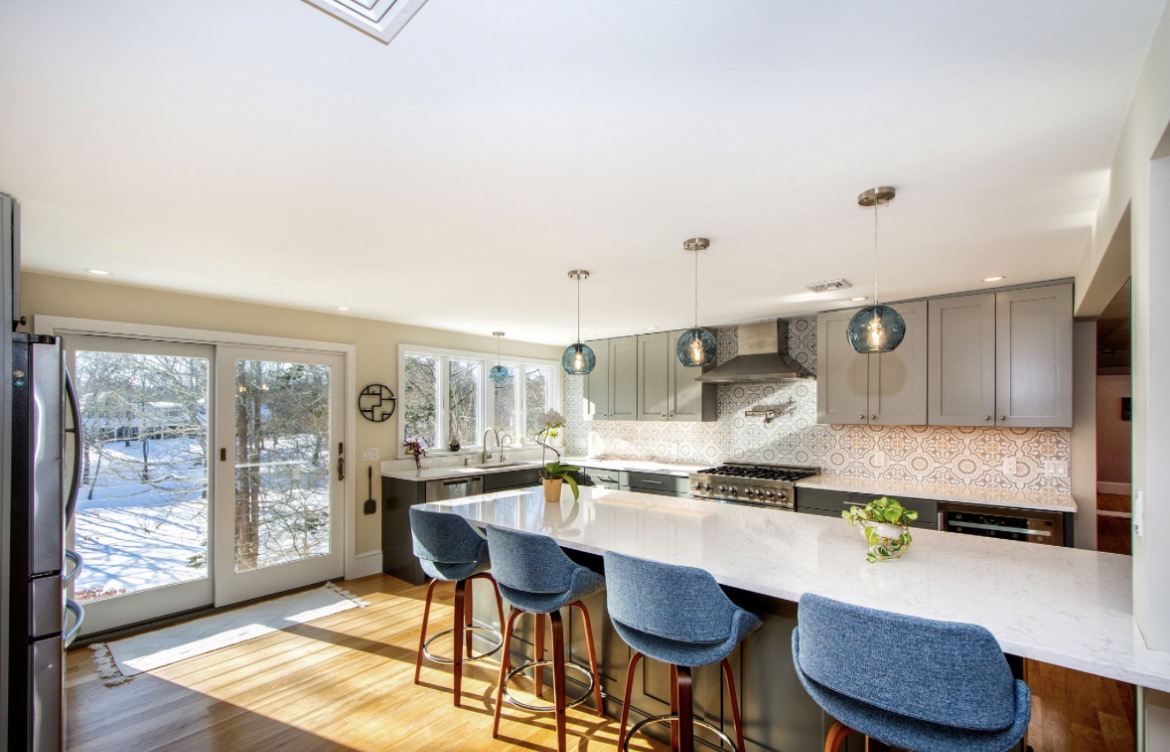

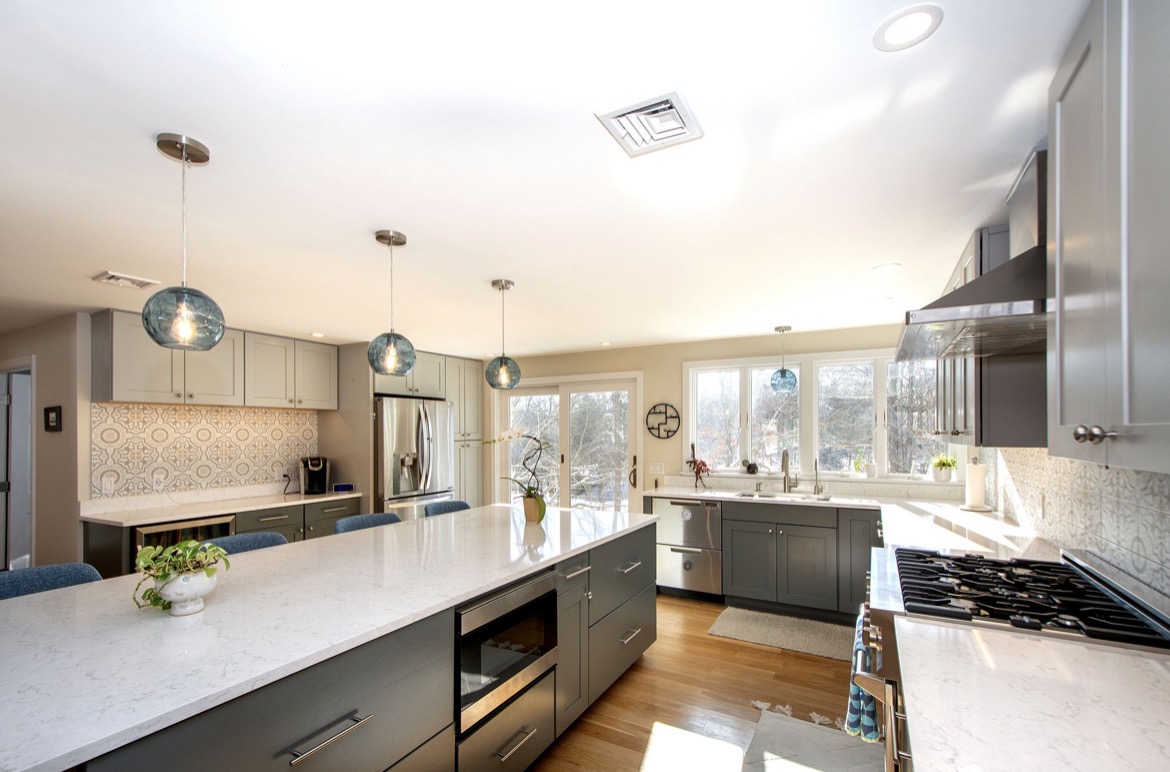
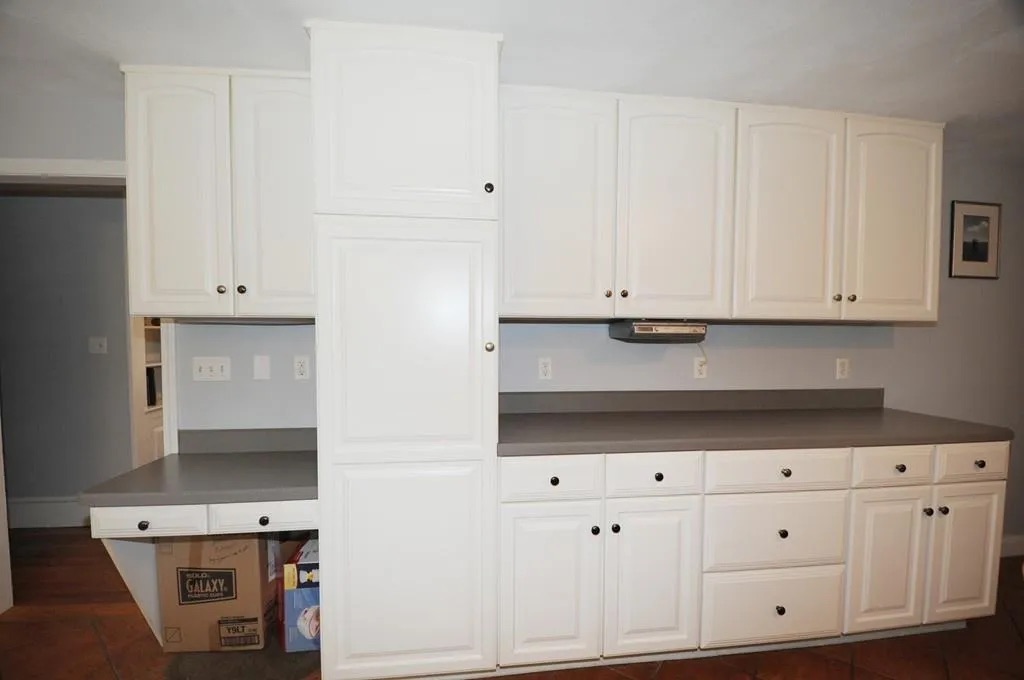
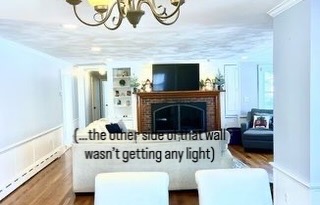
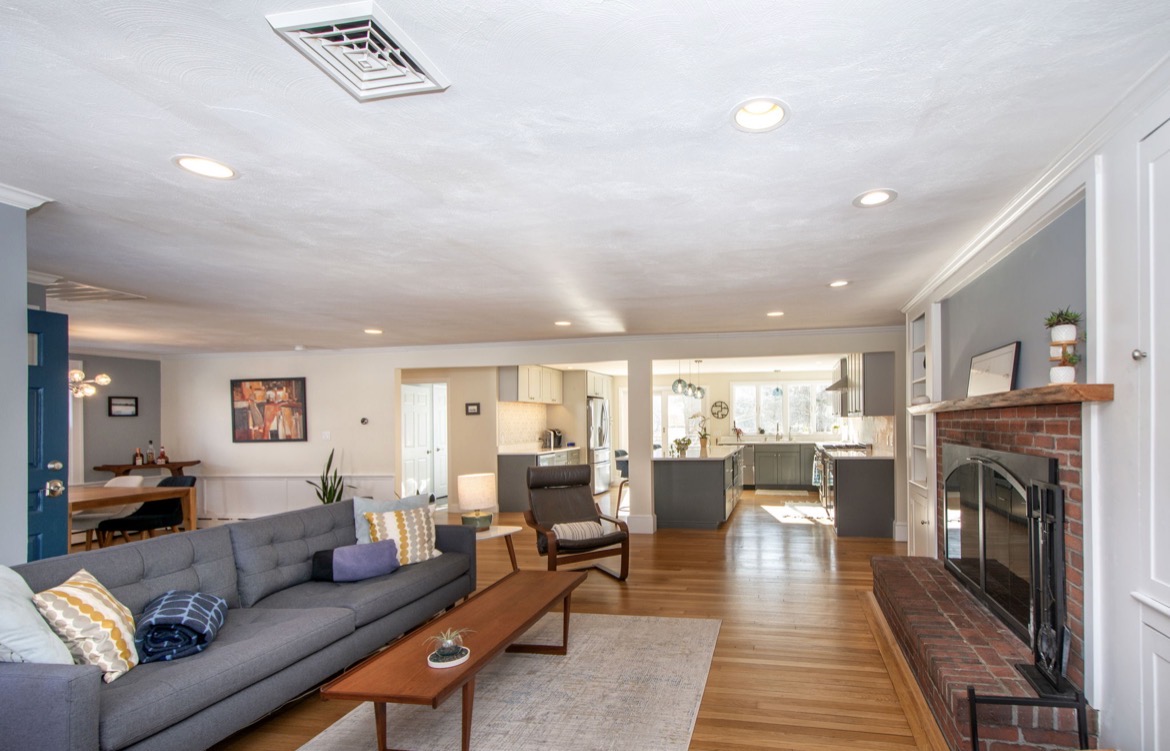
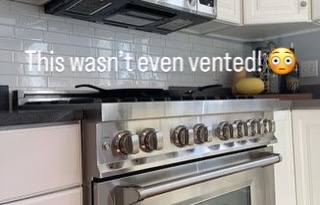
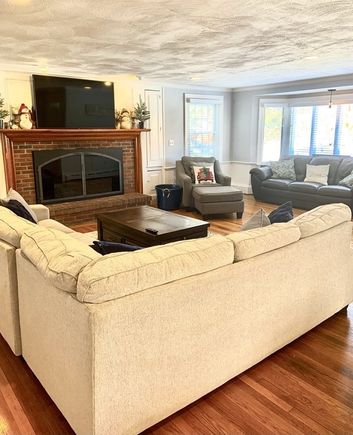
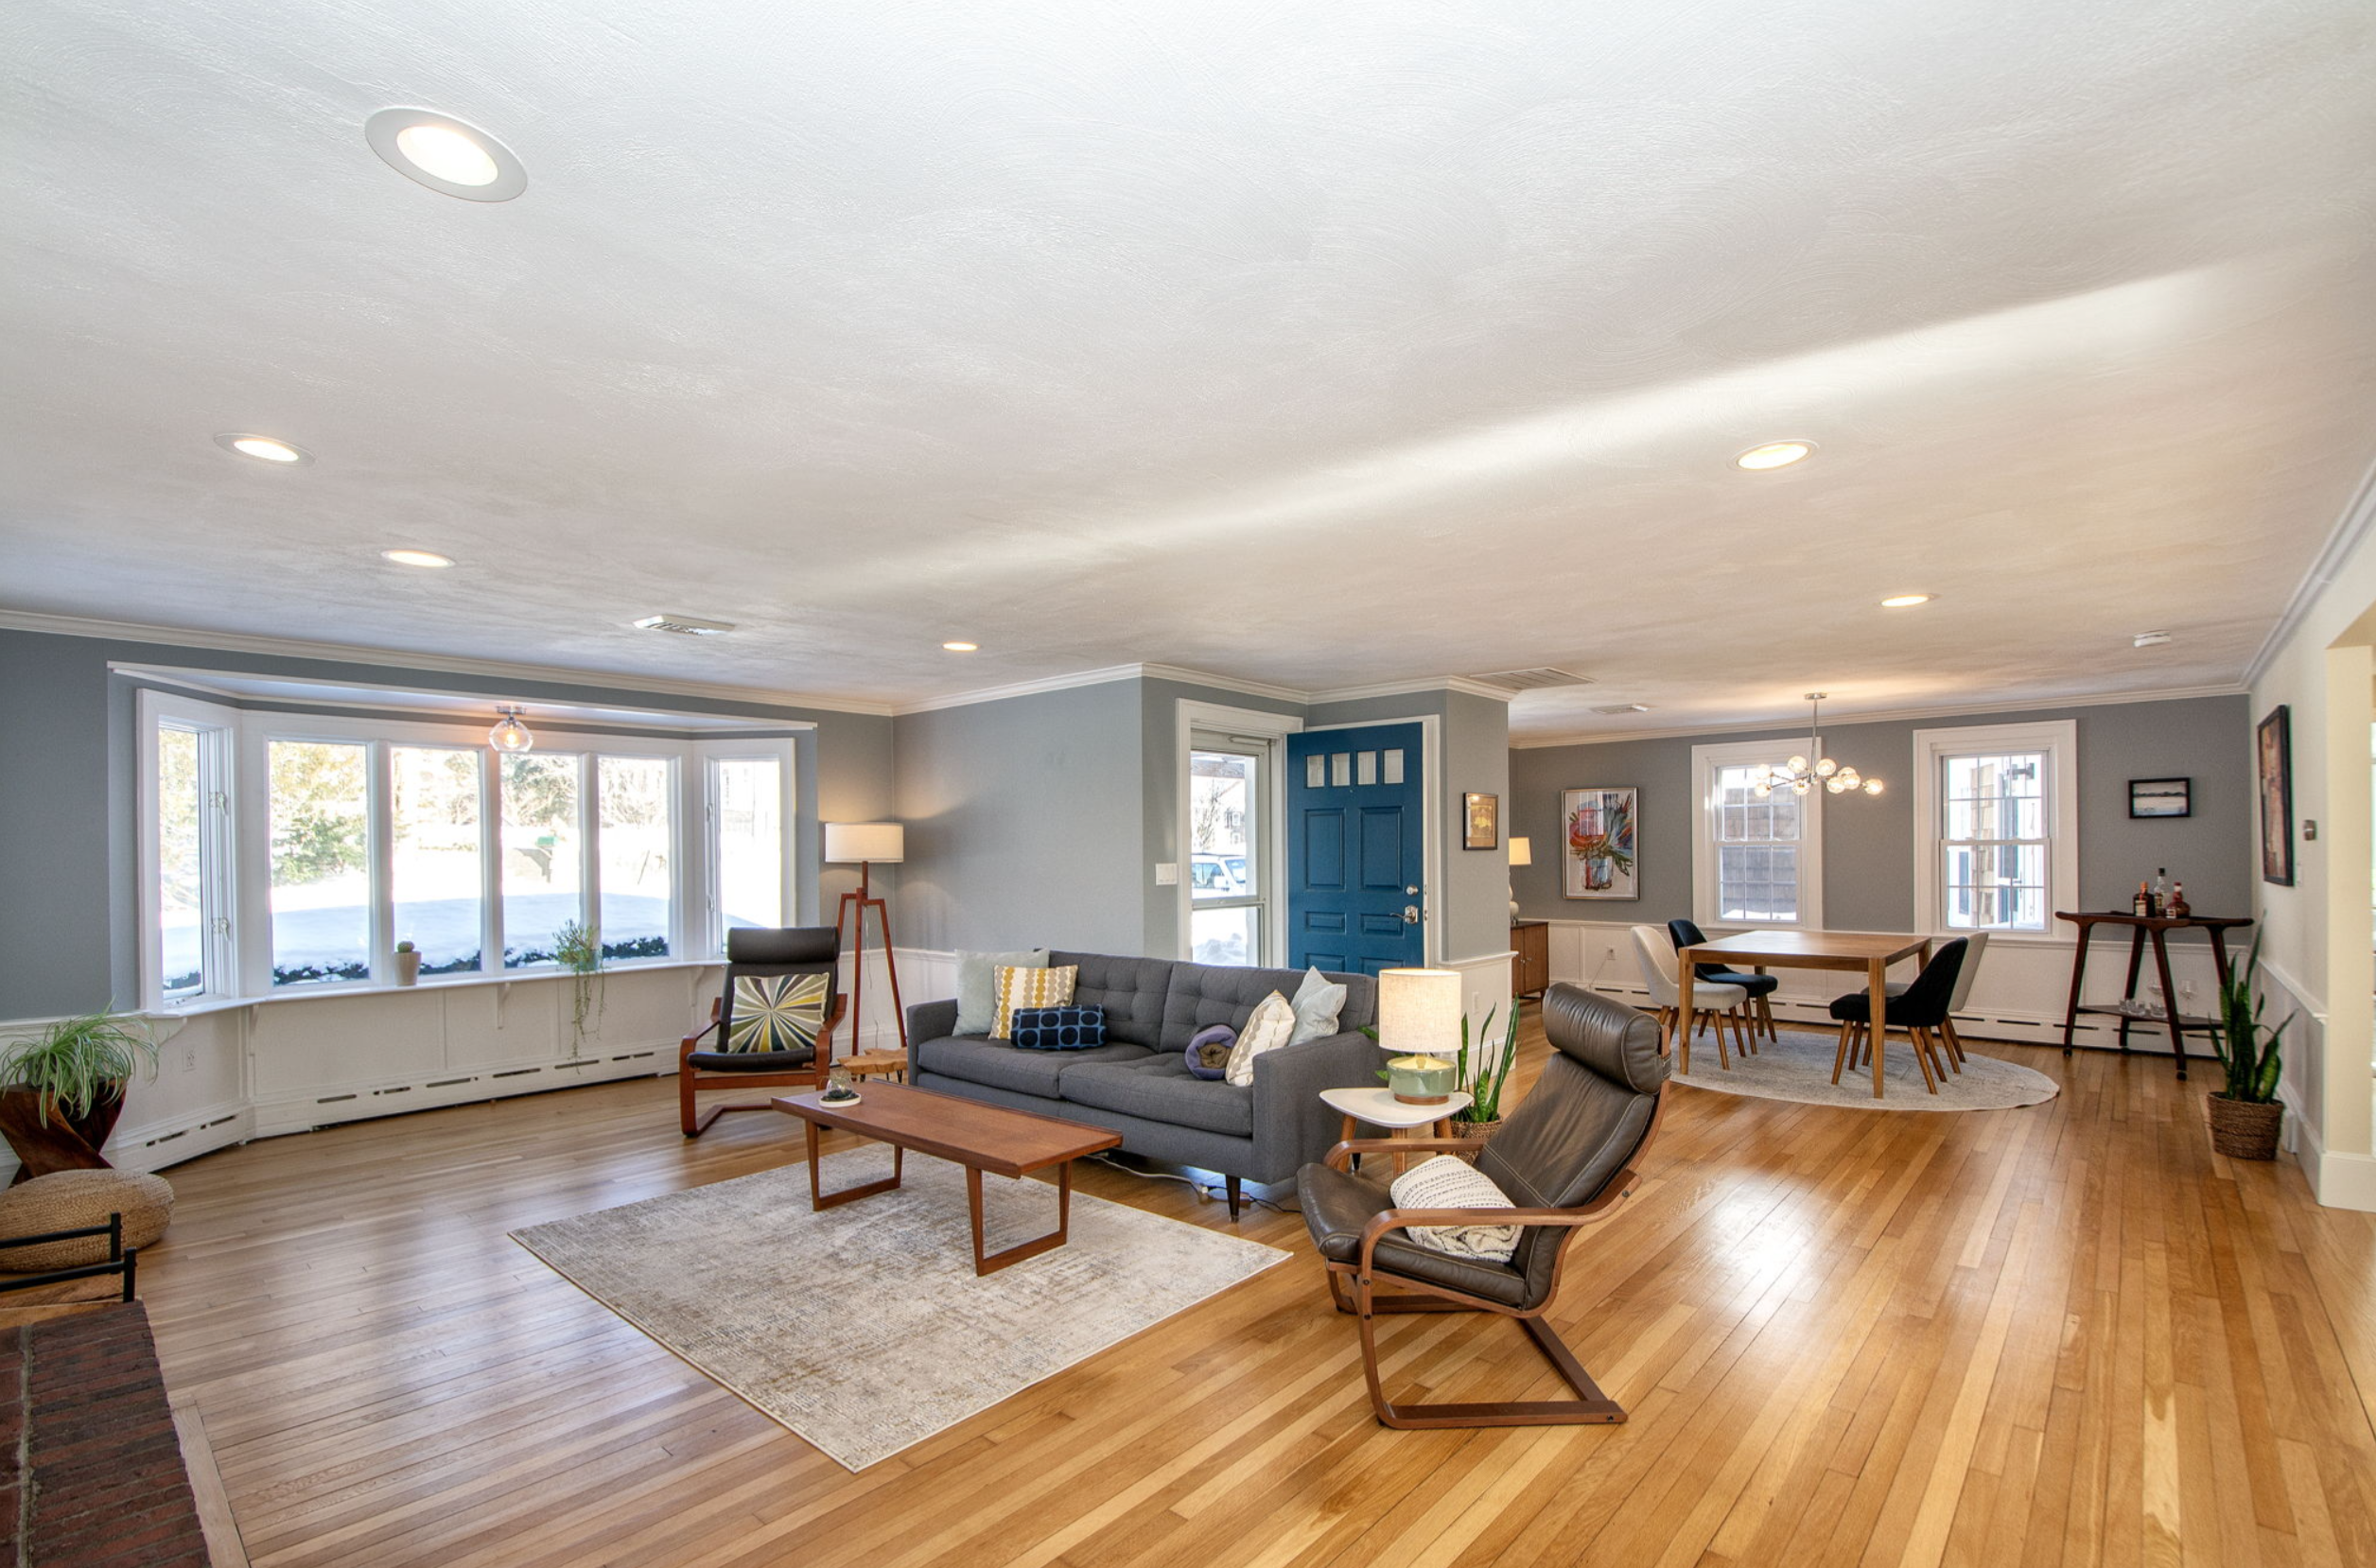
Now, the kitchen was a TRUE transformation. It was boxed in by a wall of cabinets, the range wasn’t vented, there weren’t very many windows, the tile was ugly and not well installed, and it was just generally cramped and outdated. By knocking out the wall between kitchen and LR, opening a sliding door to a (future) deck, installing a 10’x4′ island with built-in shelf microwave, and updating the lighting, it’s much brighter and more expansive. We tiled the backsplash on both sides of the room so that it all ties together. We installed wider plank wood flooring but stained it to match the rest of the house so it blends seamlessly. Looking south out of those beautiful new windows toward the adjacent pond, it really feels like you’re in a treehouse. And now, instead of a divided DR, LR and Kitchen, there’s a true, cohesive Greatroom, with light, flow, and continuity.
Even though it’s all unified, the Dining Room is still the Dining Room. And she’s been updated! New lighting, no more dated built-ins, fresh paint, refinished flooring. Oh and air conditioning!

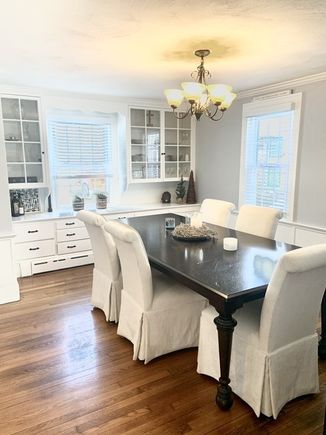
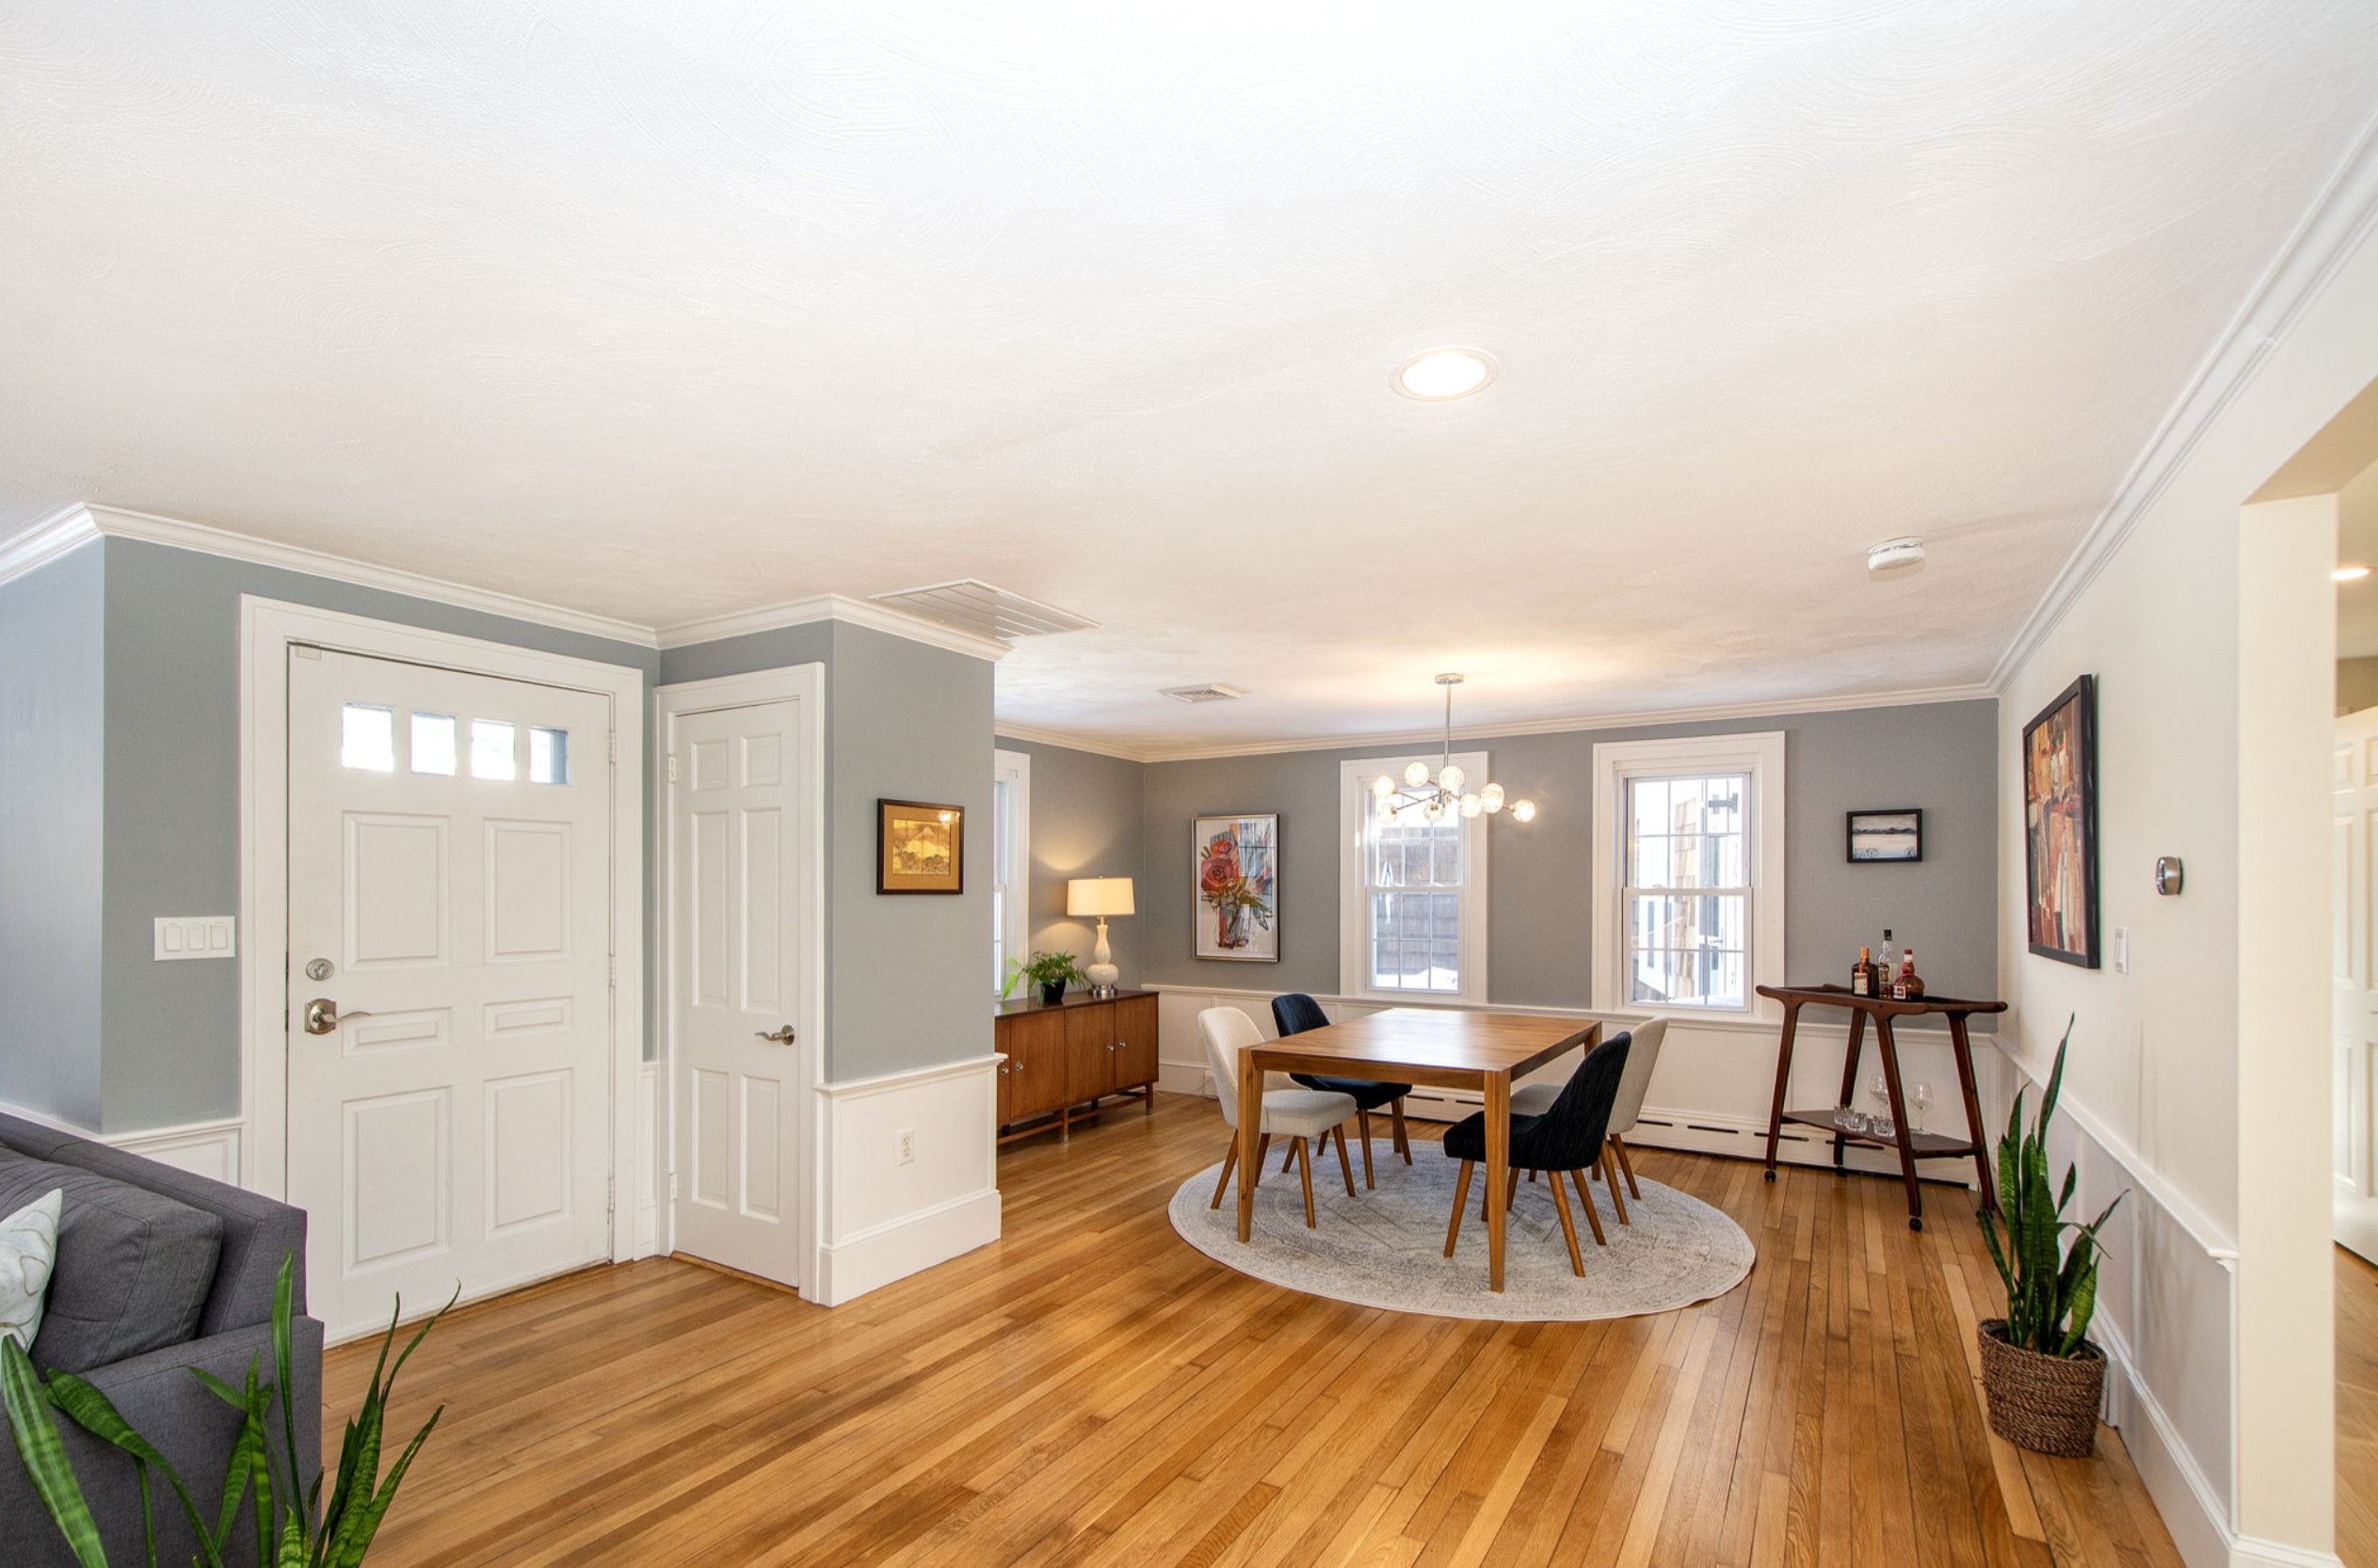
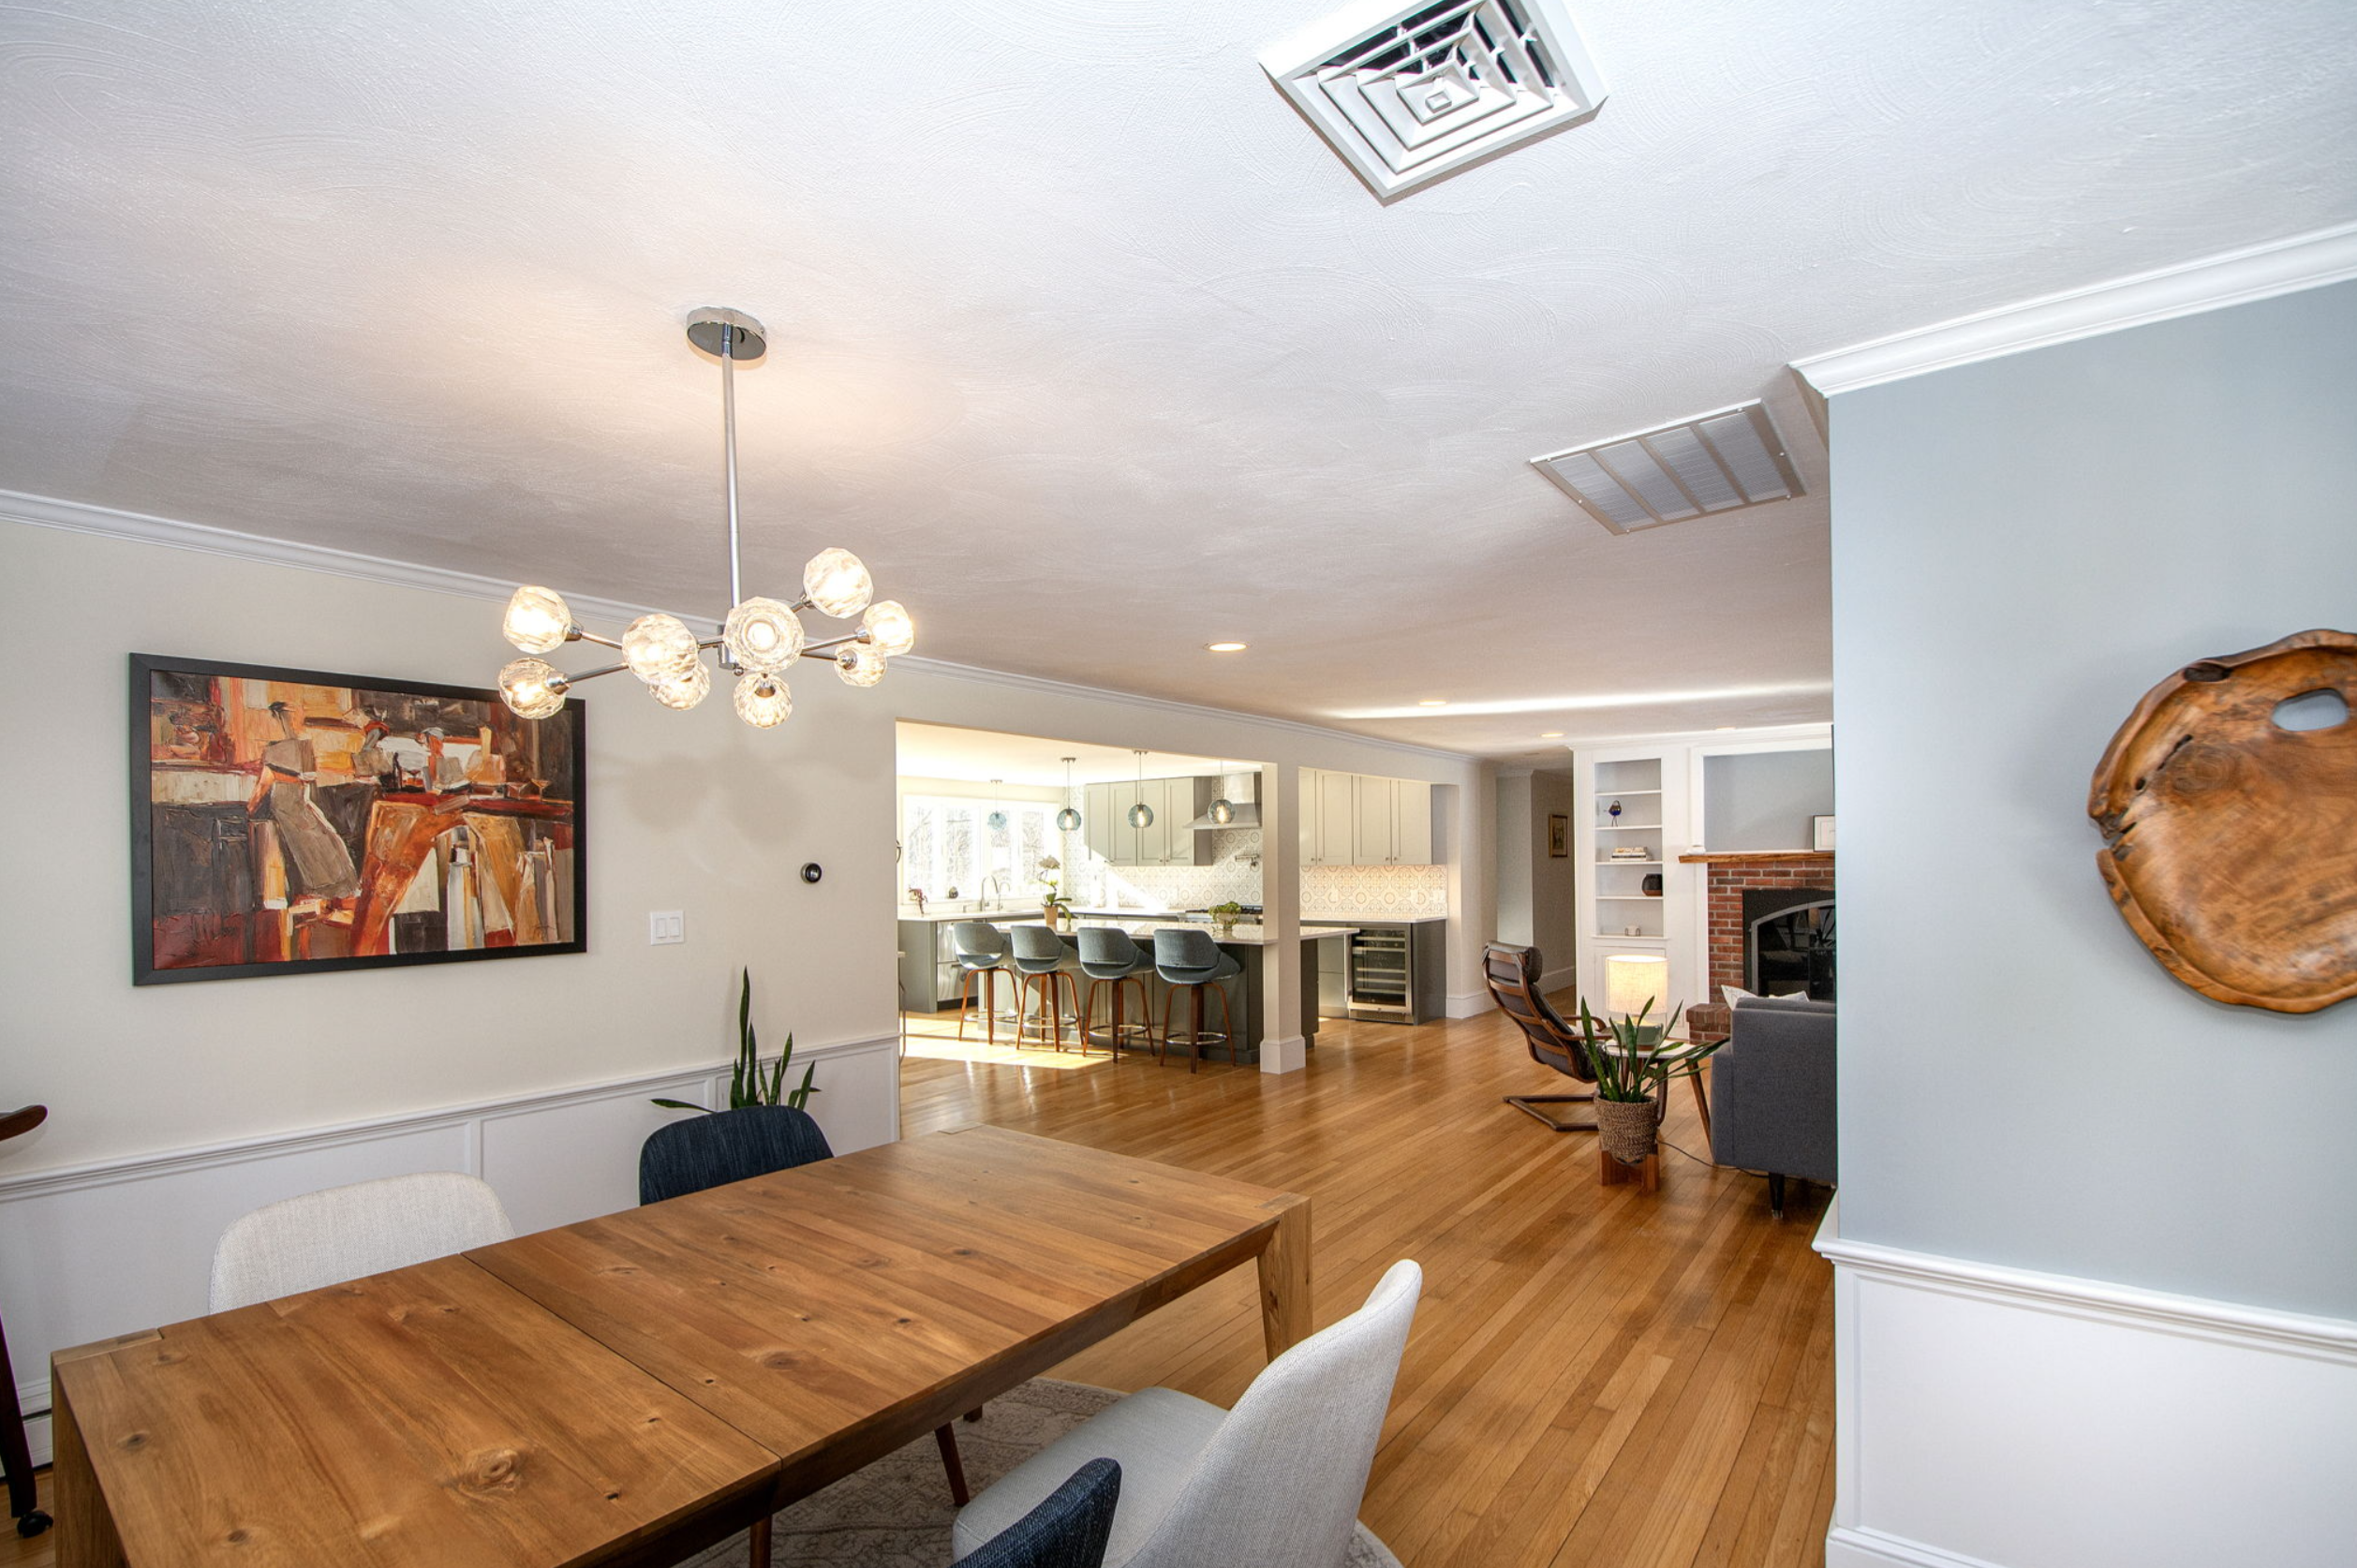
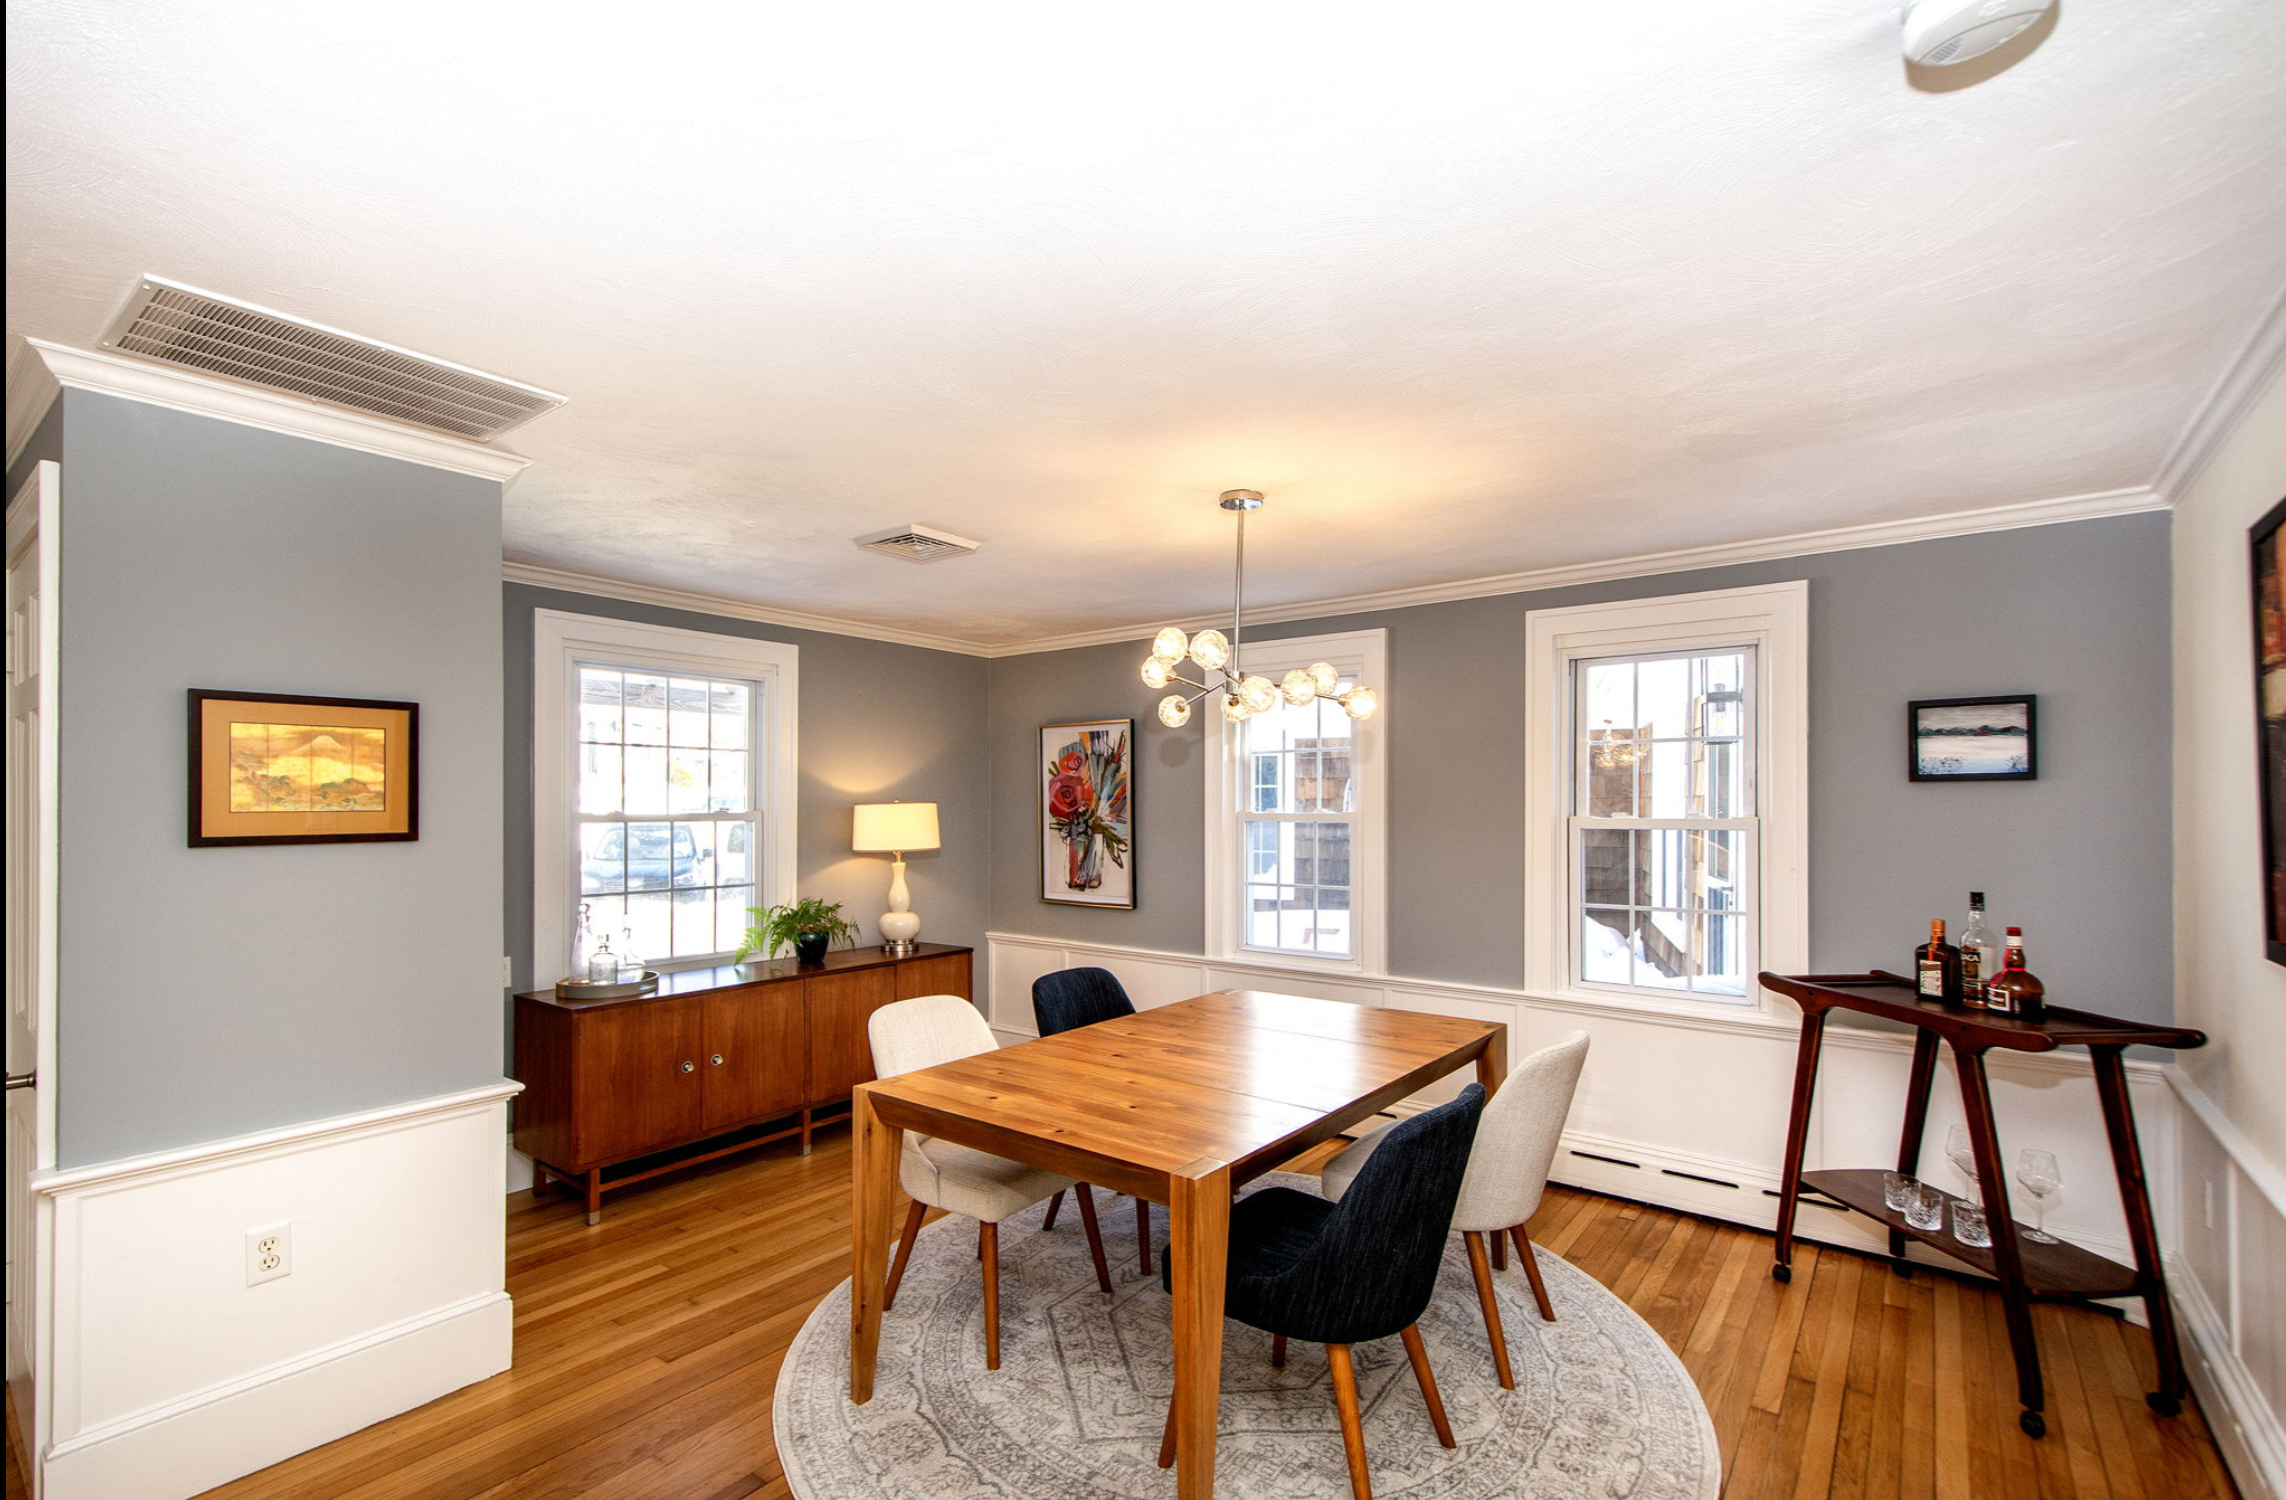
She feels more open, lighter of course, and fresh. What everyone wants when sitting down to a meal. Cozy enough for just 2 or 4, but large enough to accommodate a party of 20. (which we’ve done!)
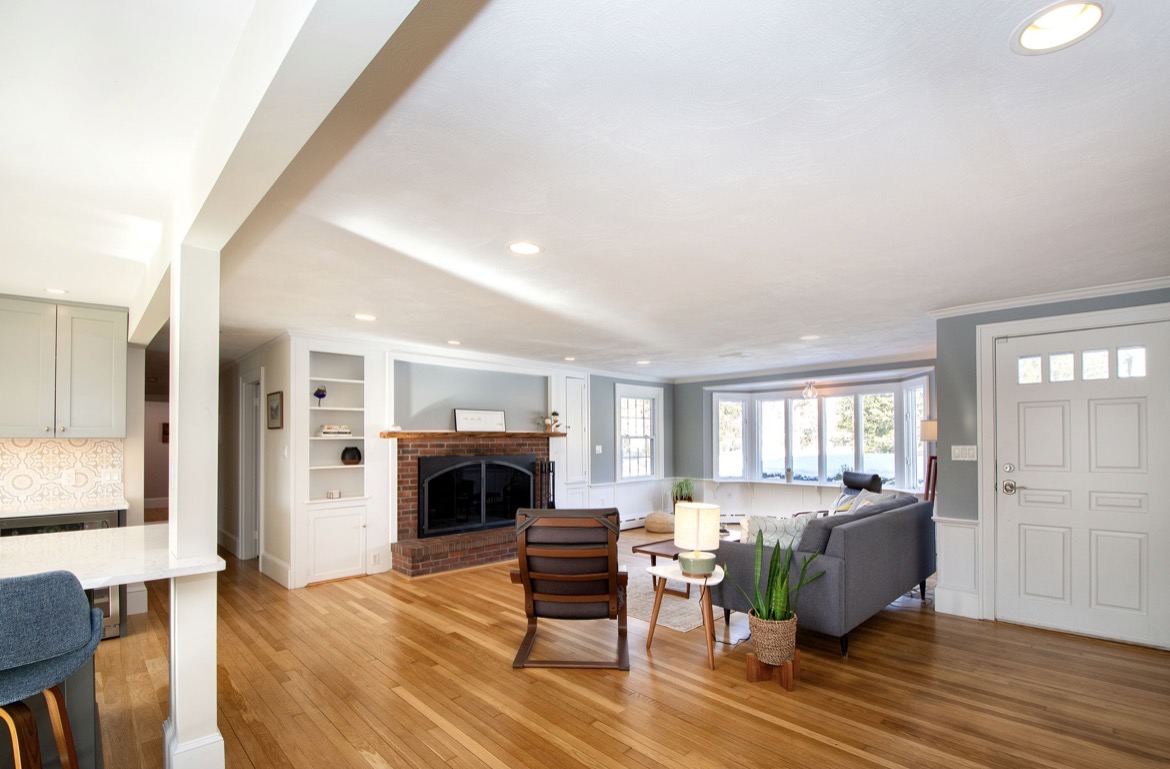
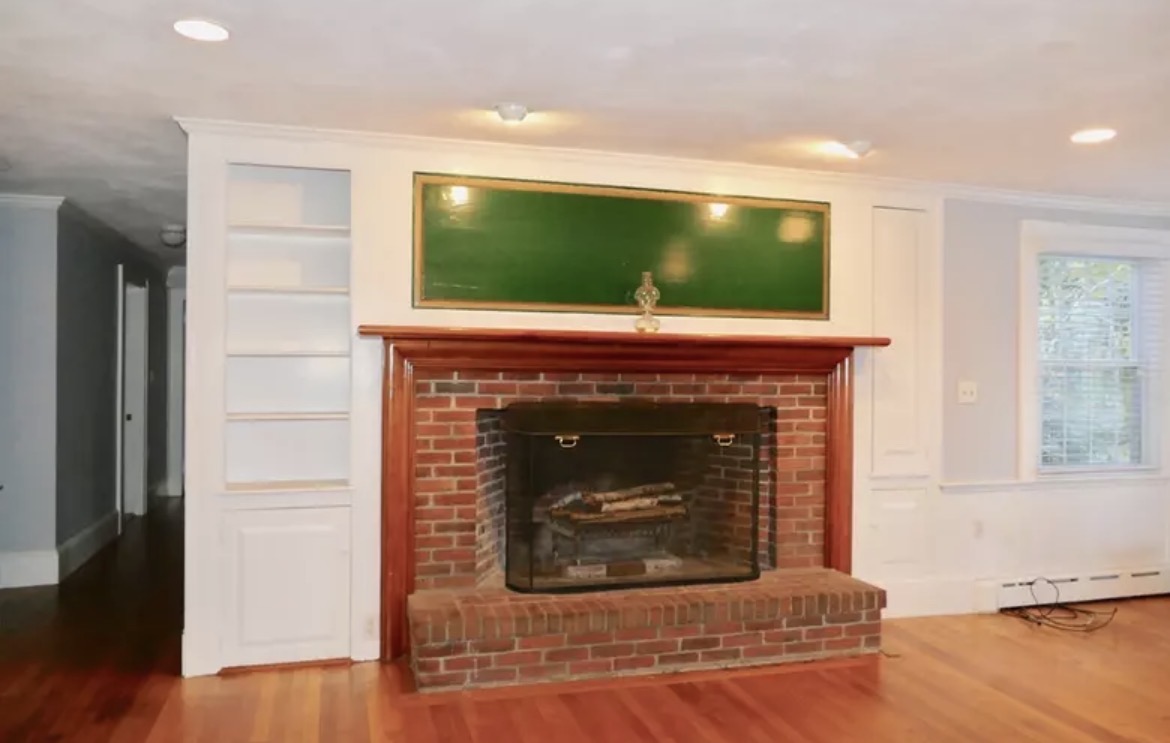
The Living Room is giving Living!
wall unless there is balcony seating.
(trust me, I used to work for THX!)
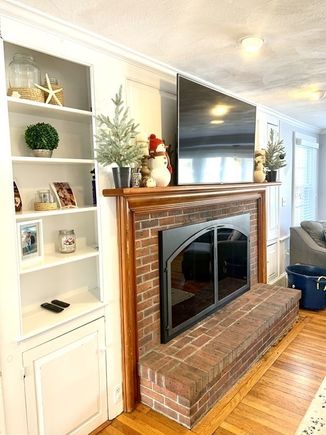
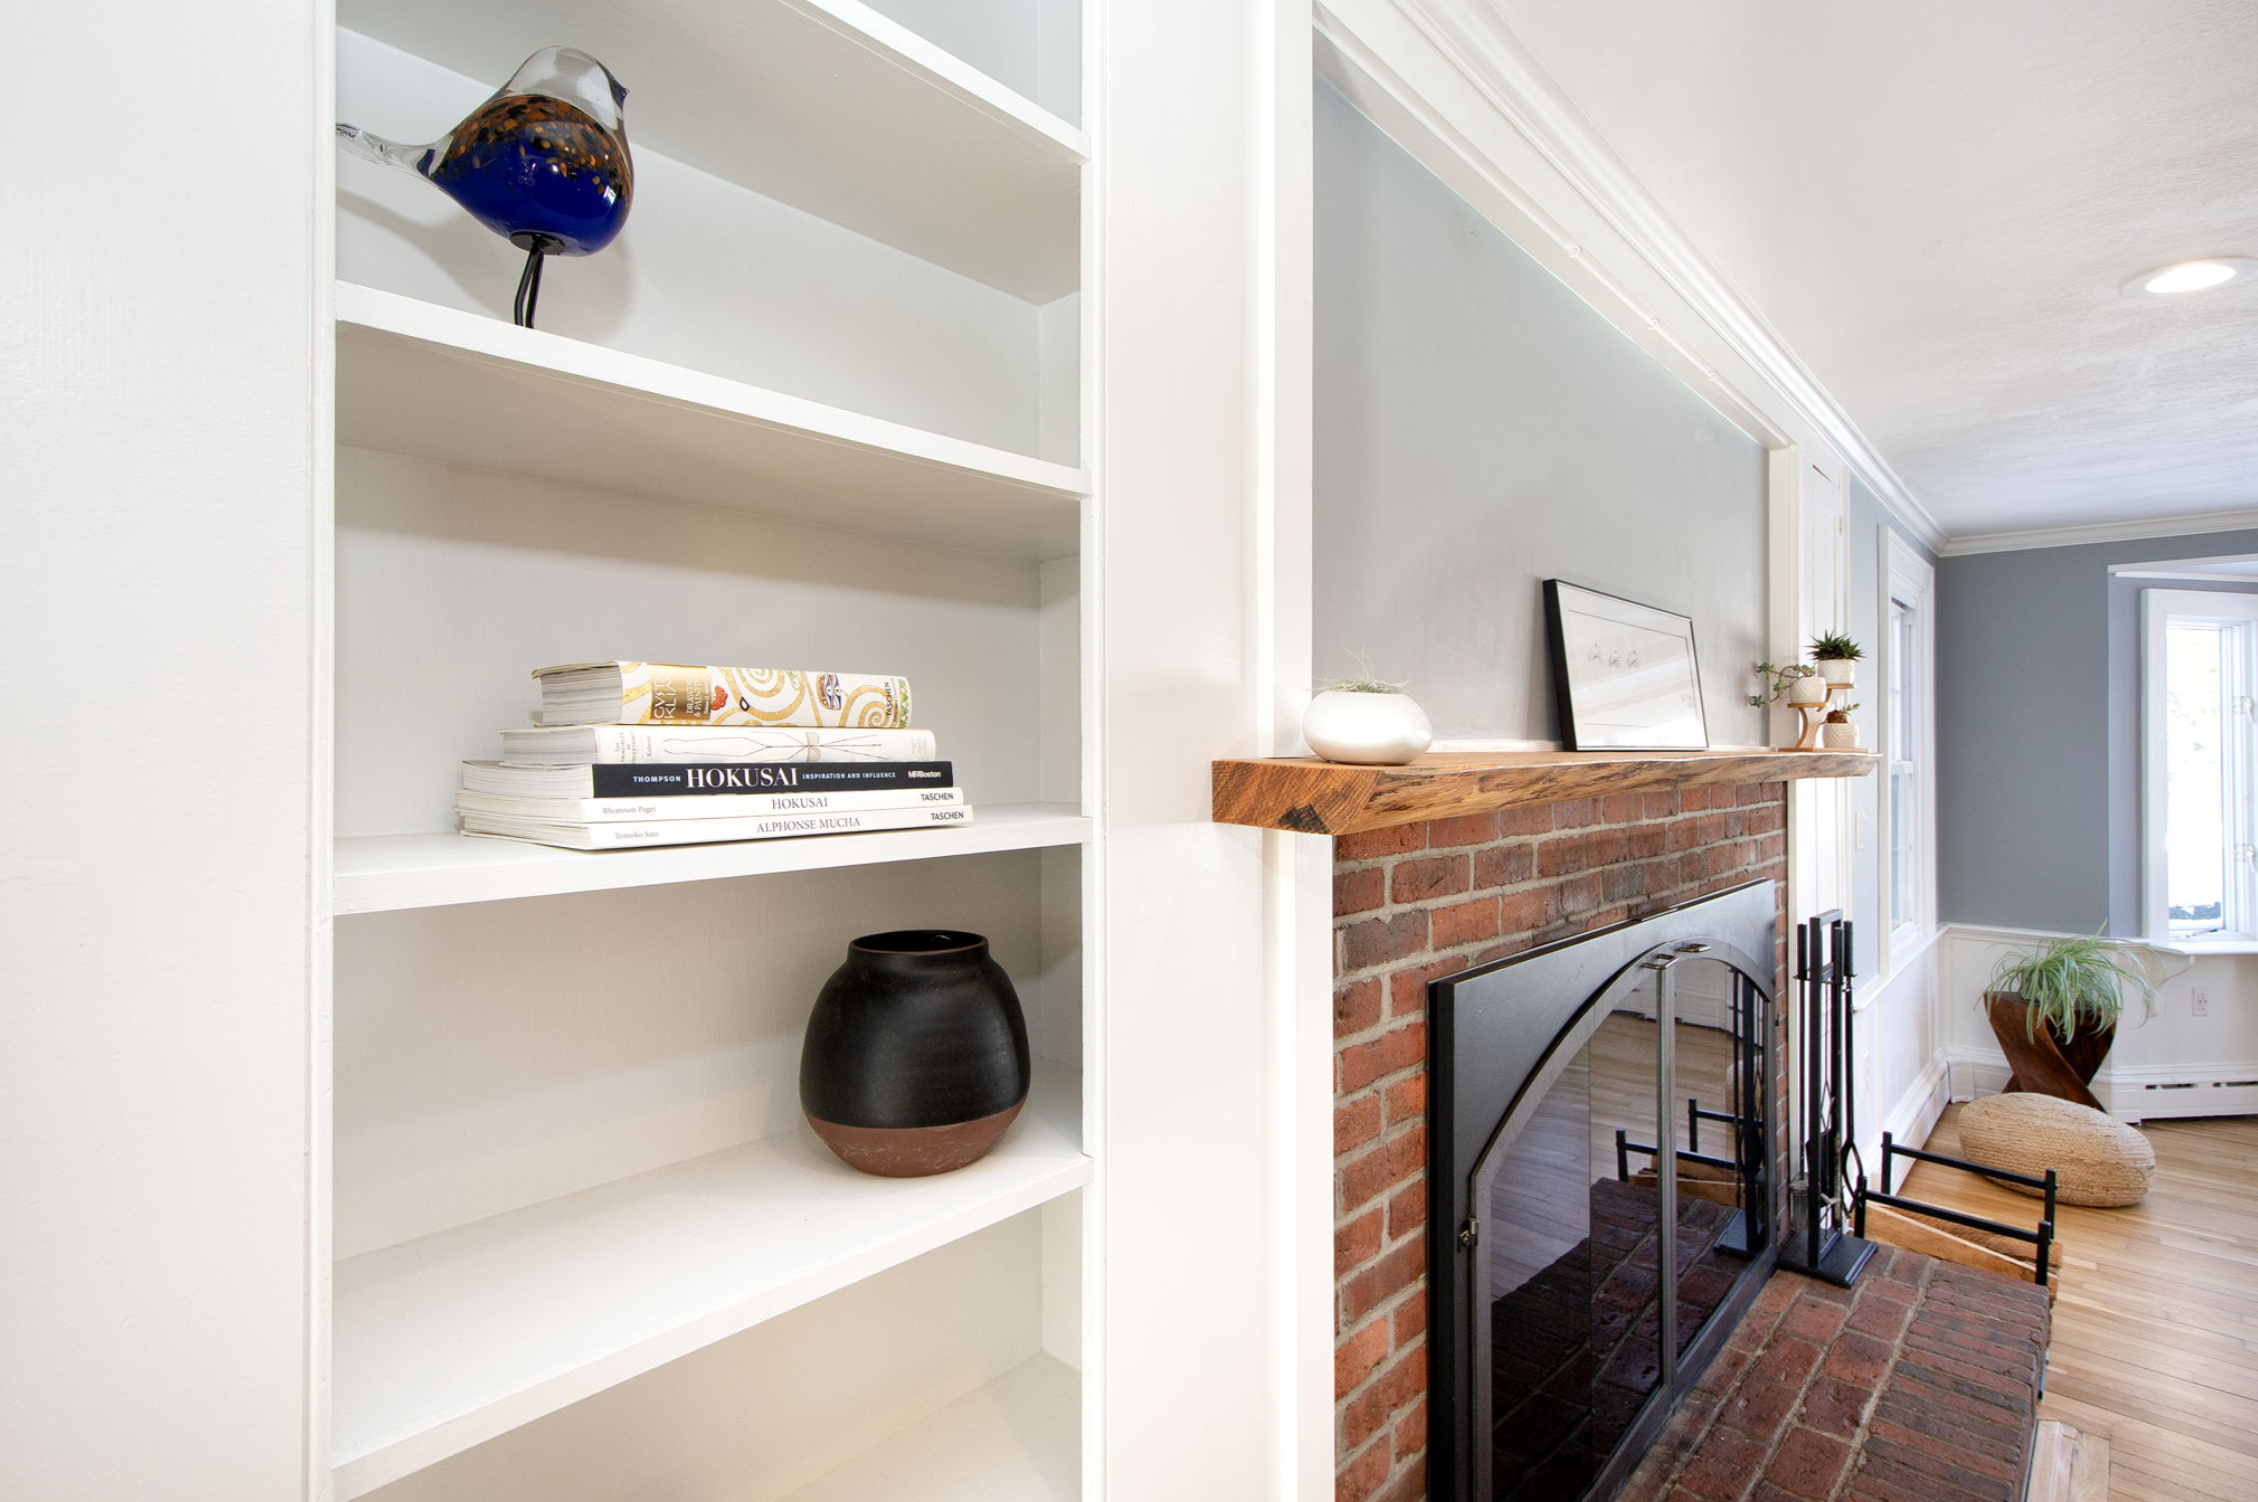
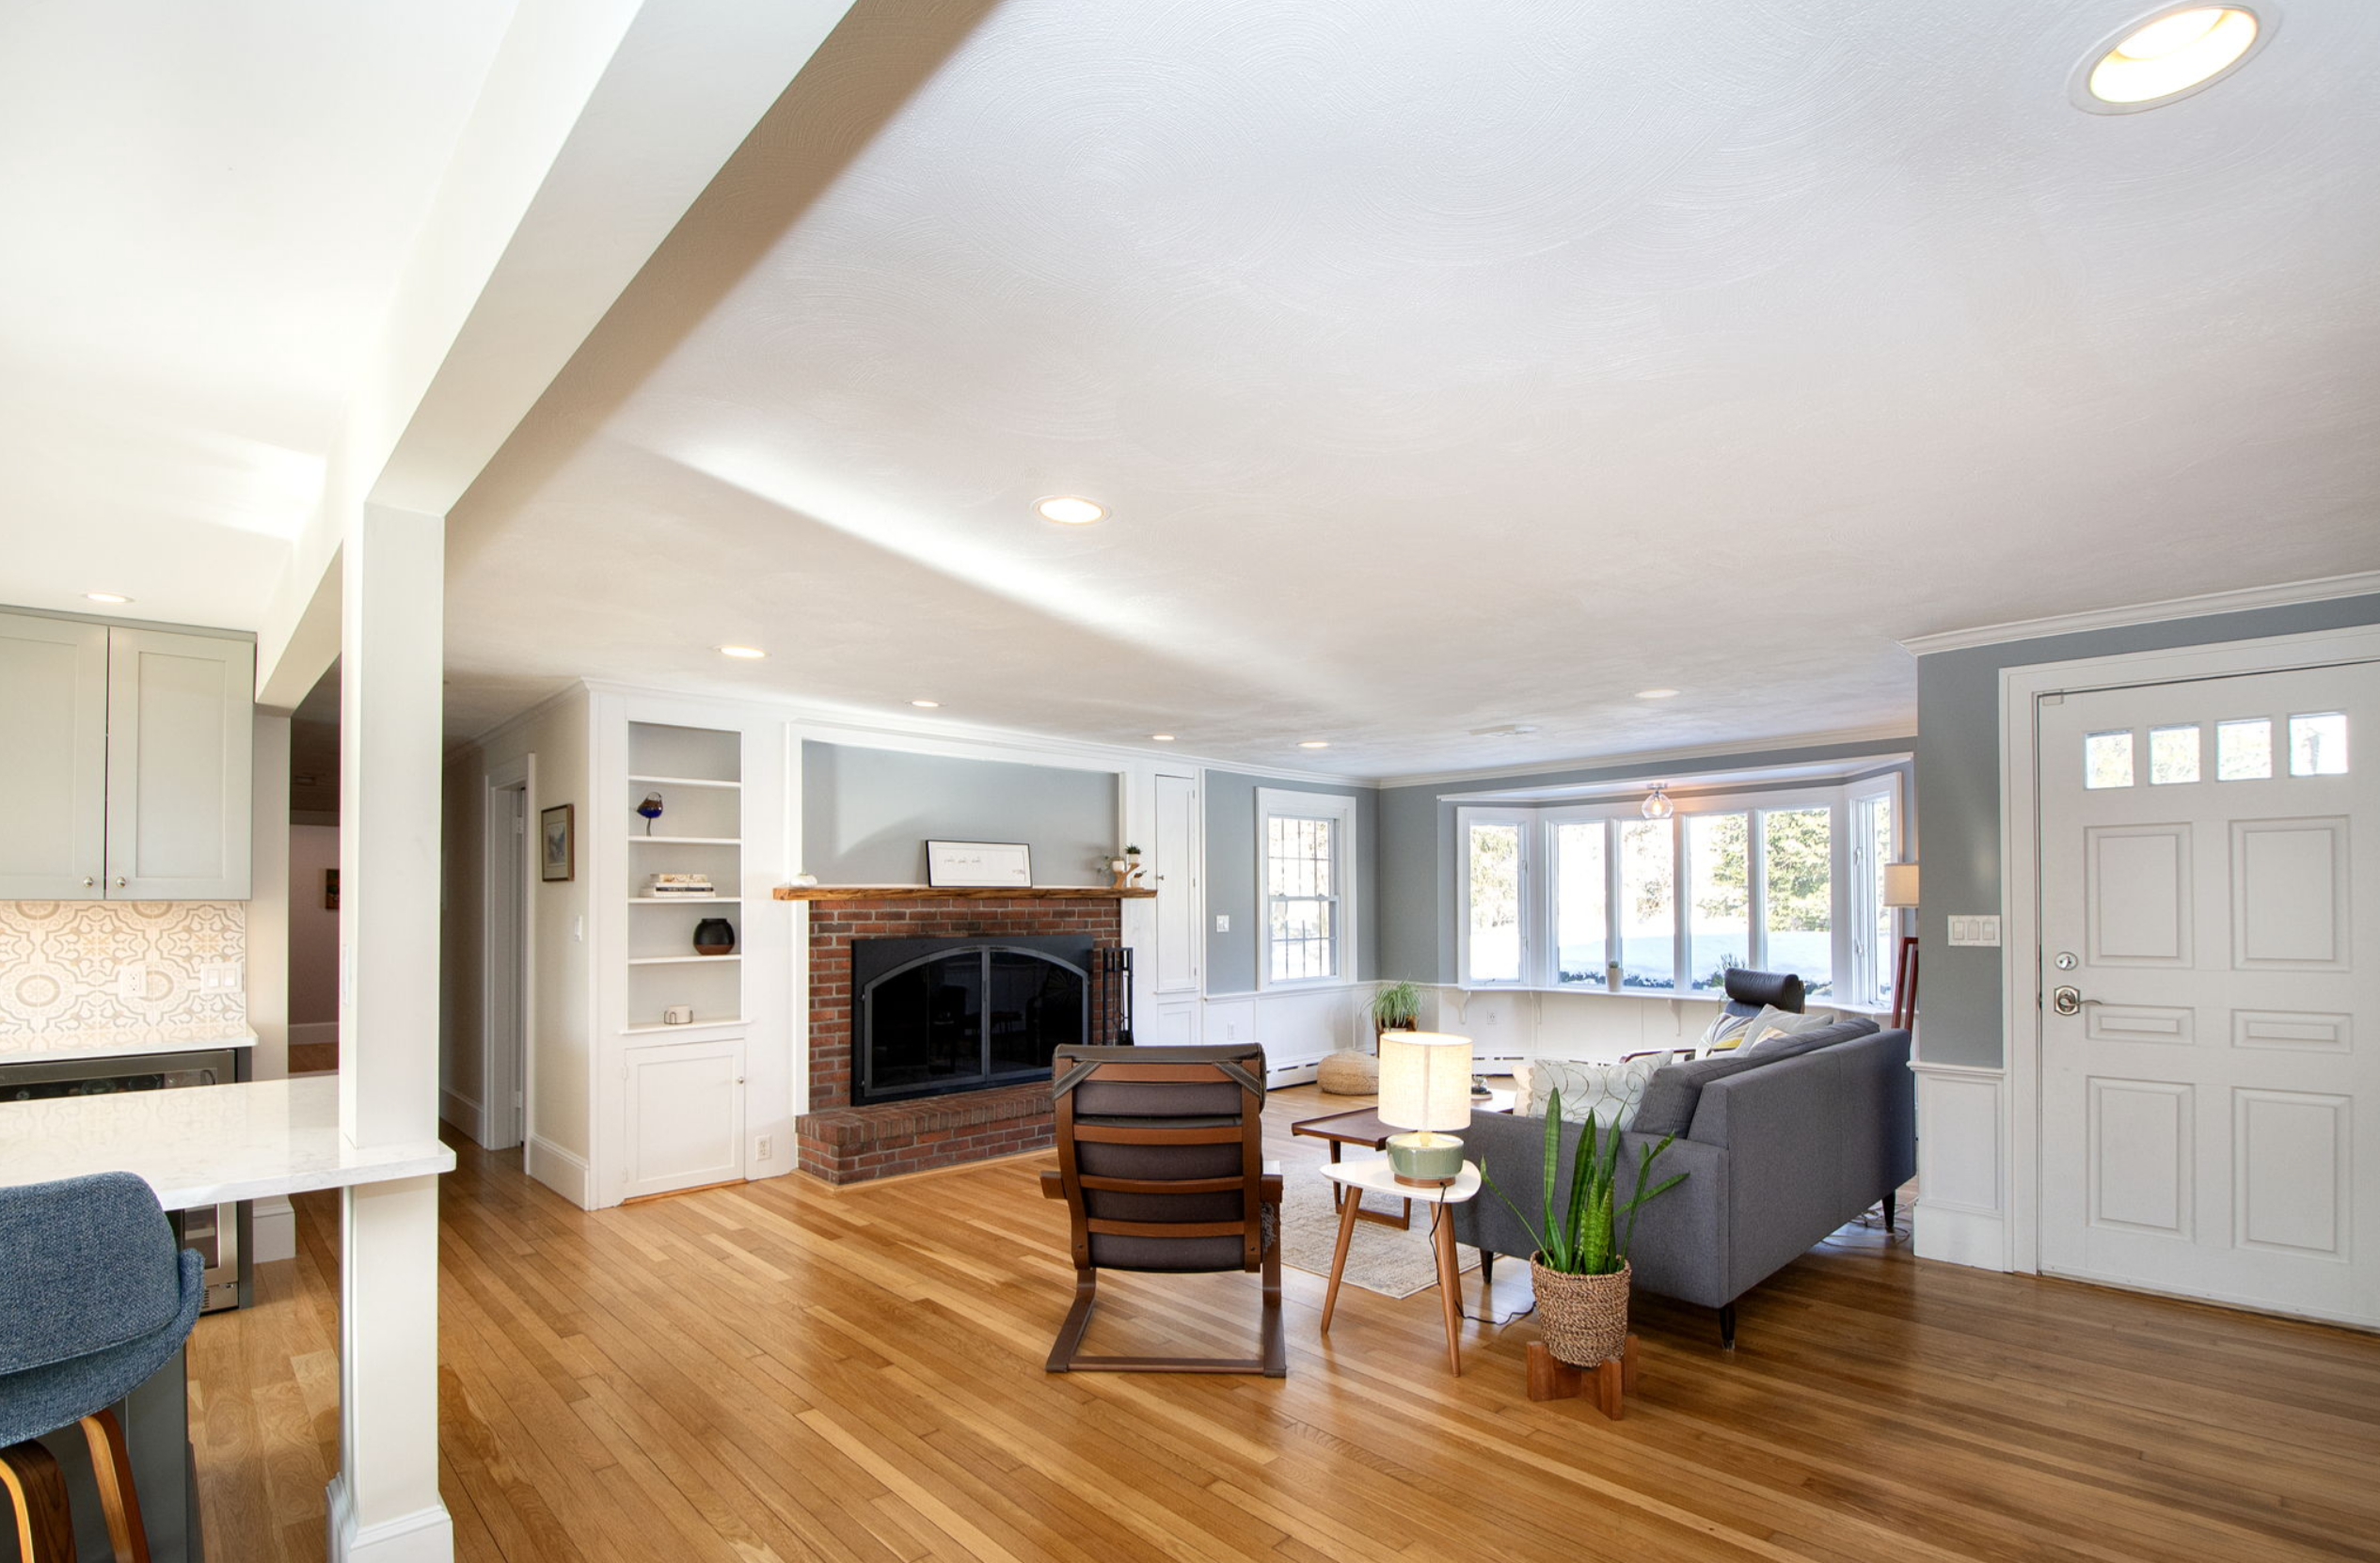
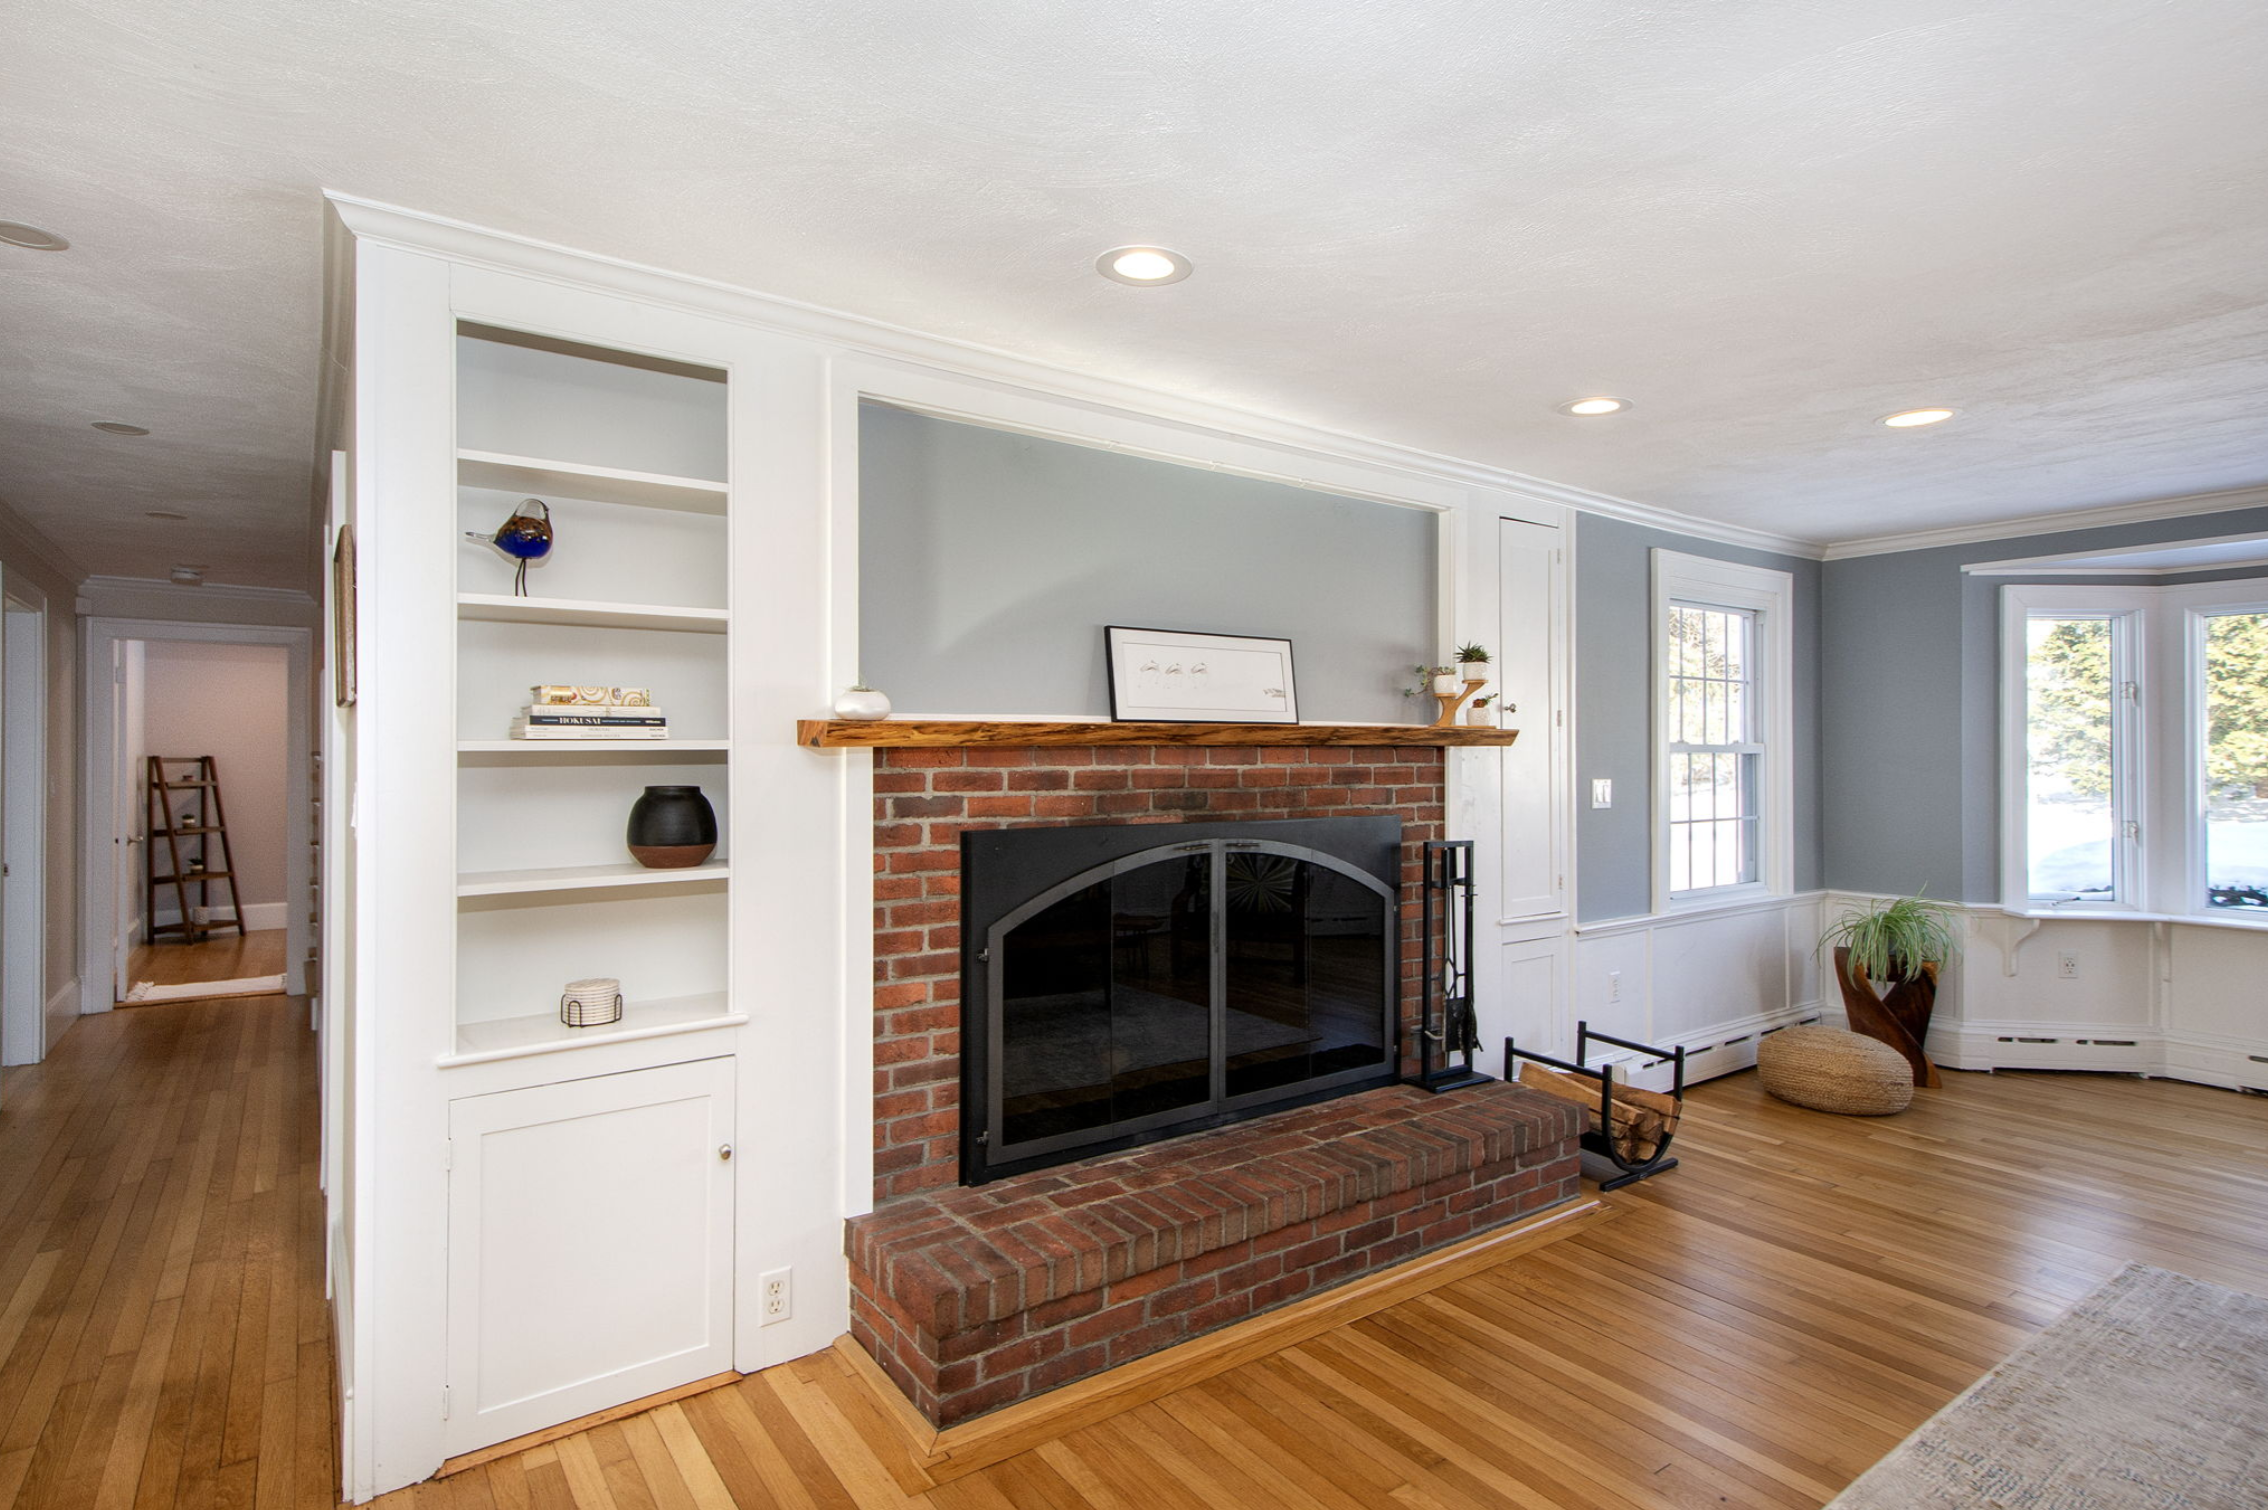
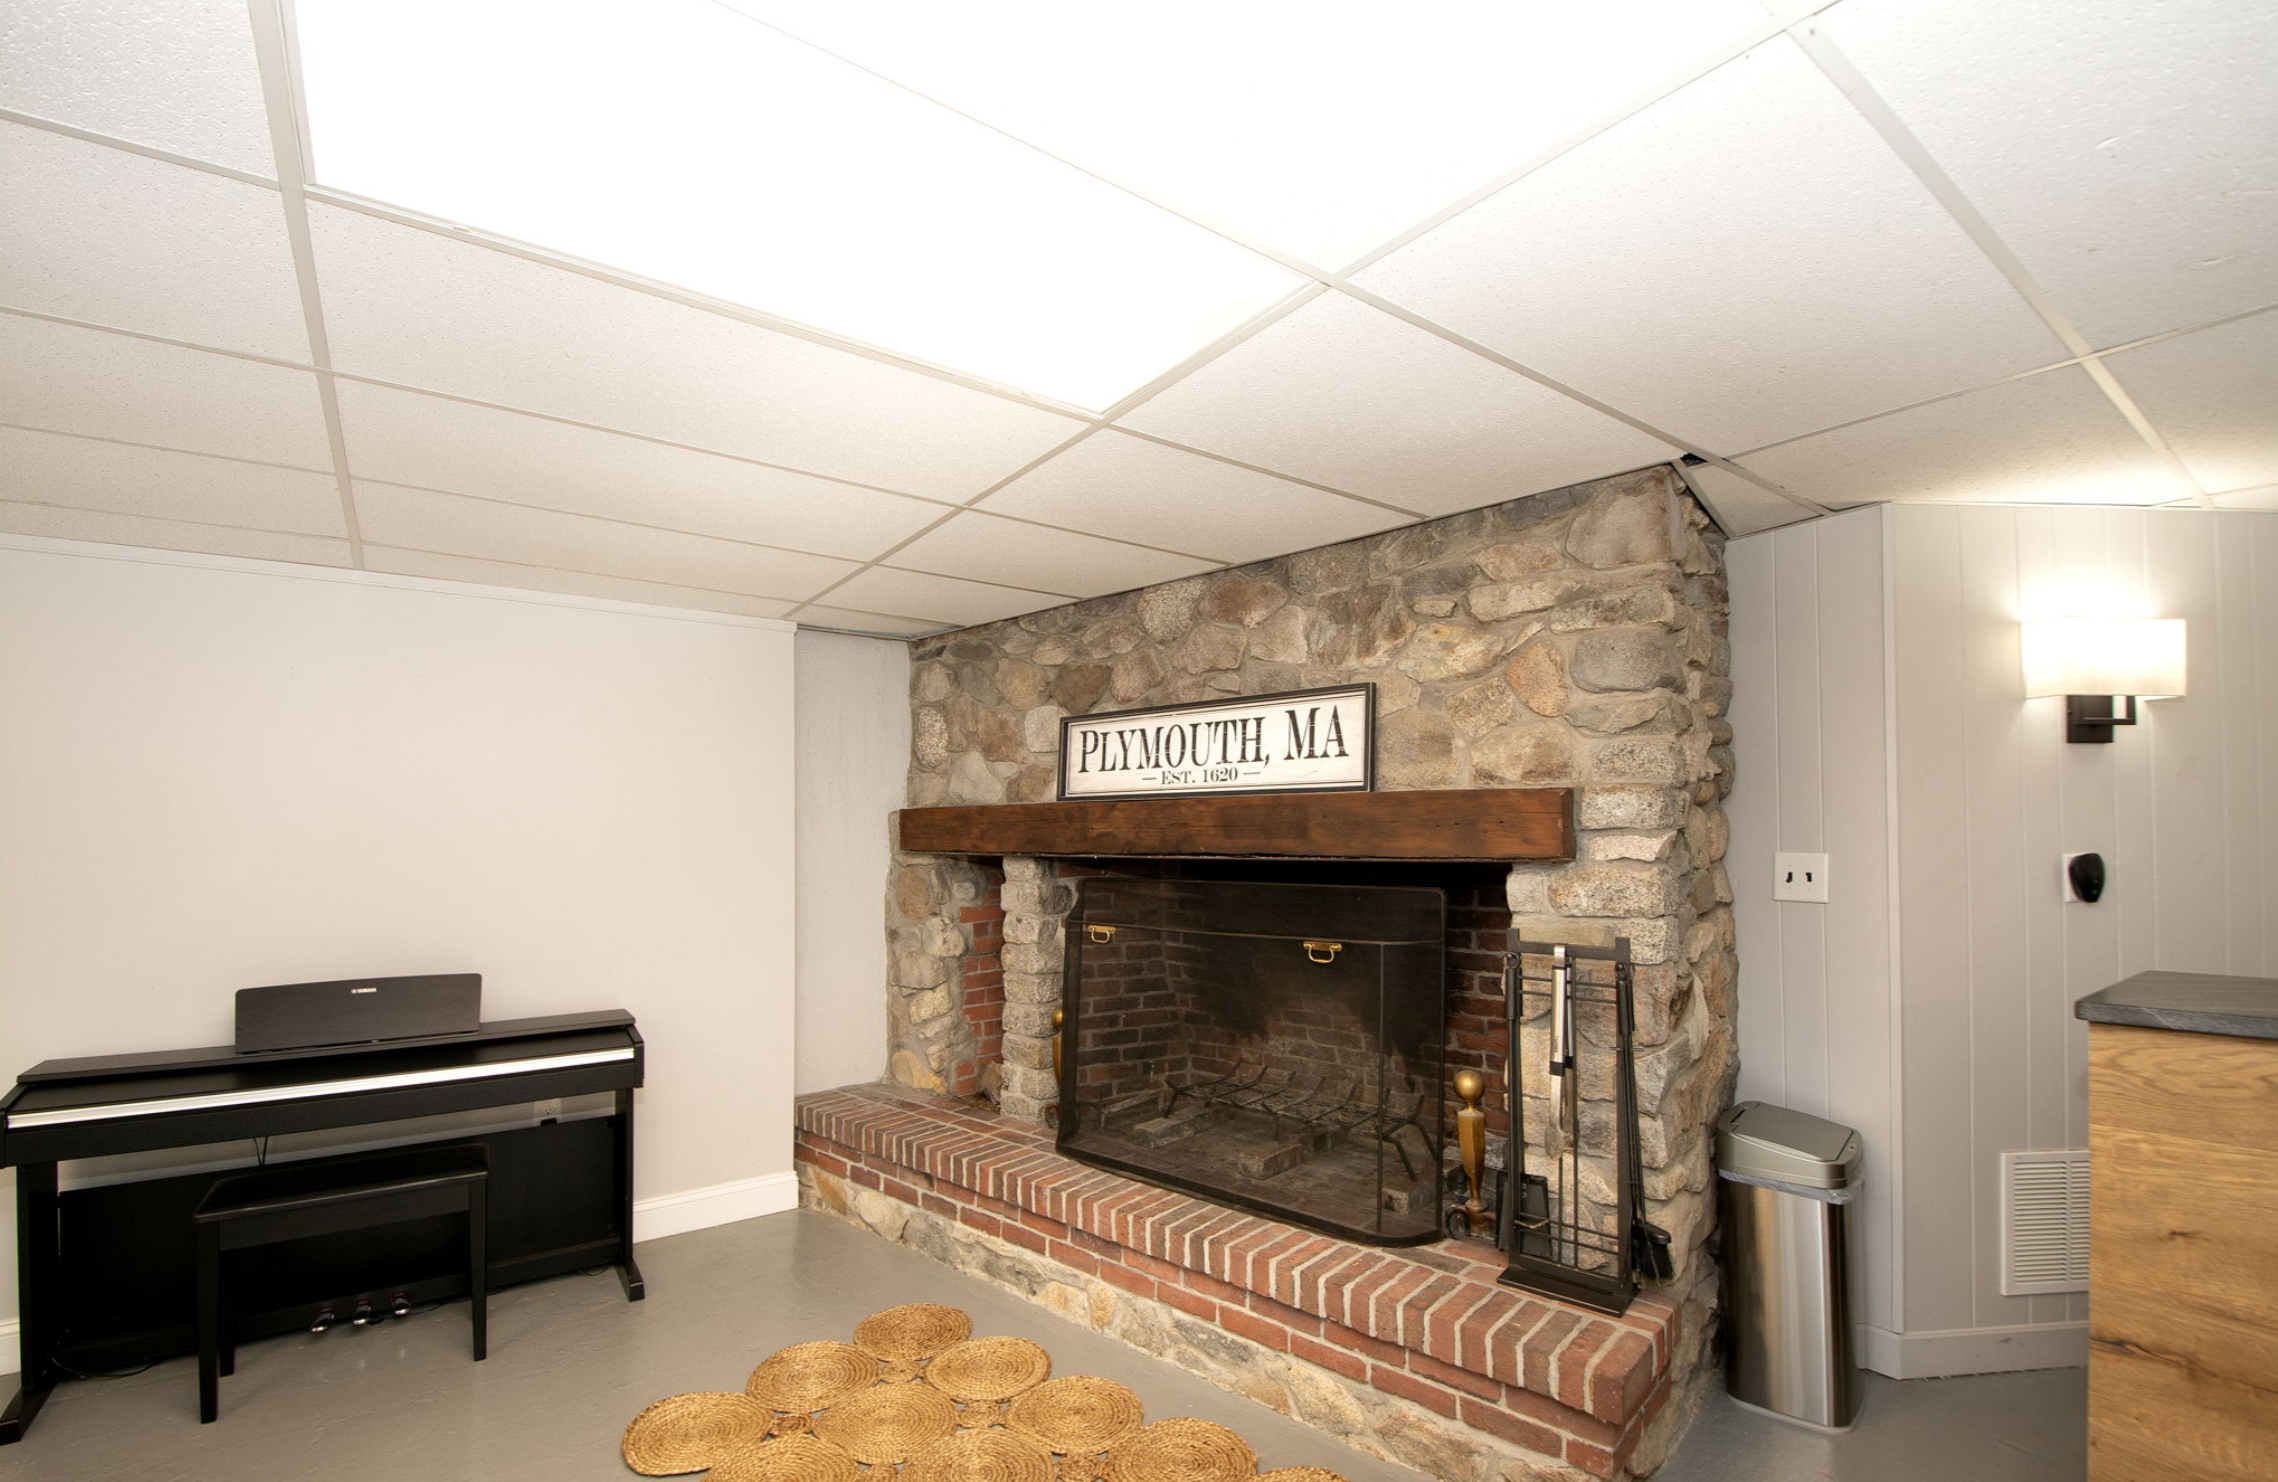
We replaced the bay window ceiling with beadboard and installed a new light fixture. We added more light fixtures and HVAC ducting in the LR ceiling. Then we cut out the ornate trimmings on the built-ins surrounding the fireplace, bringing it into the 21st century. And, again with the help of my talented carpenter of a neighbor, I took another live edge wood slab and crafted a custom mantel. With that installed and cleaner moulding fastened around it, the fireplace now stands out as a modern, attractive gathering place in any season.
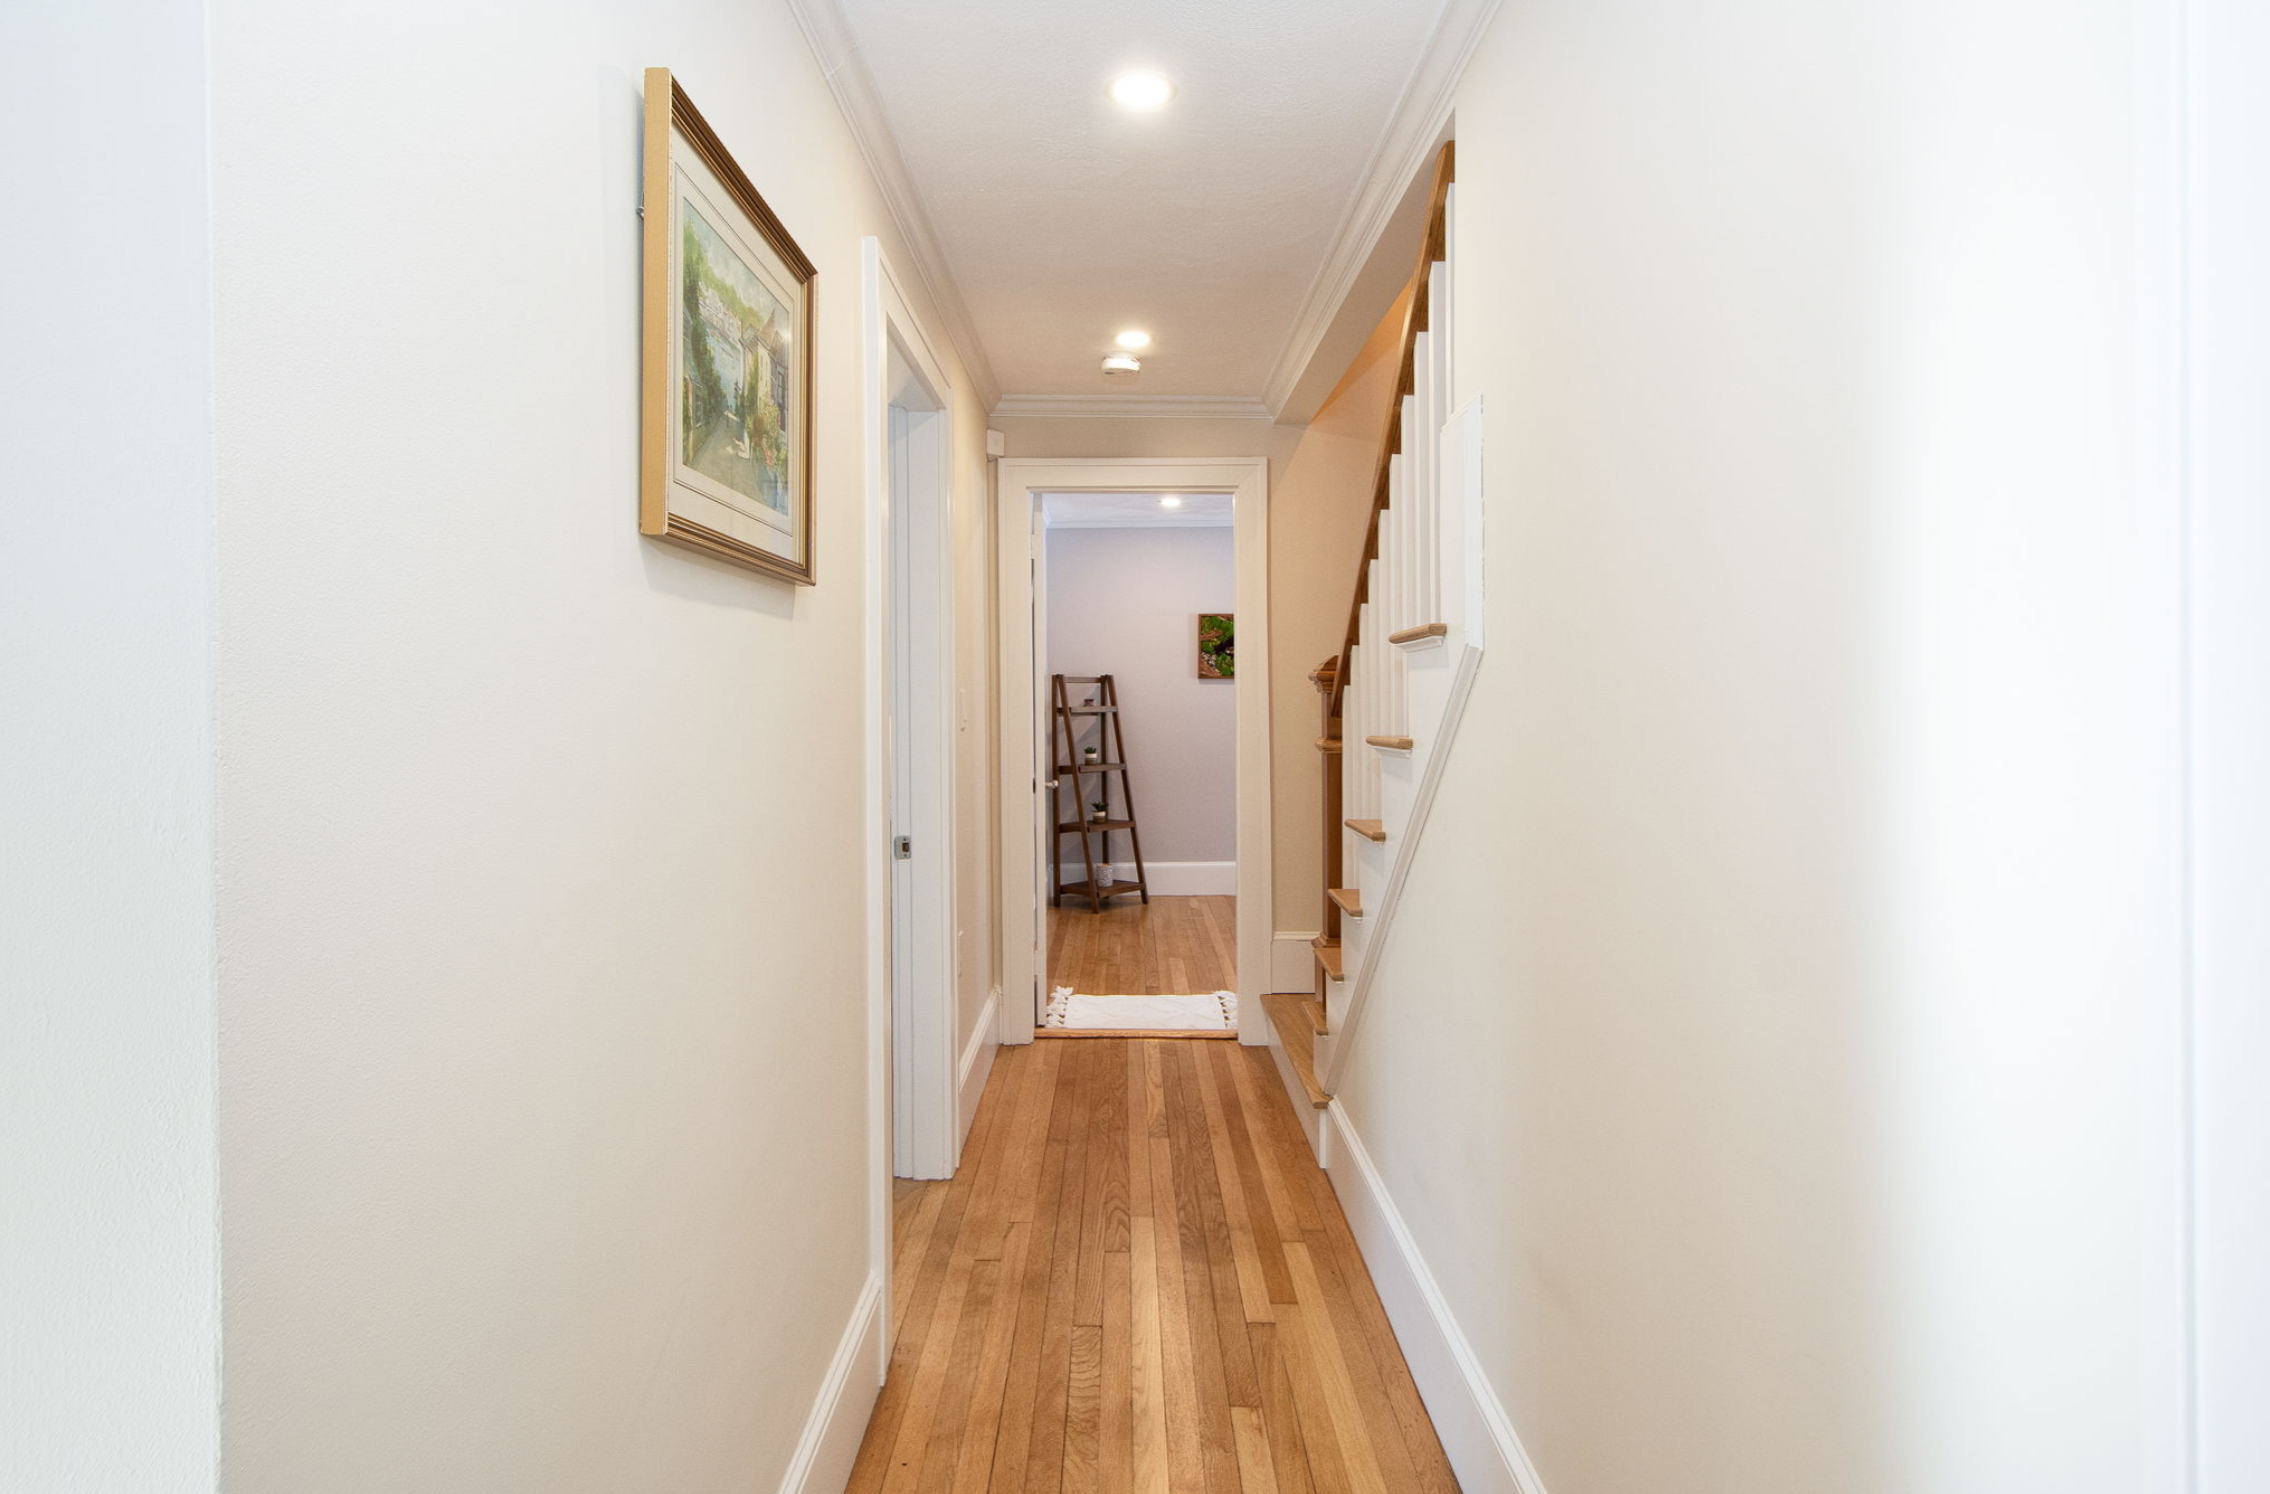
UP NEXT: Ye Terrifying Olde Stairs!
Moving down the hall from the kitchen, beyond the main floor primary suite and just before the 3rd bedroom, you encounter a stairwell to the upper floor.
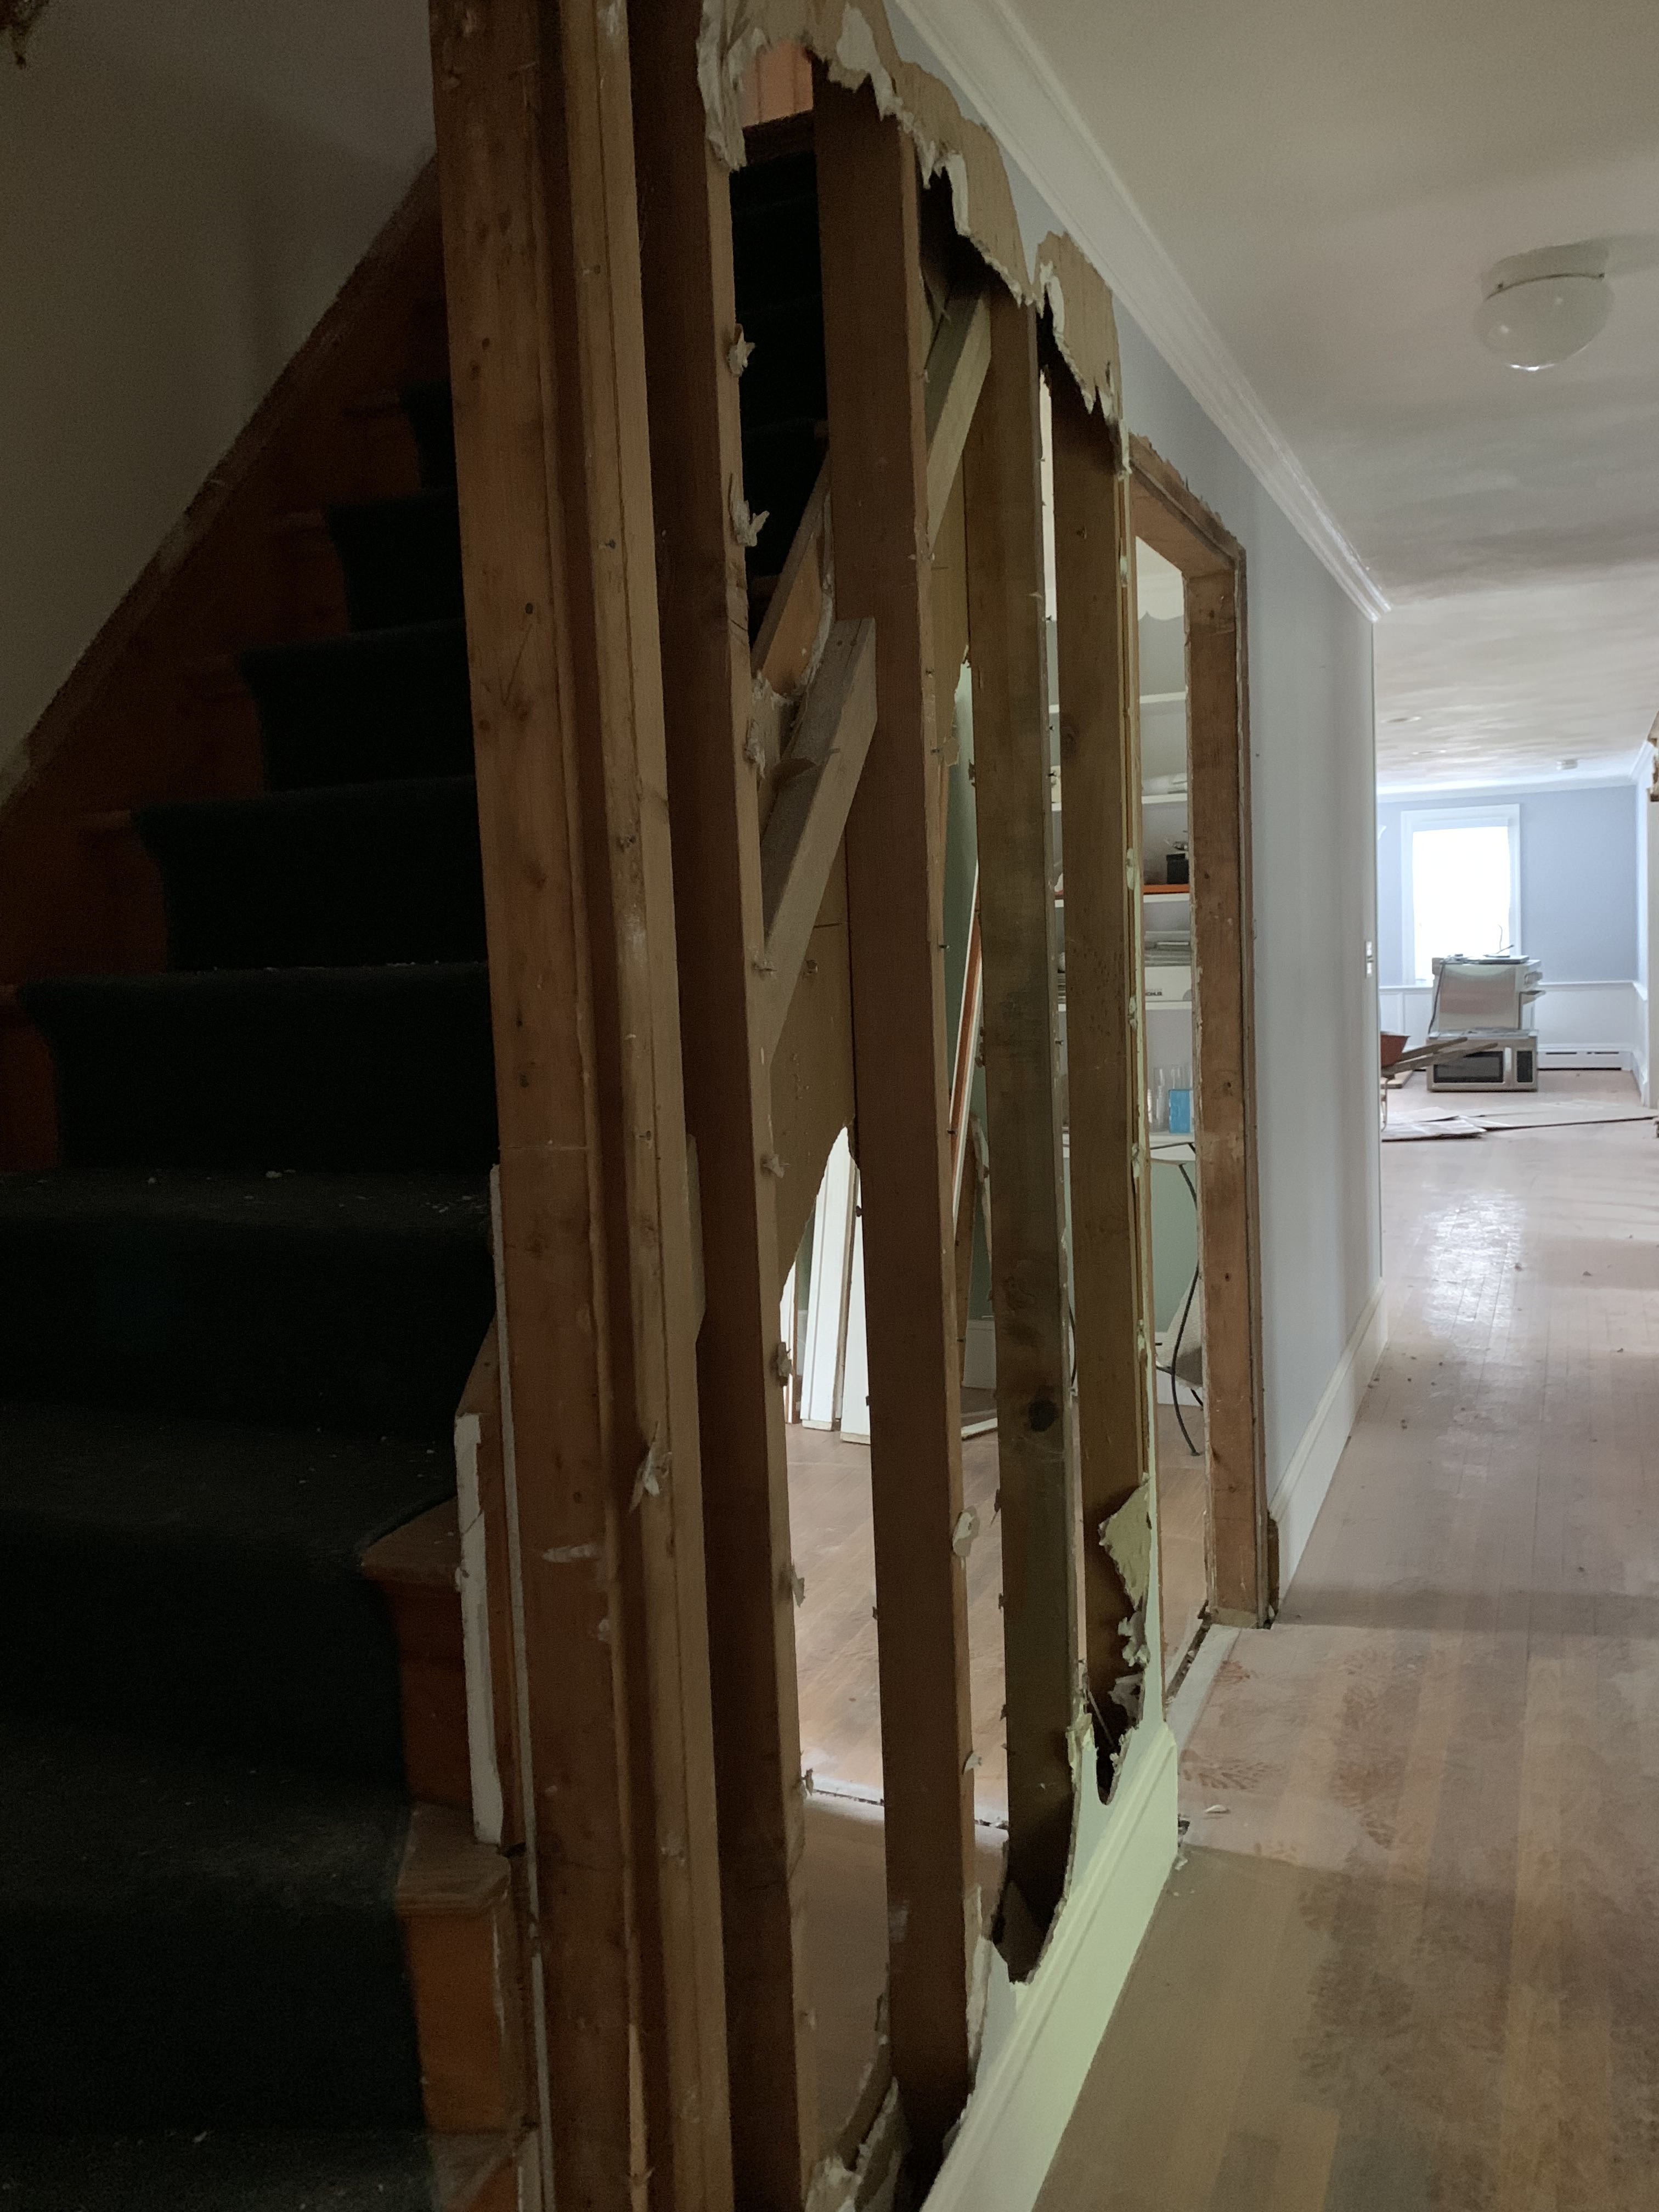
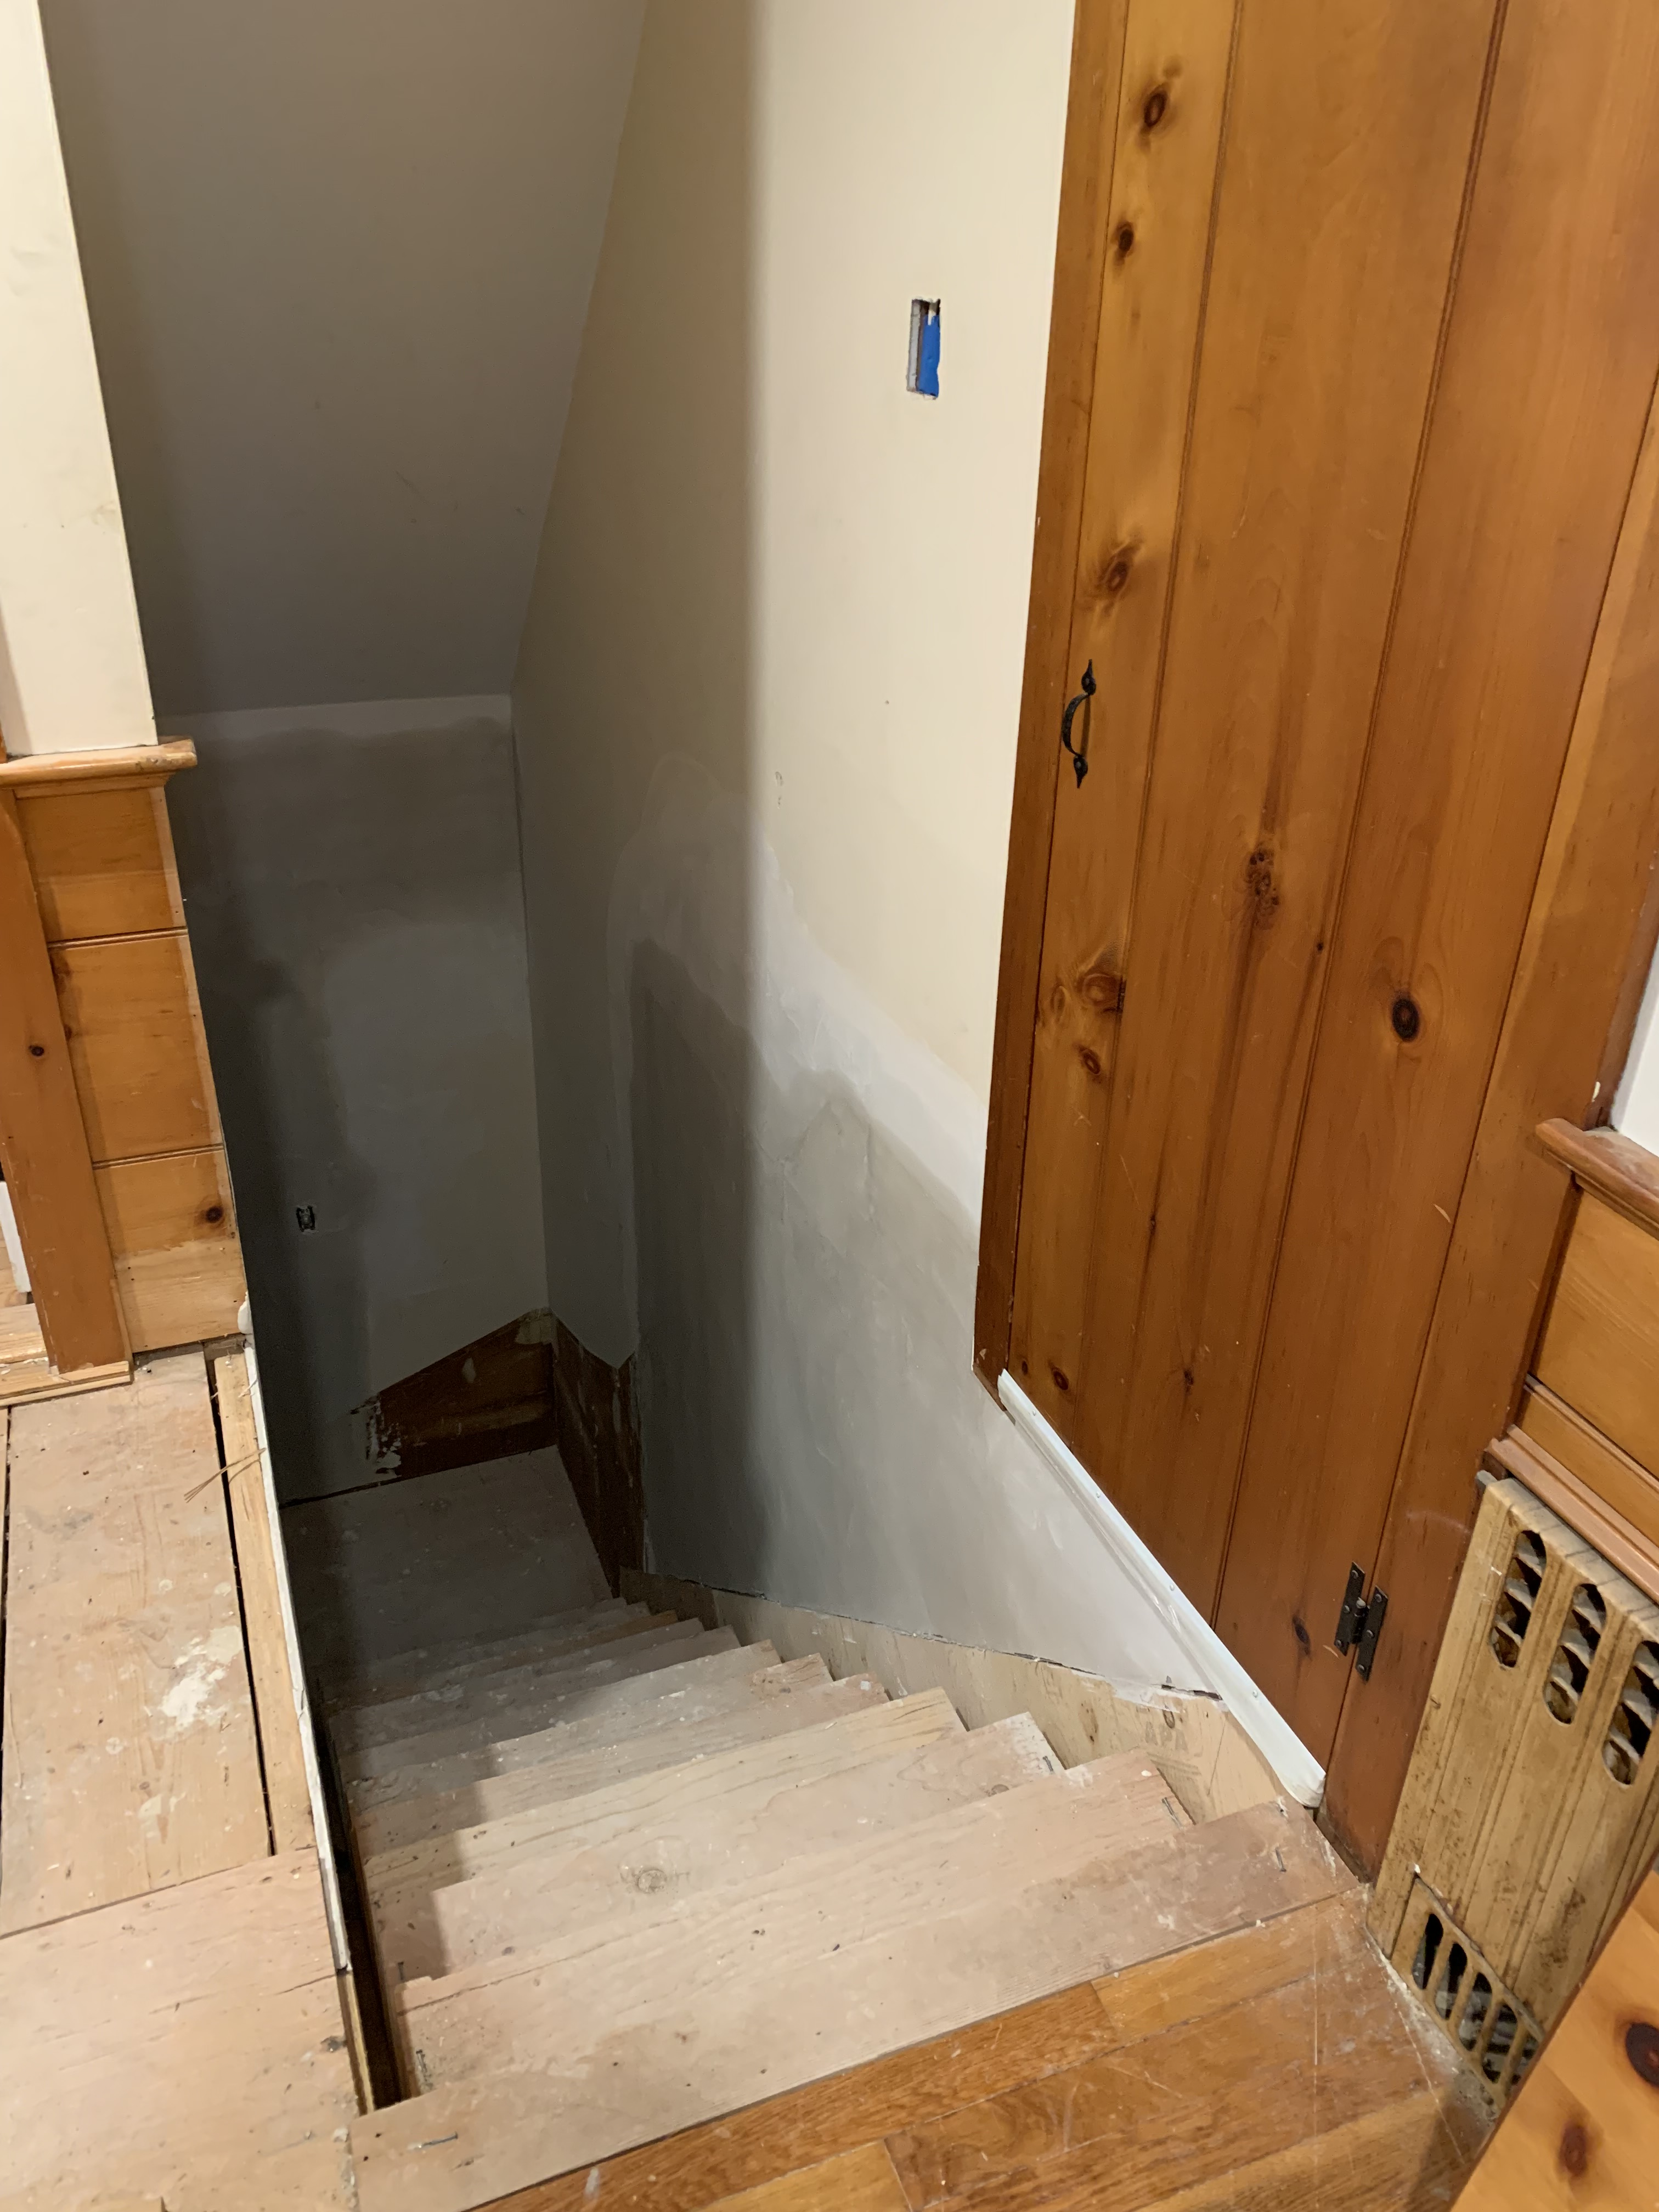
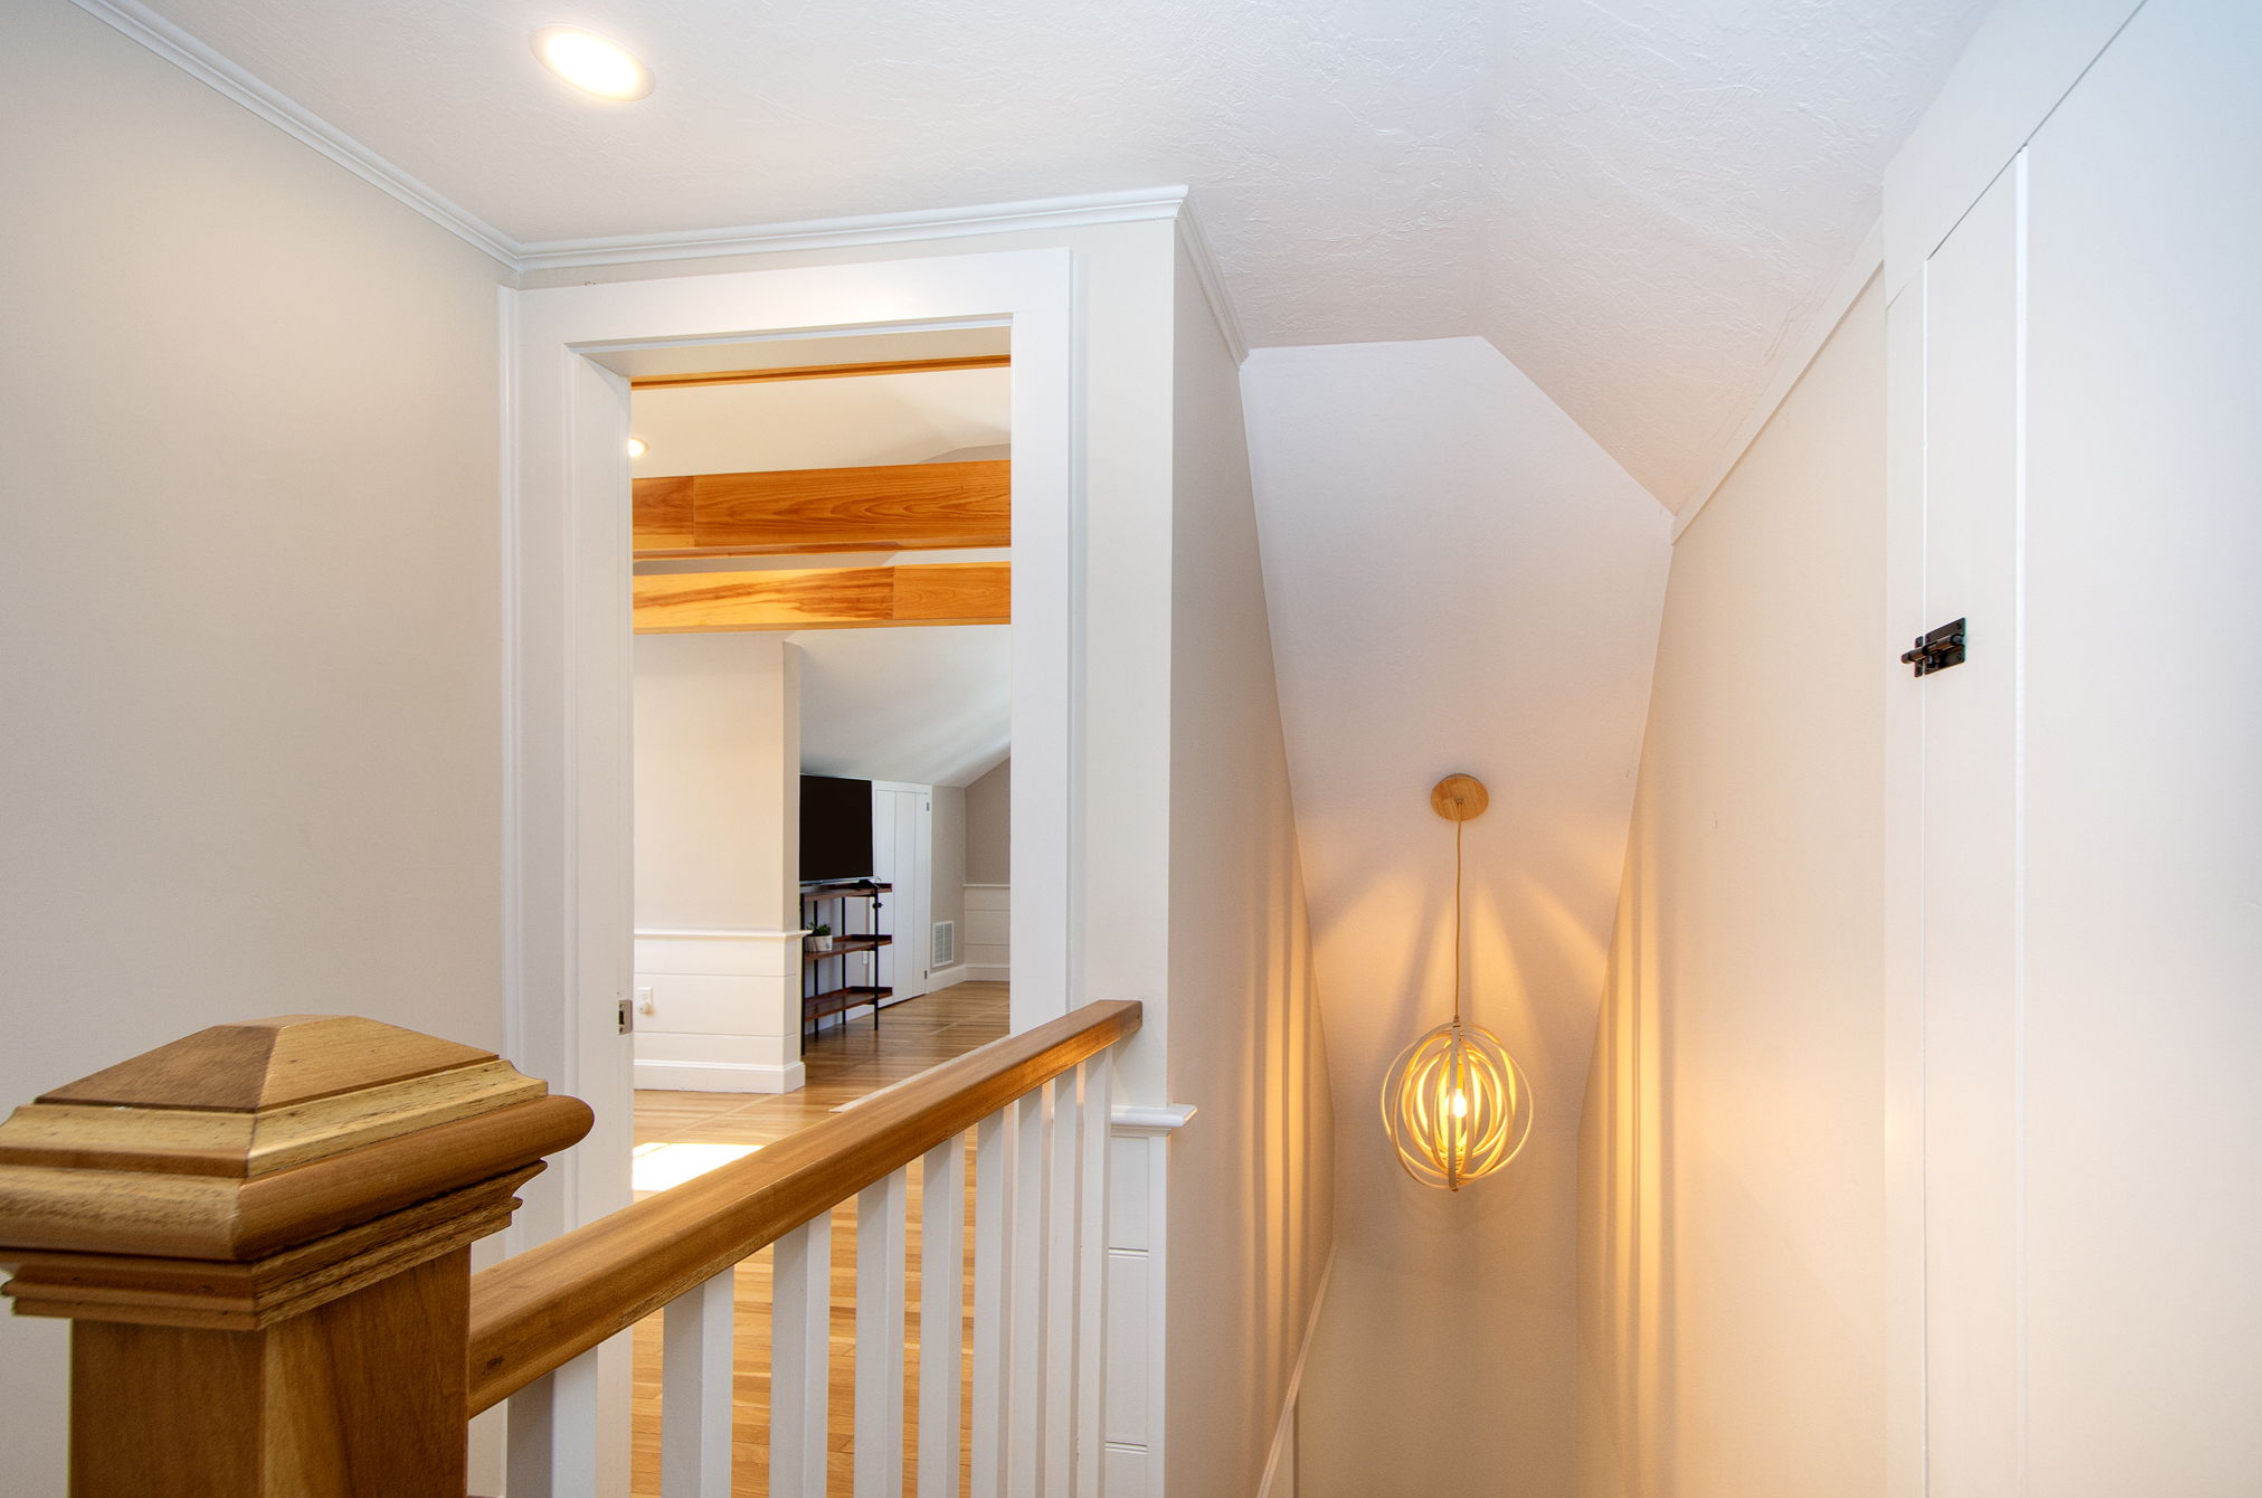
The former stairwell between the main and upper floors was, in a word, precarious. It was locked off, curved, narrow, and steep – definitely not “to code”!! (I really wish I could find a picture of it in full. Seriously, you have no idea.) We had an architect help us design an update to it, which naturally led us to another challenge: the landing. Now, normally, that wouldn’t be such an issue, but in this case, of course, the radiator is RIGHT at the top of the stairs, and right in front of it is the entry to a super handy attic storage space. SO. Our very clever GC devised a super innovative solution: he left the door where it was, and cut an almost-unnoticeable opening in the railing where you can enter from a stair below the landing. 🤯🧐 Oh and the new stairs are GORGEOUS (besides being safe)!
**BTW the GC, also our friend, is a genius at carpentry!
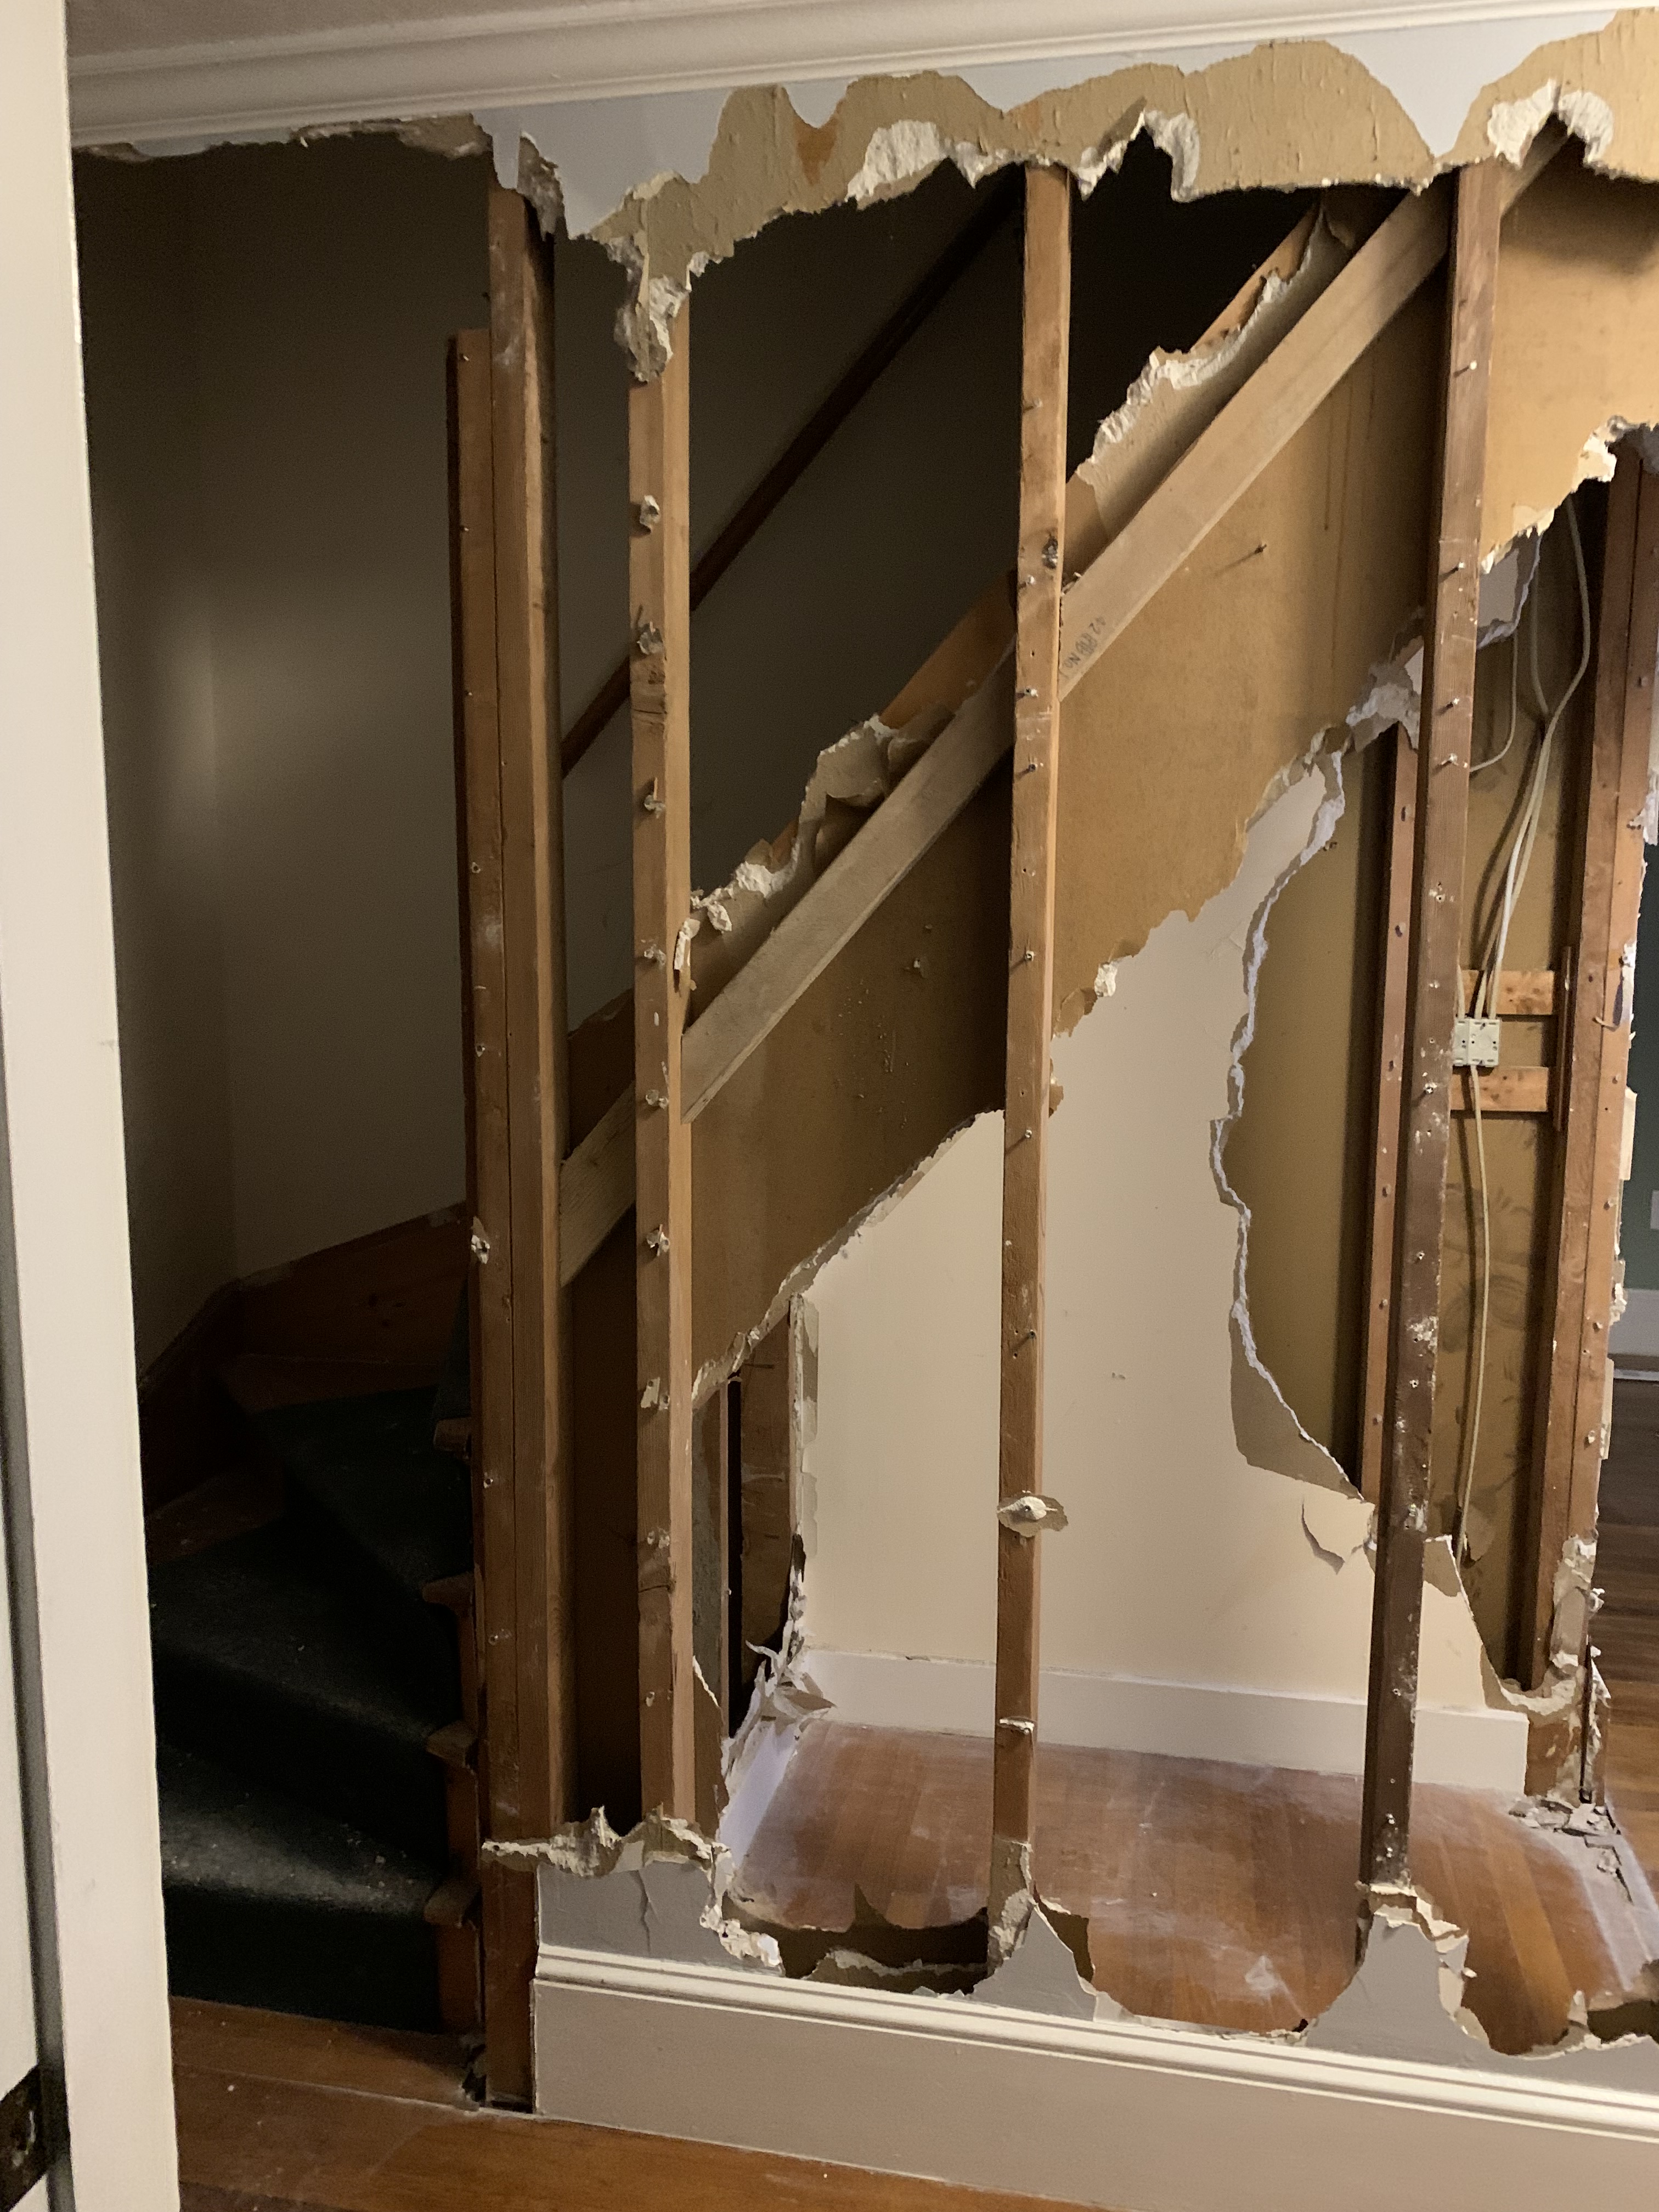
(well, I don’t have a pic of the stairwell before demo,
but these came close…)
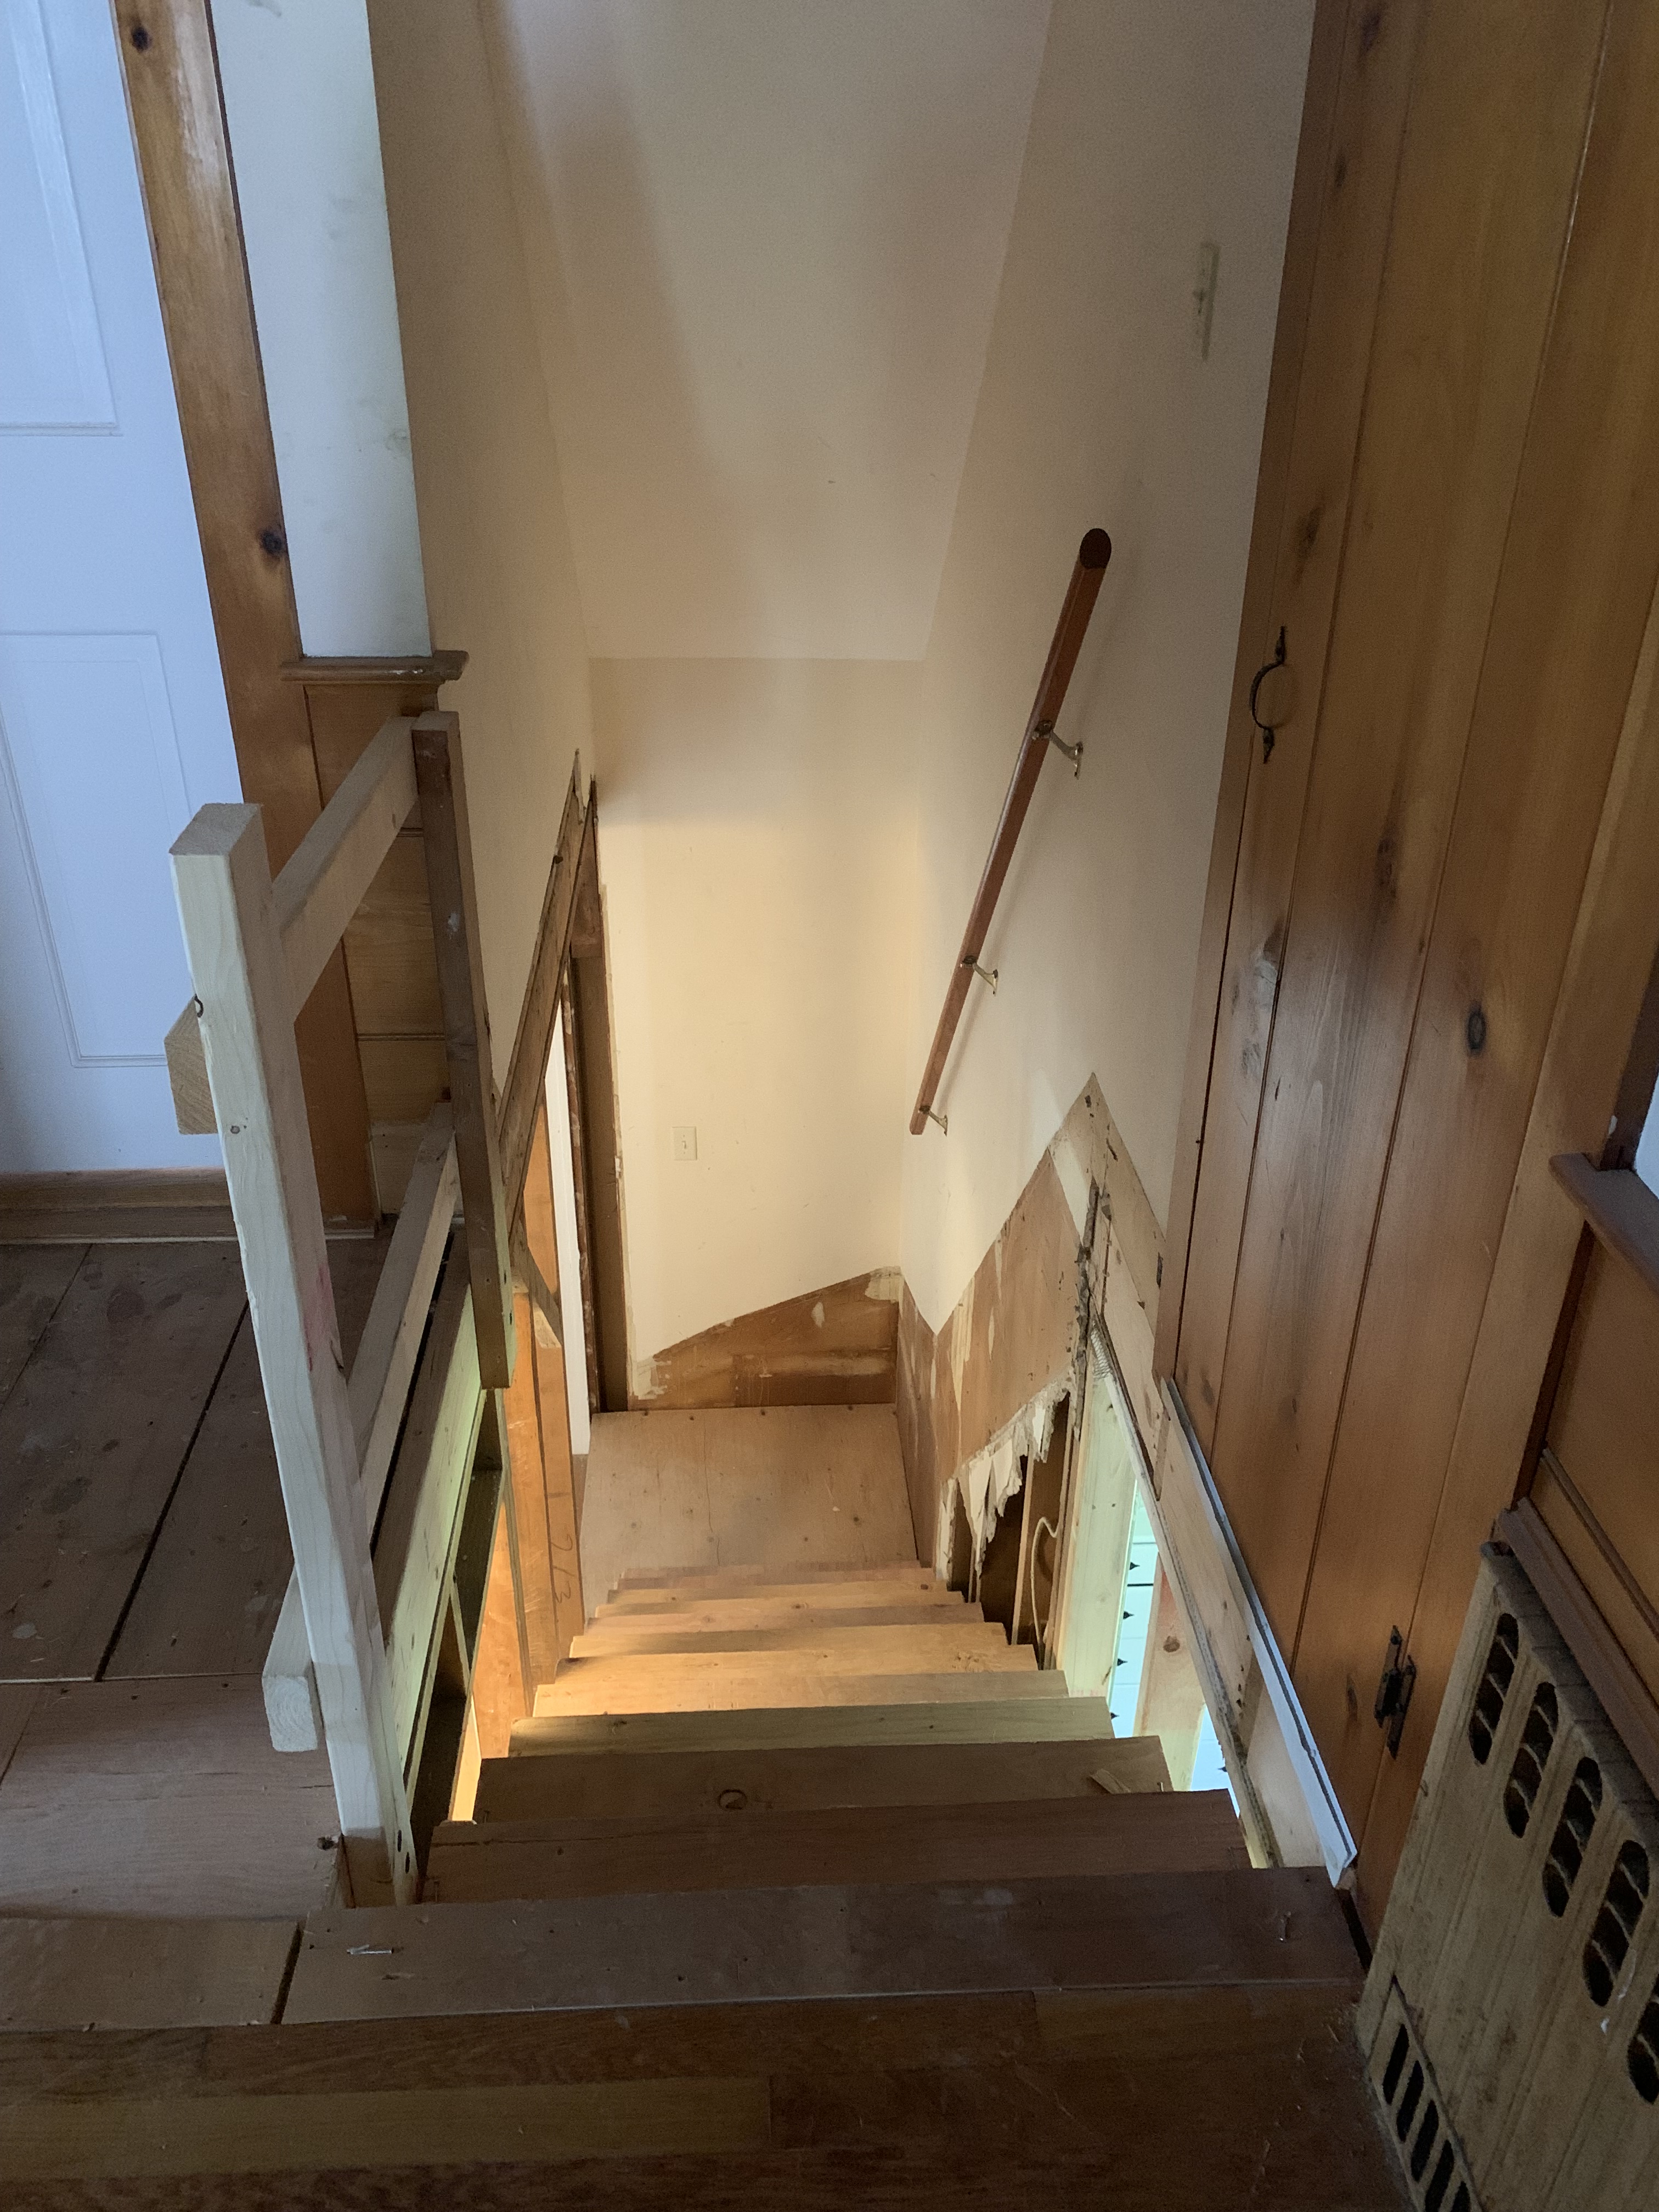

to the attic on the right! <wink>)
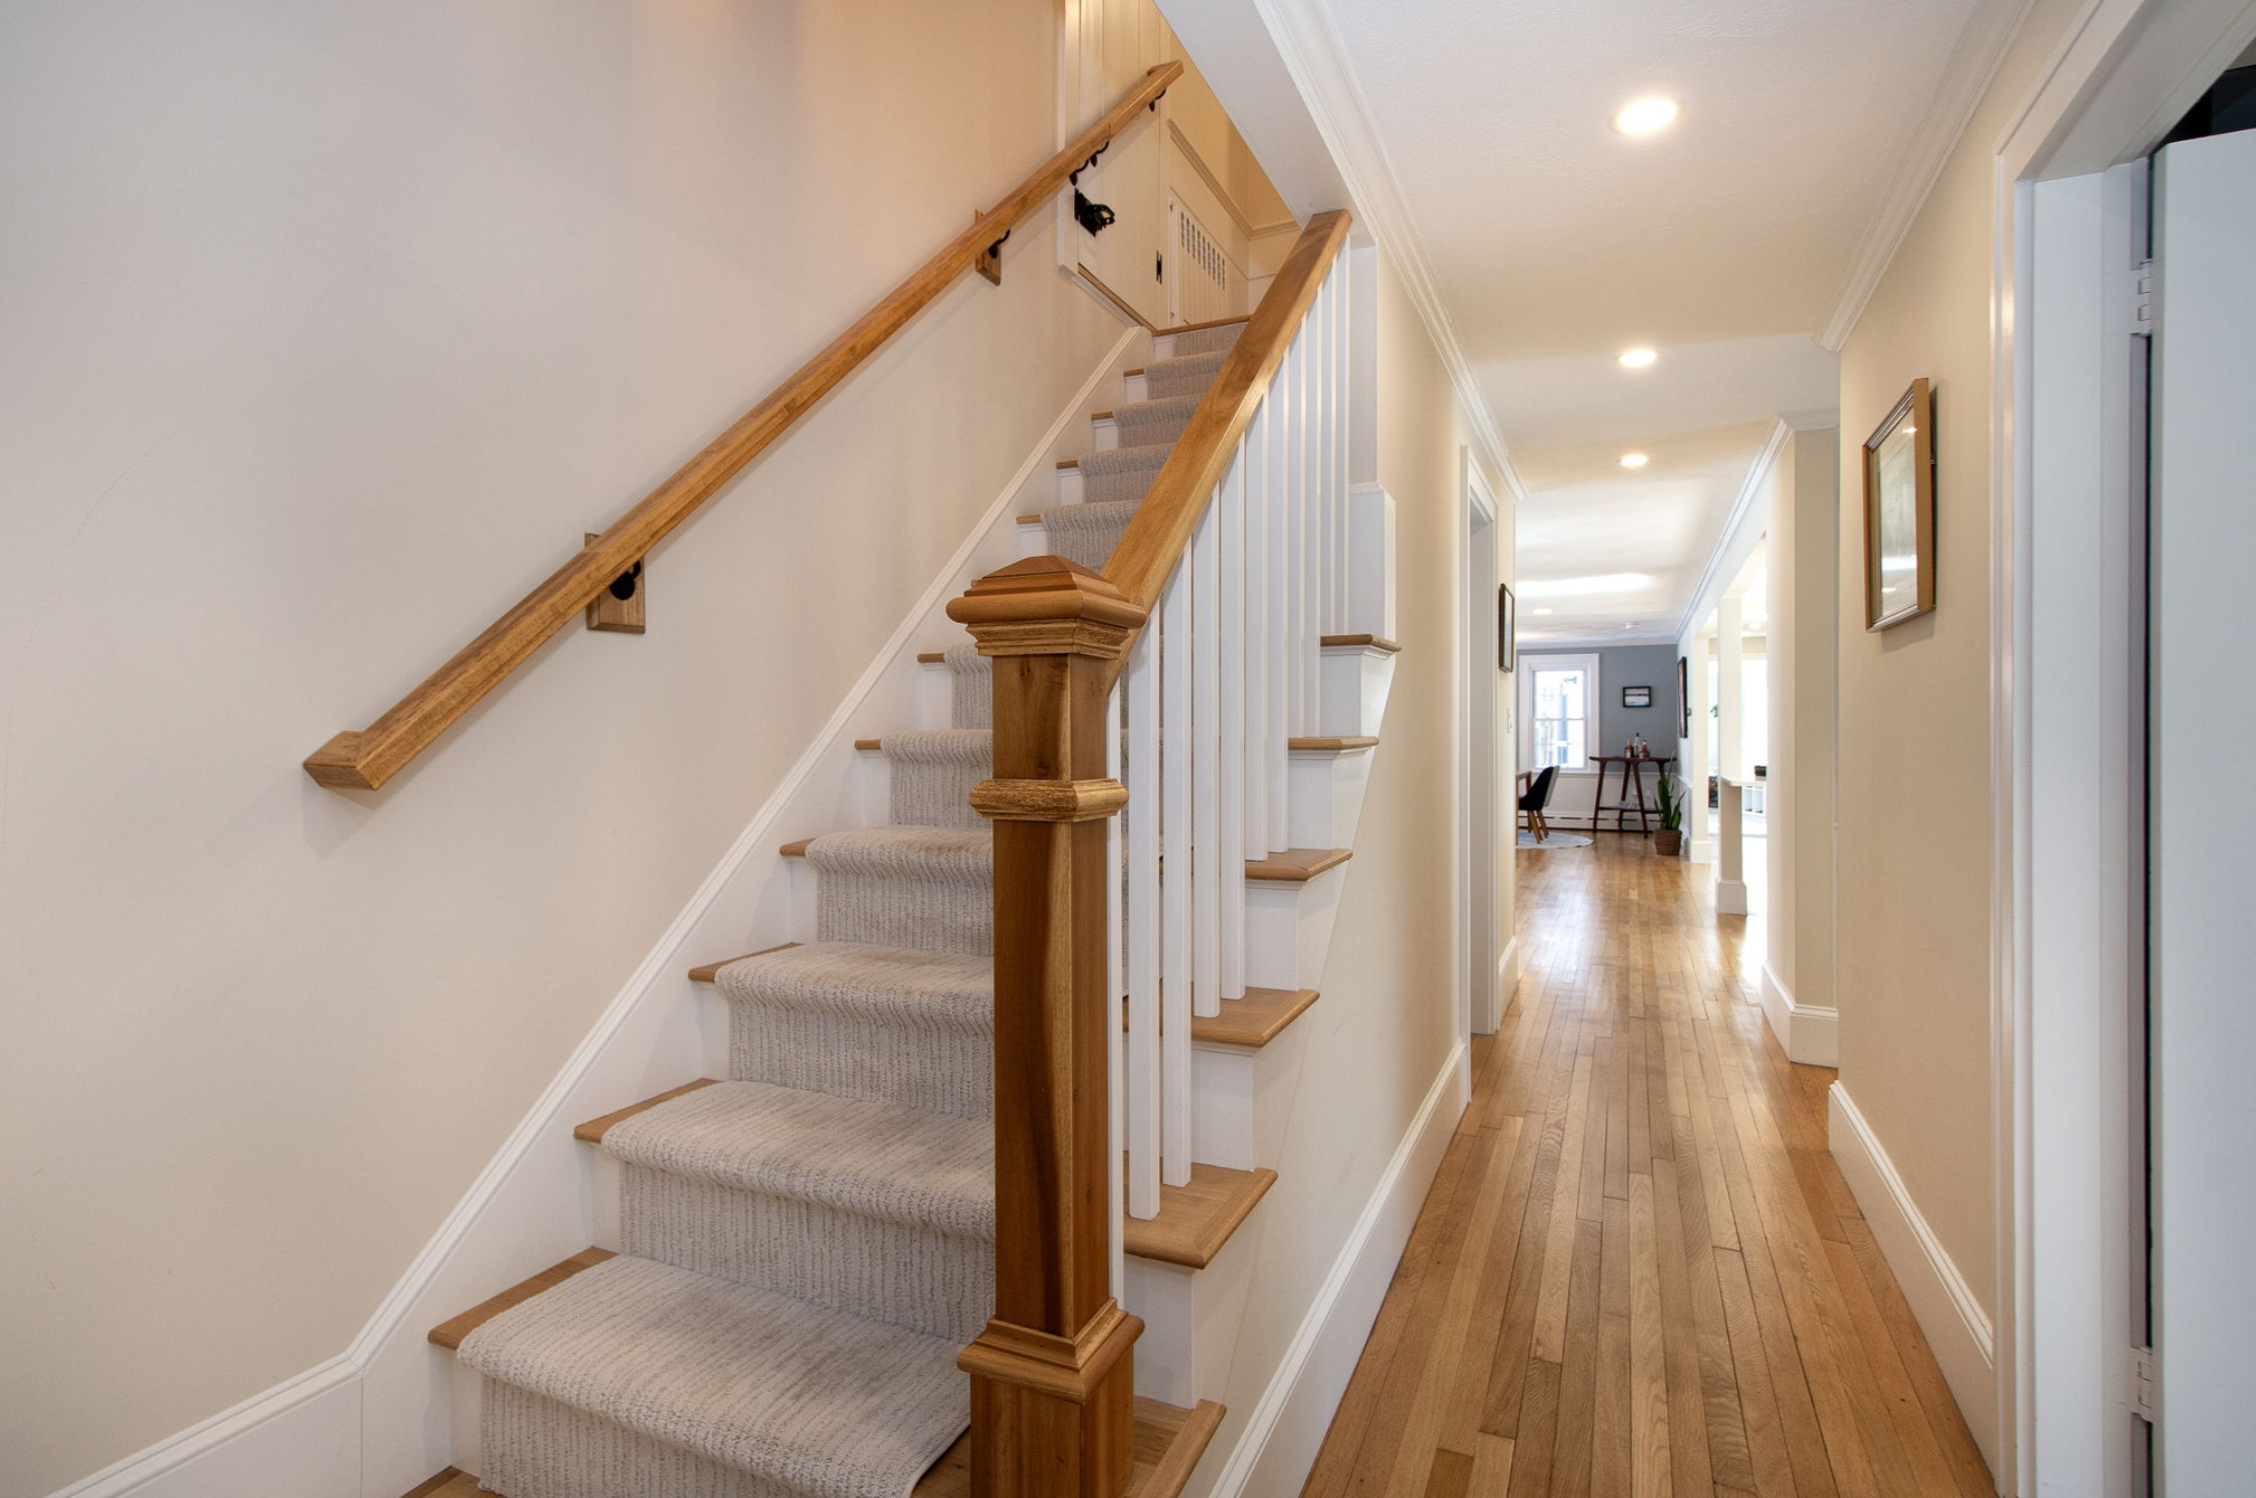
Lighter, brighter, safer, happier. ✨
Beneath the stairs, the first main floor bedroom lost a little space in bringing the stairwell up to code, but she gained a storage area. She’s snug, so best suited for use as a study or nursery. The main floor primary suite is right across the hall.

built-ins with ugly hardware

AND NOW FOR MY FAV PART OF THE HOUSE…..🥁🥁🥁 (and prolly the best makeover 👀) I present:
THE MAIN FLOOR PRIMARY EN-SUITE BATH.
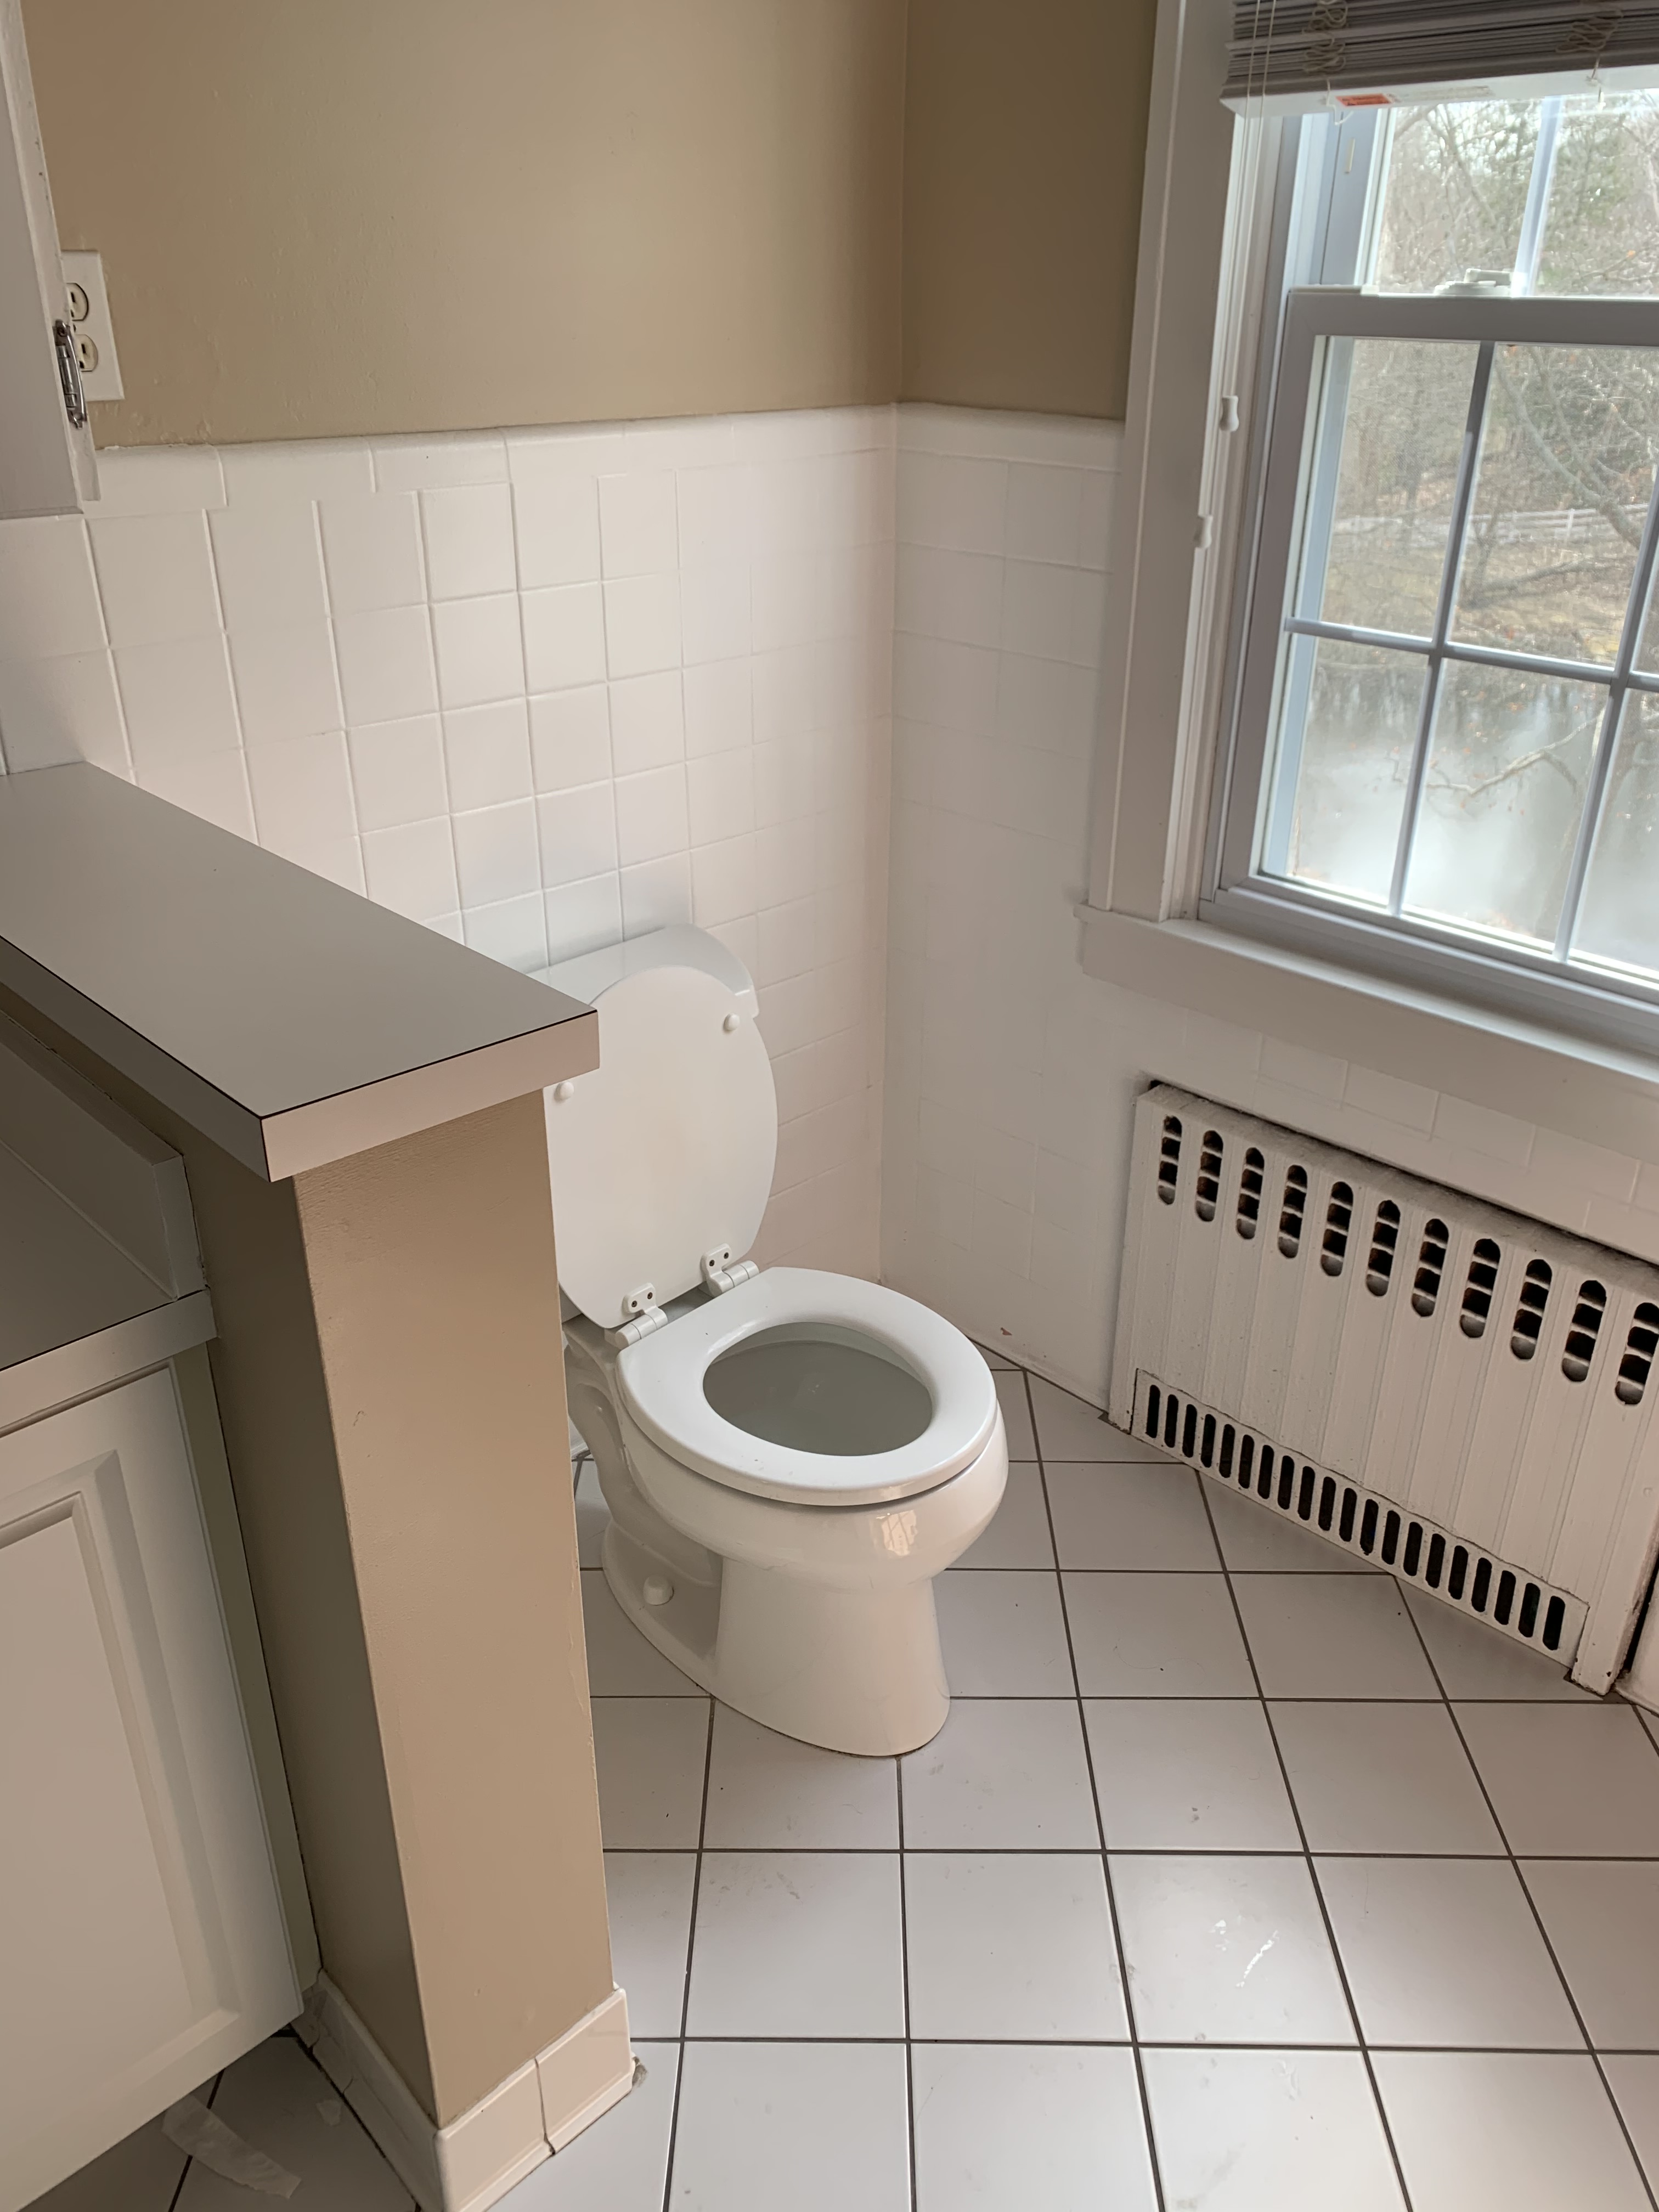
So … we borrowed a couple feet from the adjacent bedroom and closet – by doing so we expanded the passageway from the bath to the bedroom. We took it all down to the studs – removed the weird pink cast iron bath/shower thingy and the pony wall between the vanity and toilet, added a transom window on the south wall to bring in more sunshine – we even replaced the existing window above the toilet to increase energy efficiency. Then we created a curbless shower with an infinity drain and for privacy installed a frosted glass partial wall to maximize the sunlight in the room. We added a freestanding tub with its own dimmable pendant light to enhance relaxation while soaking, and then installed a stylish sliding door to gracefully avoid the bathtub. Sun-loving greenery adds the finishing touch. Here’s the result:
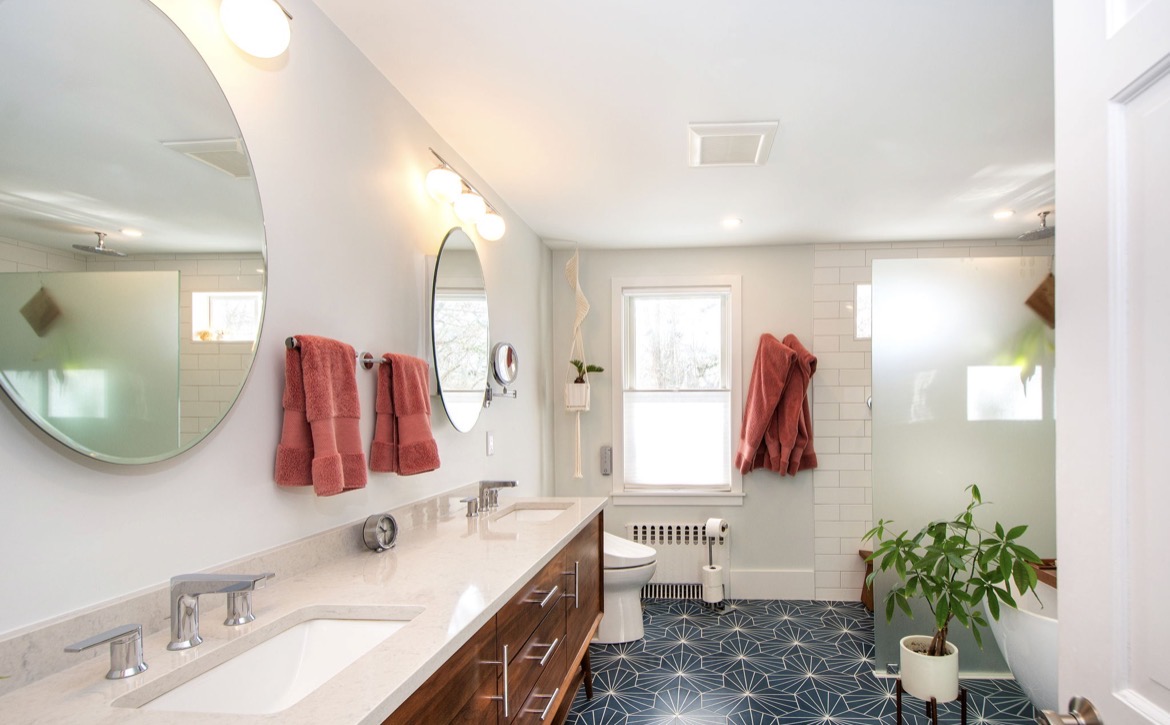
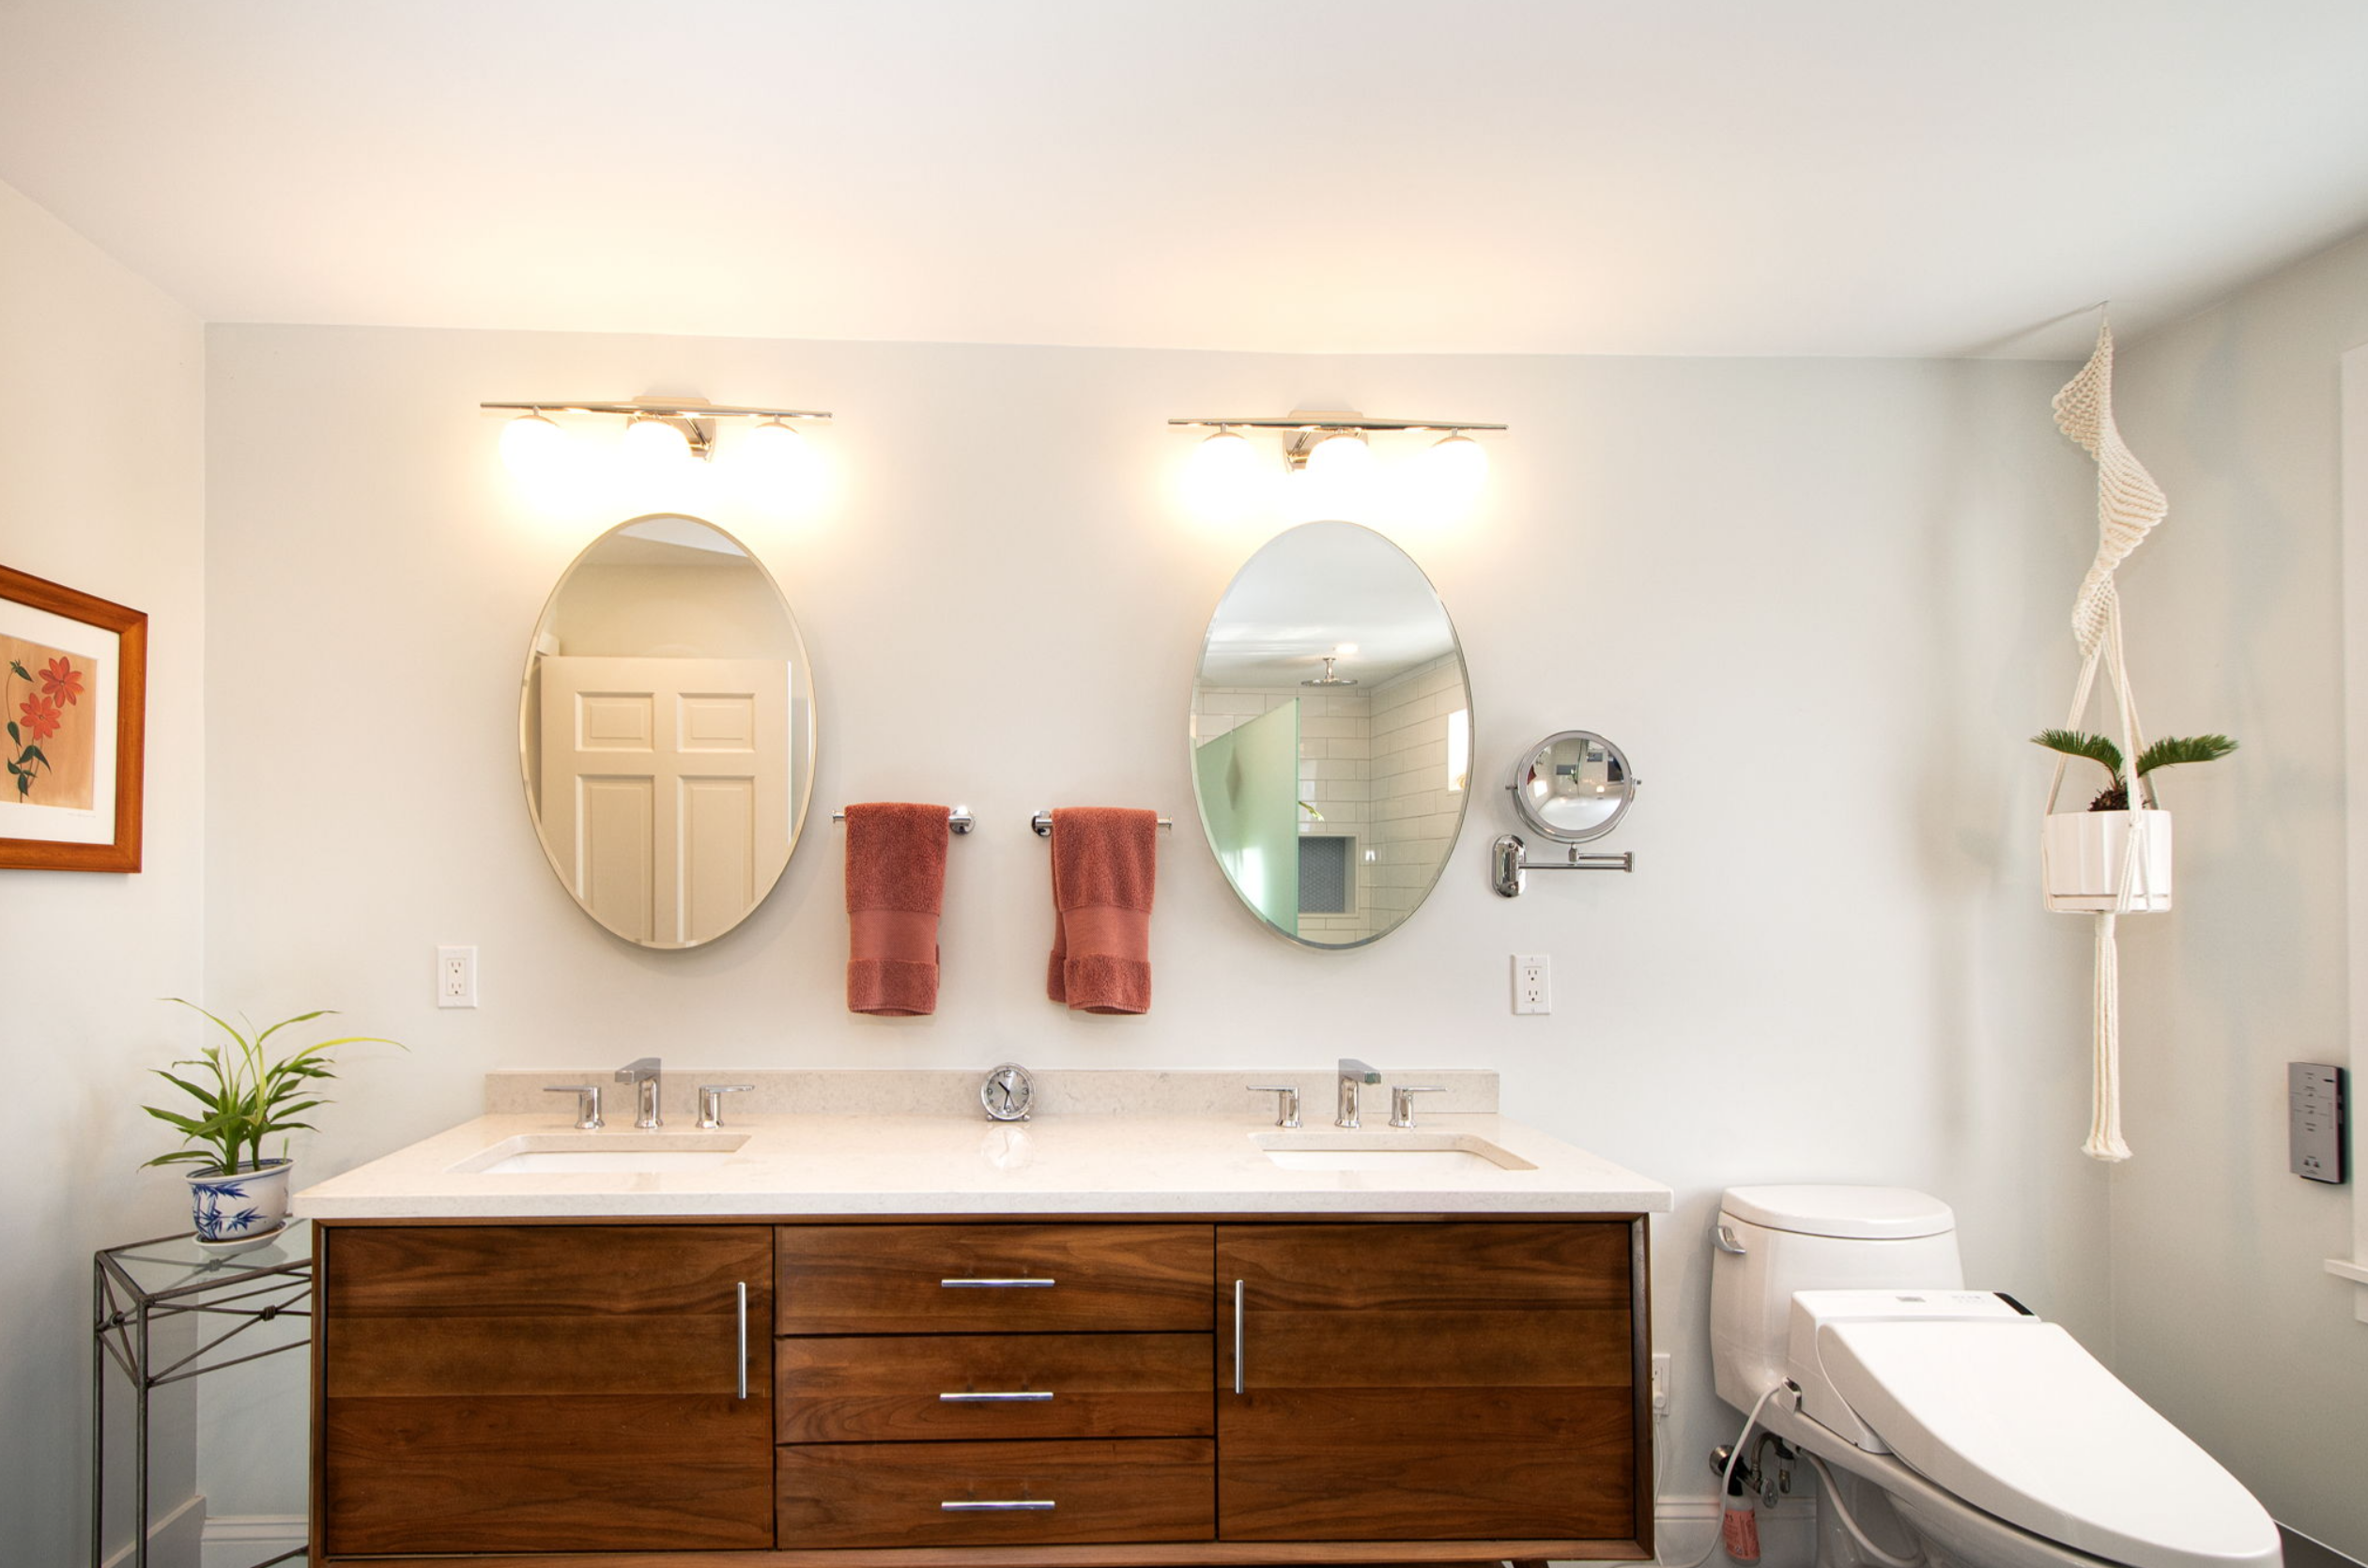
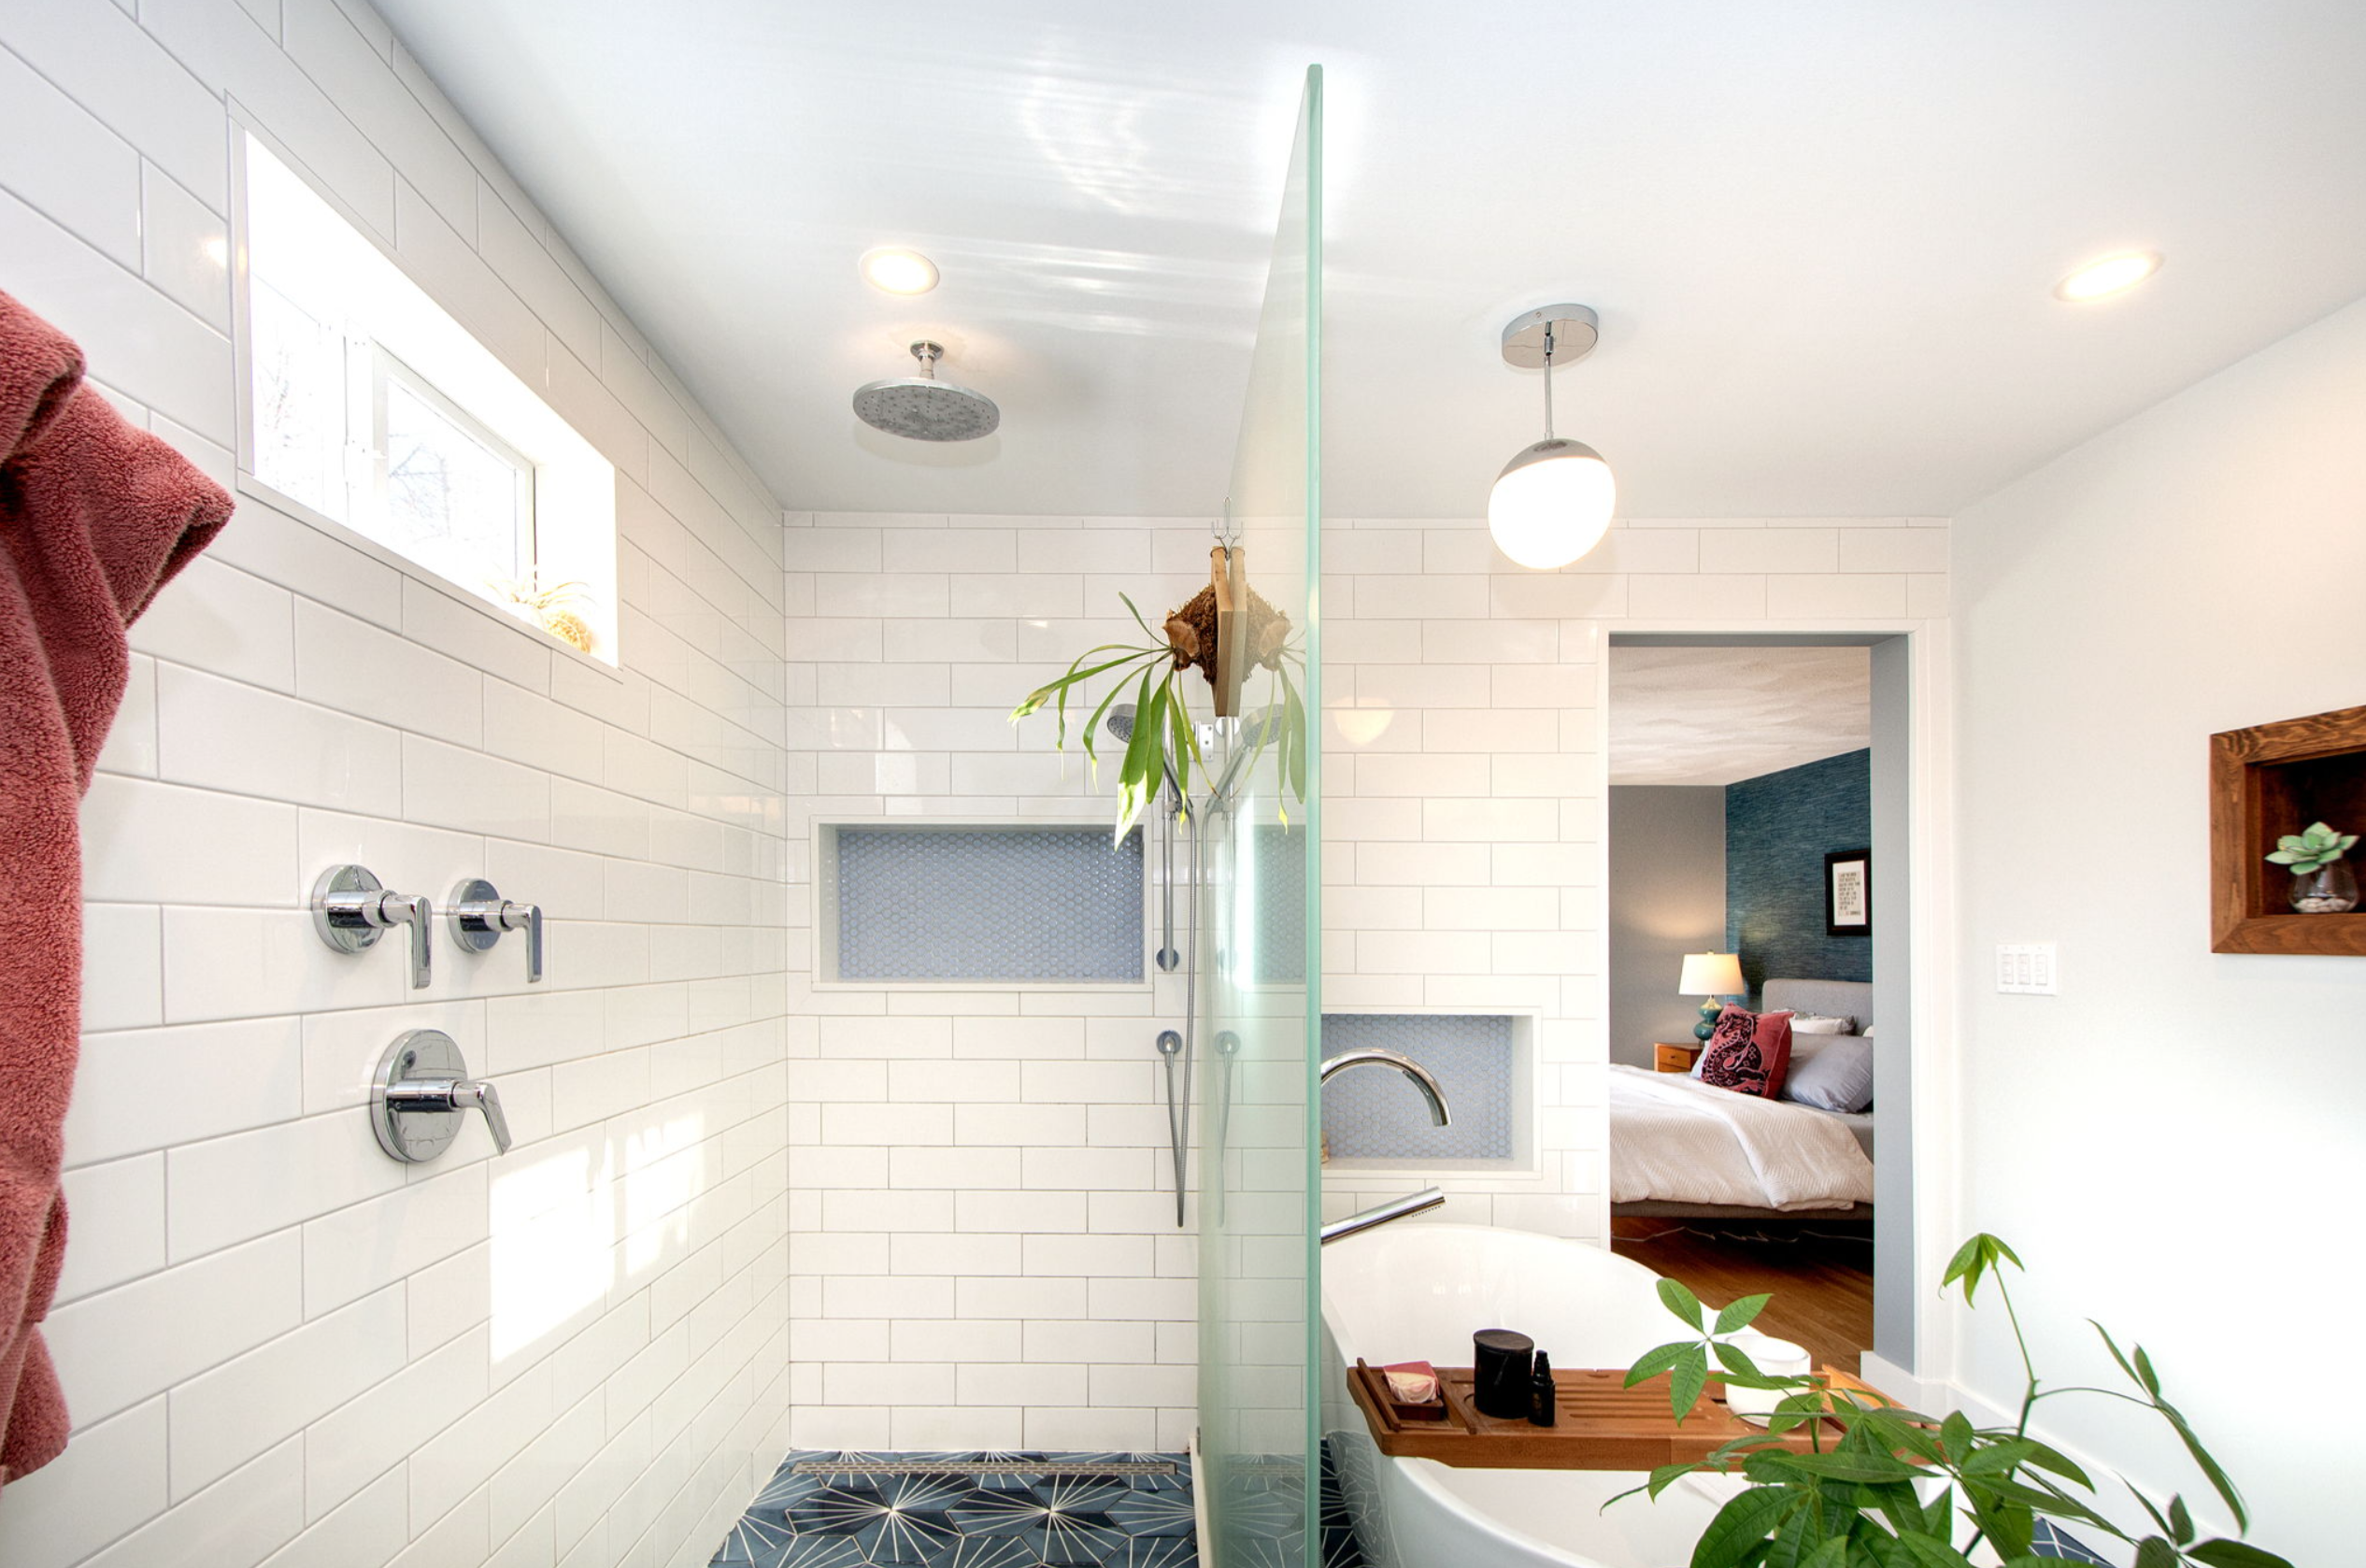
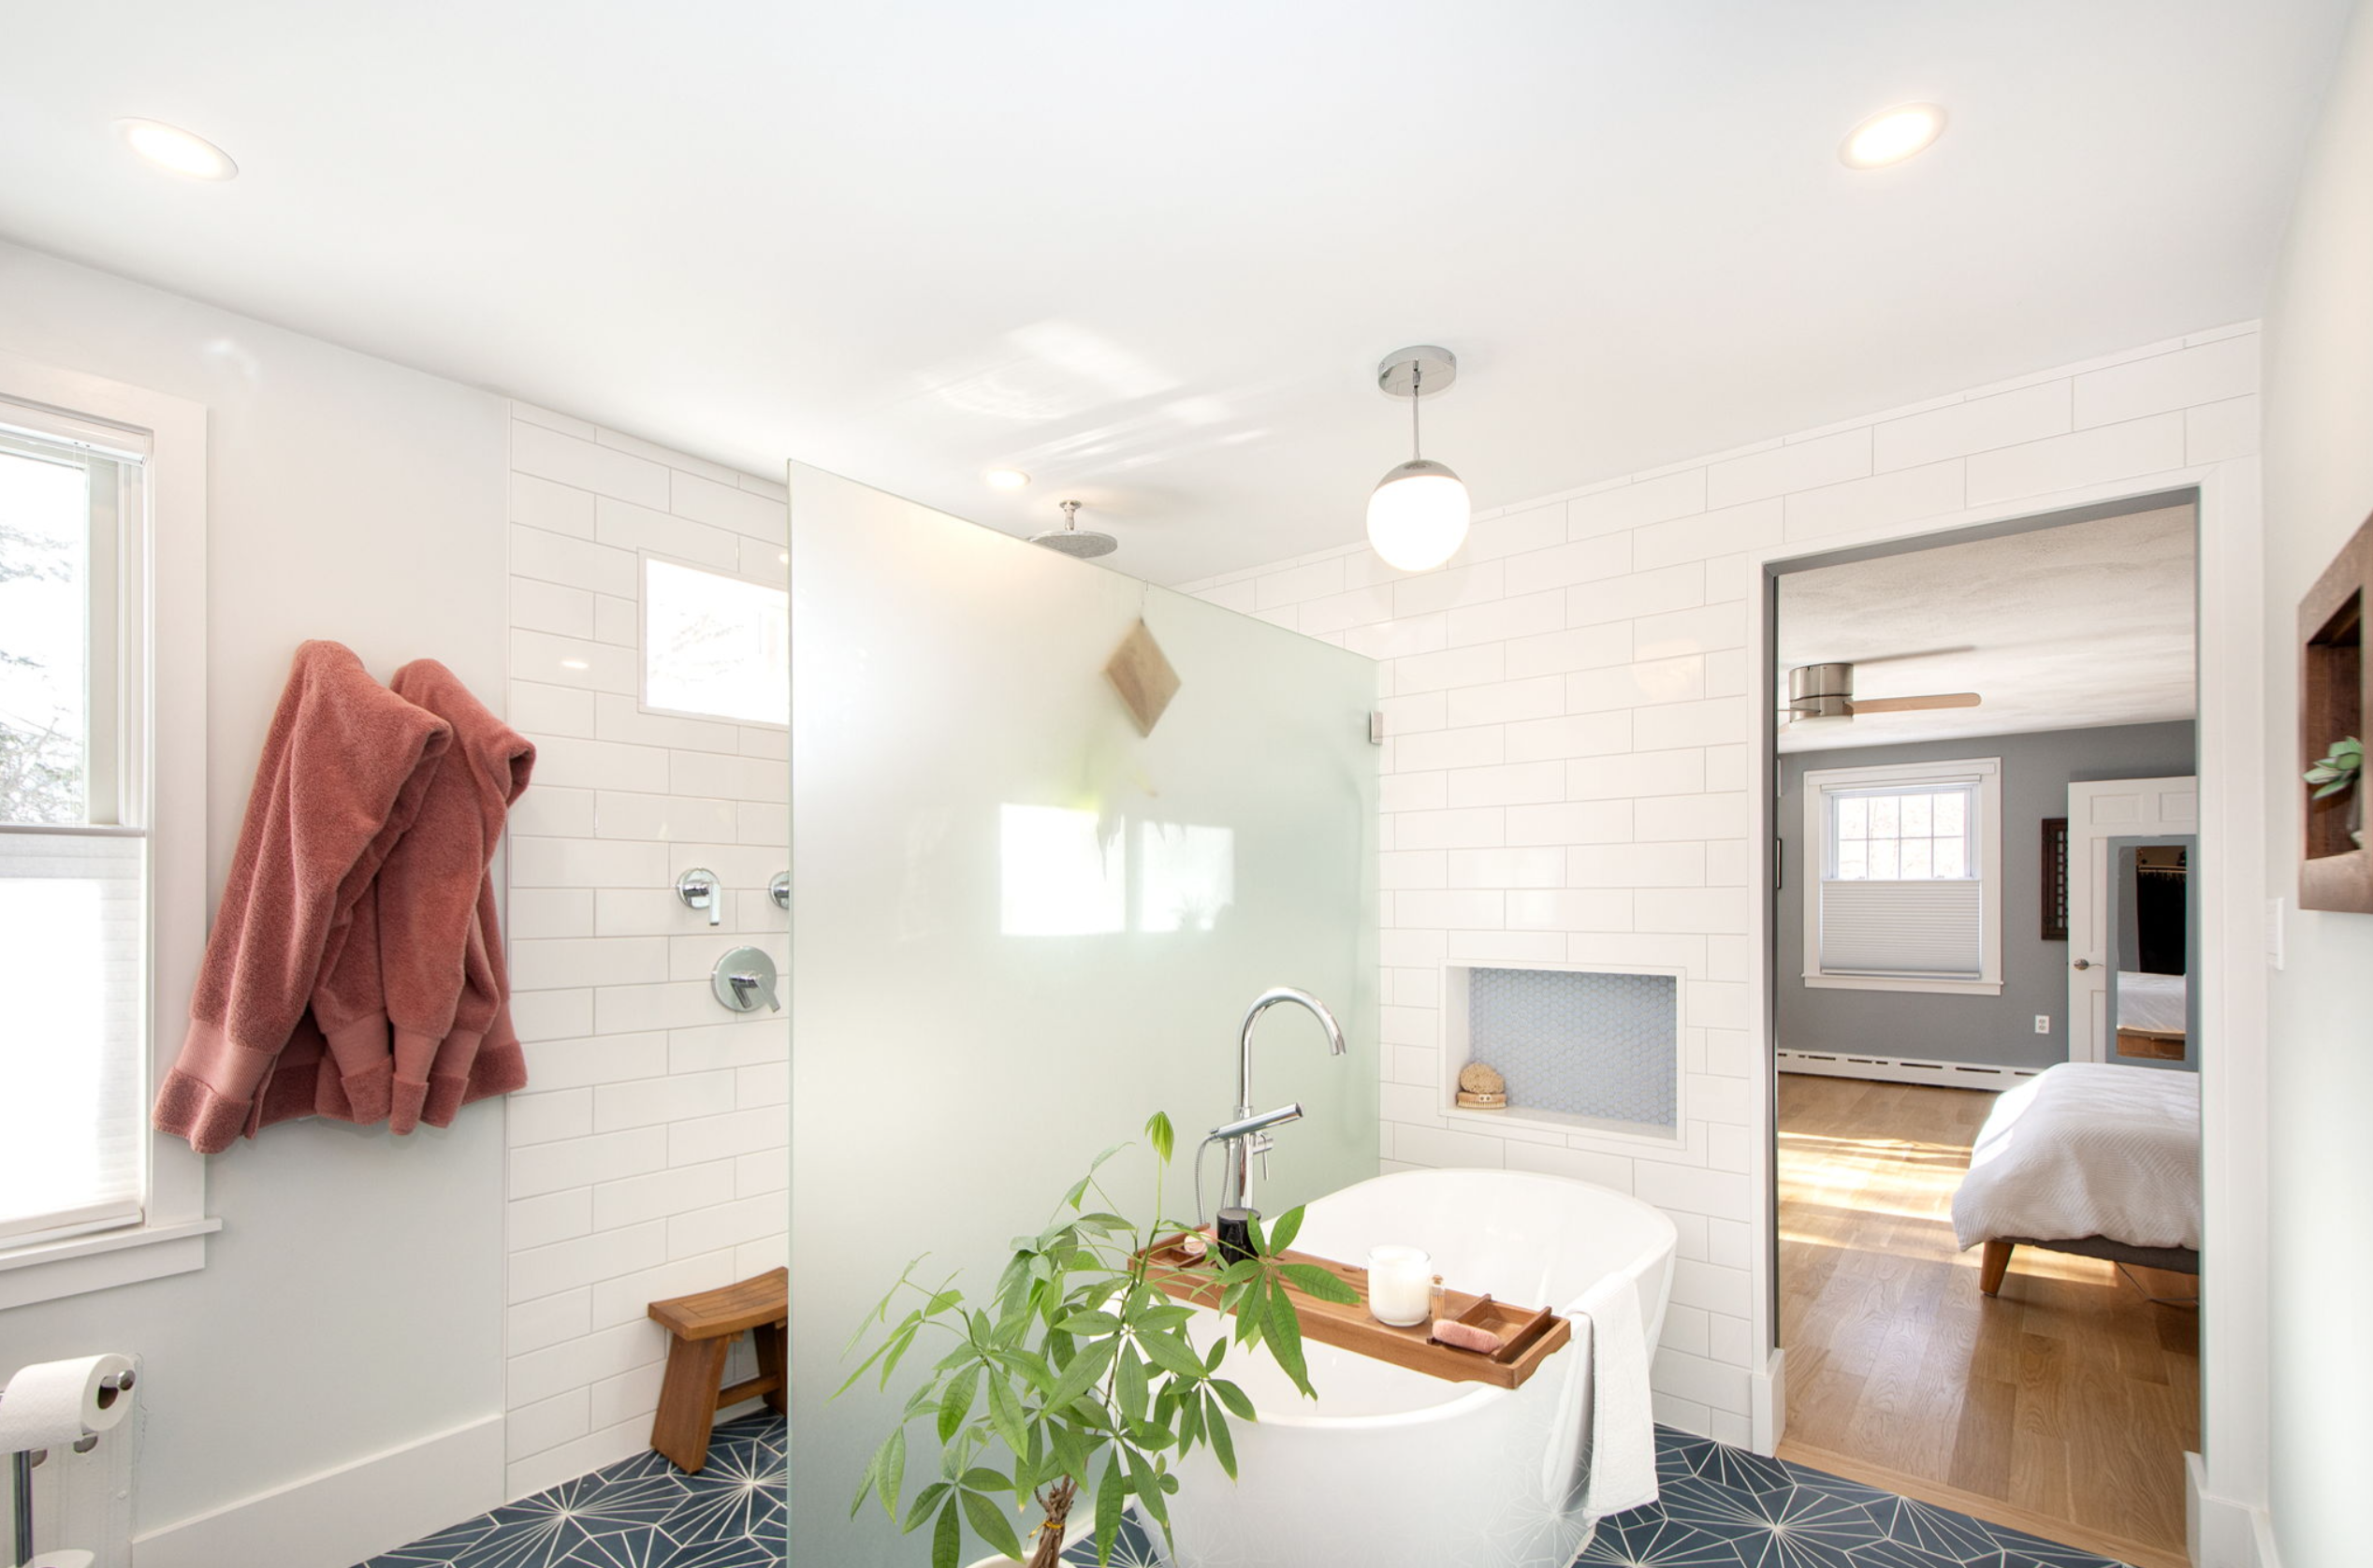
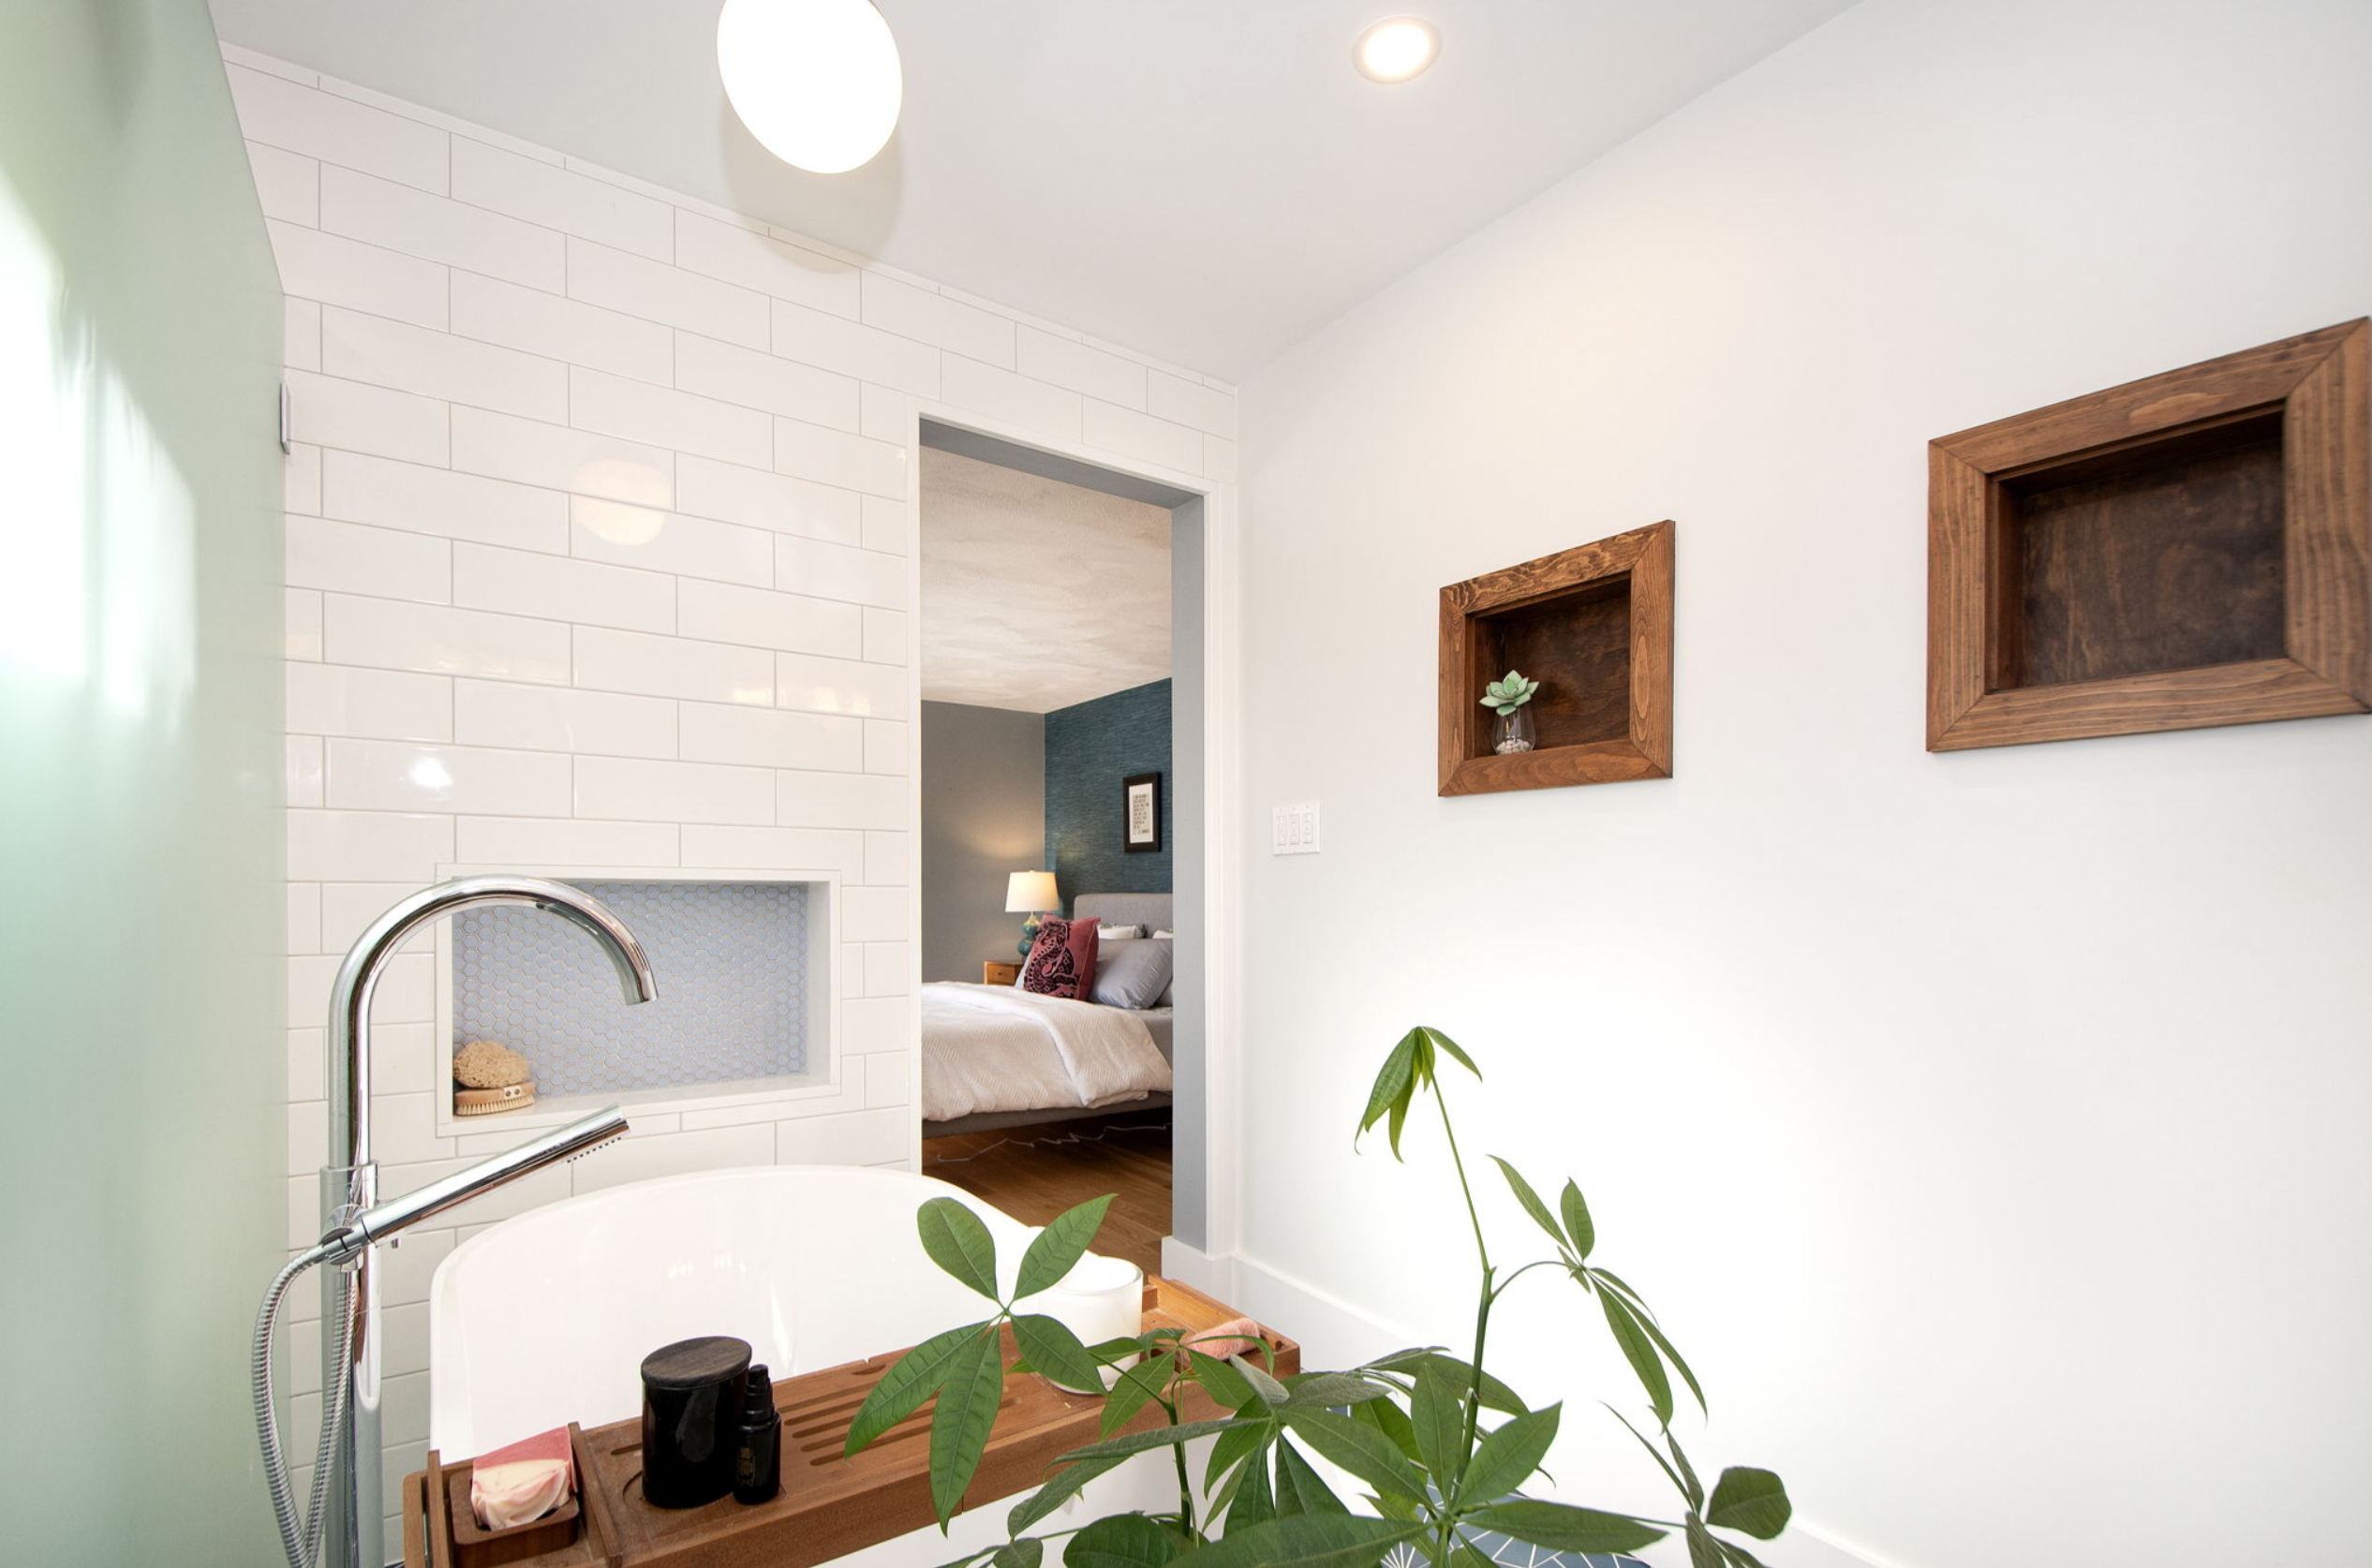
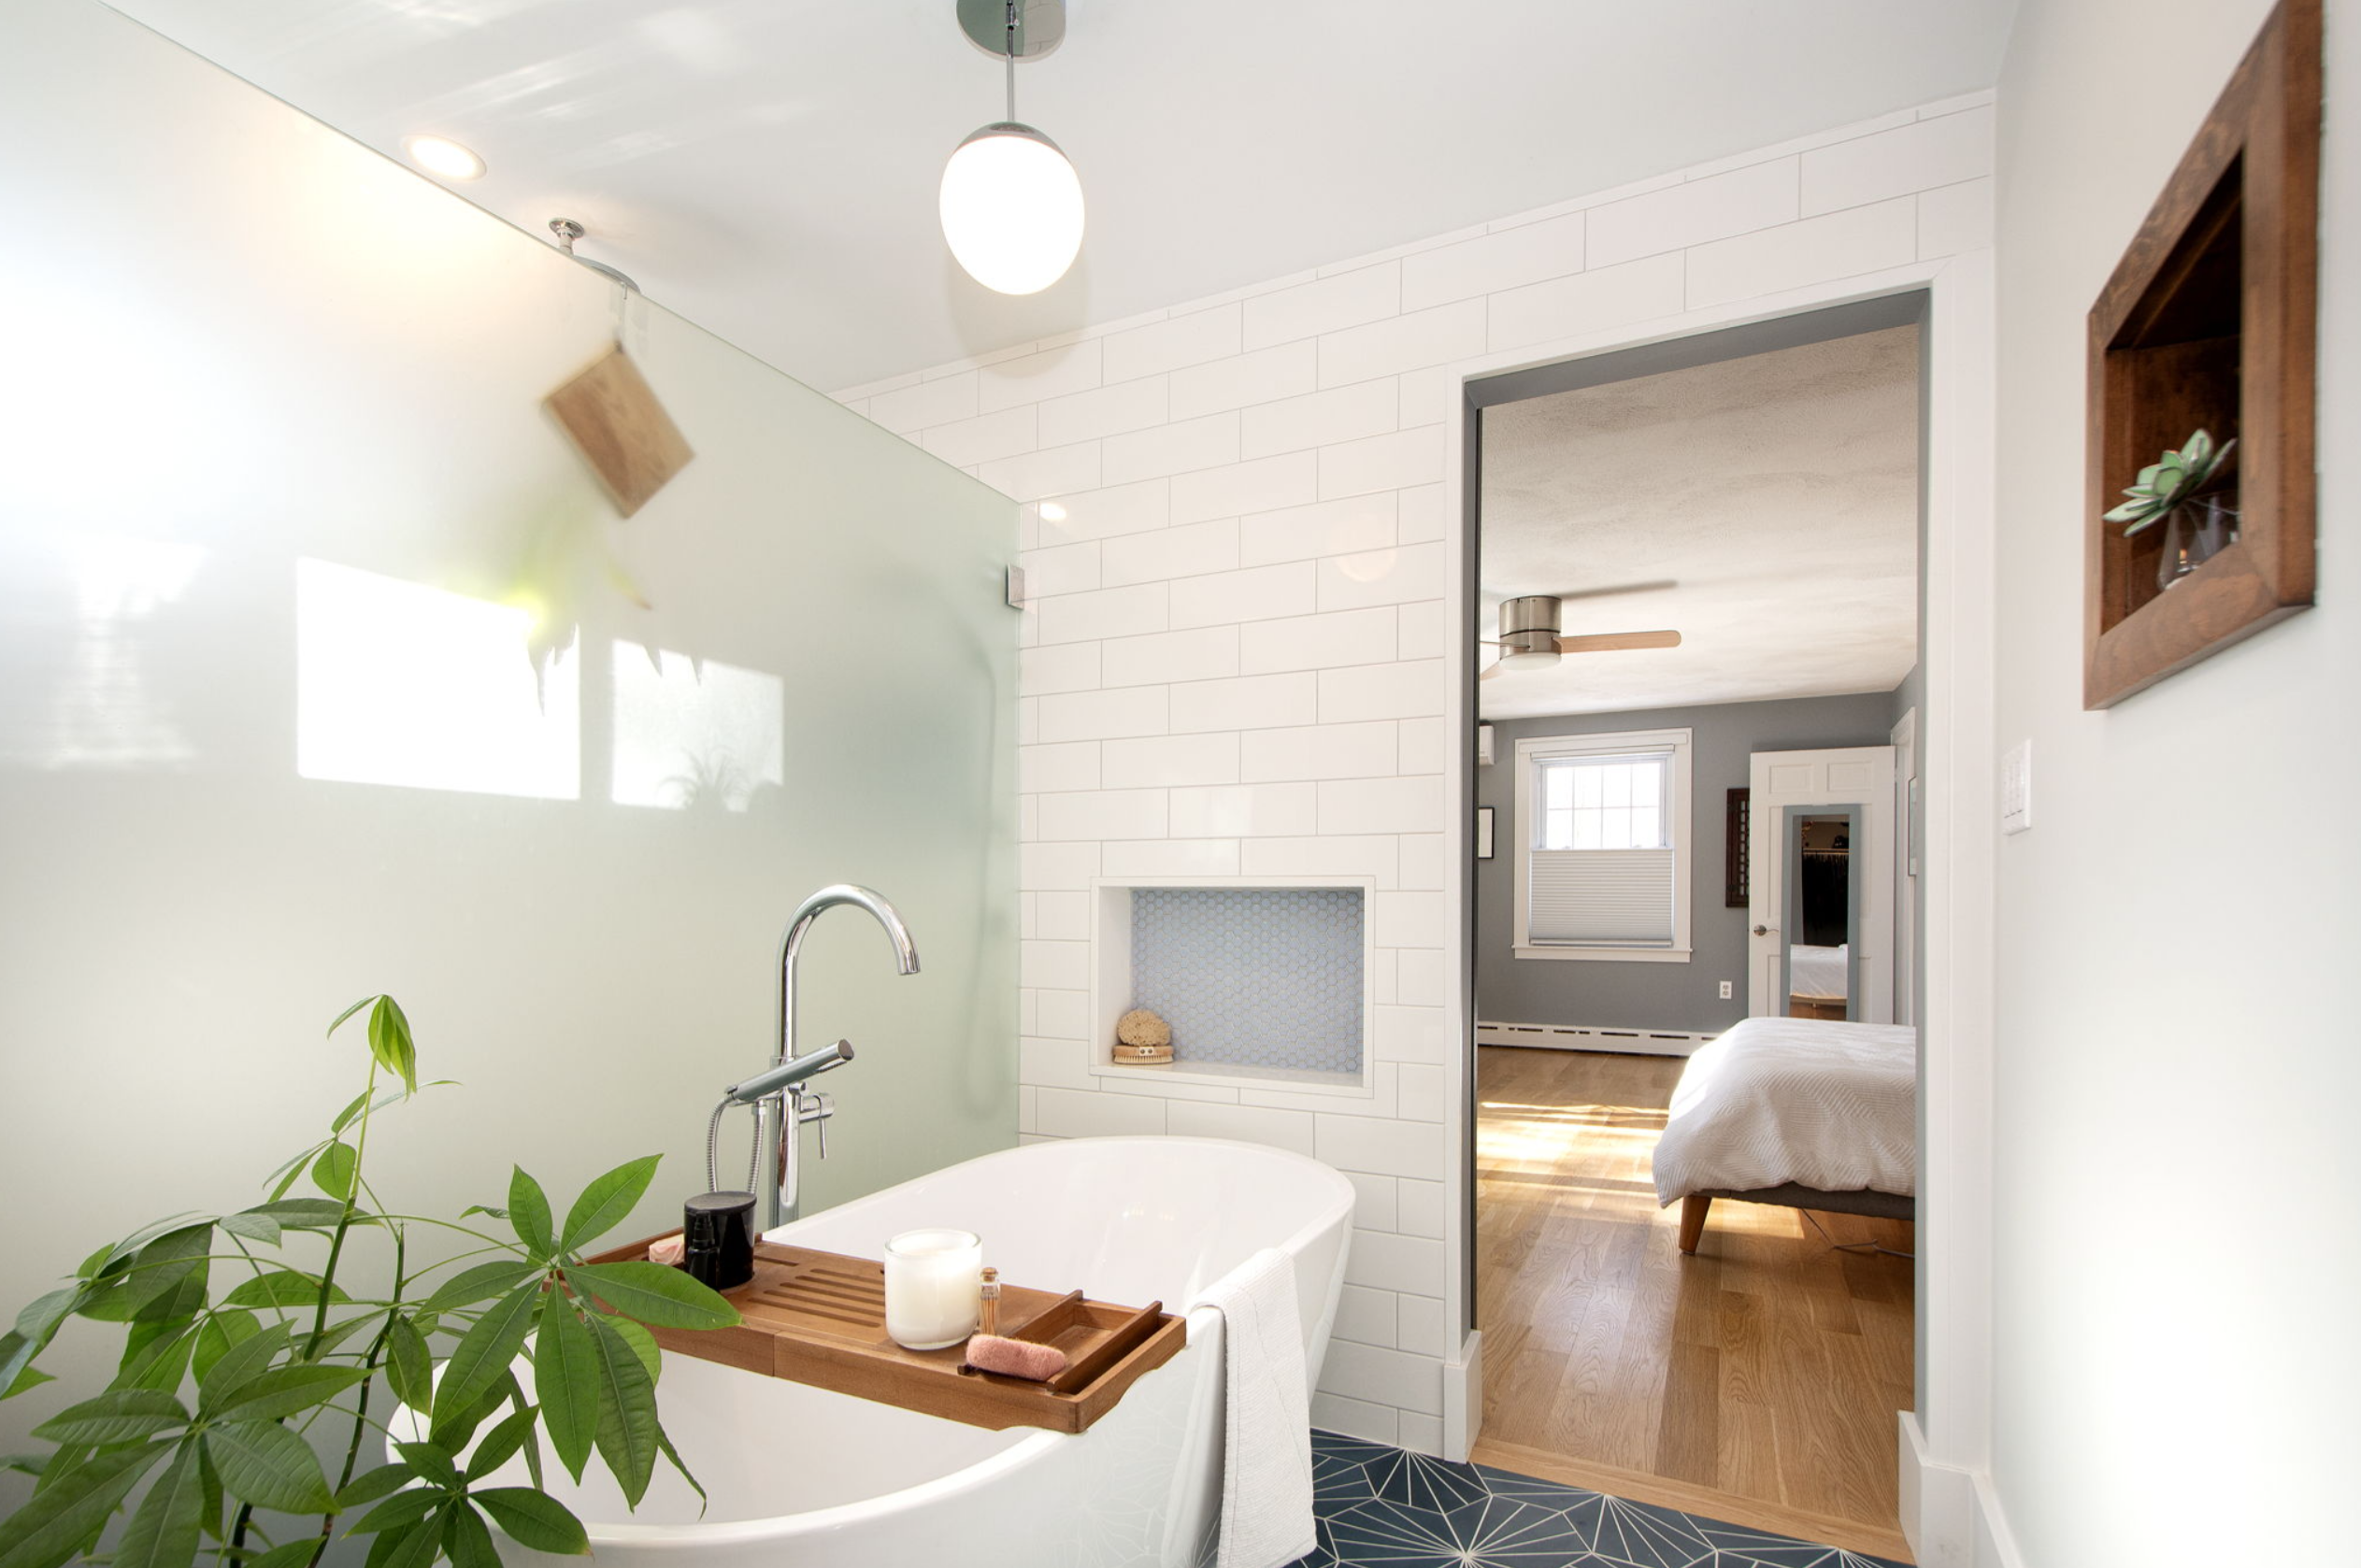

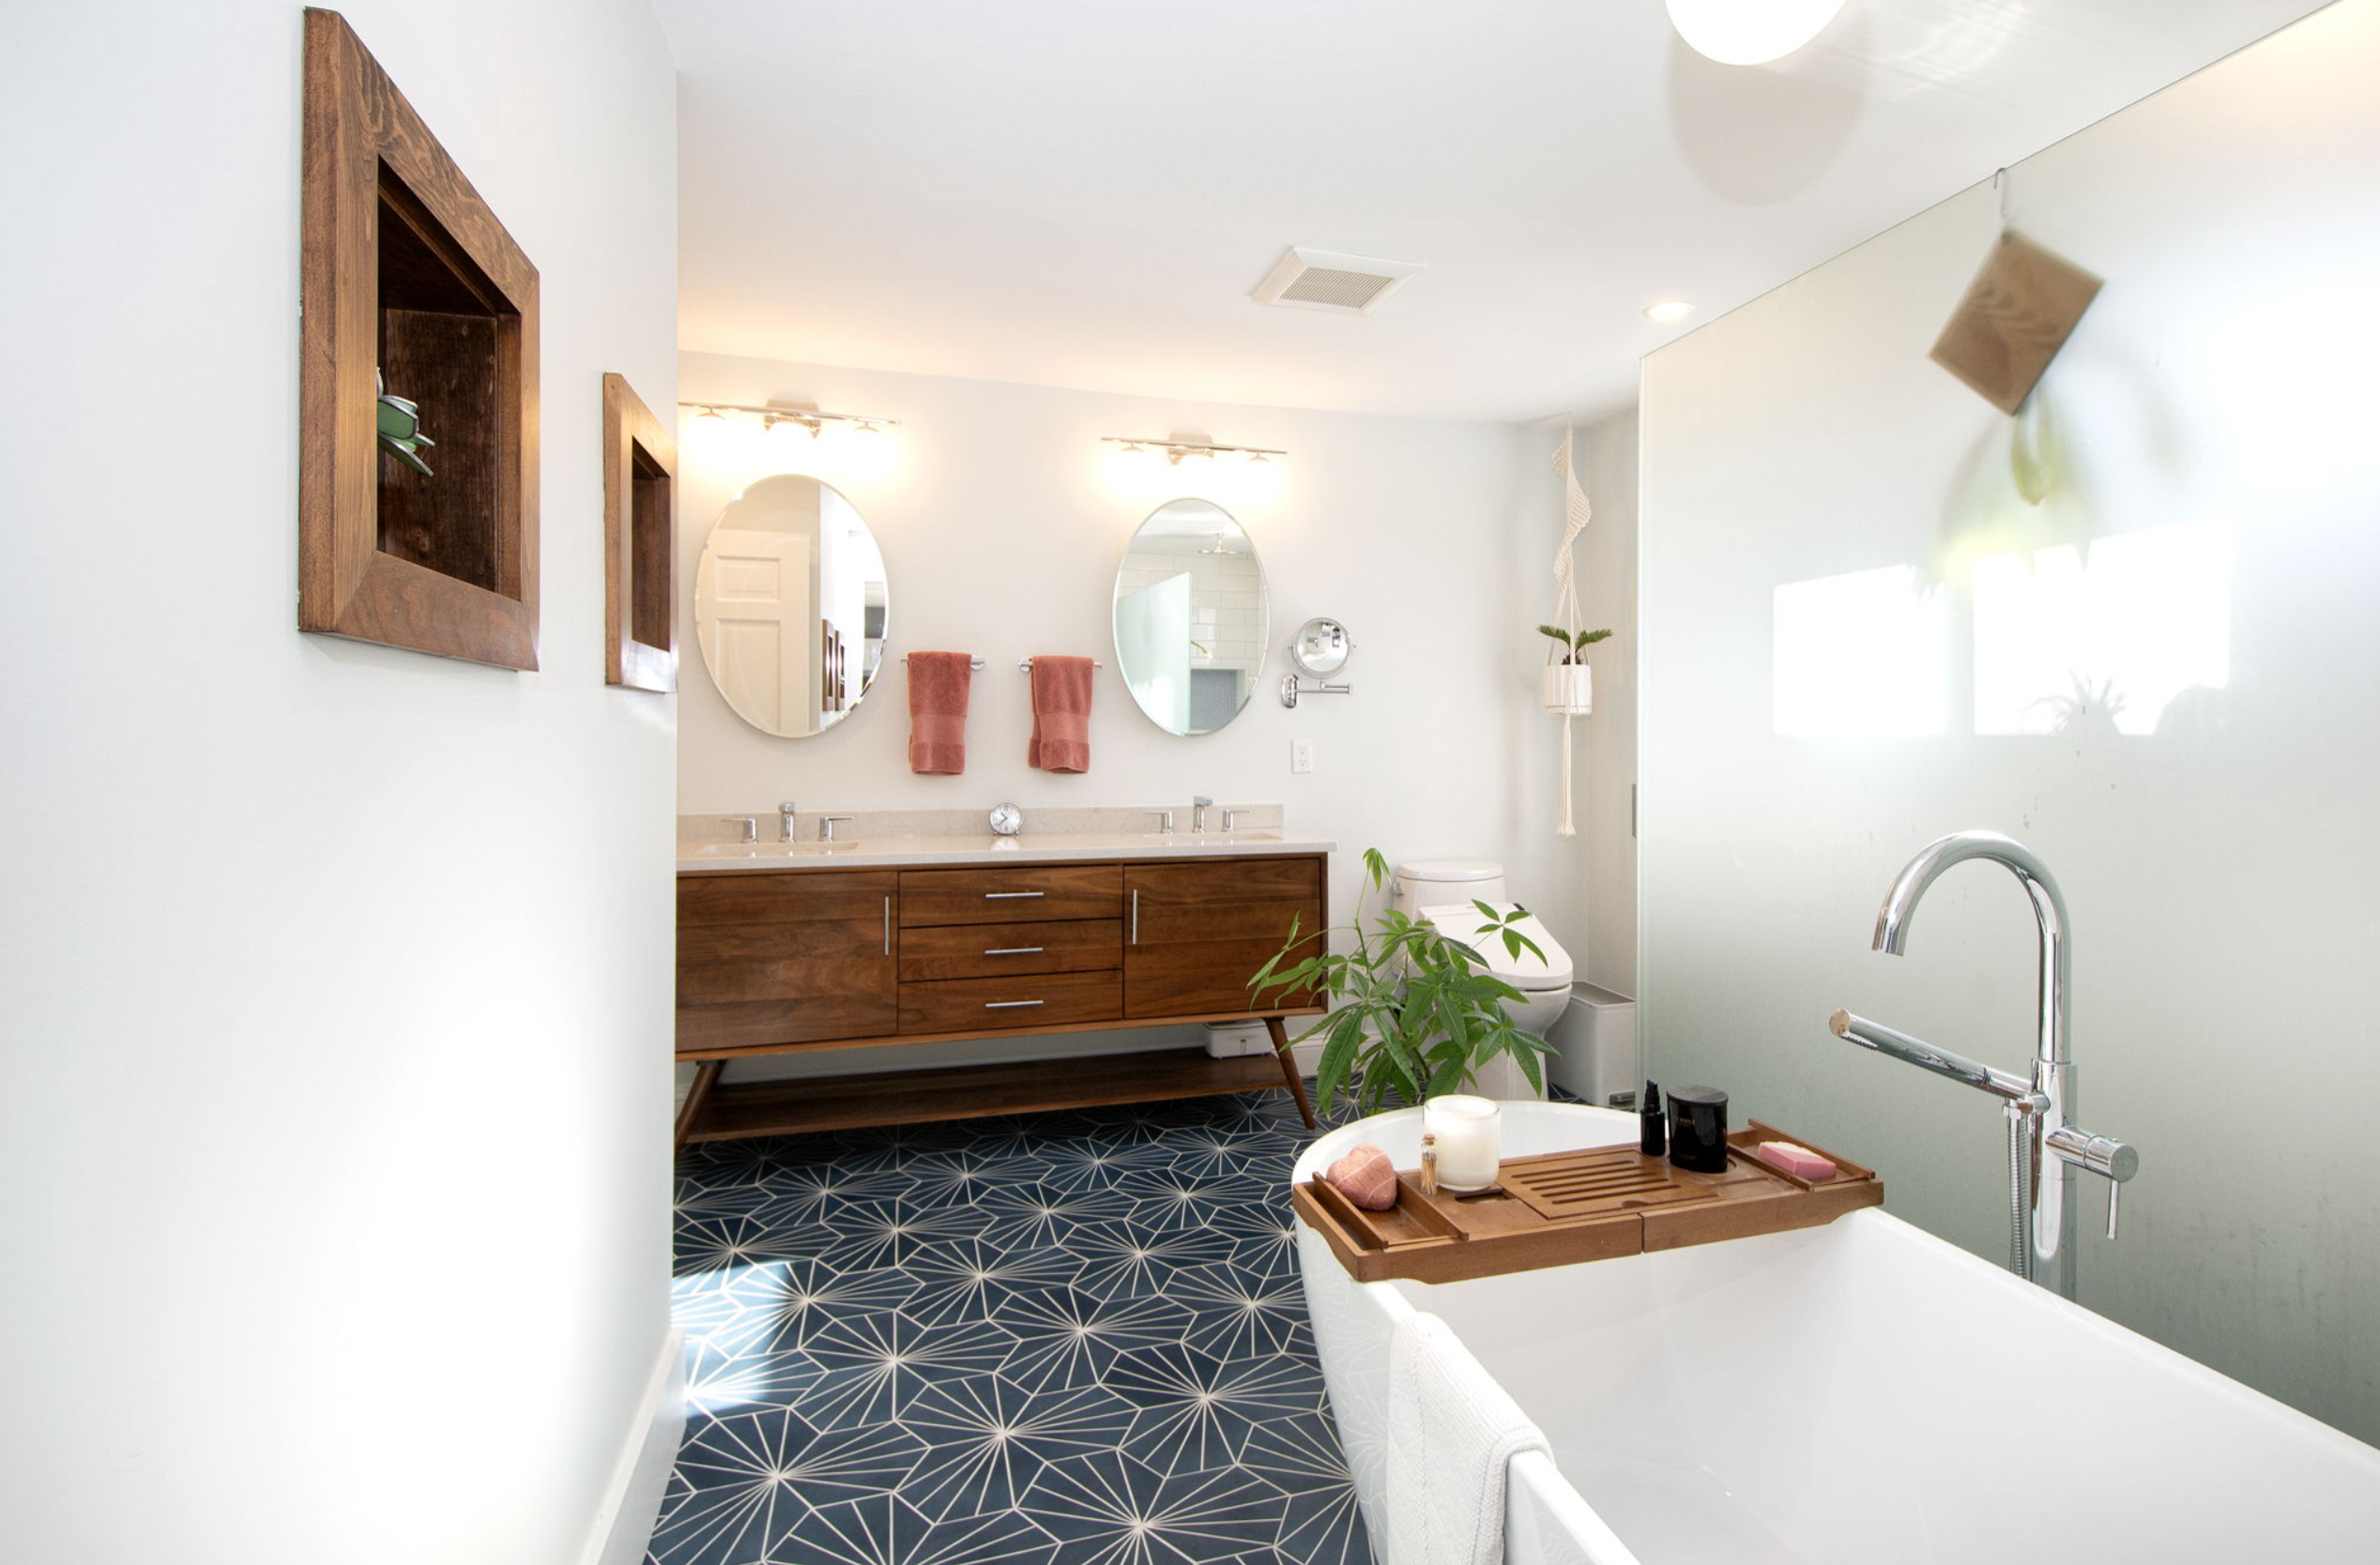
It is like a spa in here. For real. So luxurious. So bright. So much storage. So beautiful! 😍 I will miss her most of all. 🥹
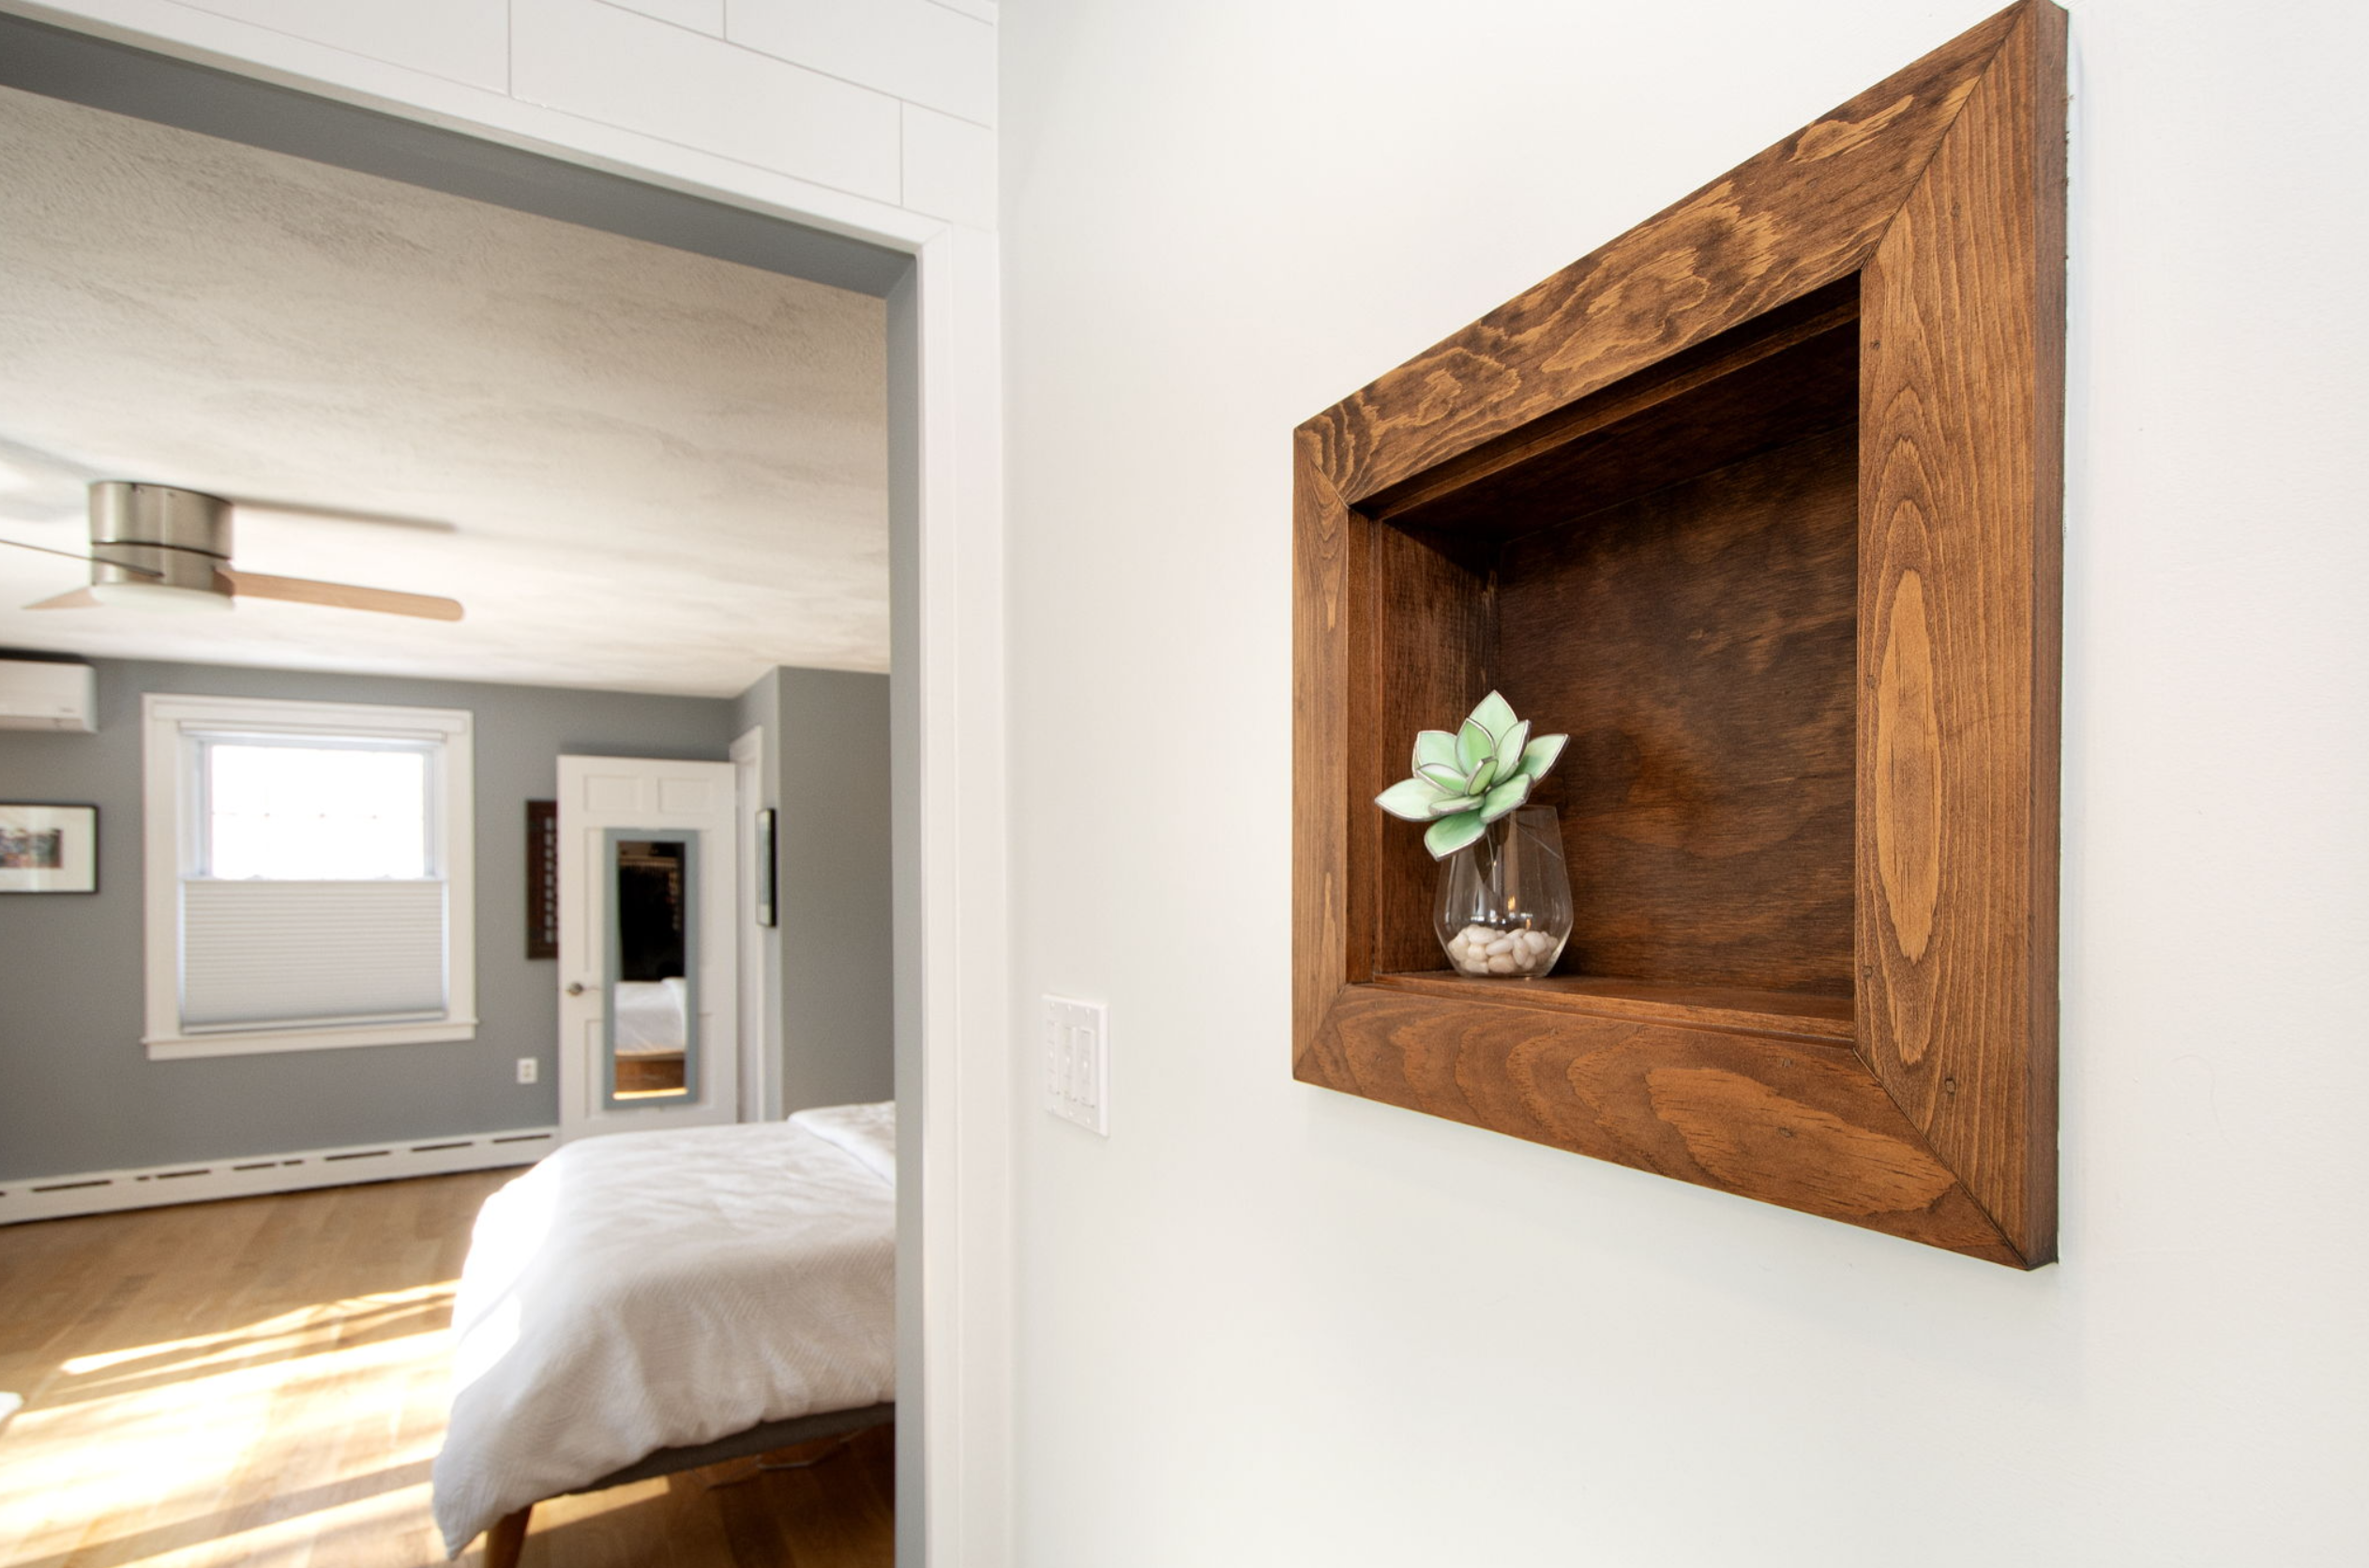
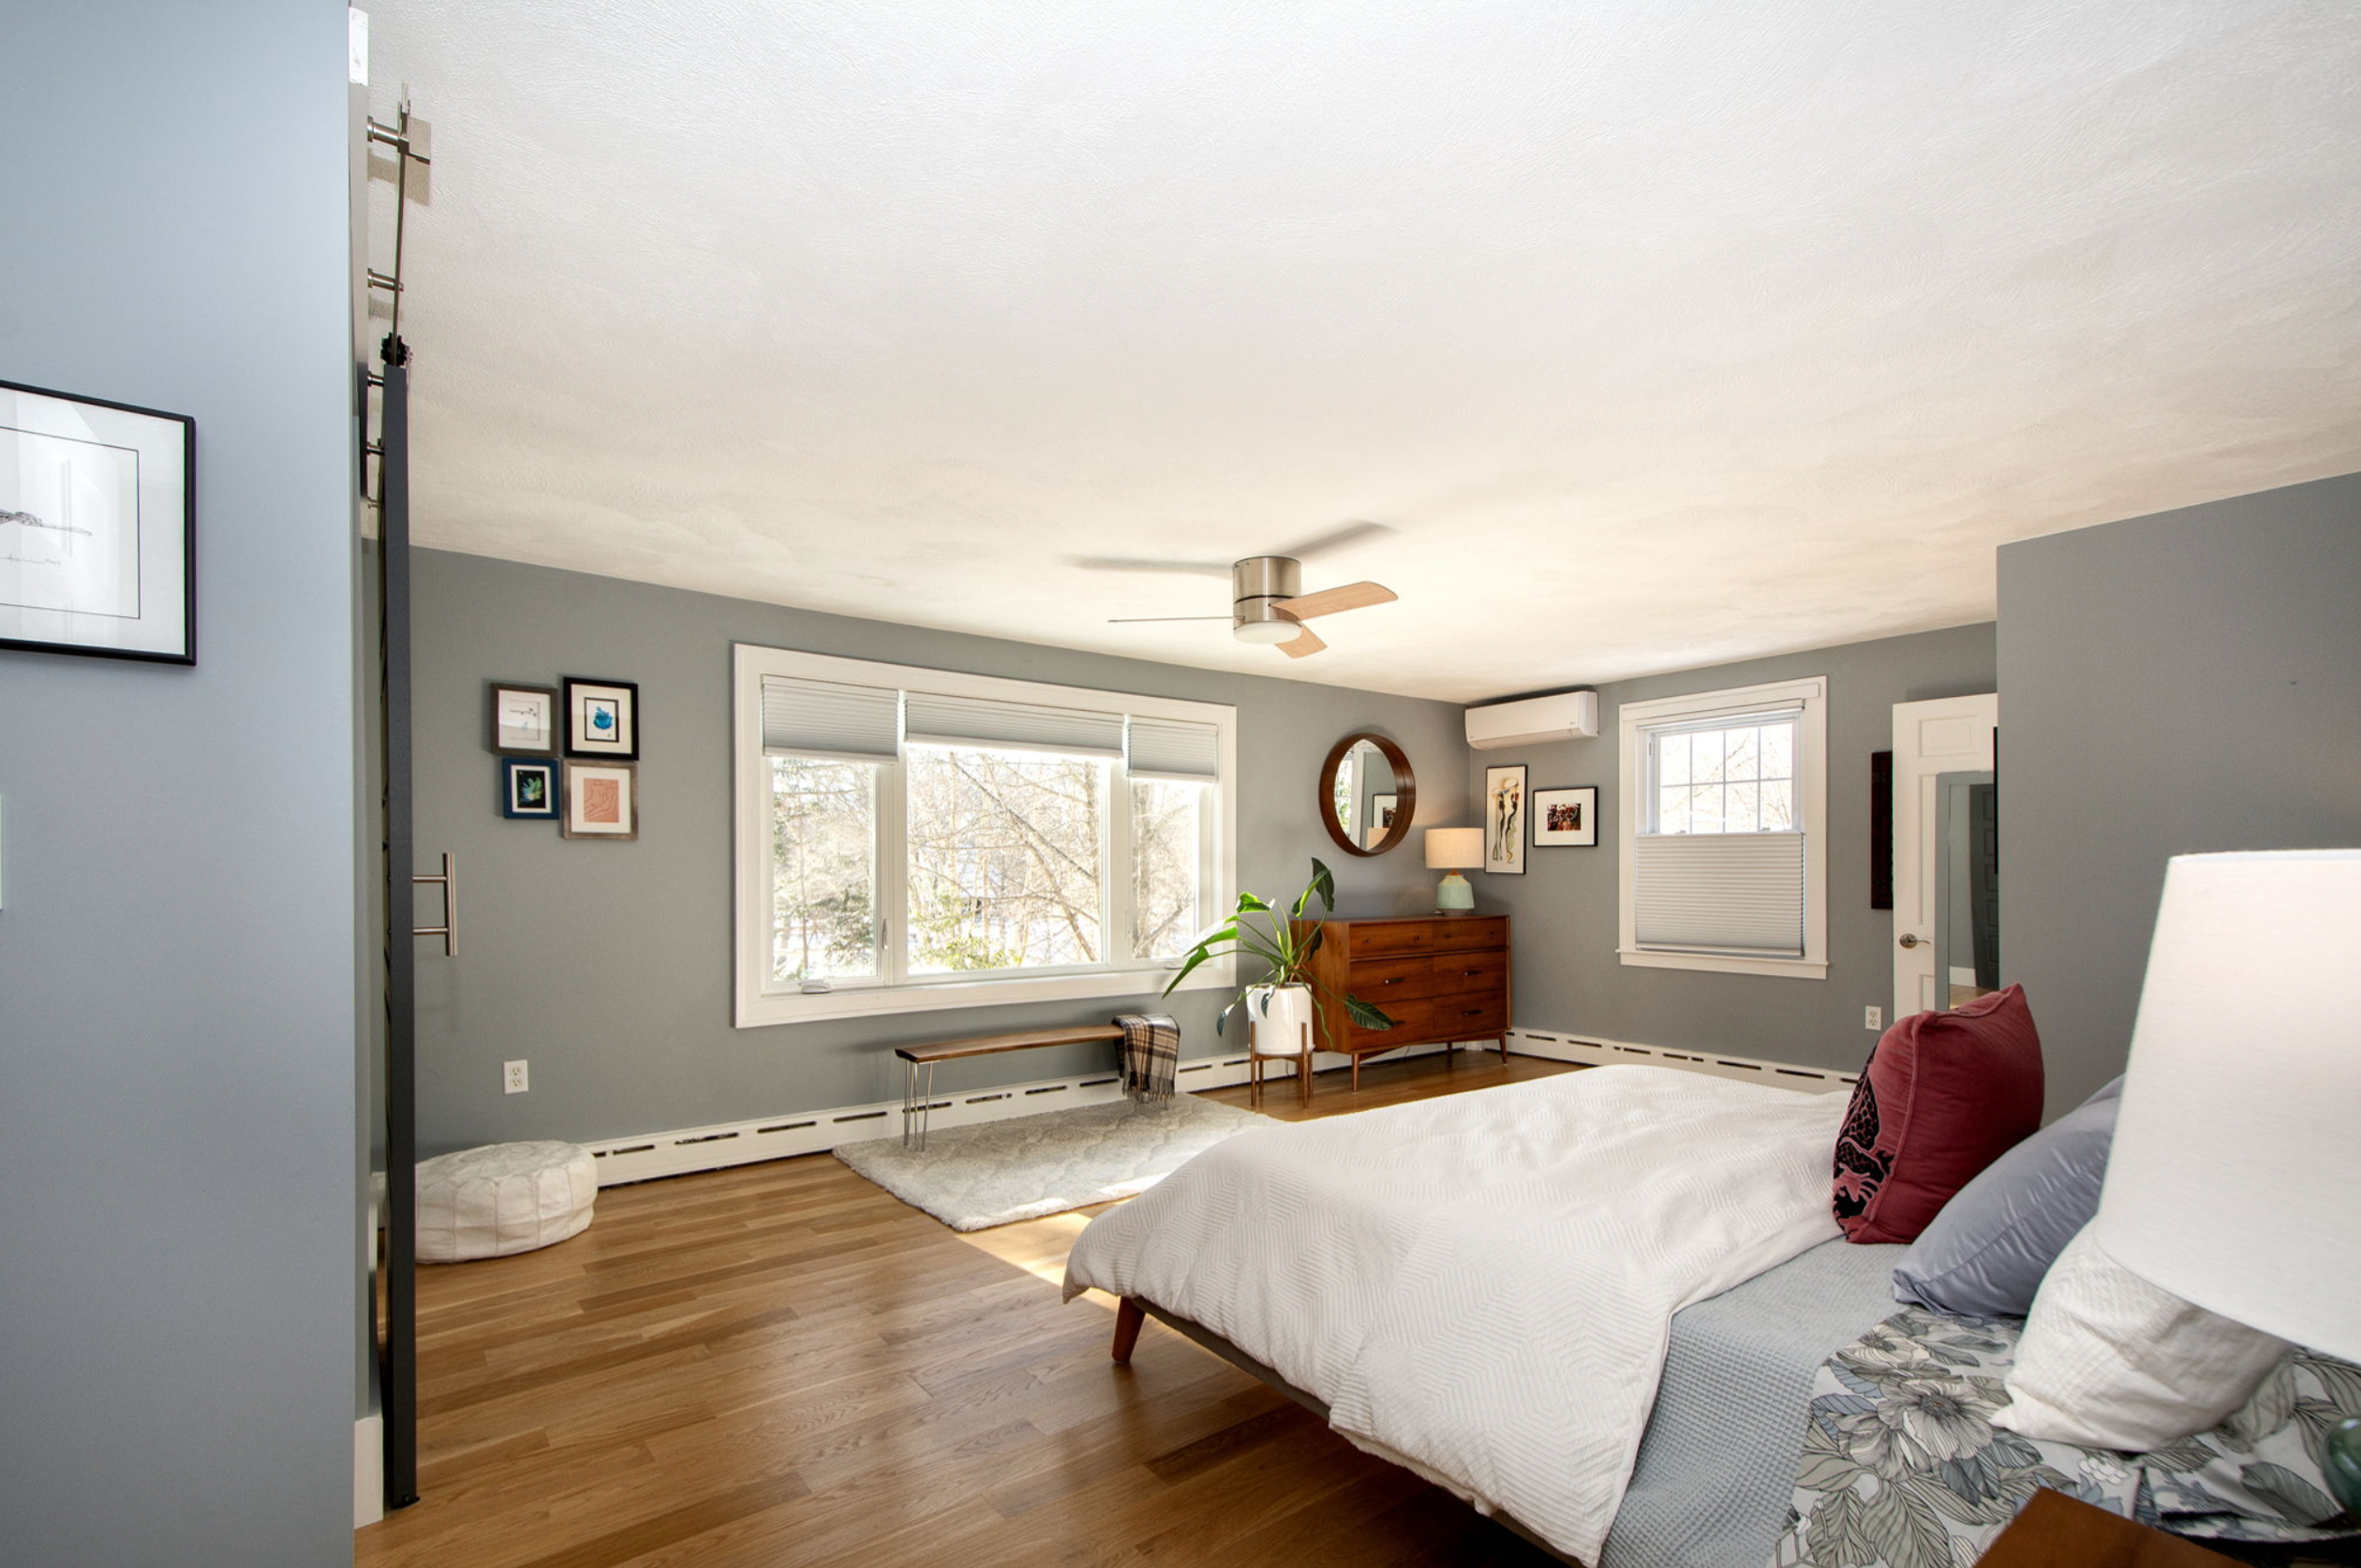
Of course, directly adjacent to that magnificent bathroom is the stunning main floor primary bedroom. She is enormous, and the expanse of windows enhances the tranquil feeling of being in a treehouse, come snow or summer.
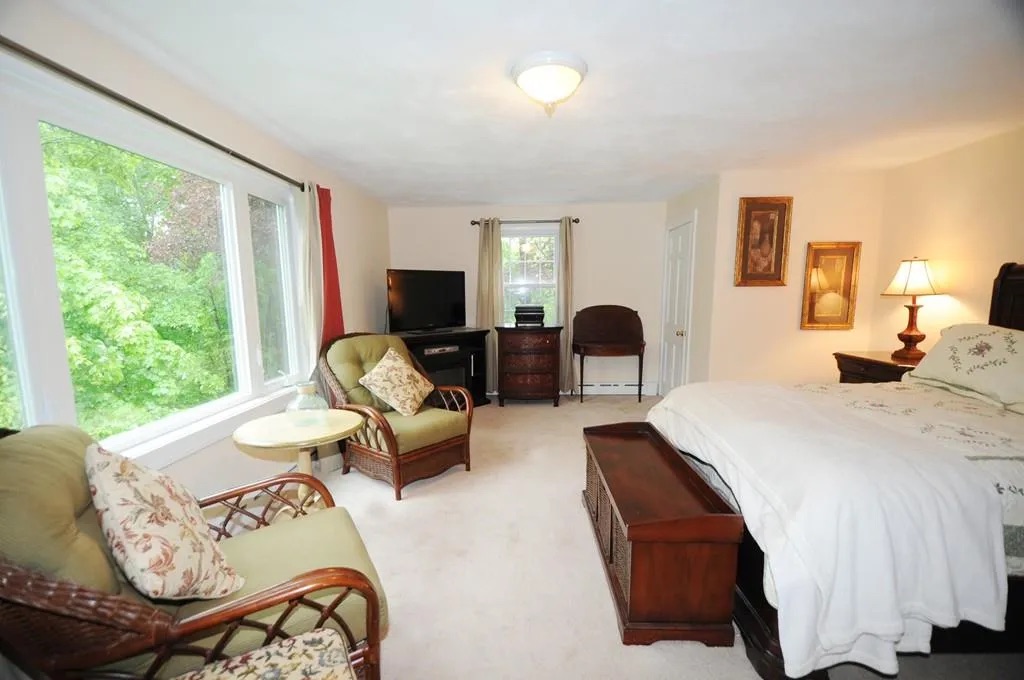
furniture, even in such a large room.

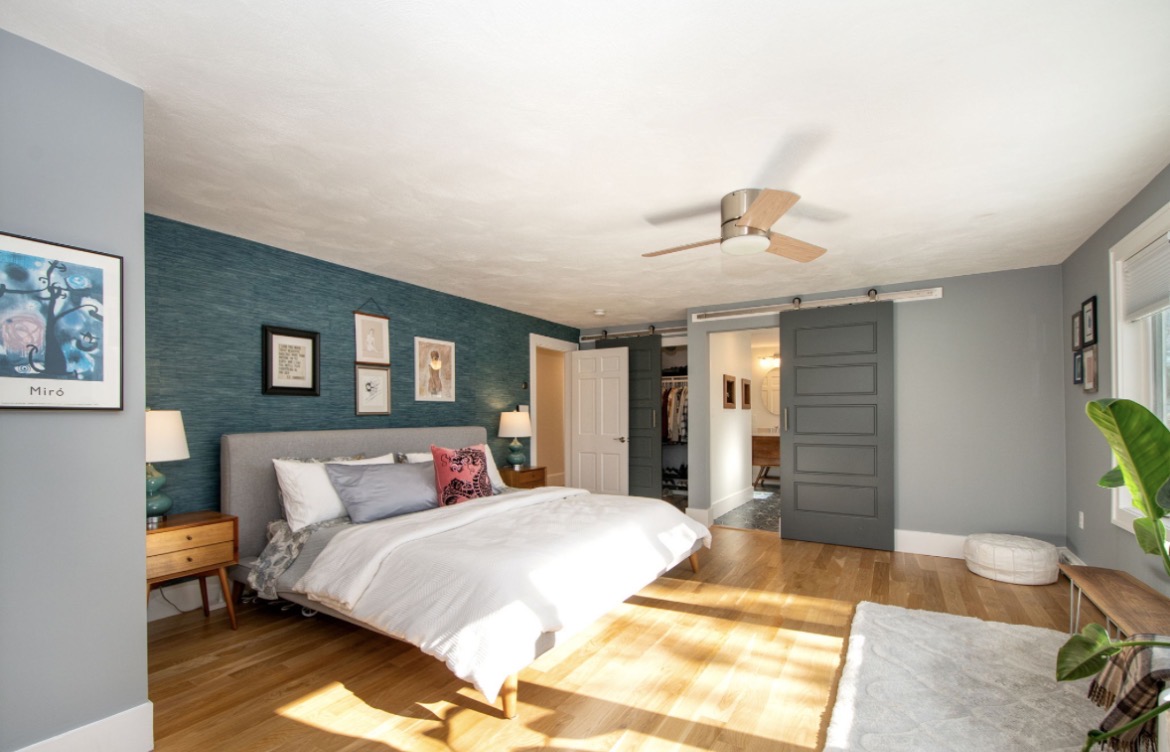
When we first found her, she was a carpeted expanse of beige, with a weird built-in dresser and no character whatsoever. But with 2 walk-in closets, that arresting view, and so much space, we could see her potential. We wanted to create a peaceful retreat from the world. I think we succeeded. (I made the bench beneath the window from a slab I picked up at a local live edge wood shop, and the help of my very talented carpenter of a neighbor!) Note that the sliding door to Closet Two matches the one to the bathroom. <wink!>
…the finishes are jewel-toned yet subtle.

cloud of a light fixture to zhuzh her up!
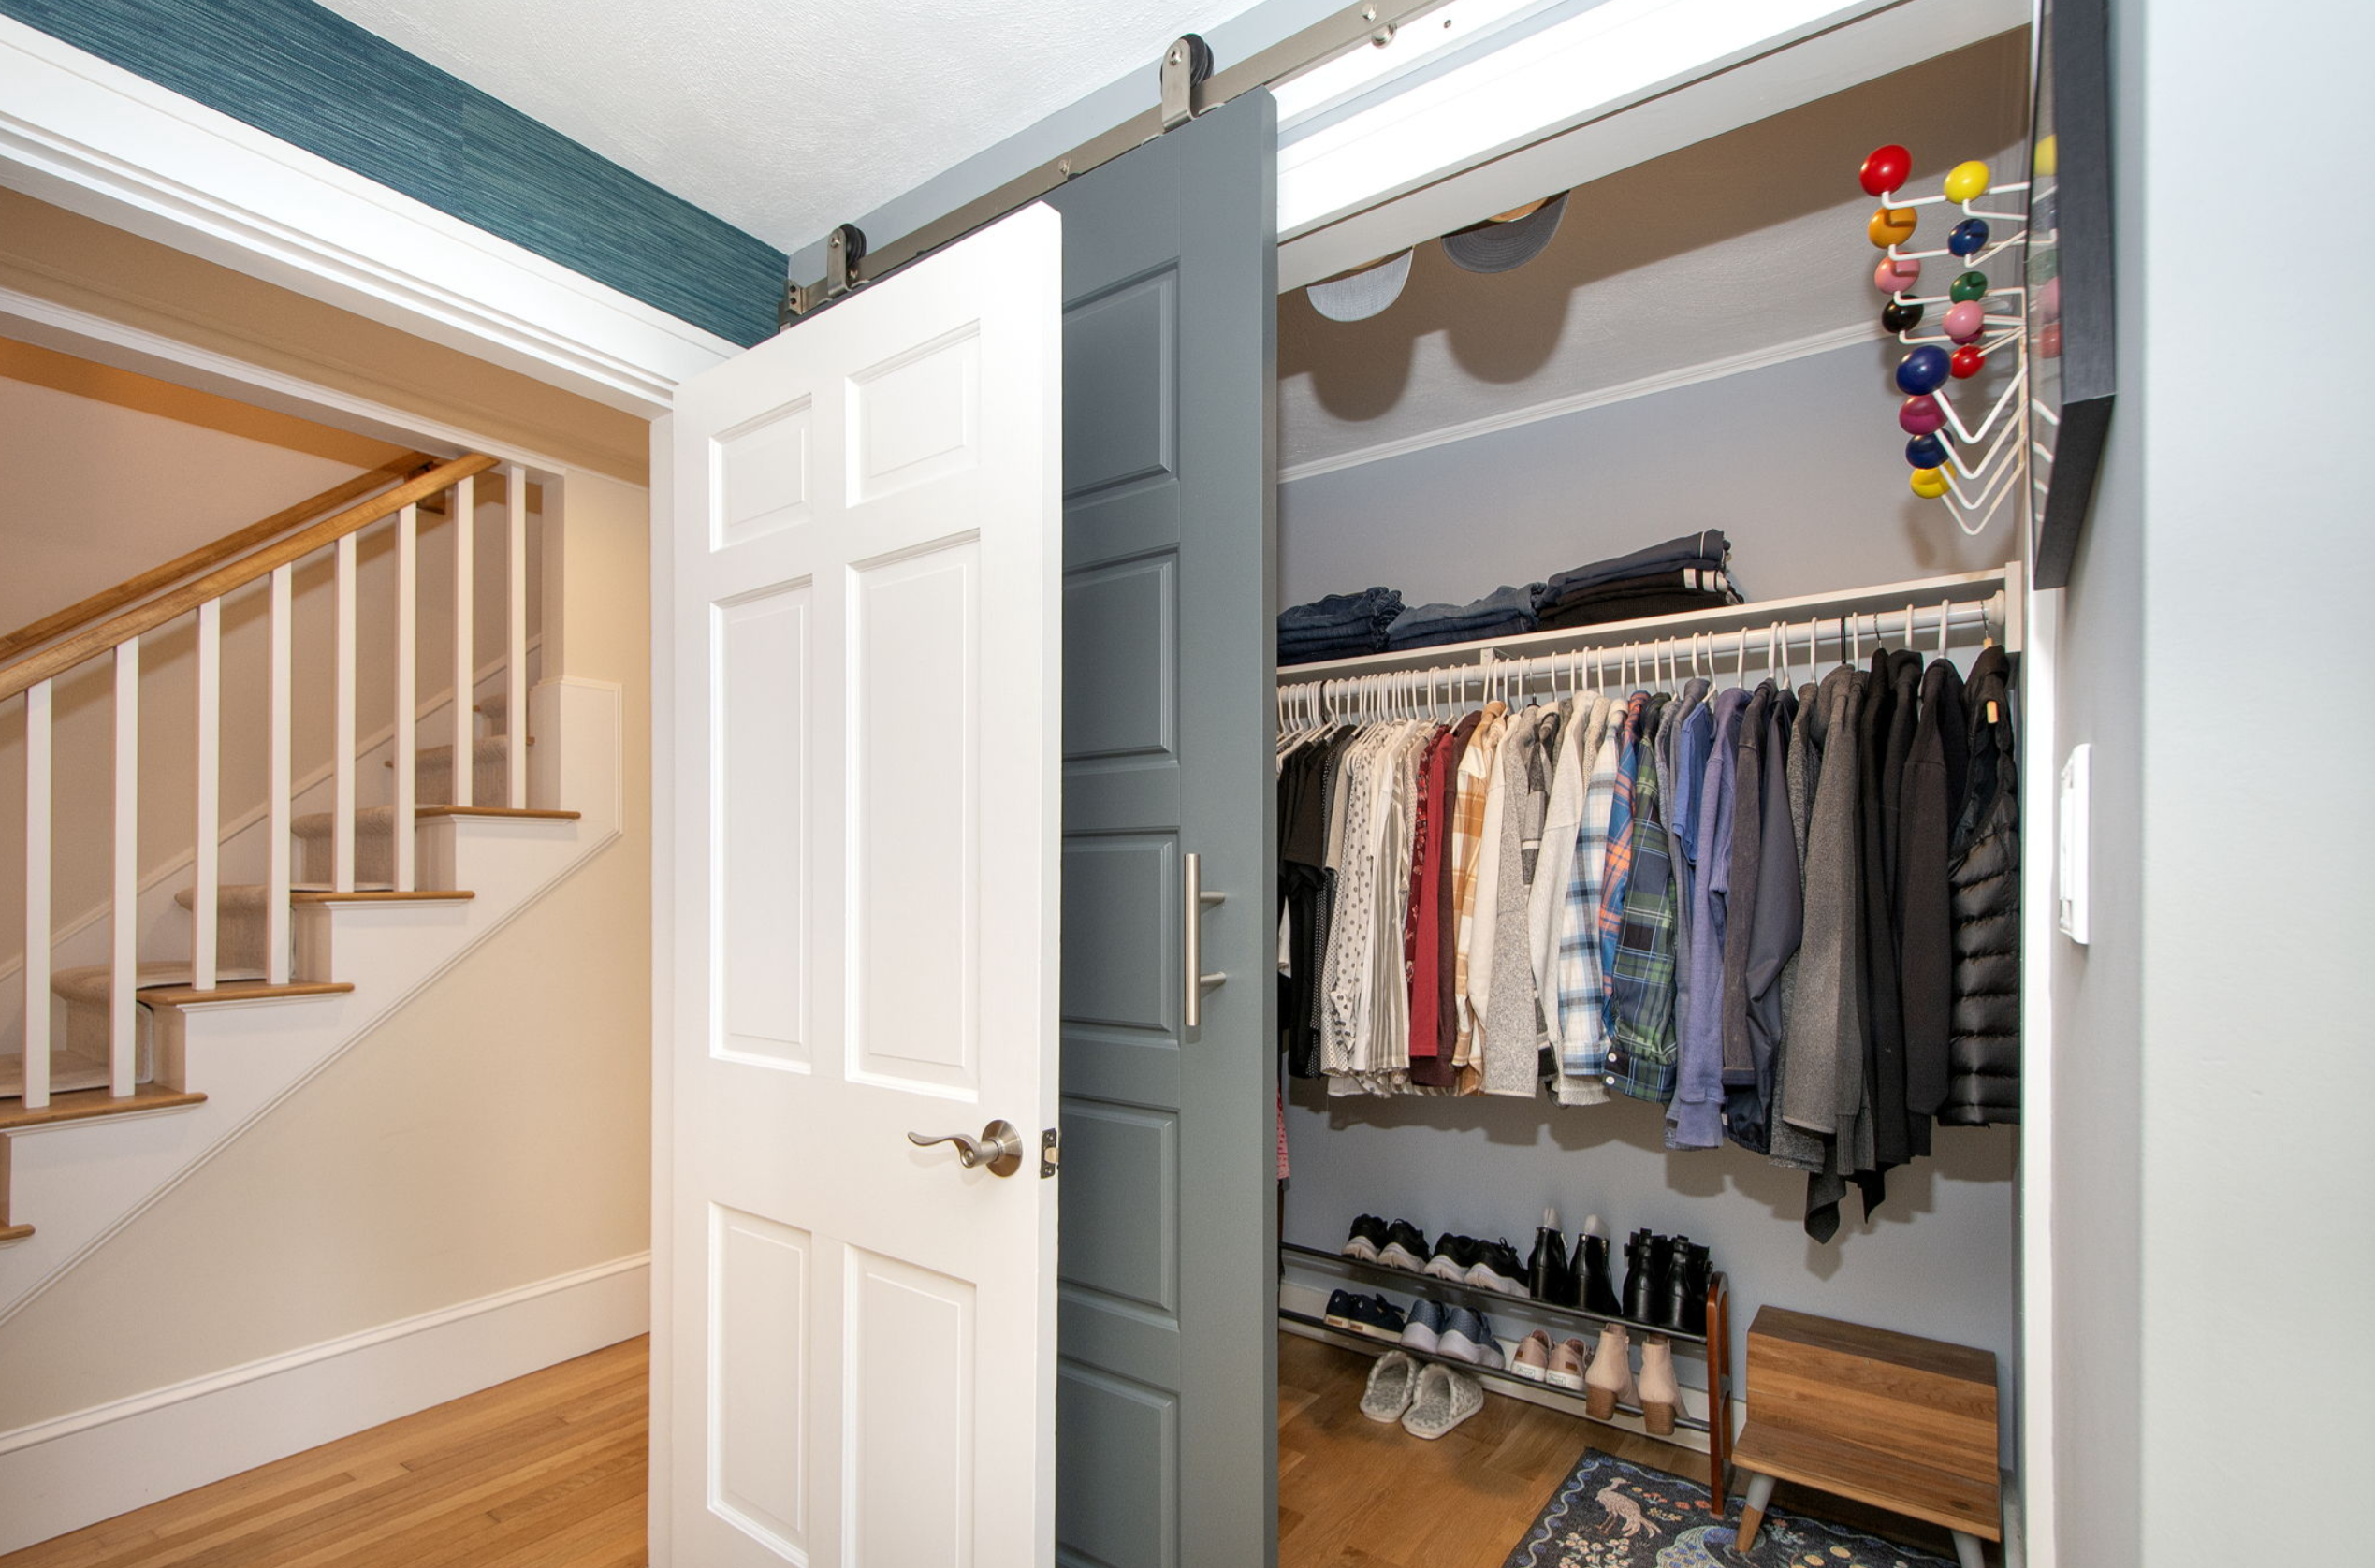
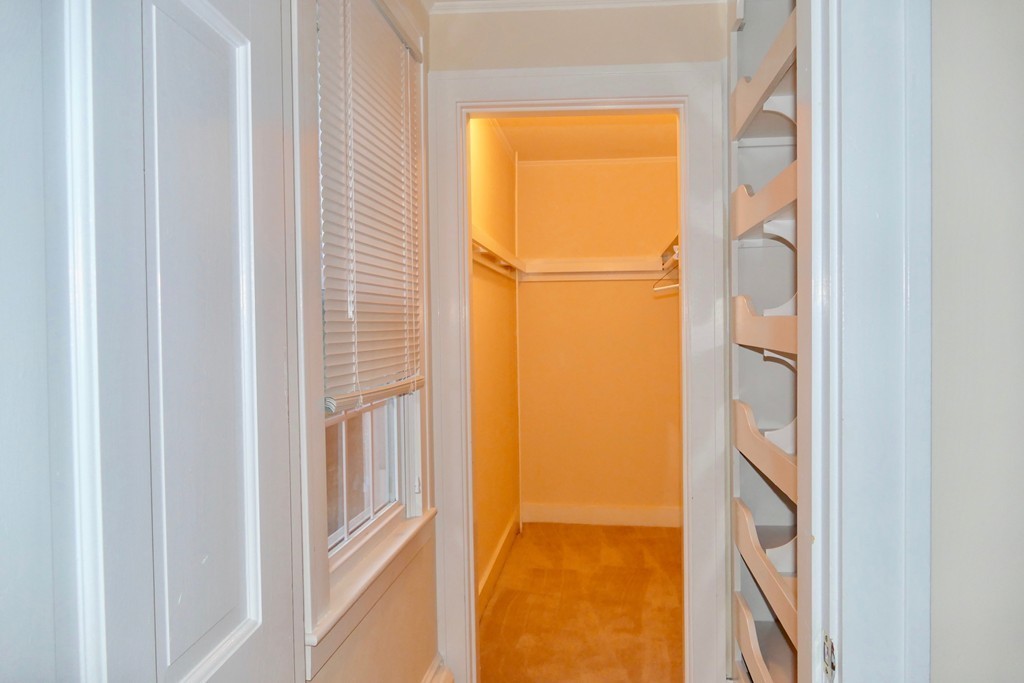
While as a native-born Californian, I am so excited to be going home, I will miss her (and especially the vast closet space!) almost as much as our custom bathroom and kitchen.
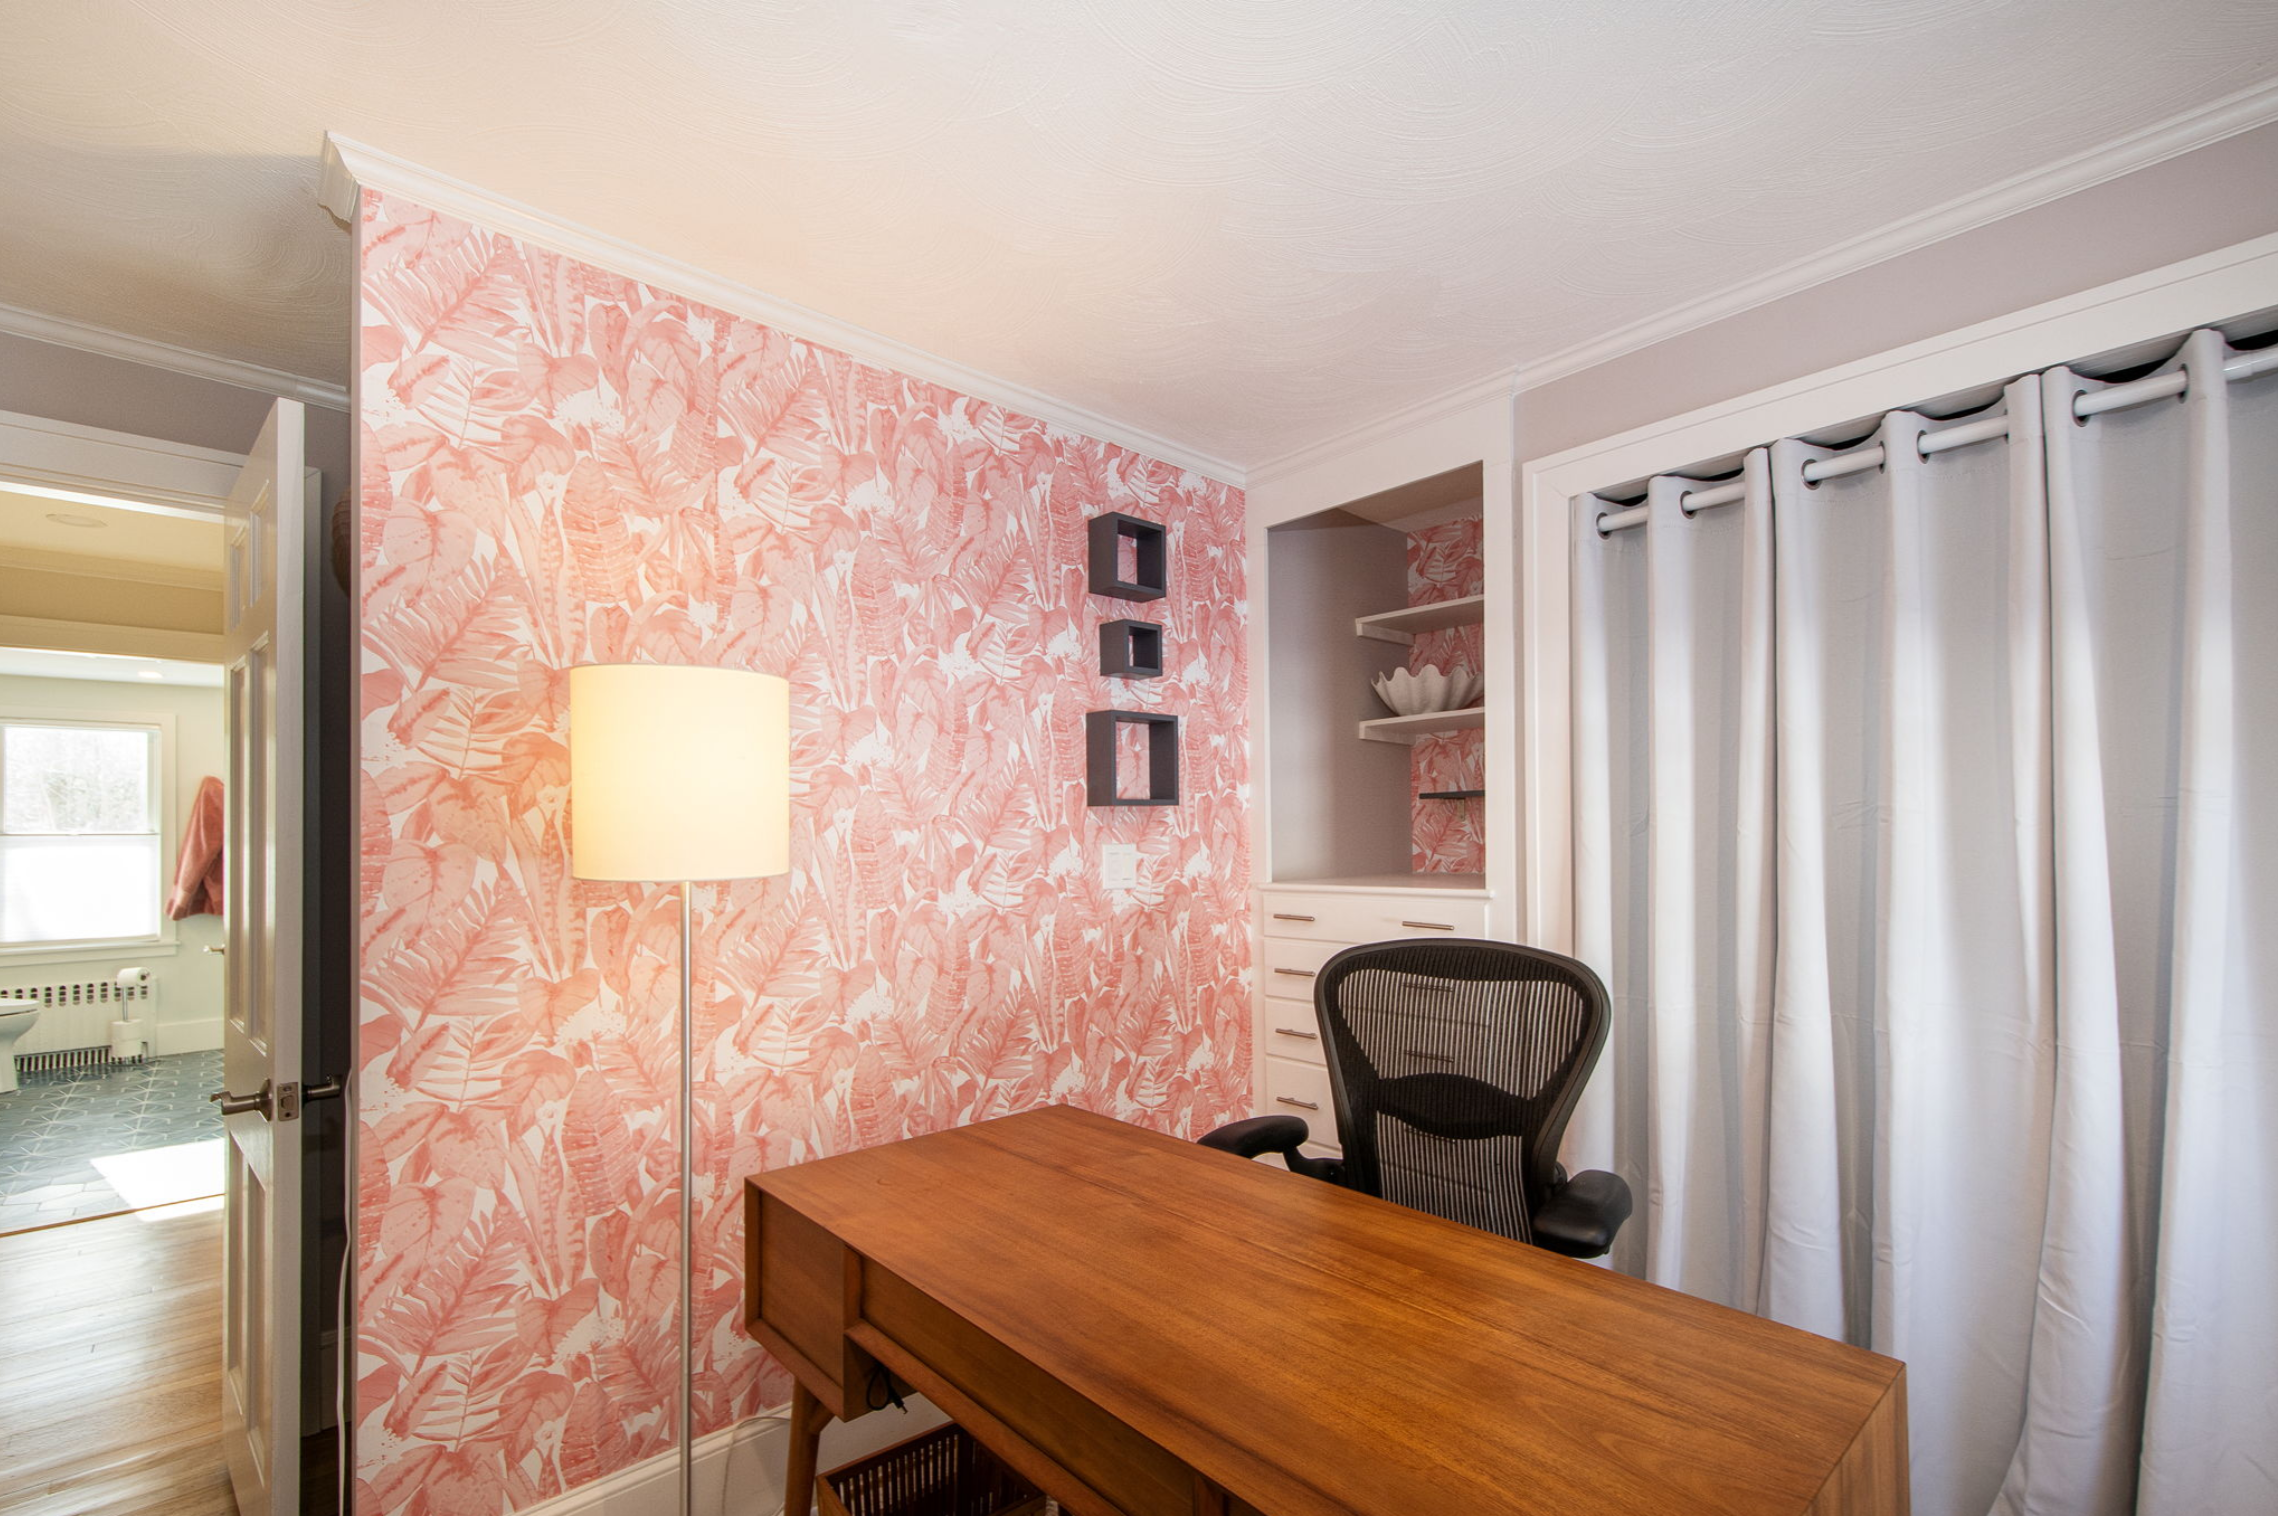
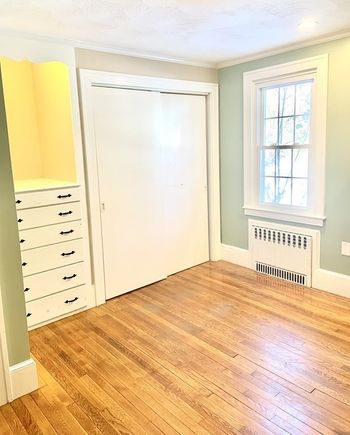
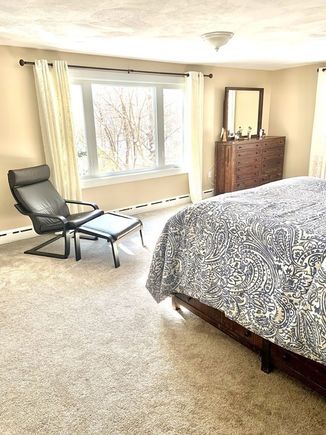
The third and final bedroom on the main floor was used as a study while we were there, hence the removal of the closet doors, but since the size of the house holds great appeal to either growing or multi-generational families (or both), we decided to stage it as a bedroom.

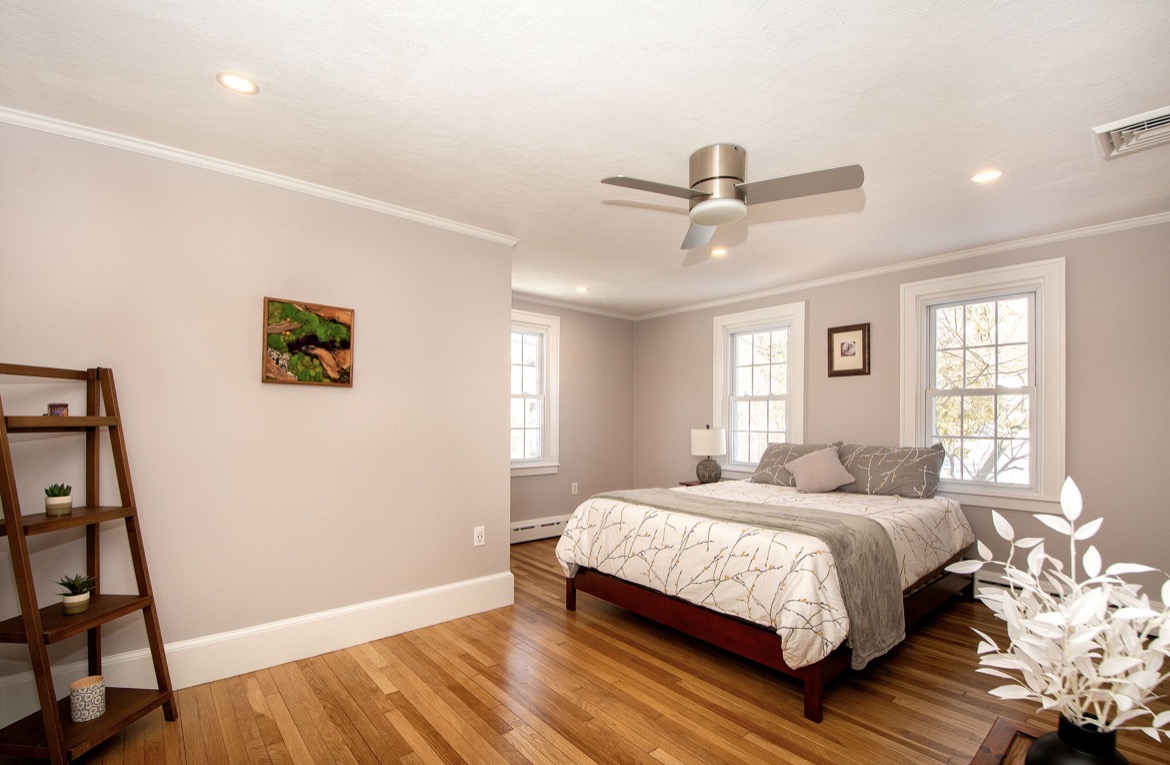

Some space had been borrowed from her at some point to create the 2nd closet in the primary bedroom, so it’s kind of an awkward layout, but it’s also fairly versatile and the resulting recess makes for a nice reading nook overlooking that beautiful west lawn.
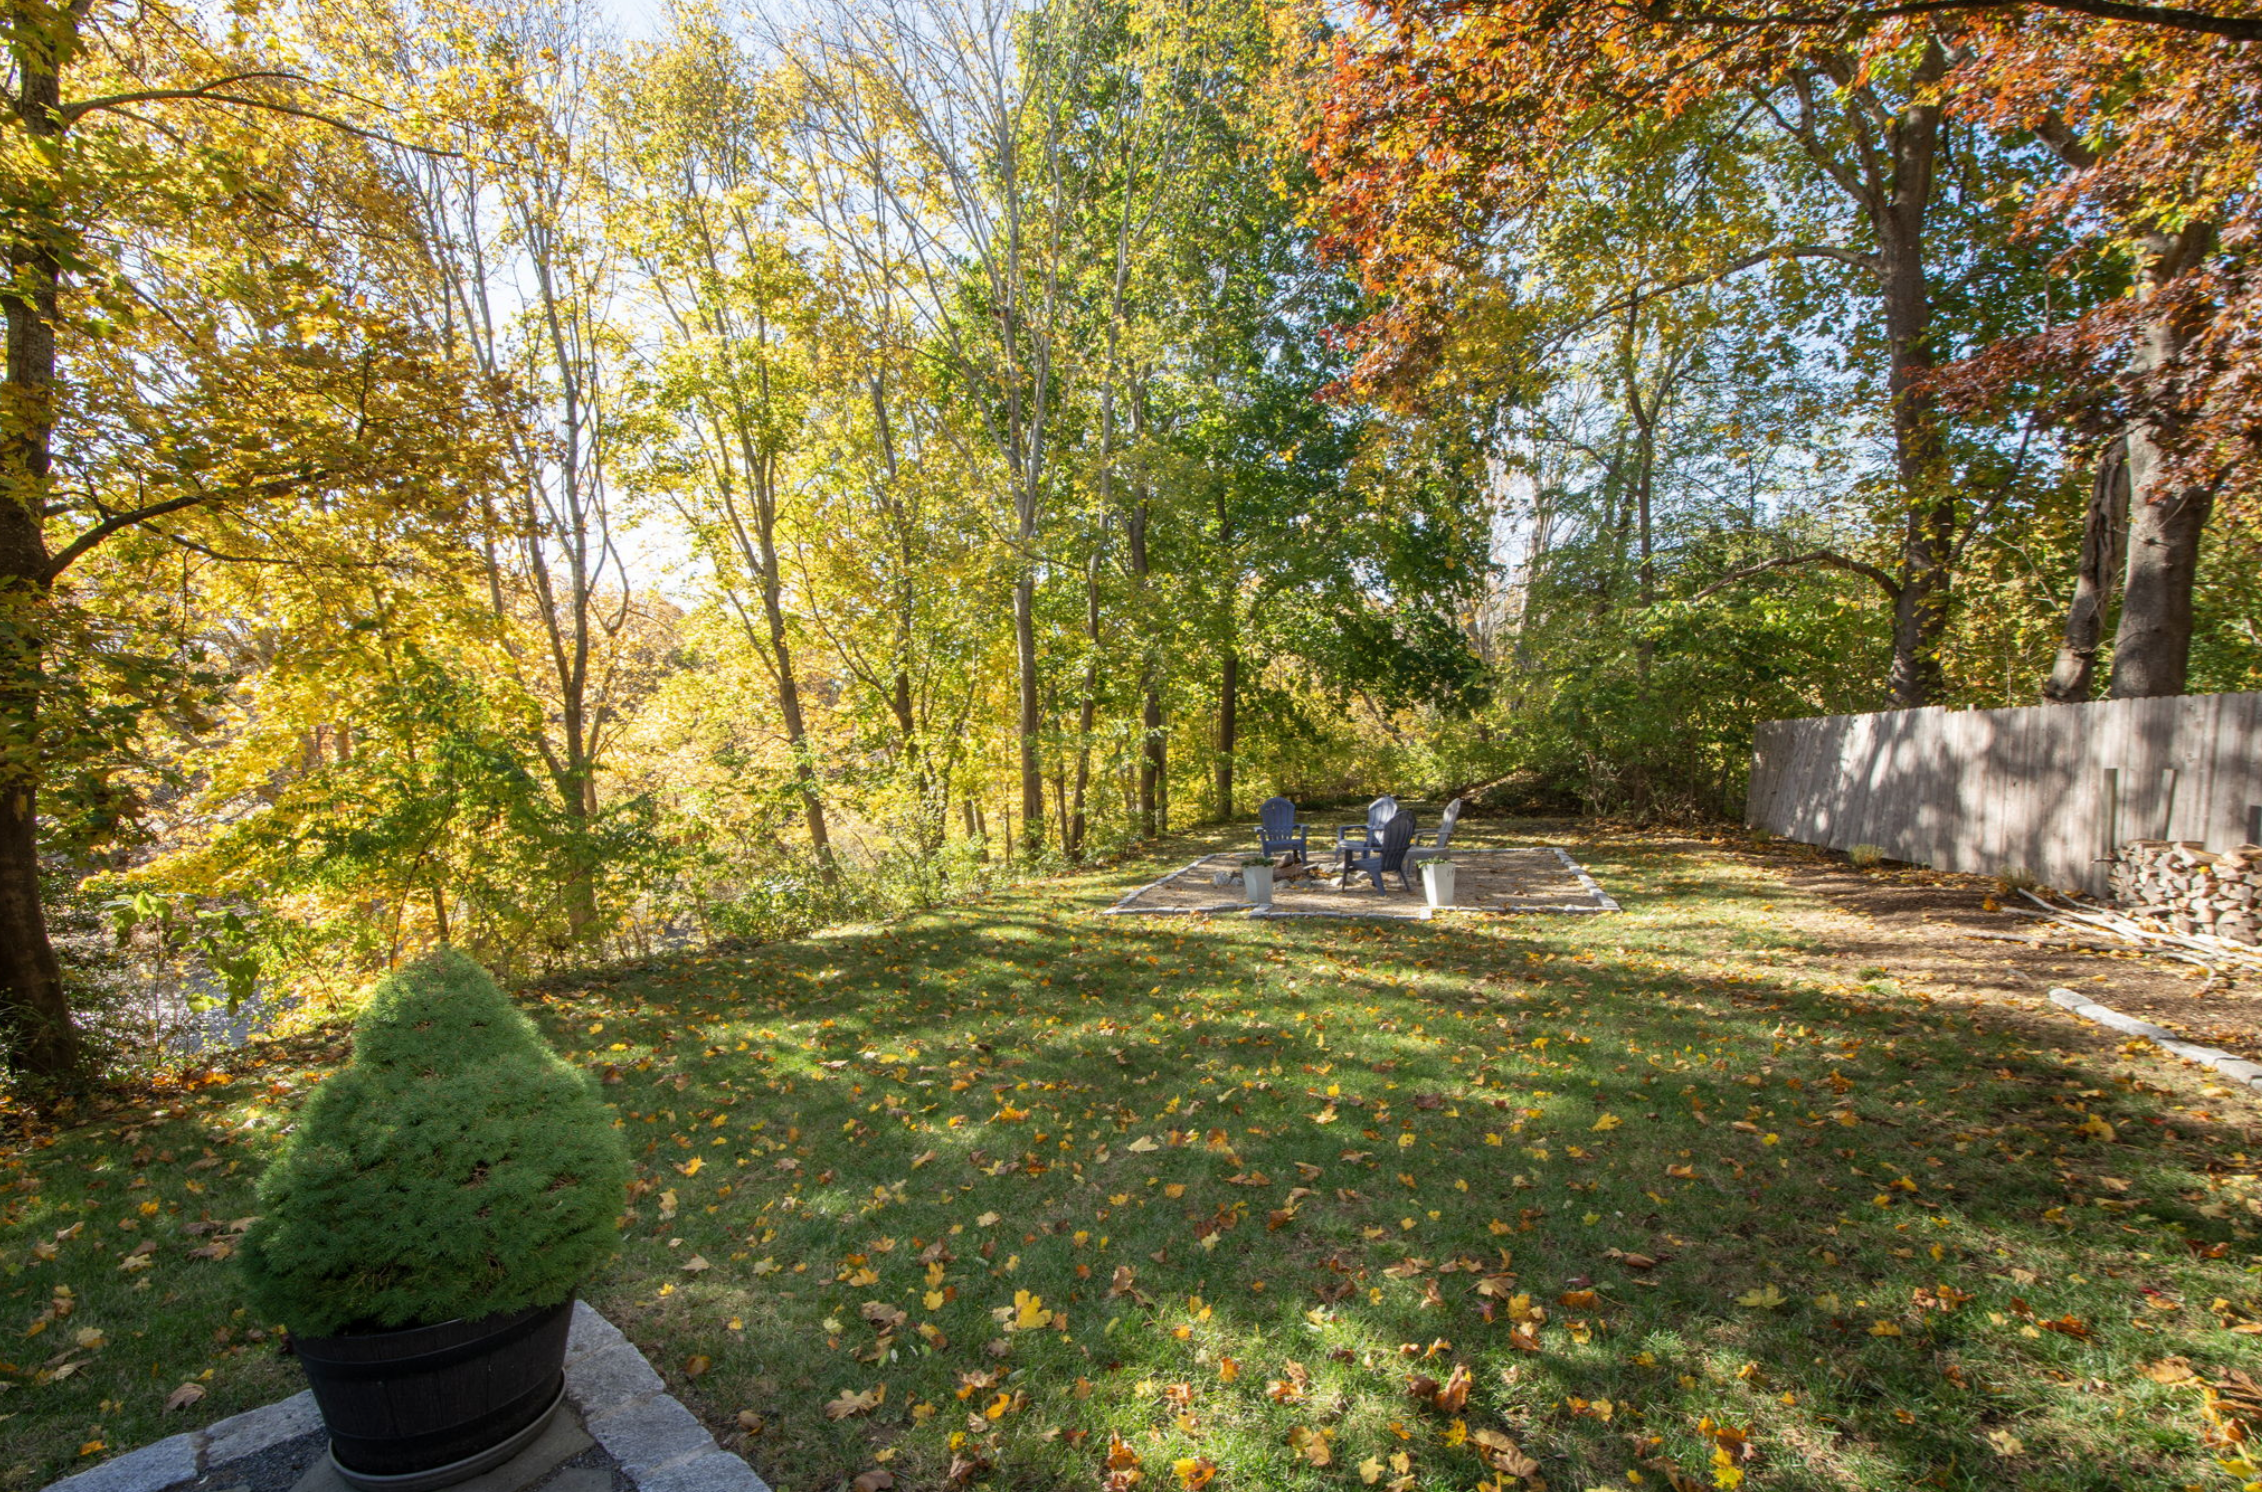
Speaking of the west lawn, let’s take a moment to step out there and take in the enhancements to it. Removing a tree is not to be undertaken lightly, but given the hazard it posed to the house and the fact that its shadow created a perfect environment for moss and mold to develop, the massive one shading the yard and house had to go. The resulting light helped facilitate growing grass, and shone more light in the western bedrooms of the house.
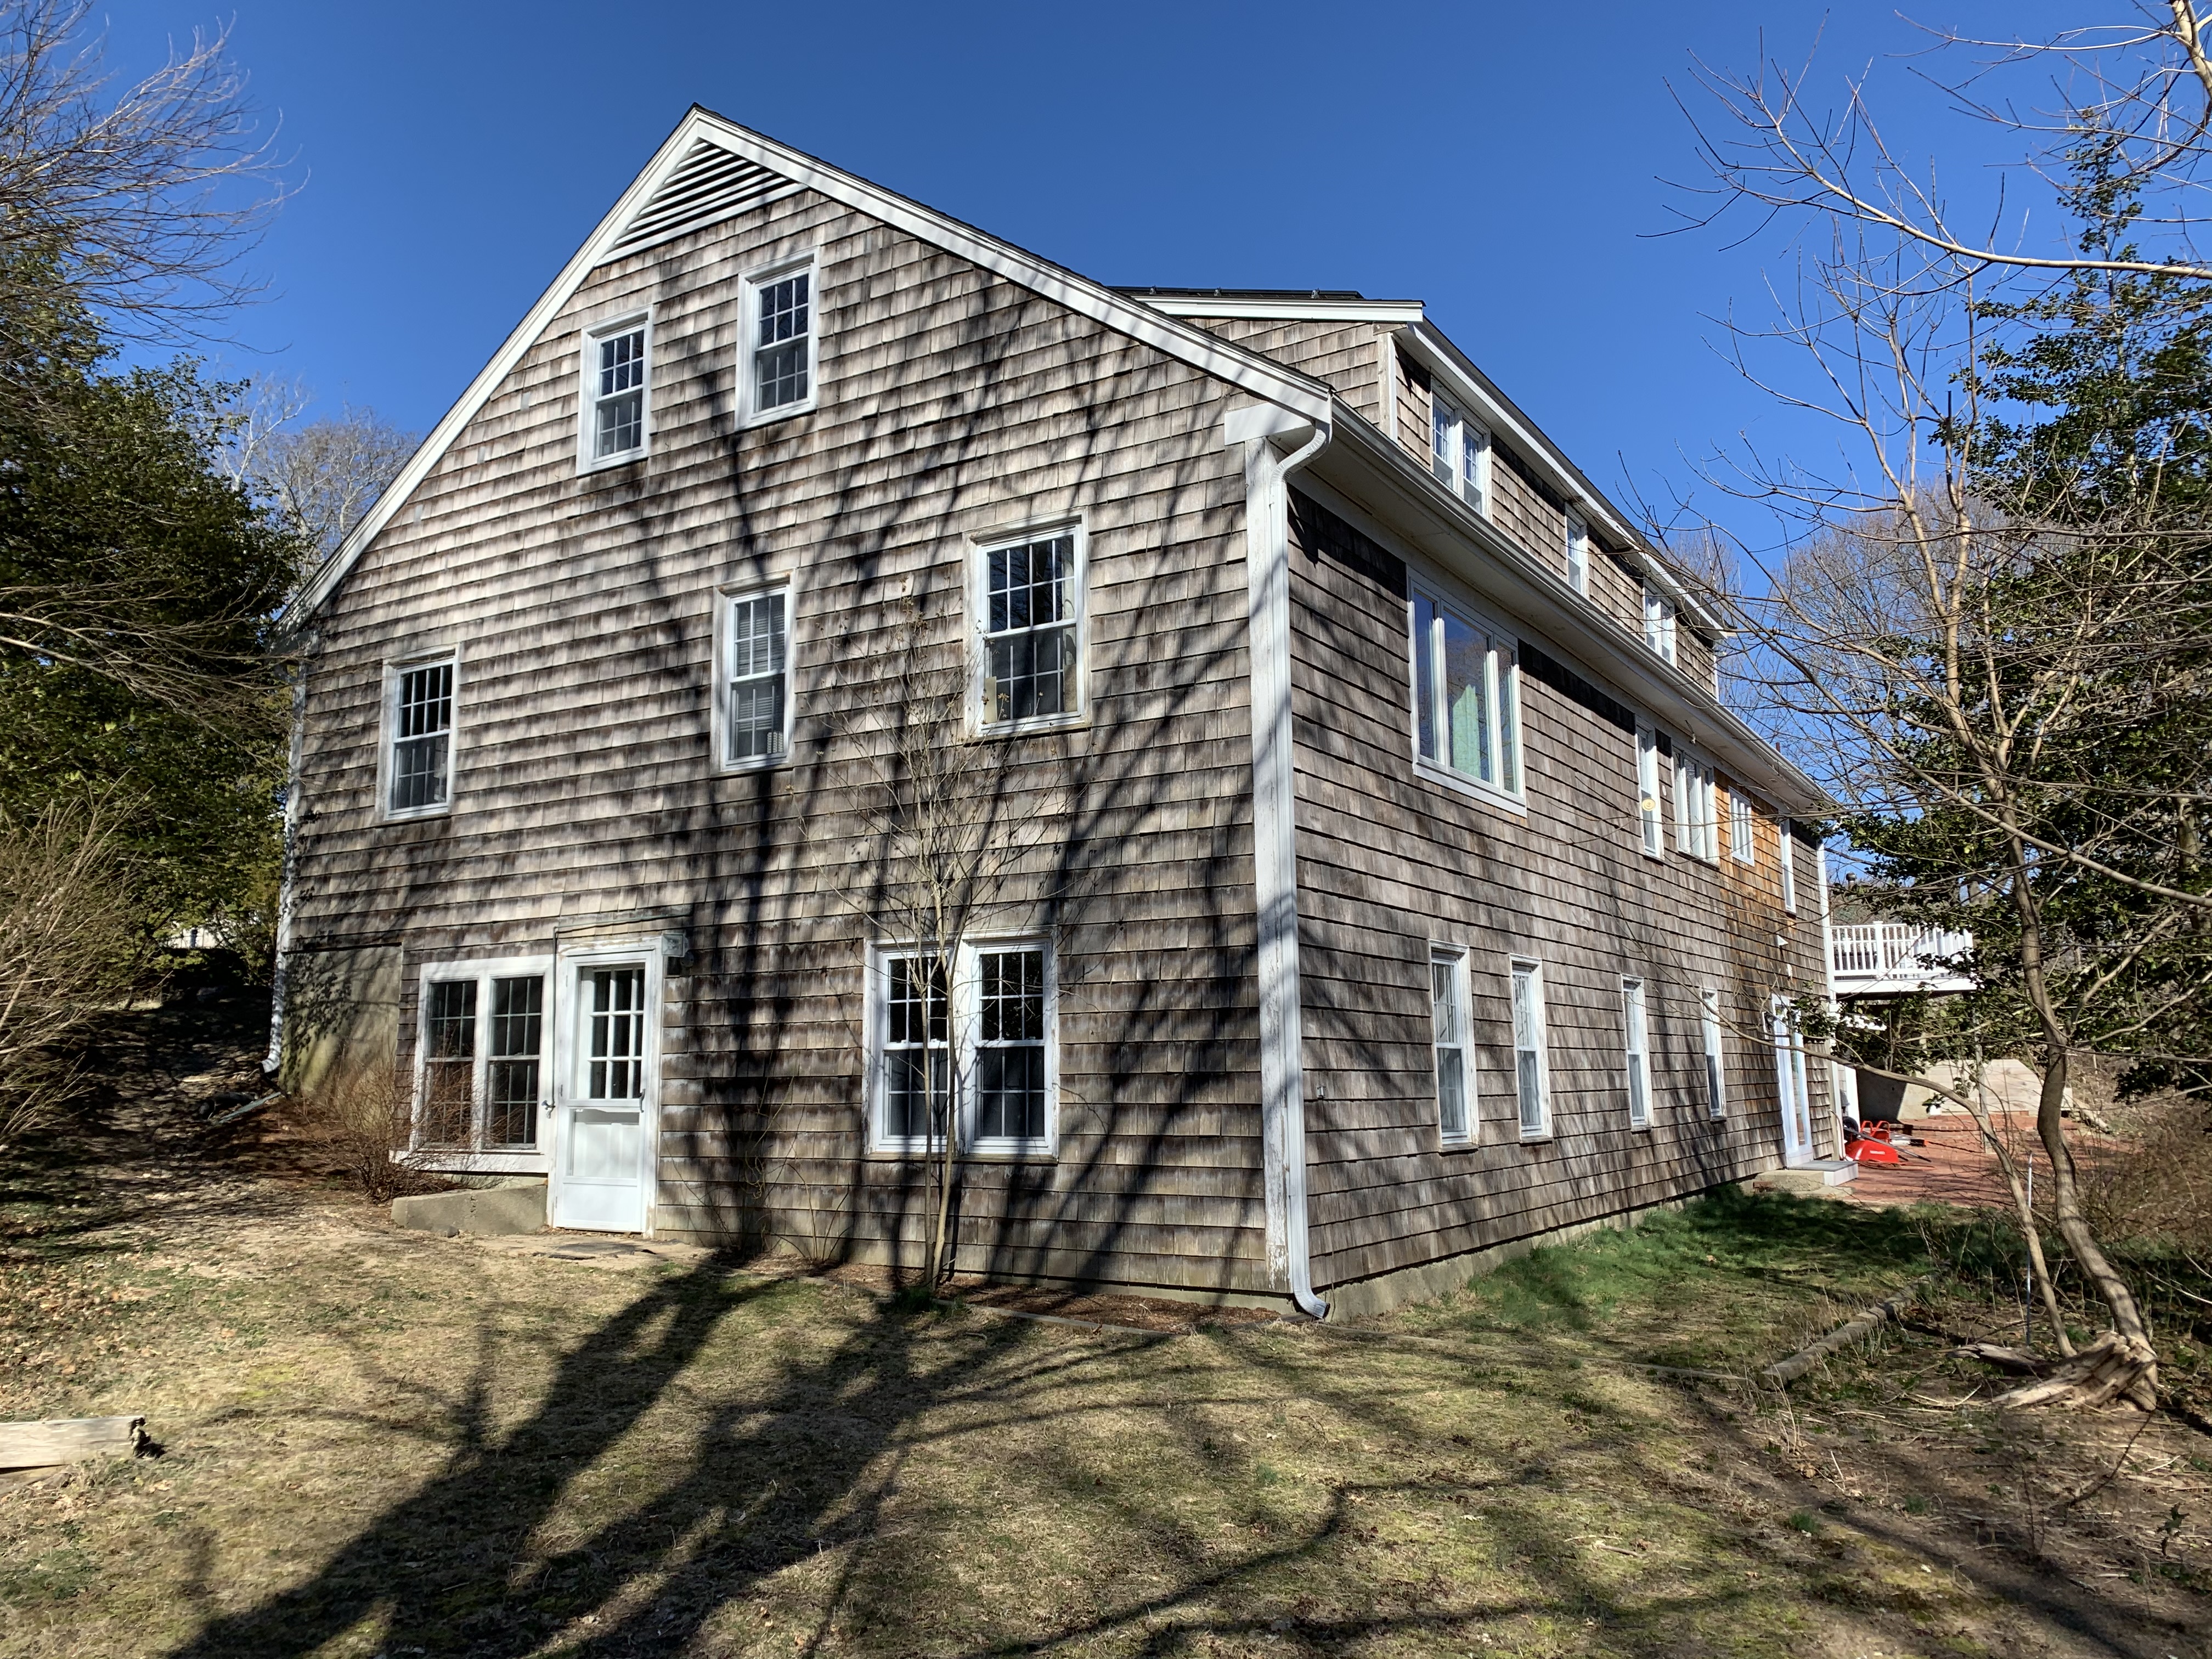
effect of aging shingles.

overlooking a lovely lawn.
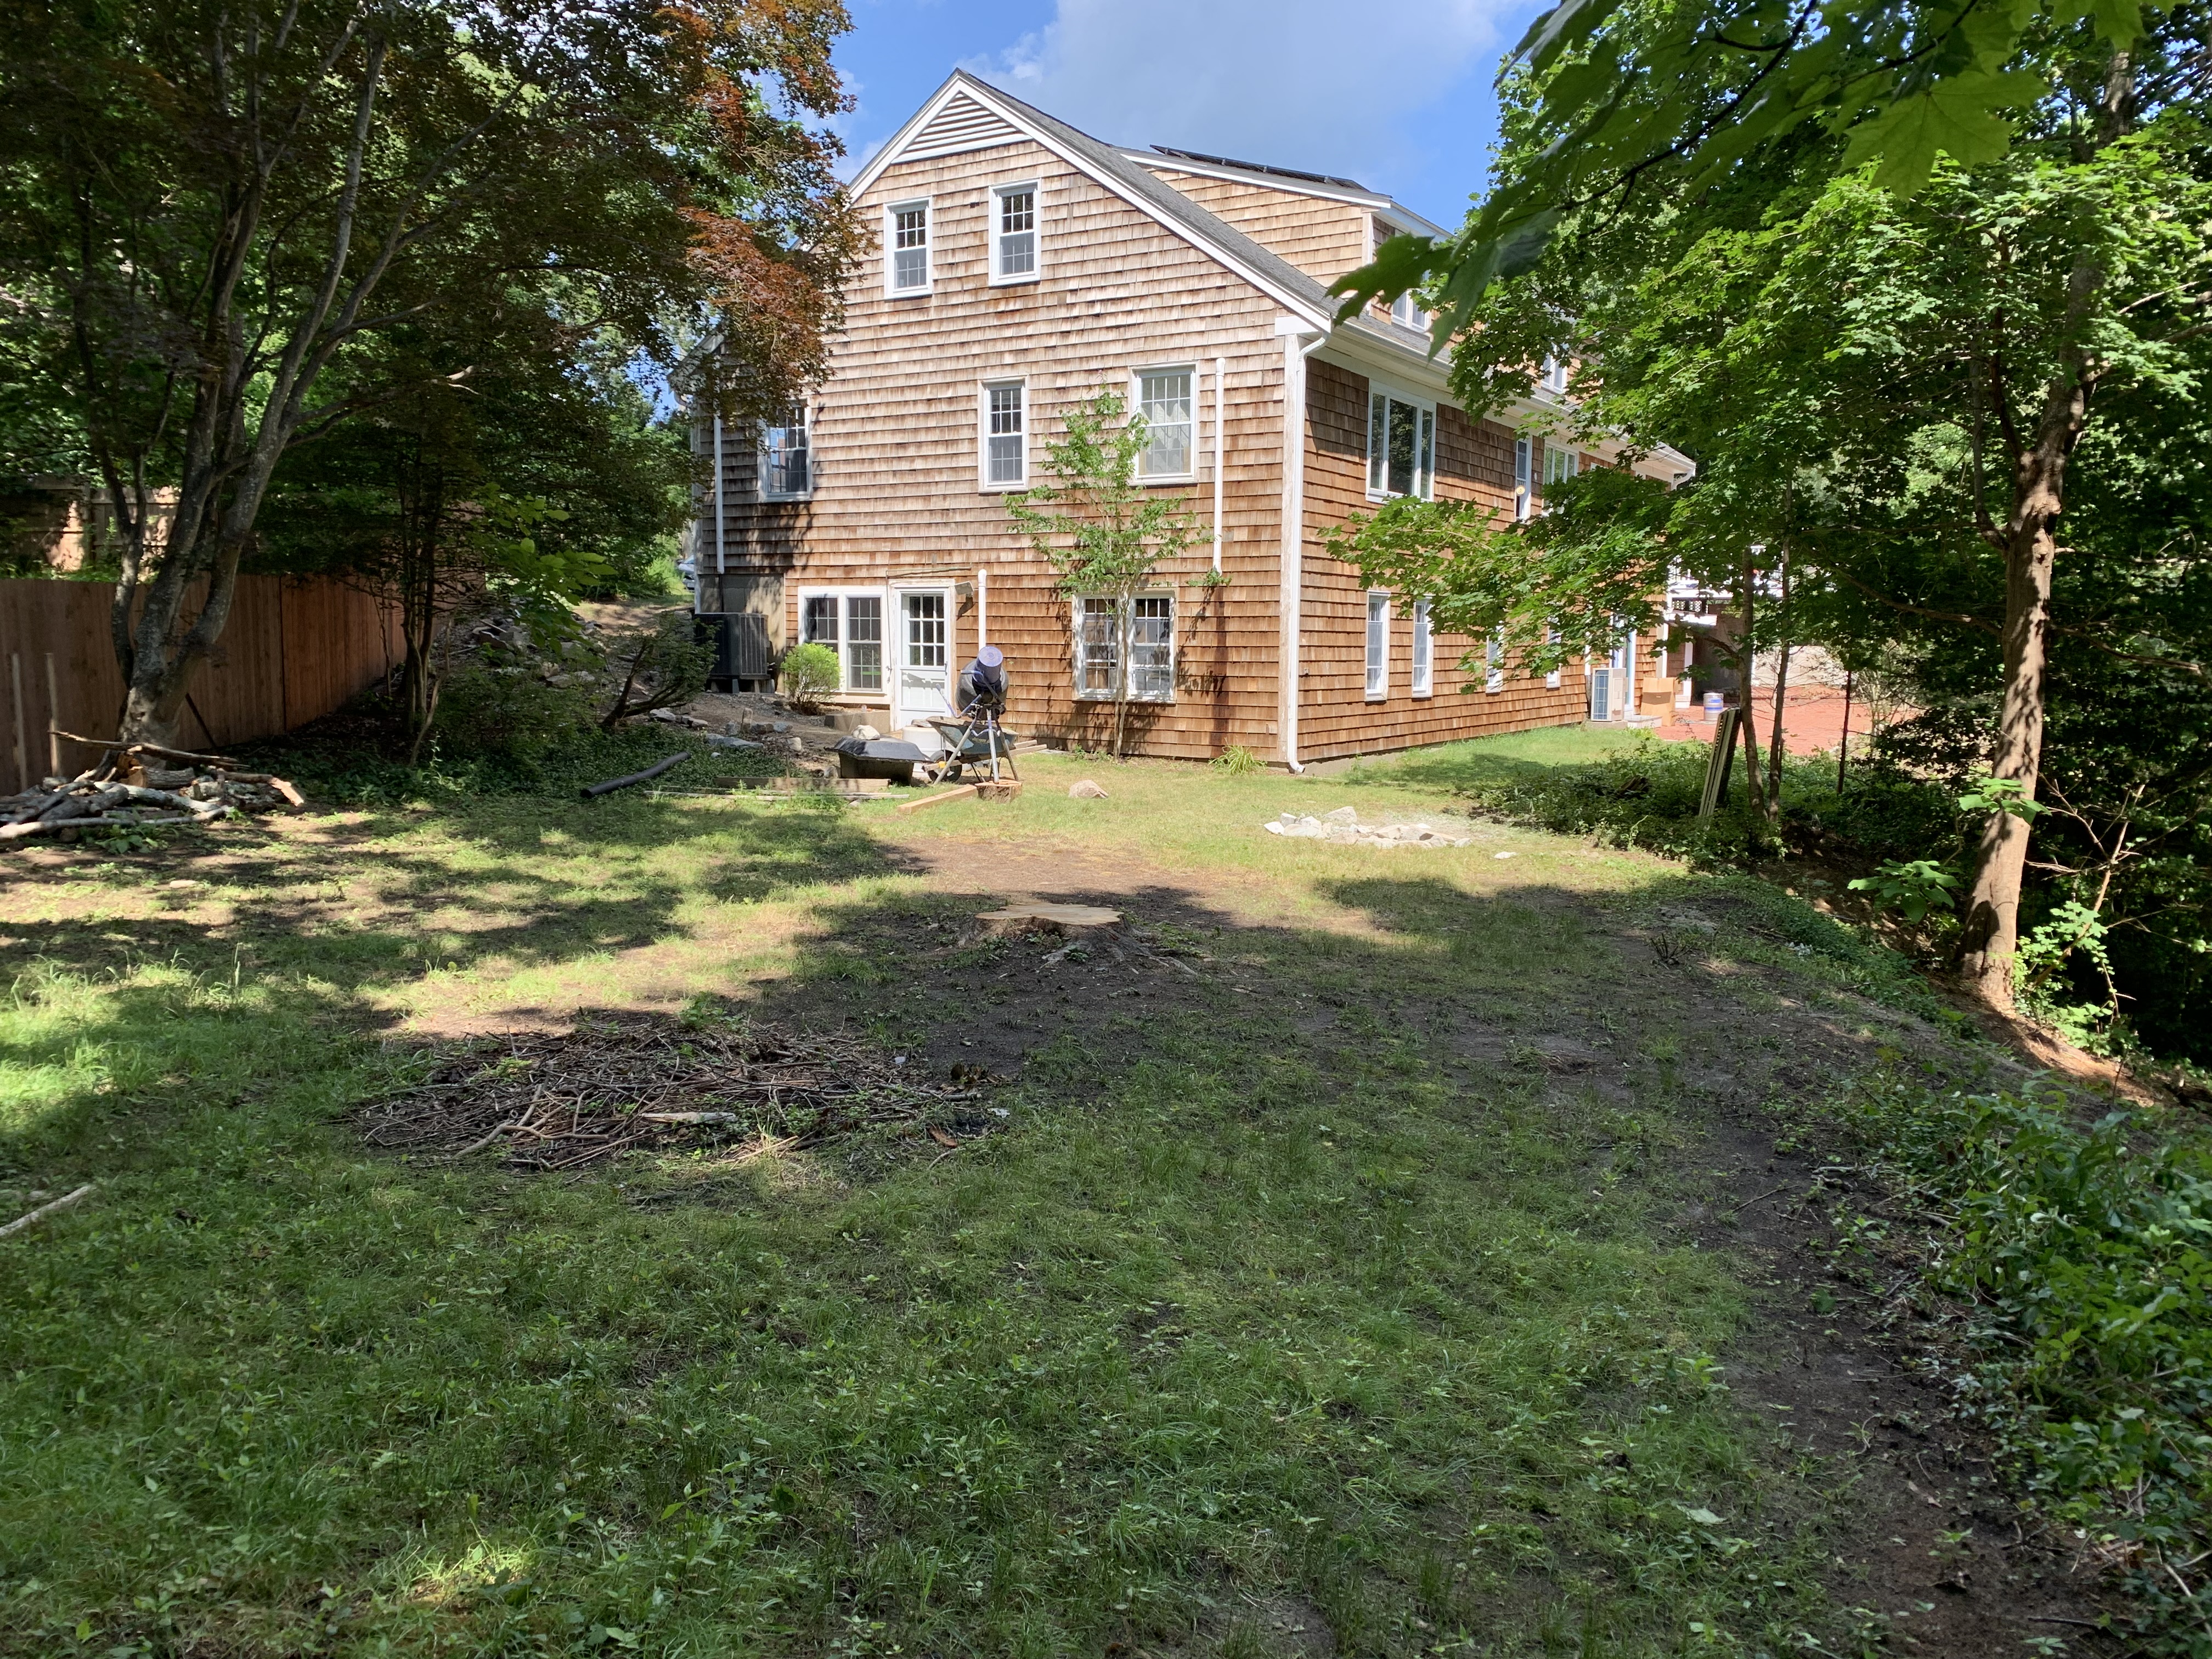
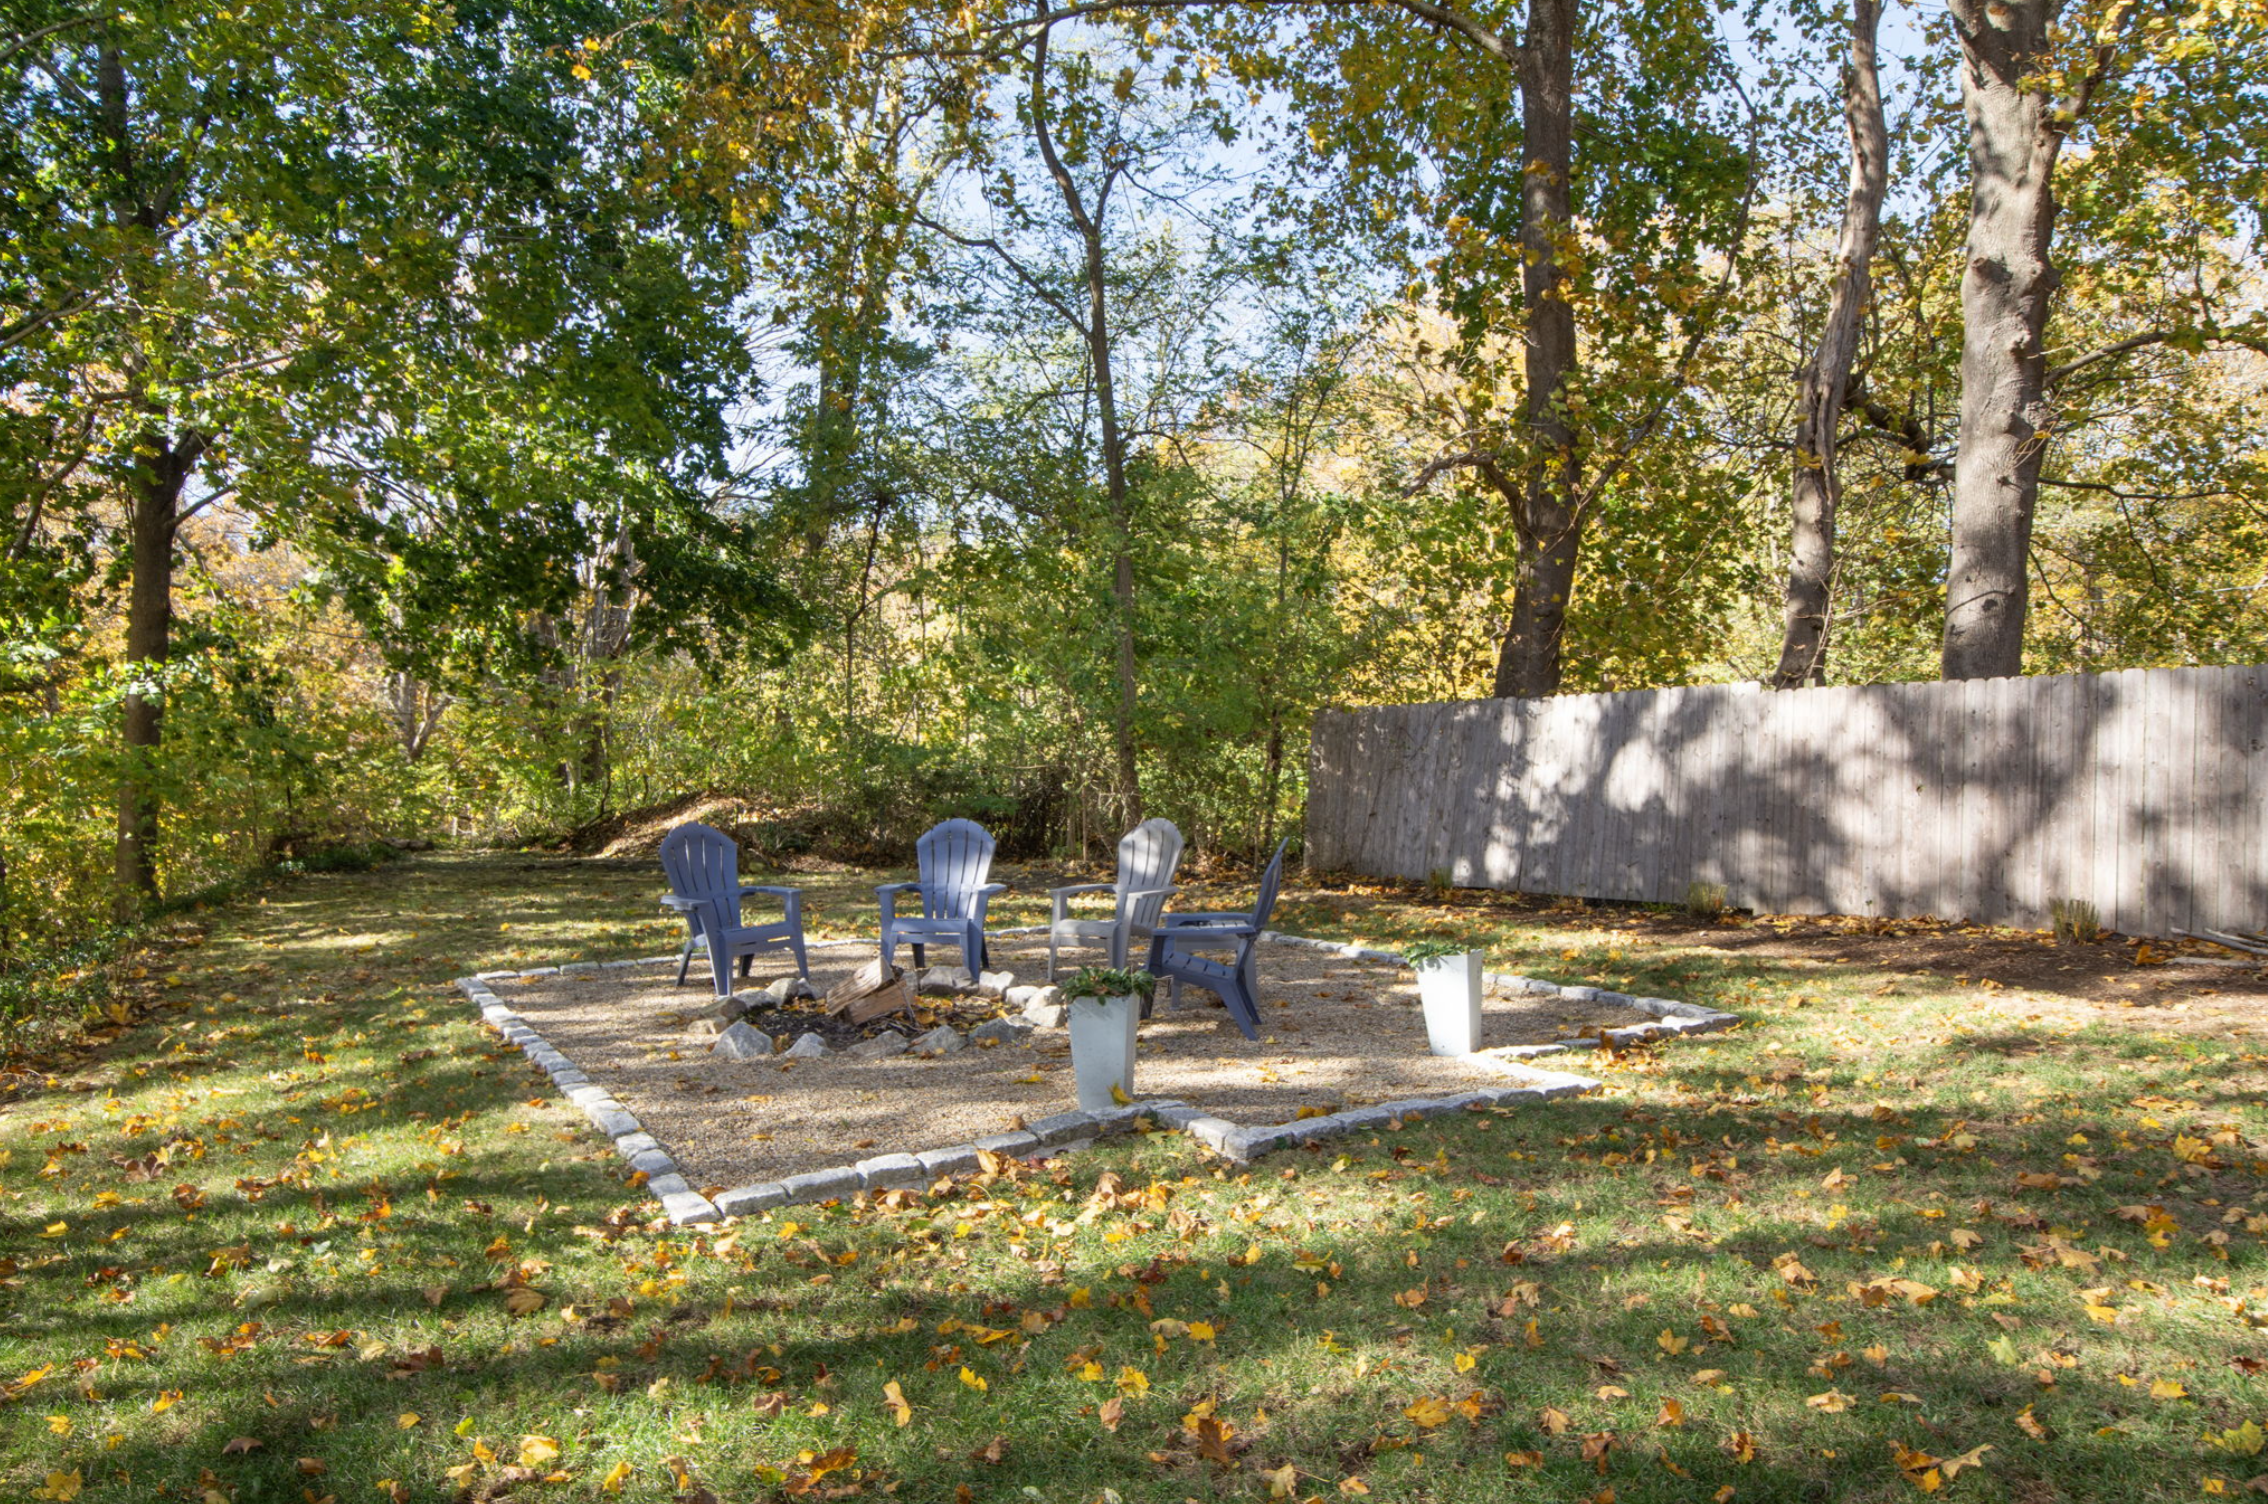
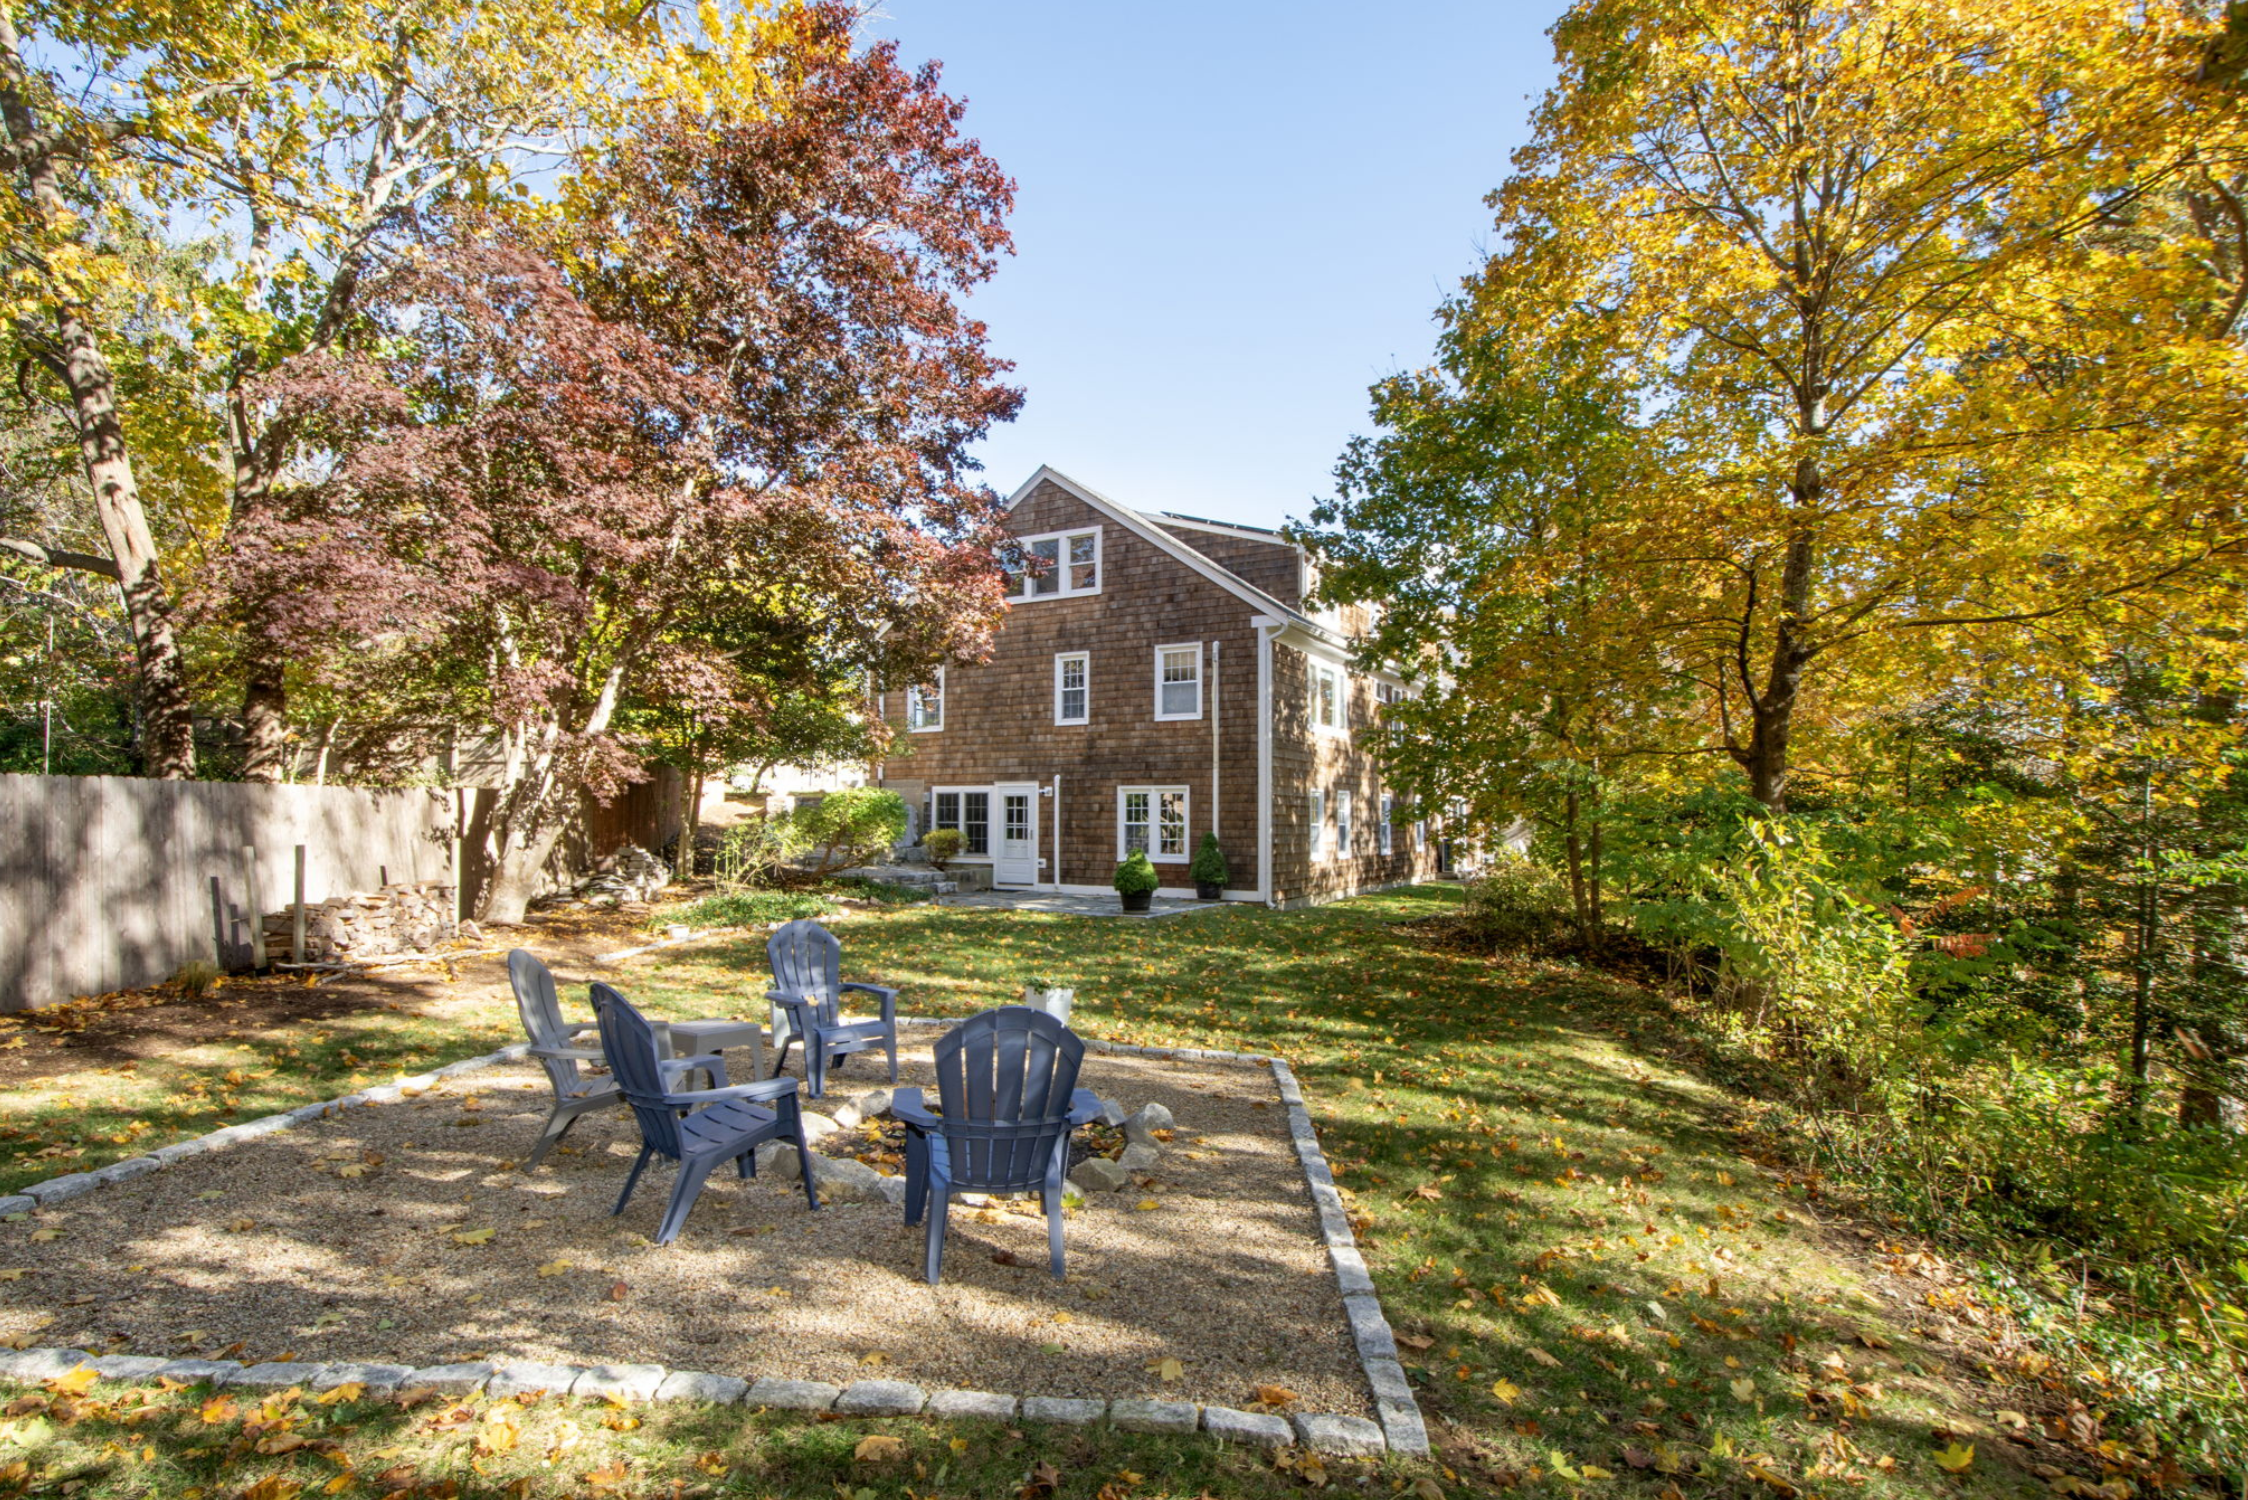
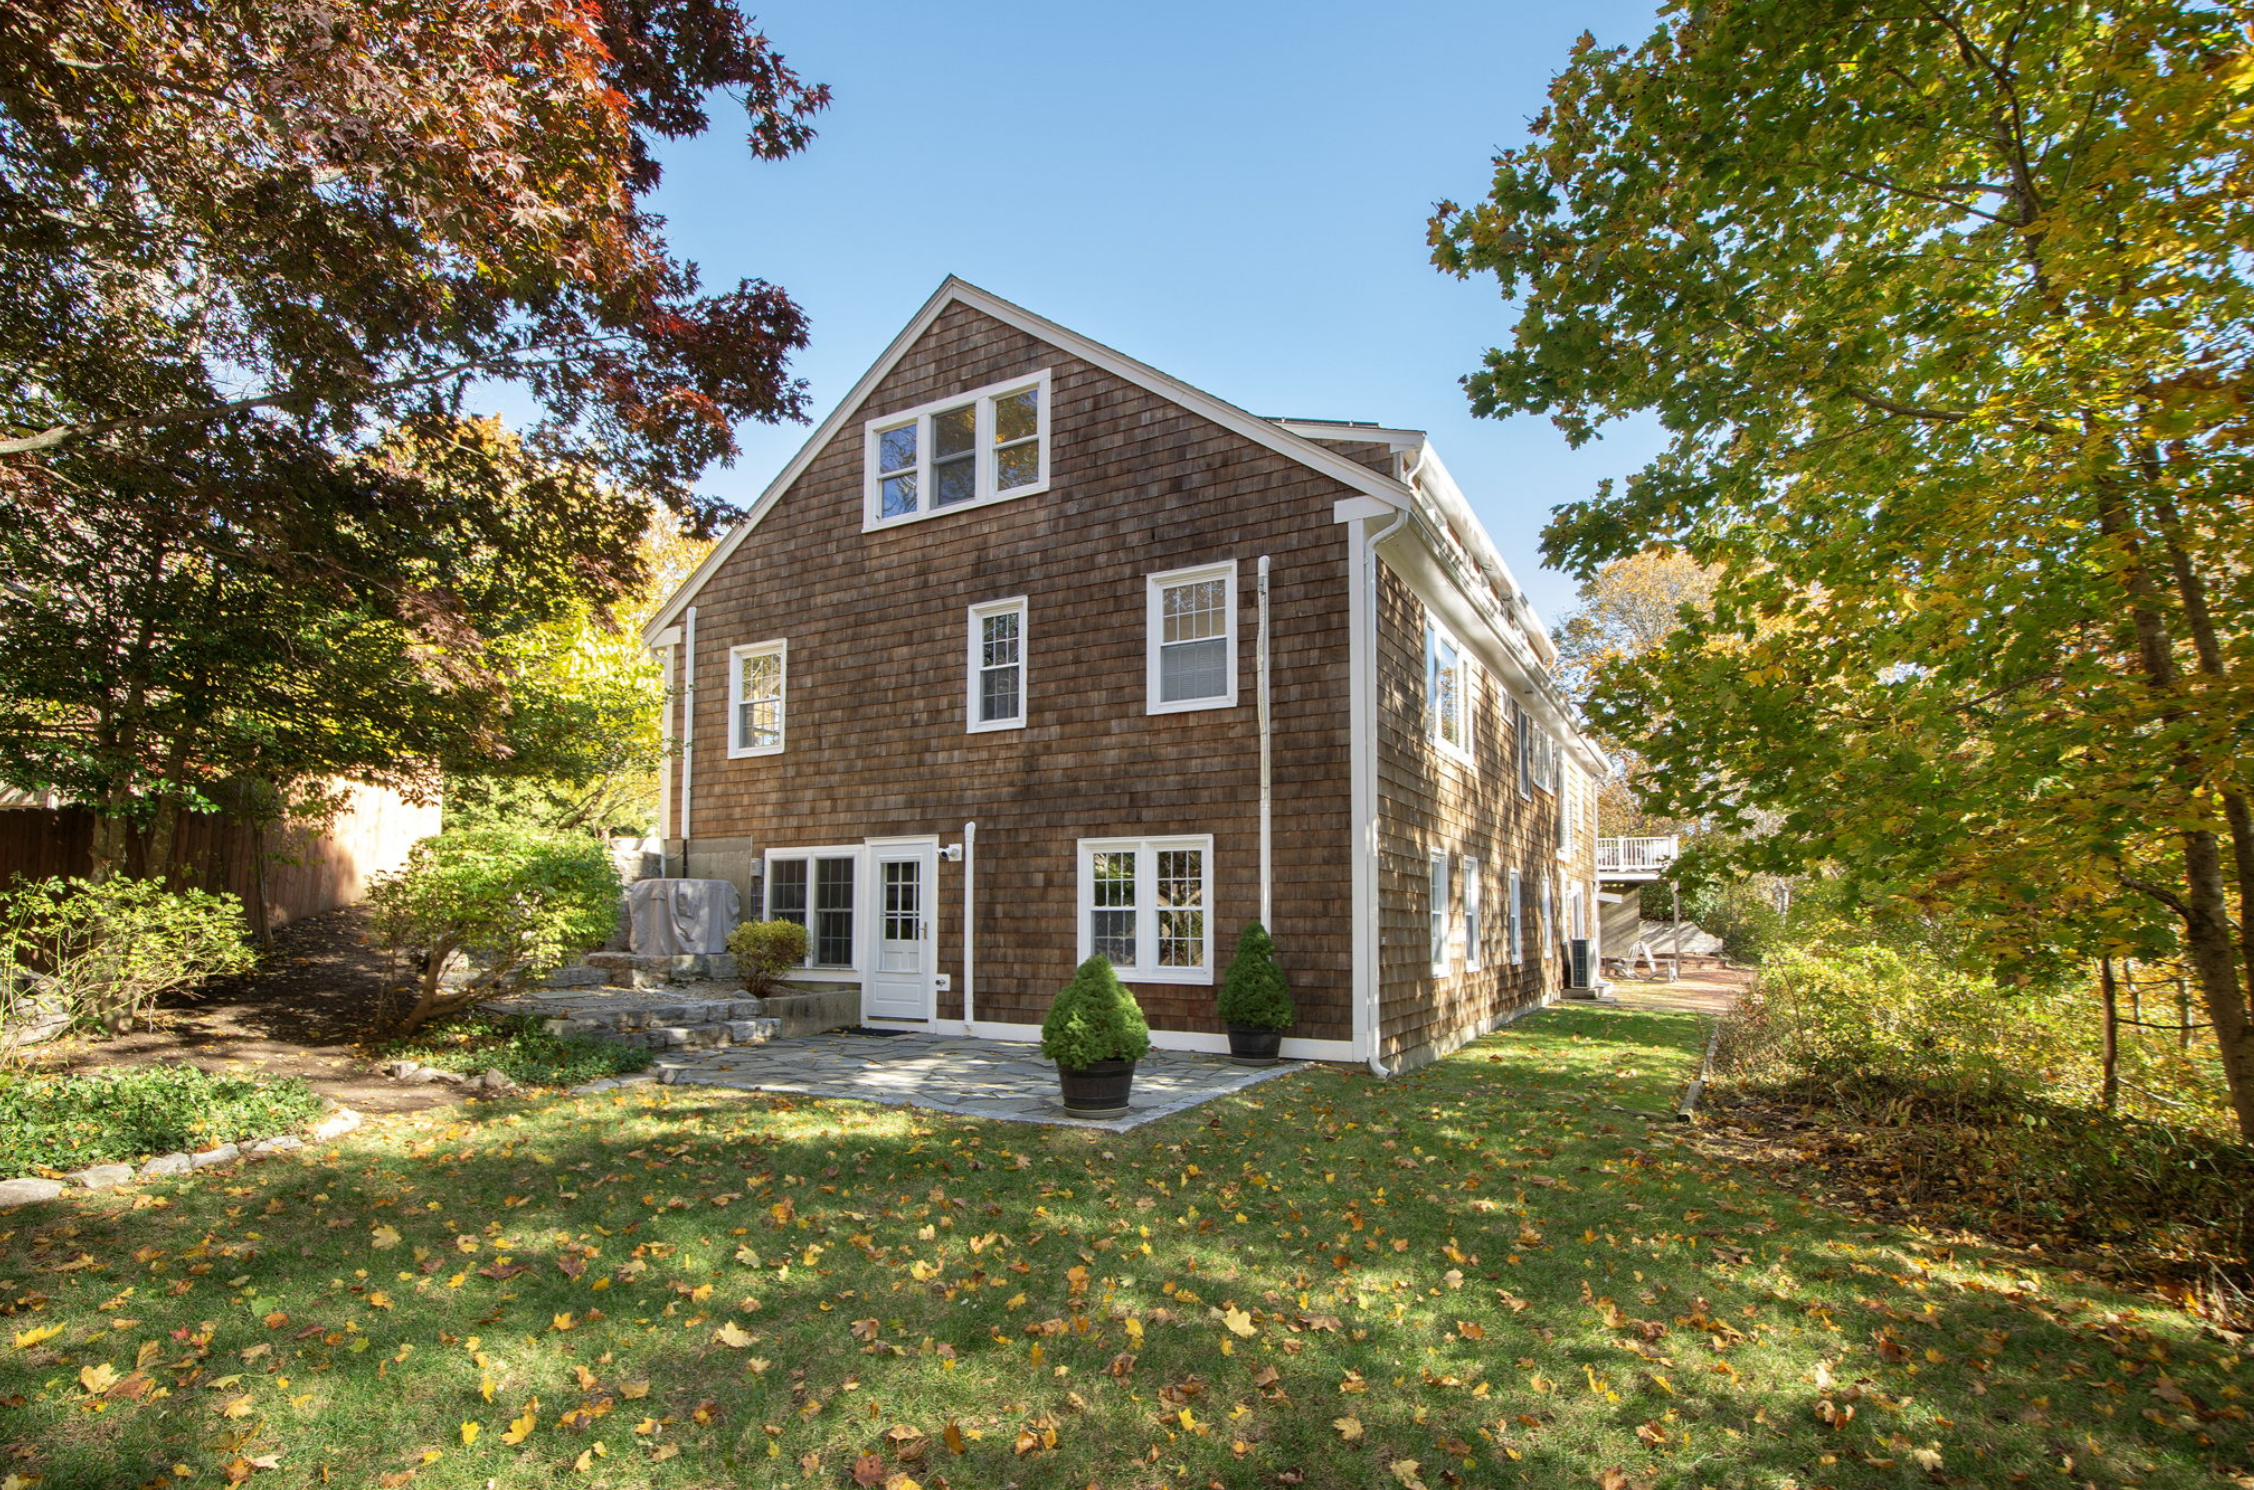
The siding on the western wall of the house had been neglected for so long that by the time we got to it to try to power wash and stain it, it was too late. It was all potato chipping – warping and gapping and just not repairable. And the mud that had washed down from the front yard and built up at the base of the west wall created some damage. So we replaced the shingles which will last for another lifetime. Finally, we added a patio accessible from the west basement walkout, and a firepit to warm those chilly autumn evenings. The west lawn is now a beautiful haven, in every season of the year.
Let’s head back inside via the basement…
is that a … dog shower?!
wood shelving was old and moldy, populated by rodents,
and the whole room was just dejected.
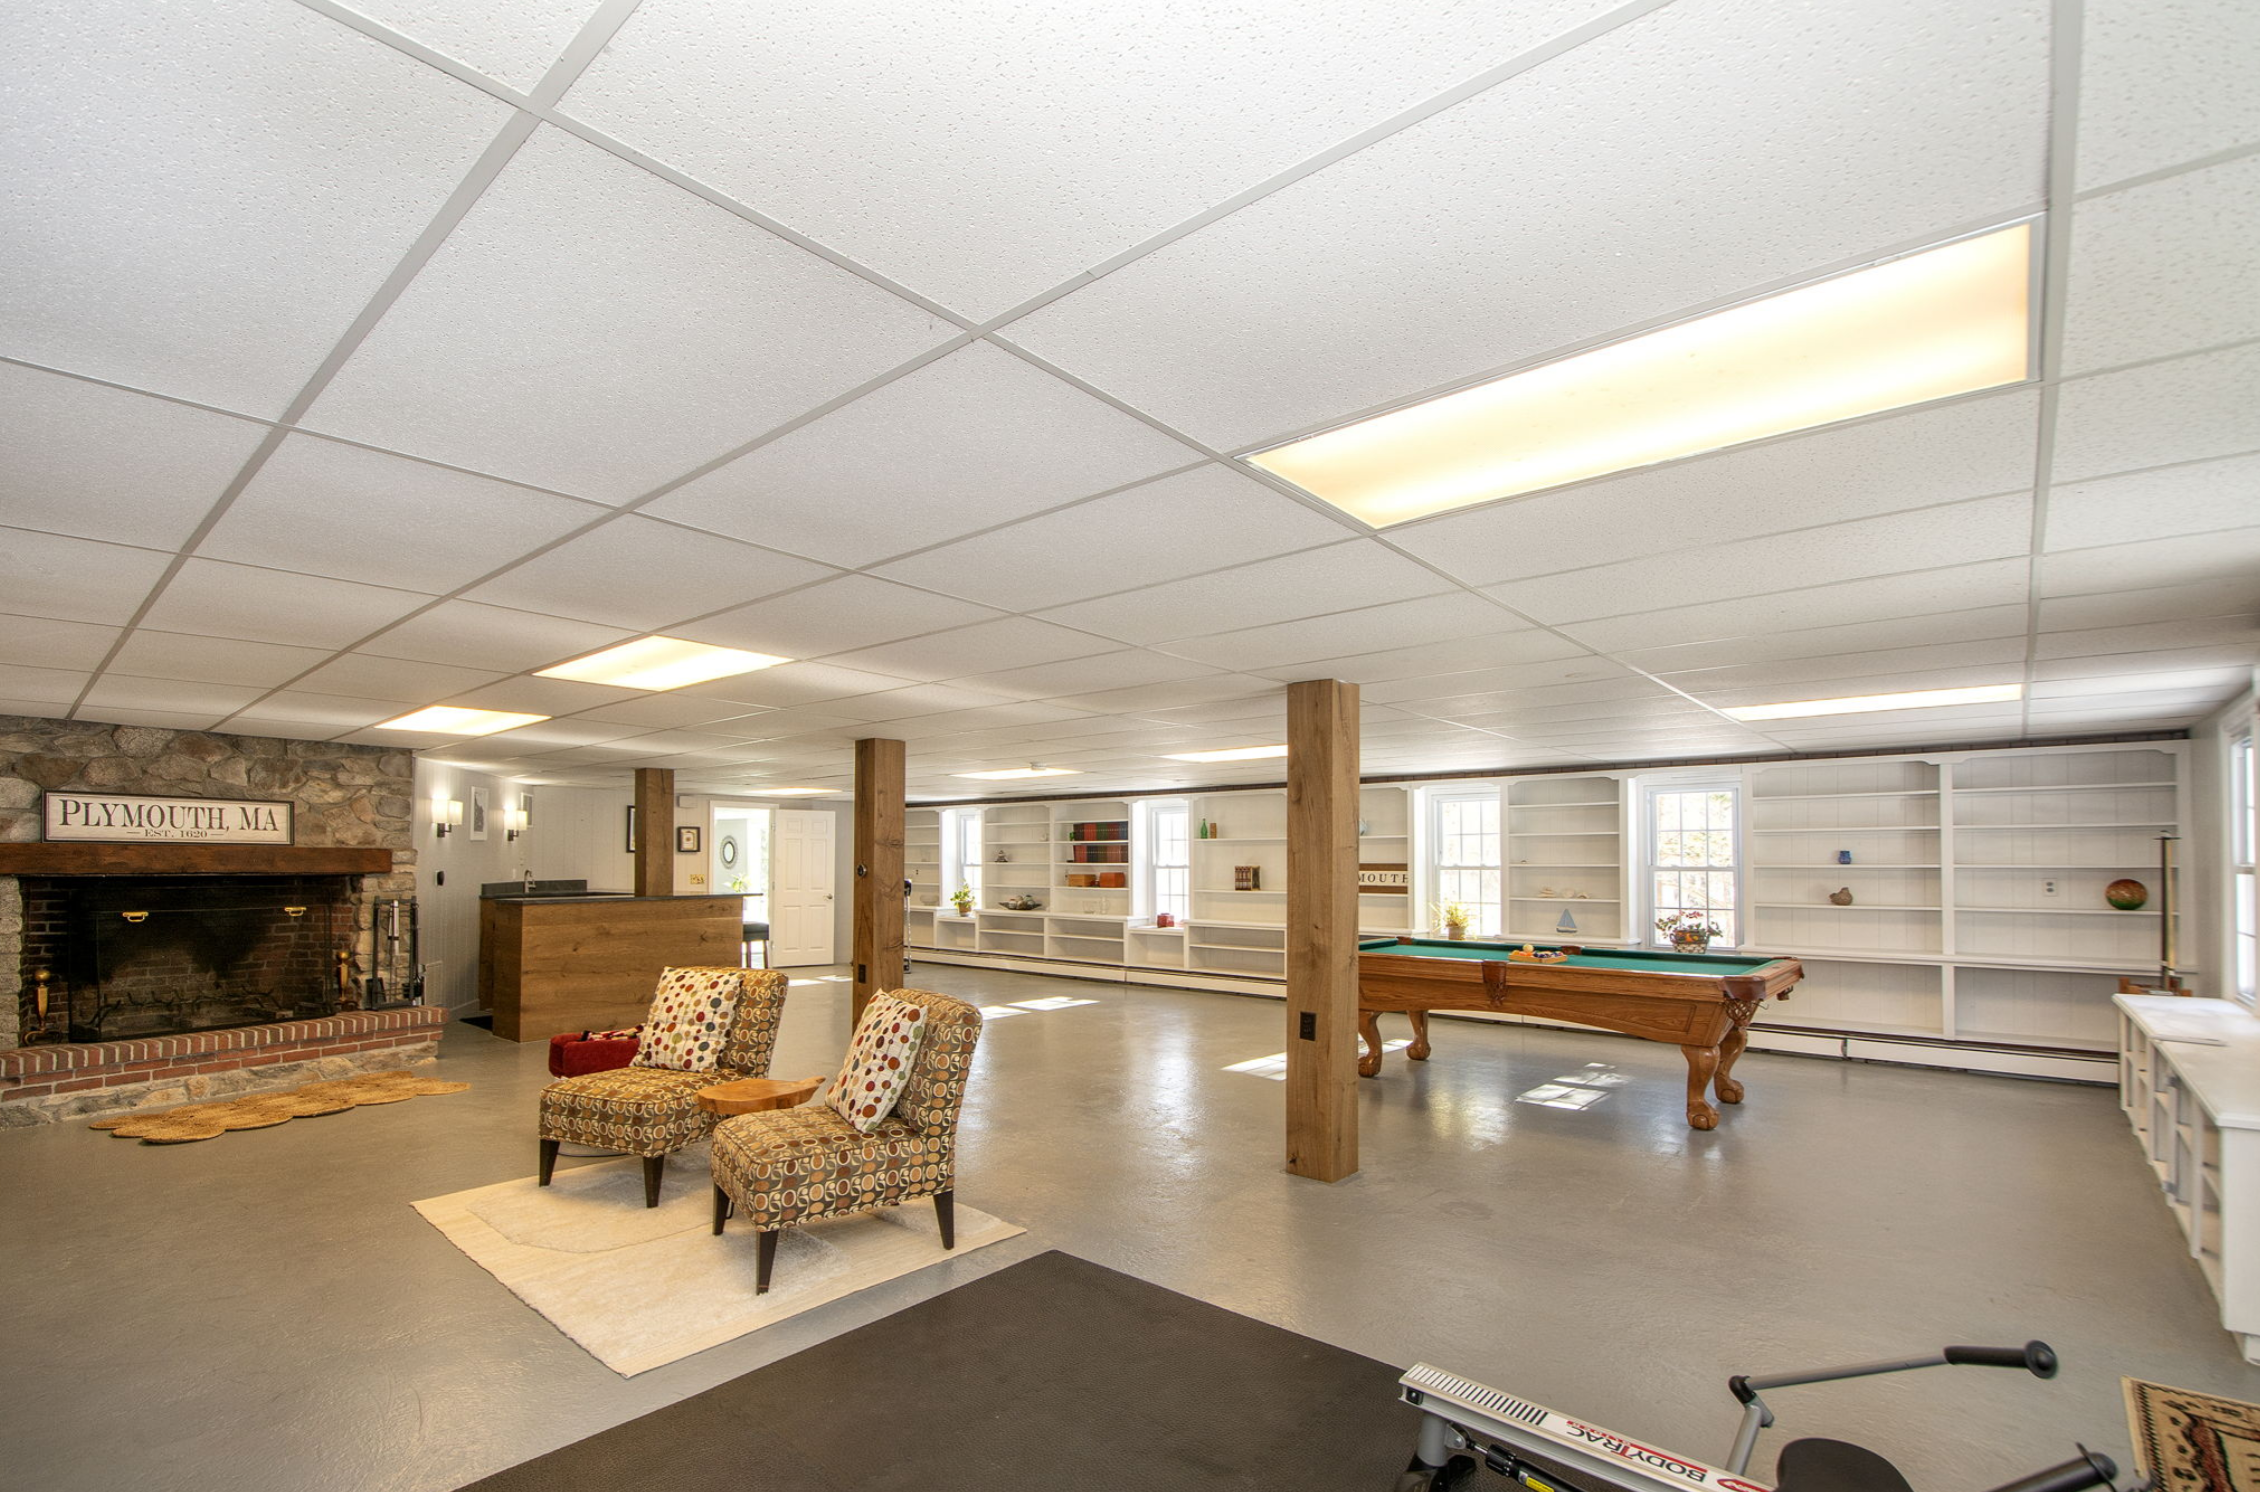
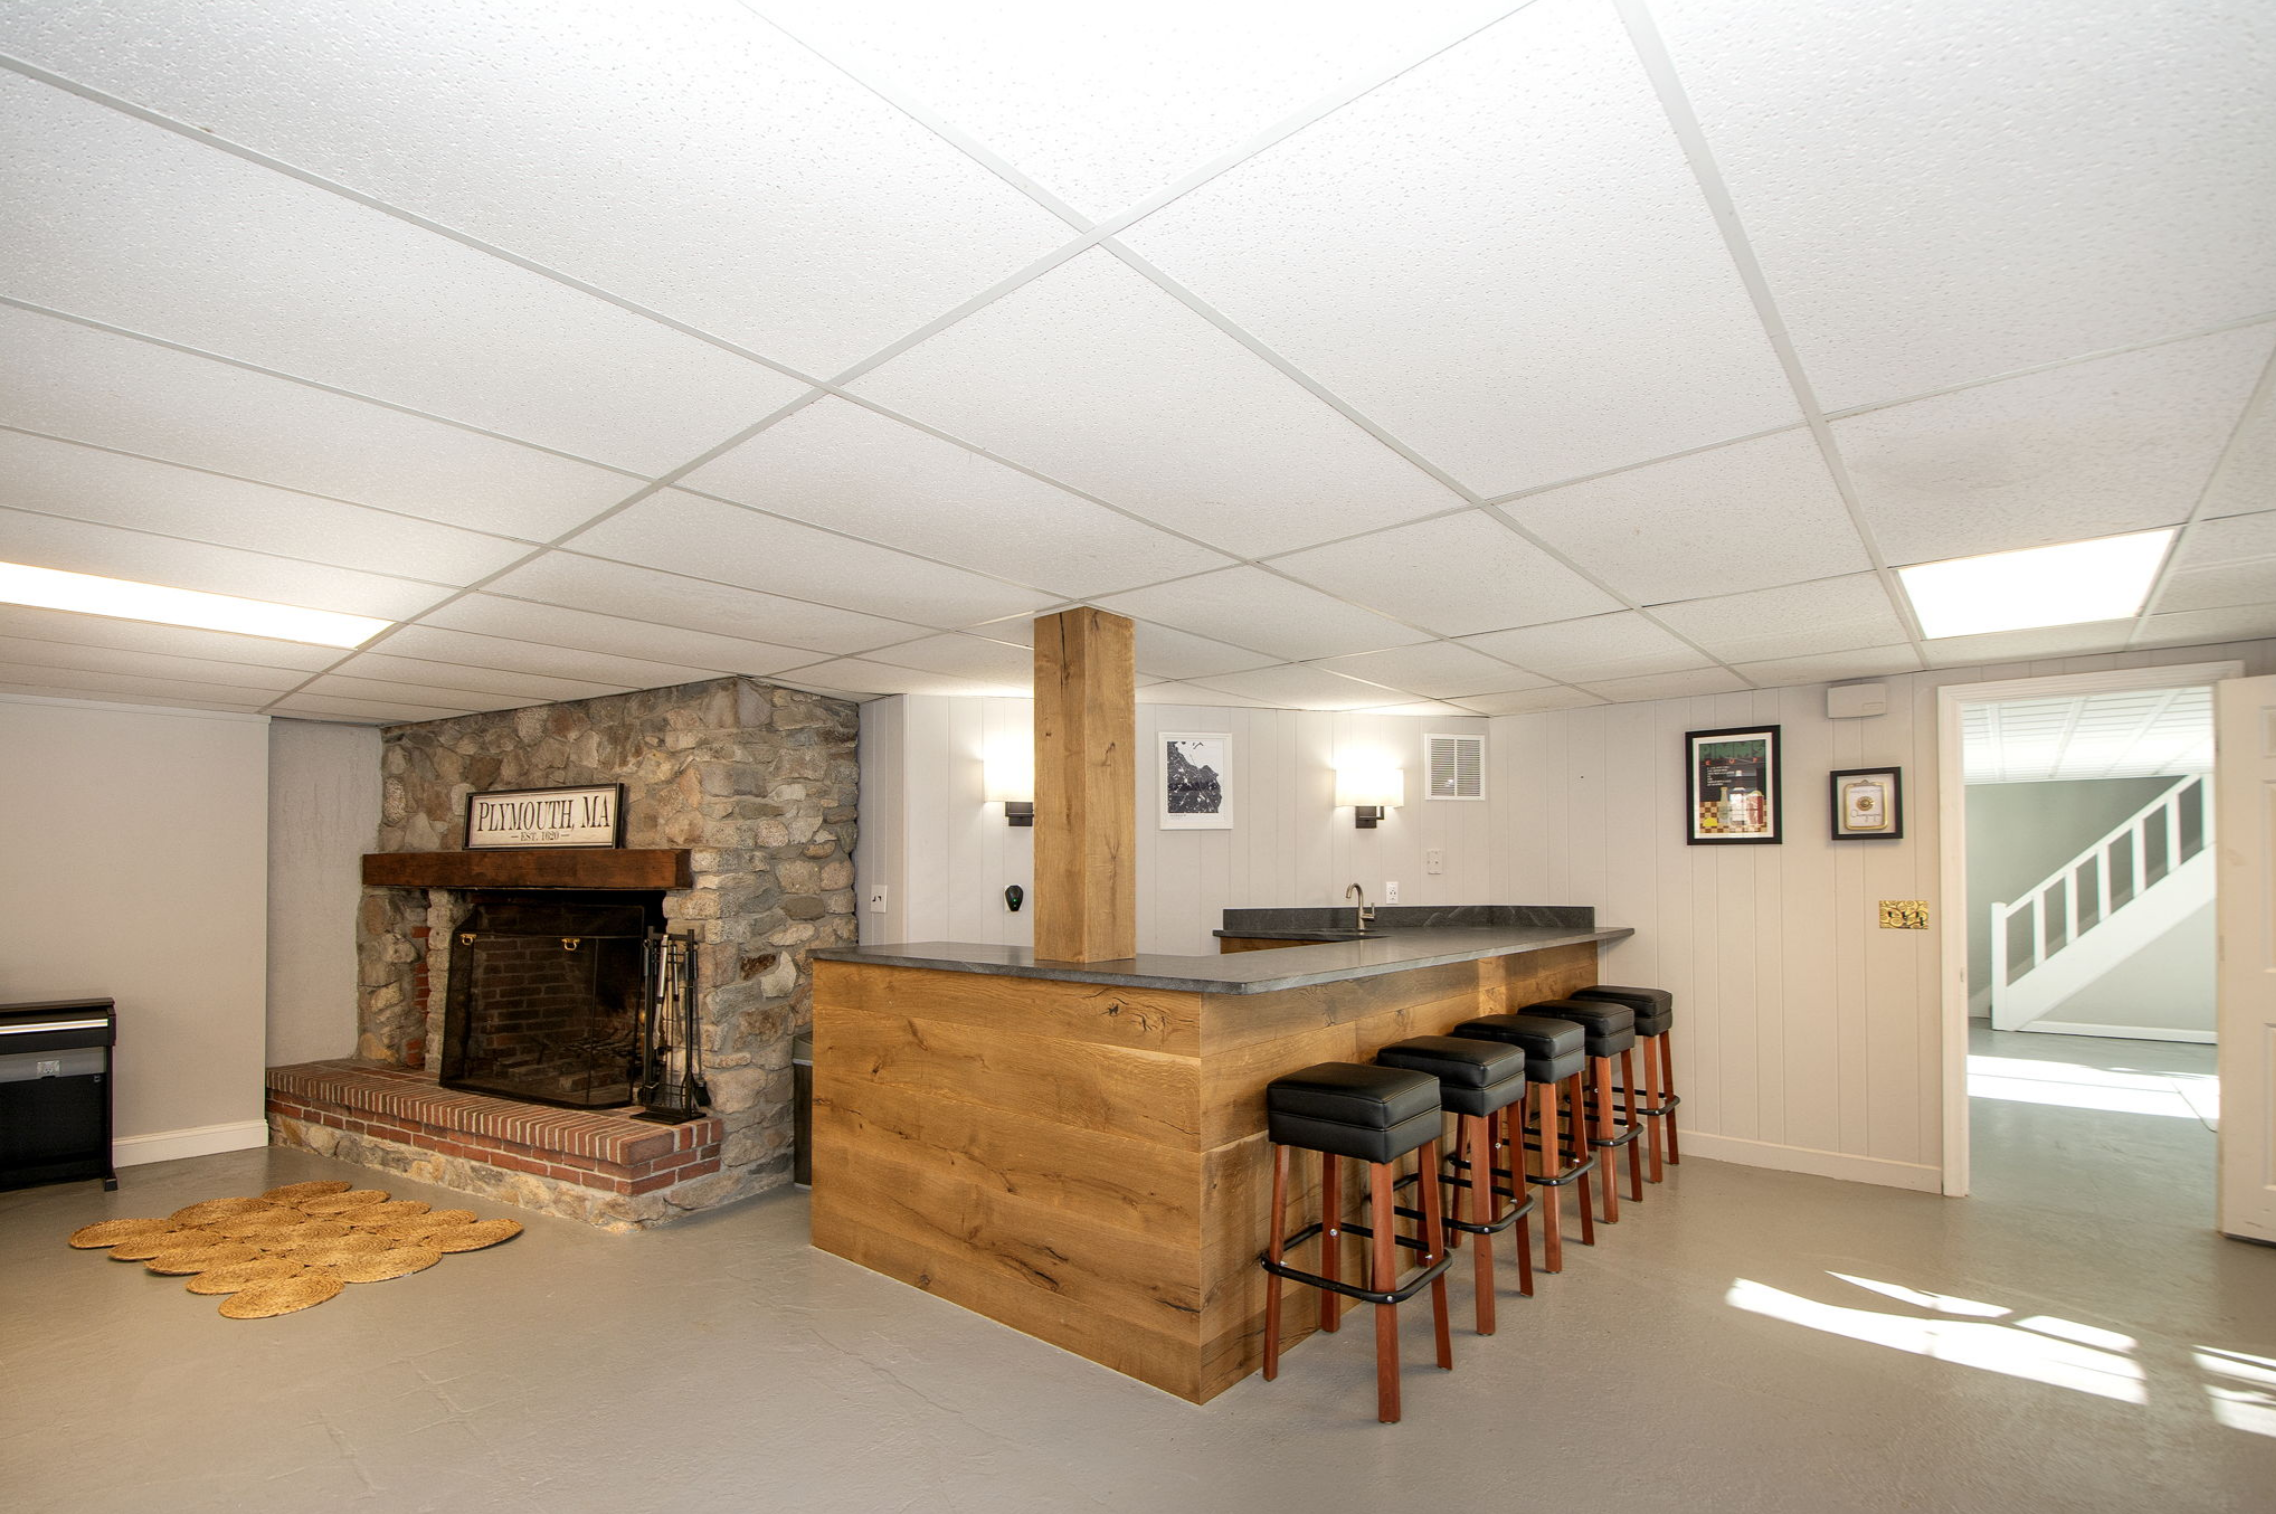
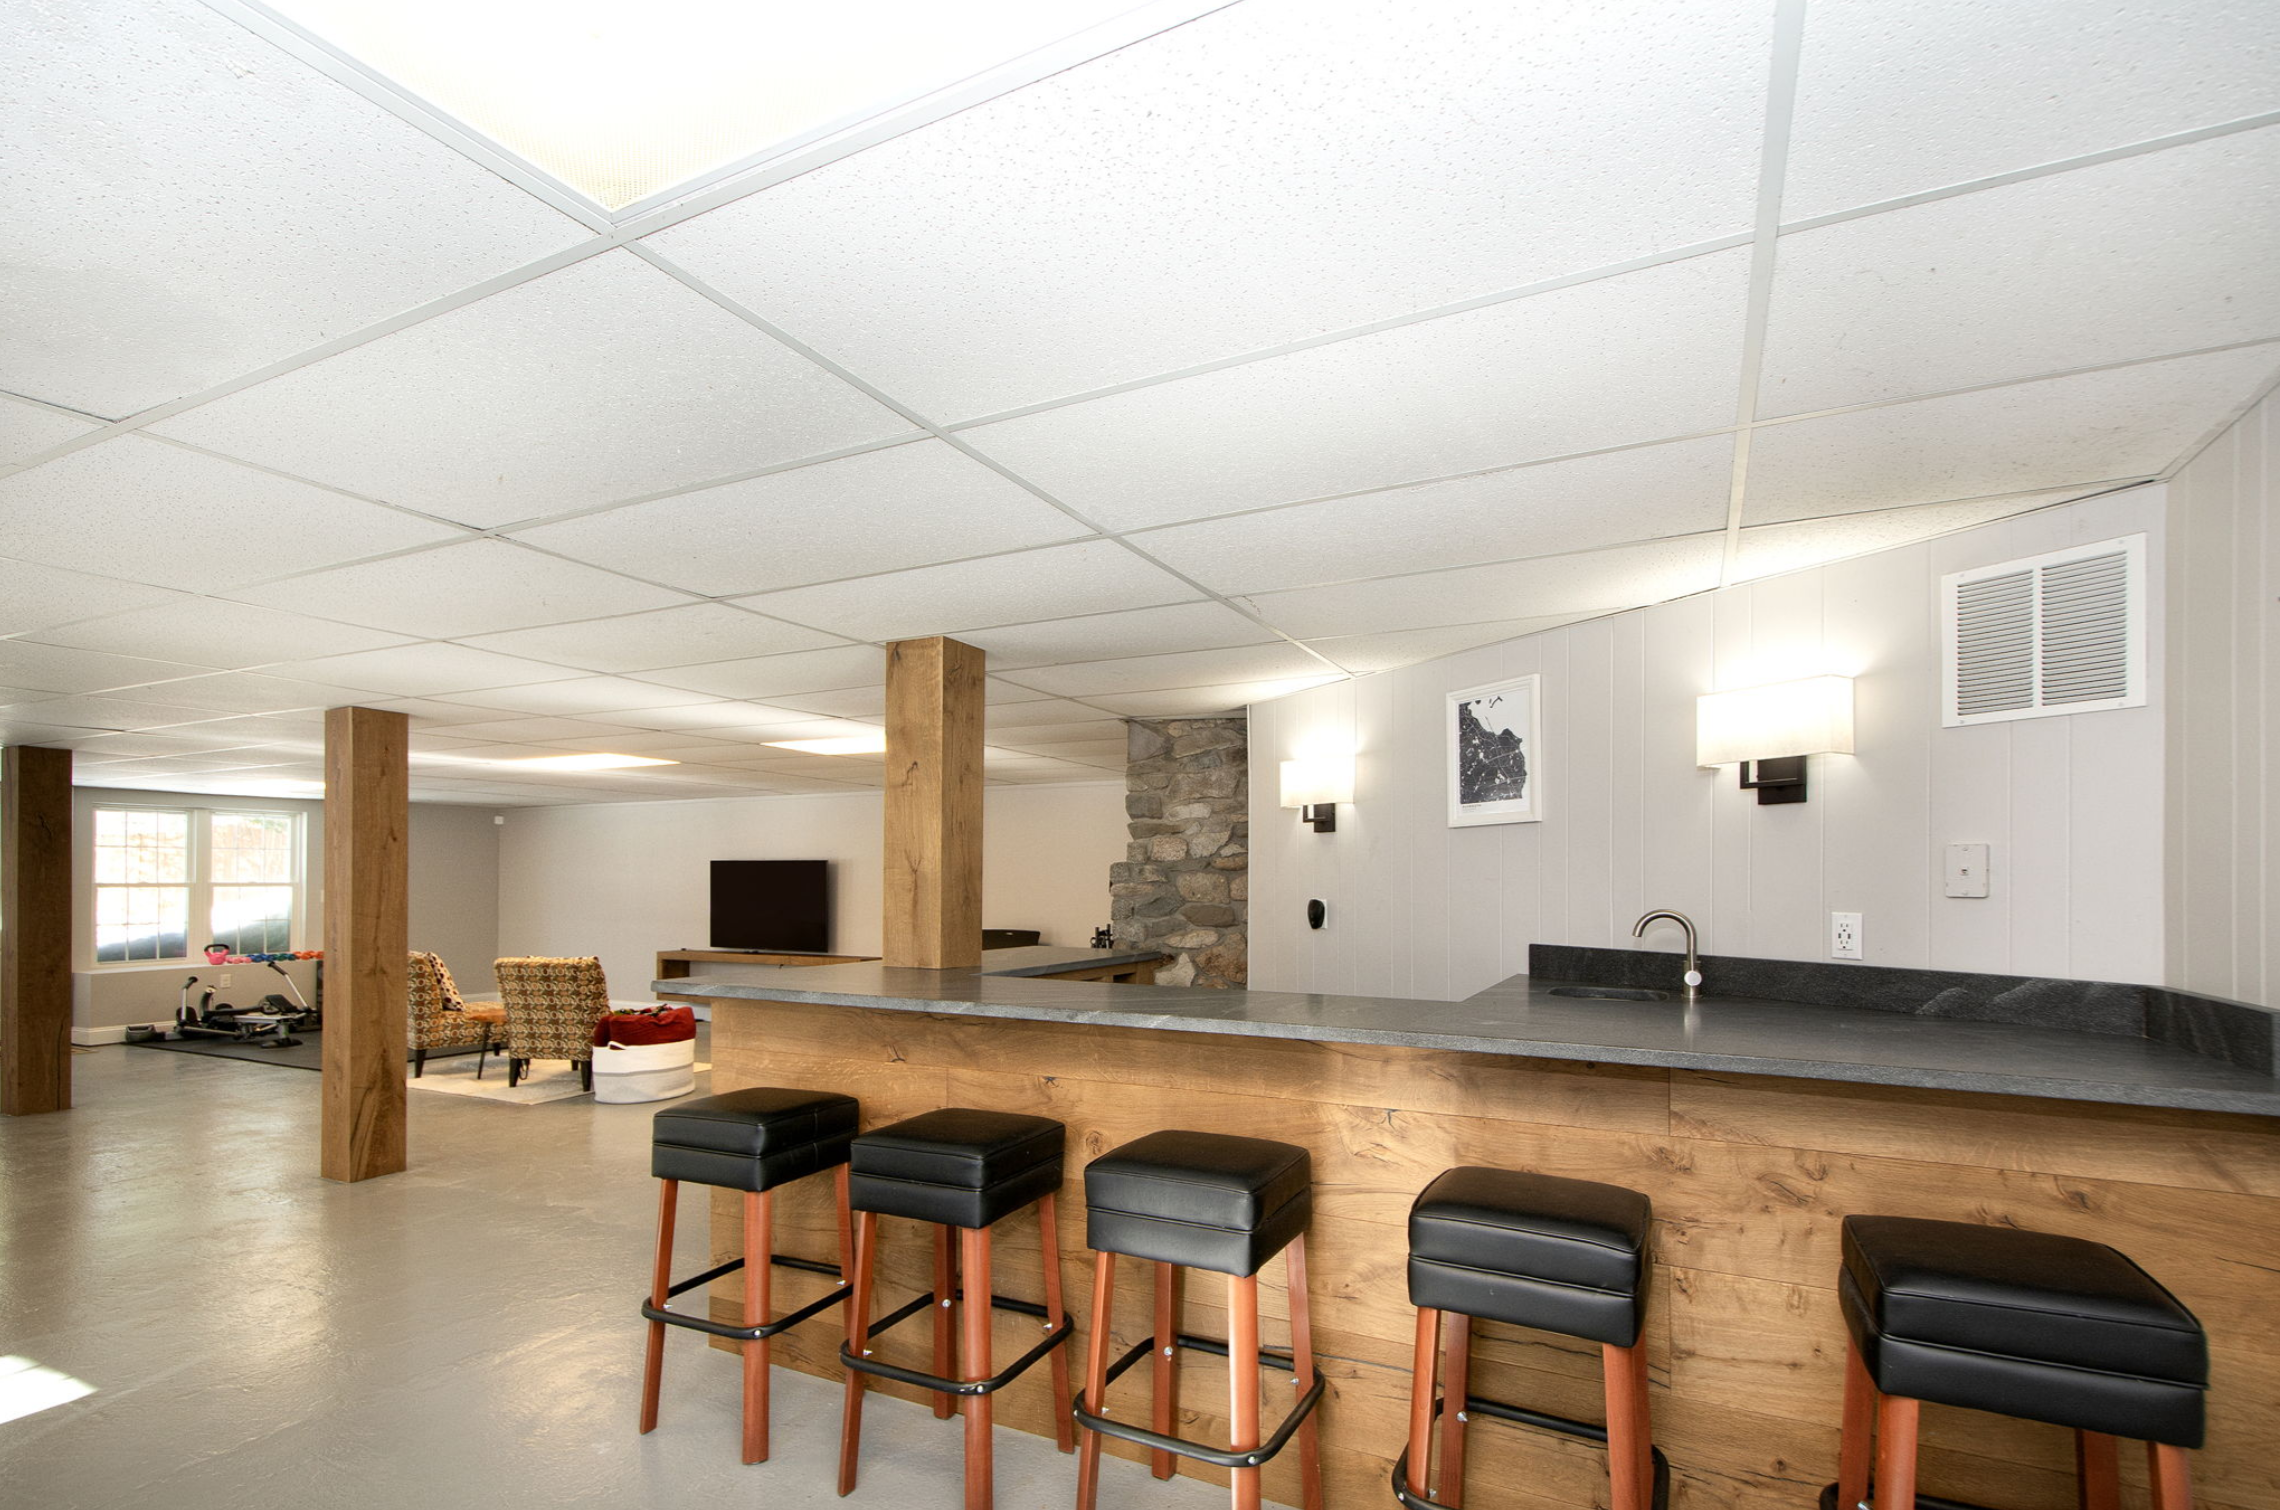
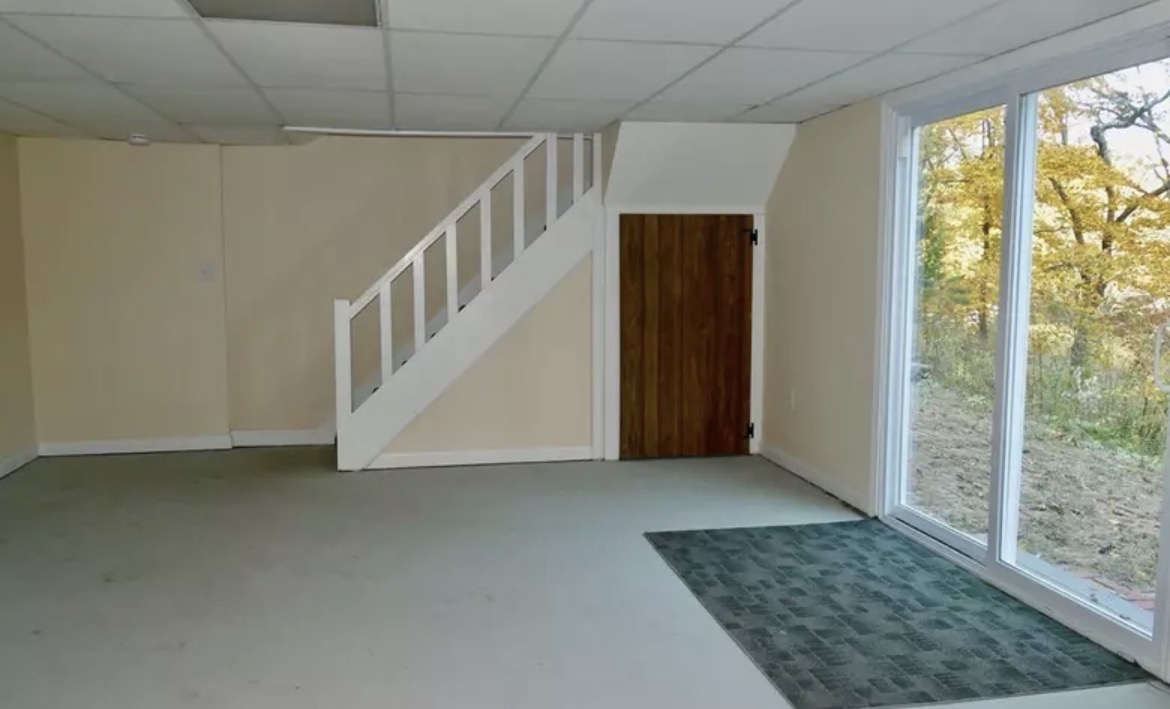
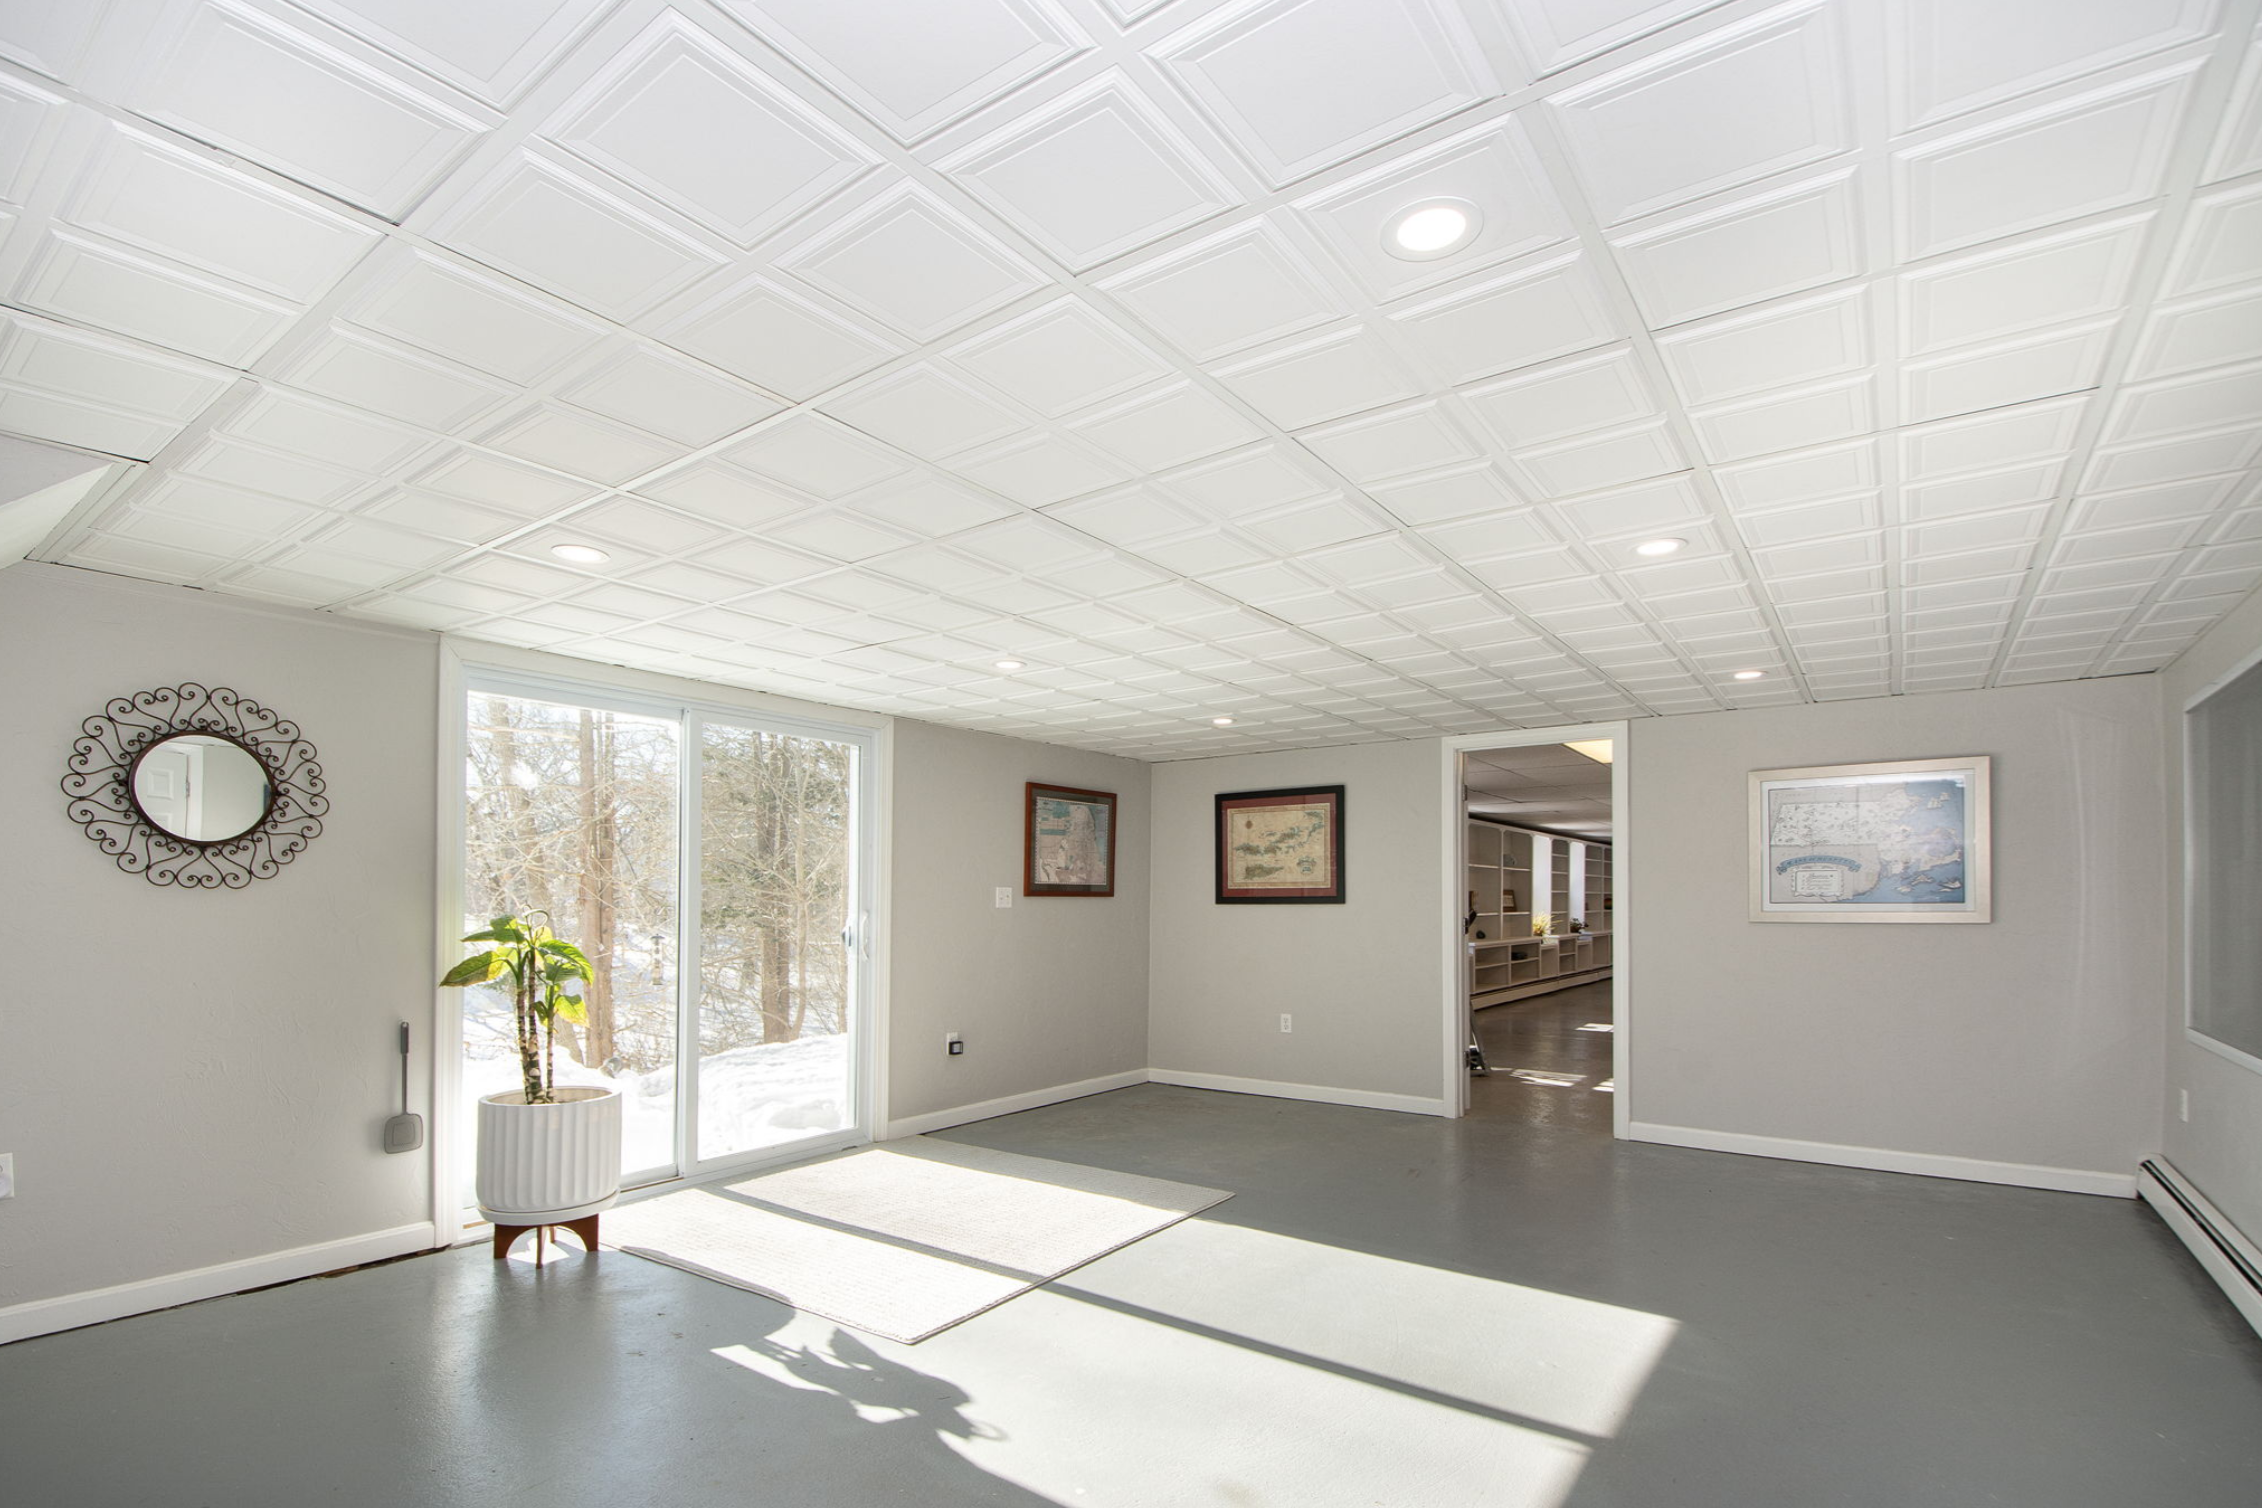
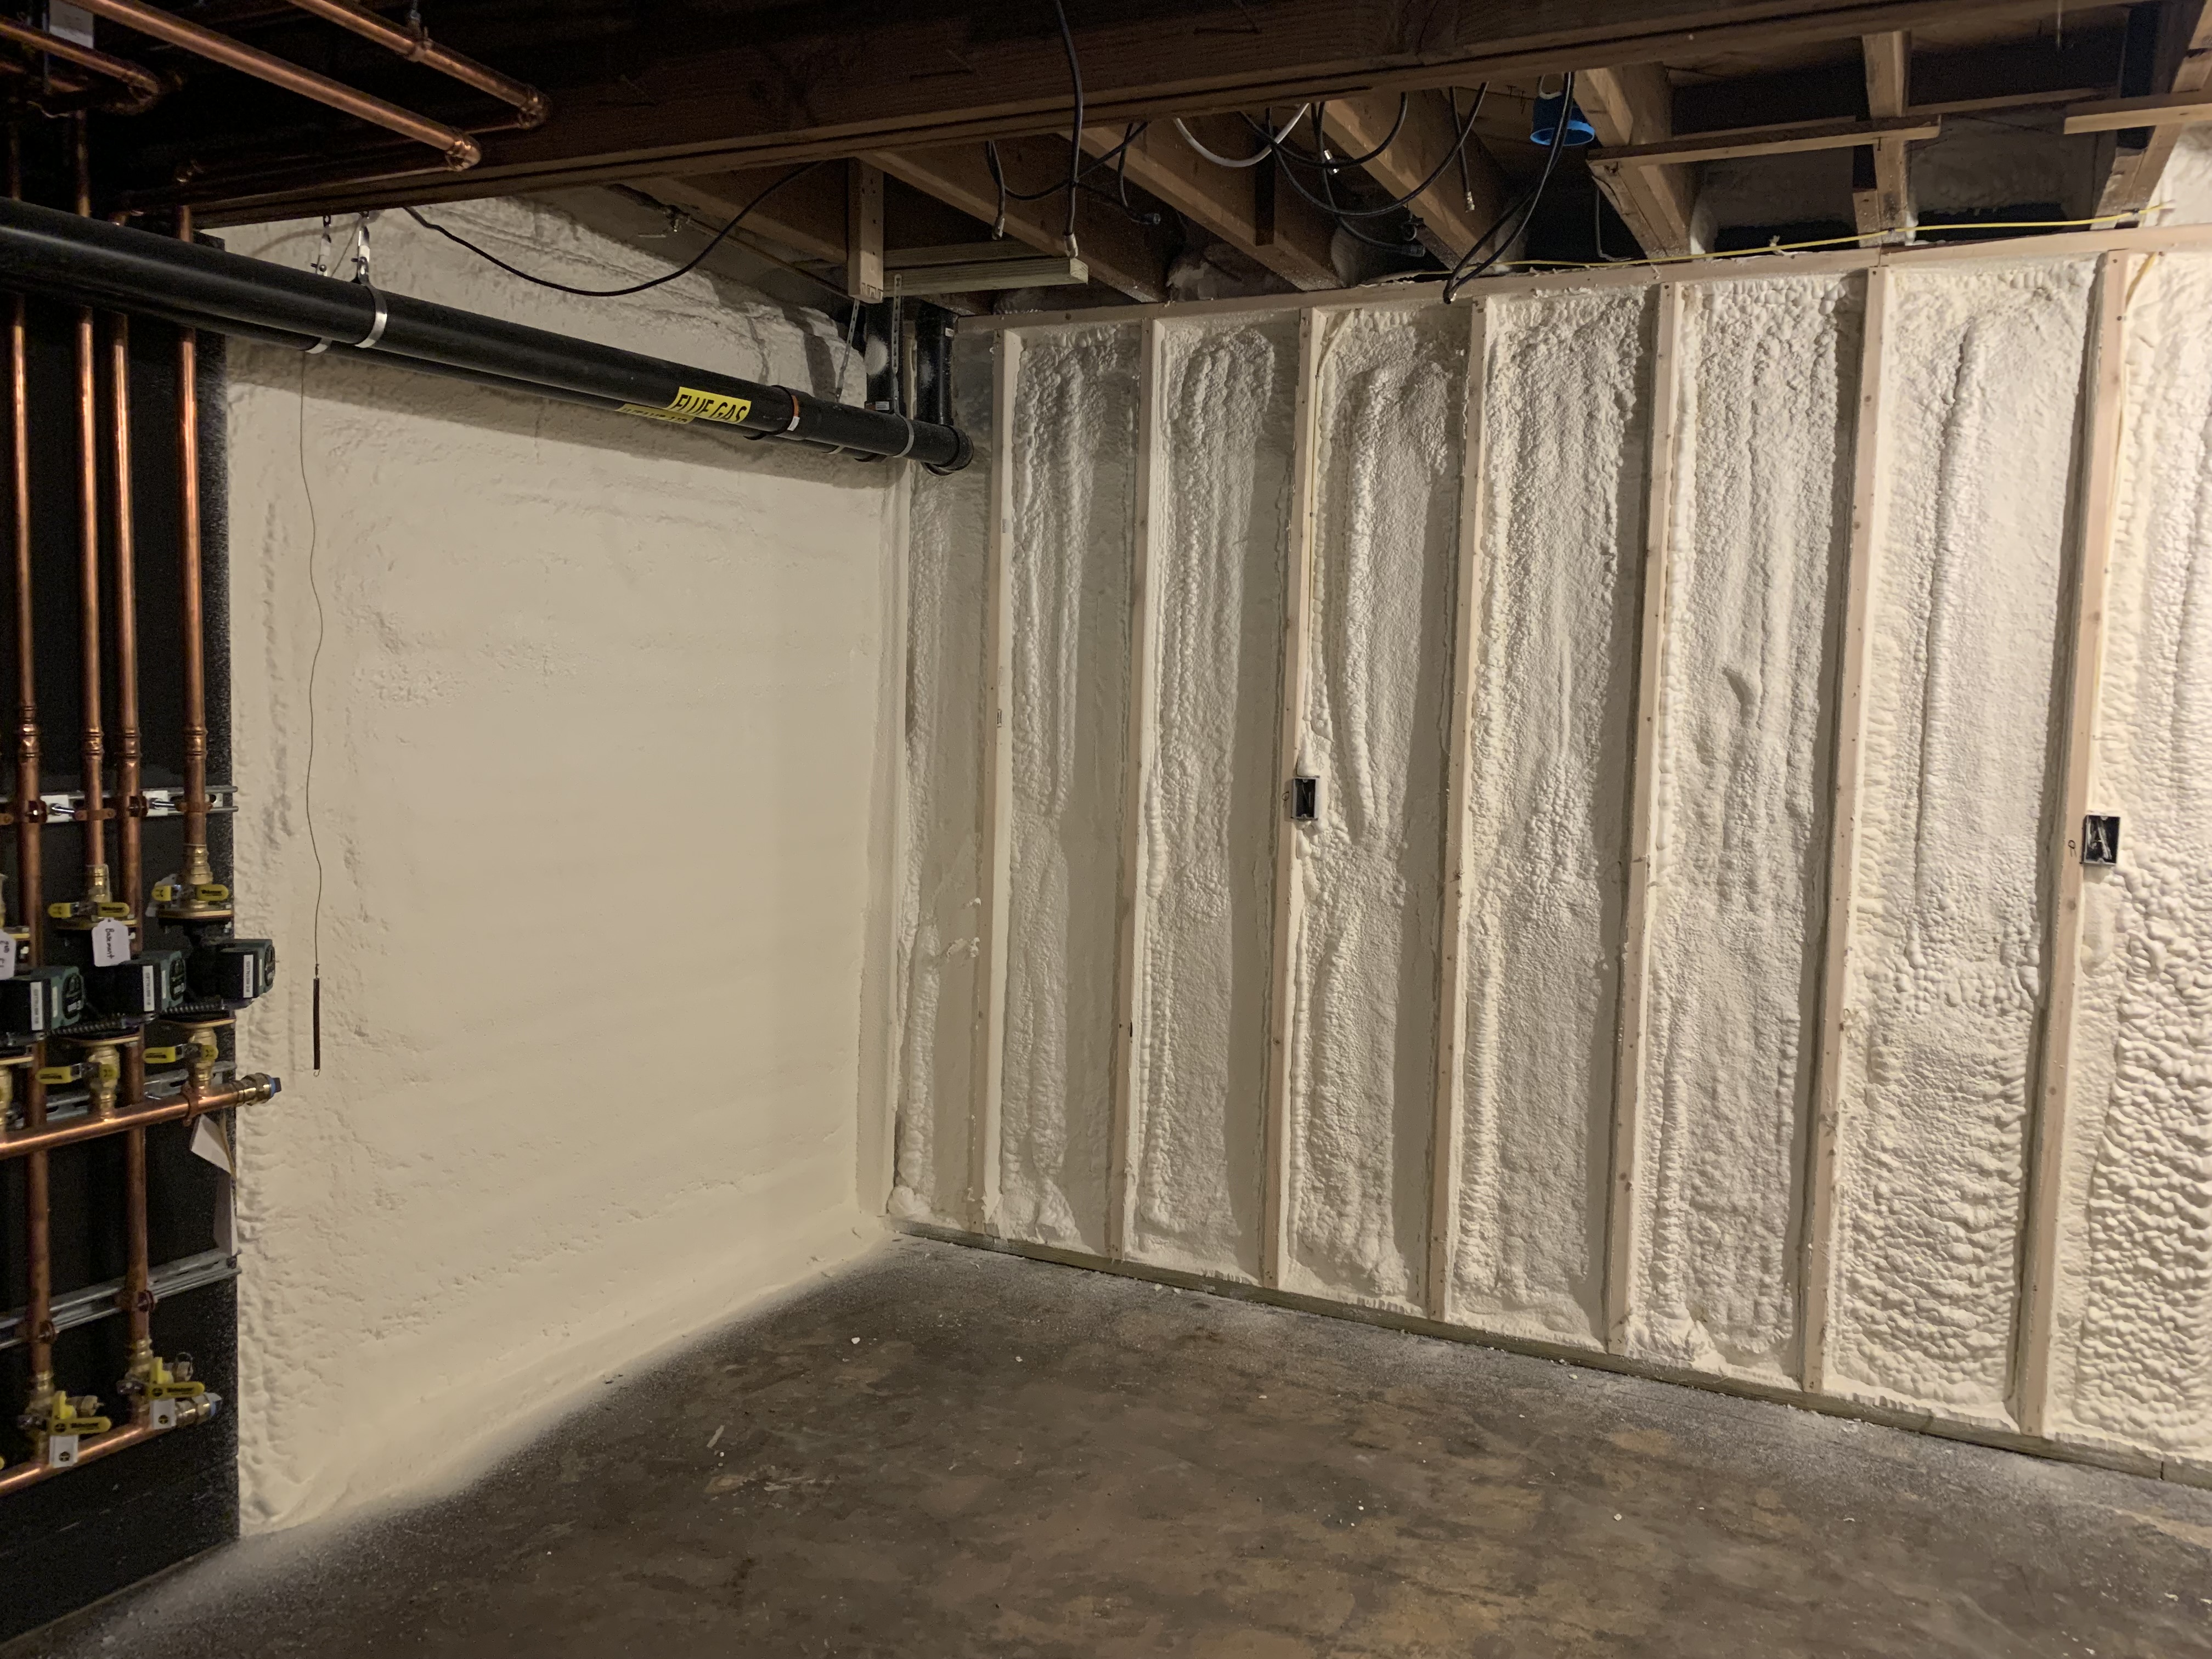
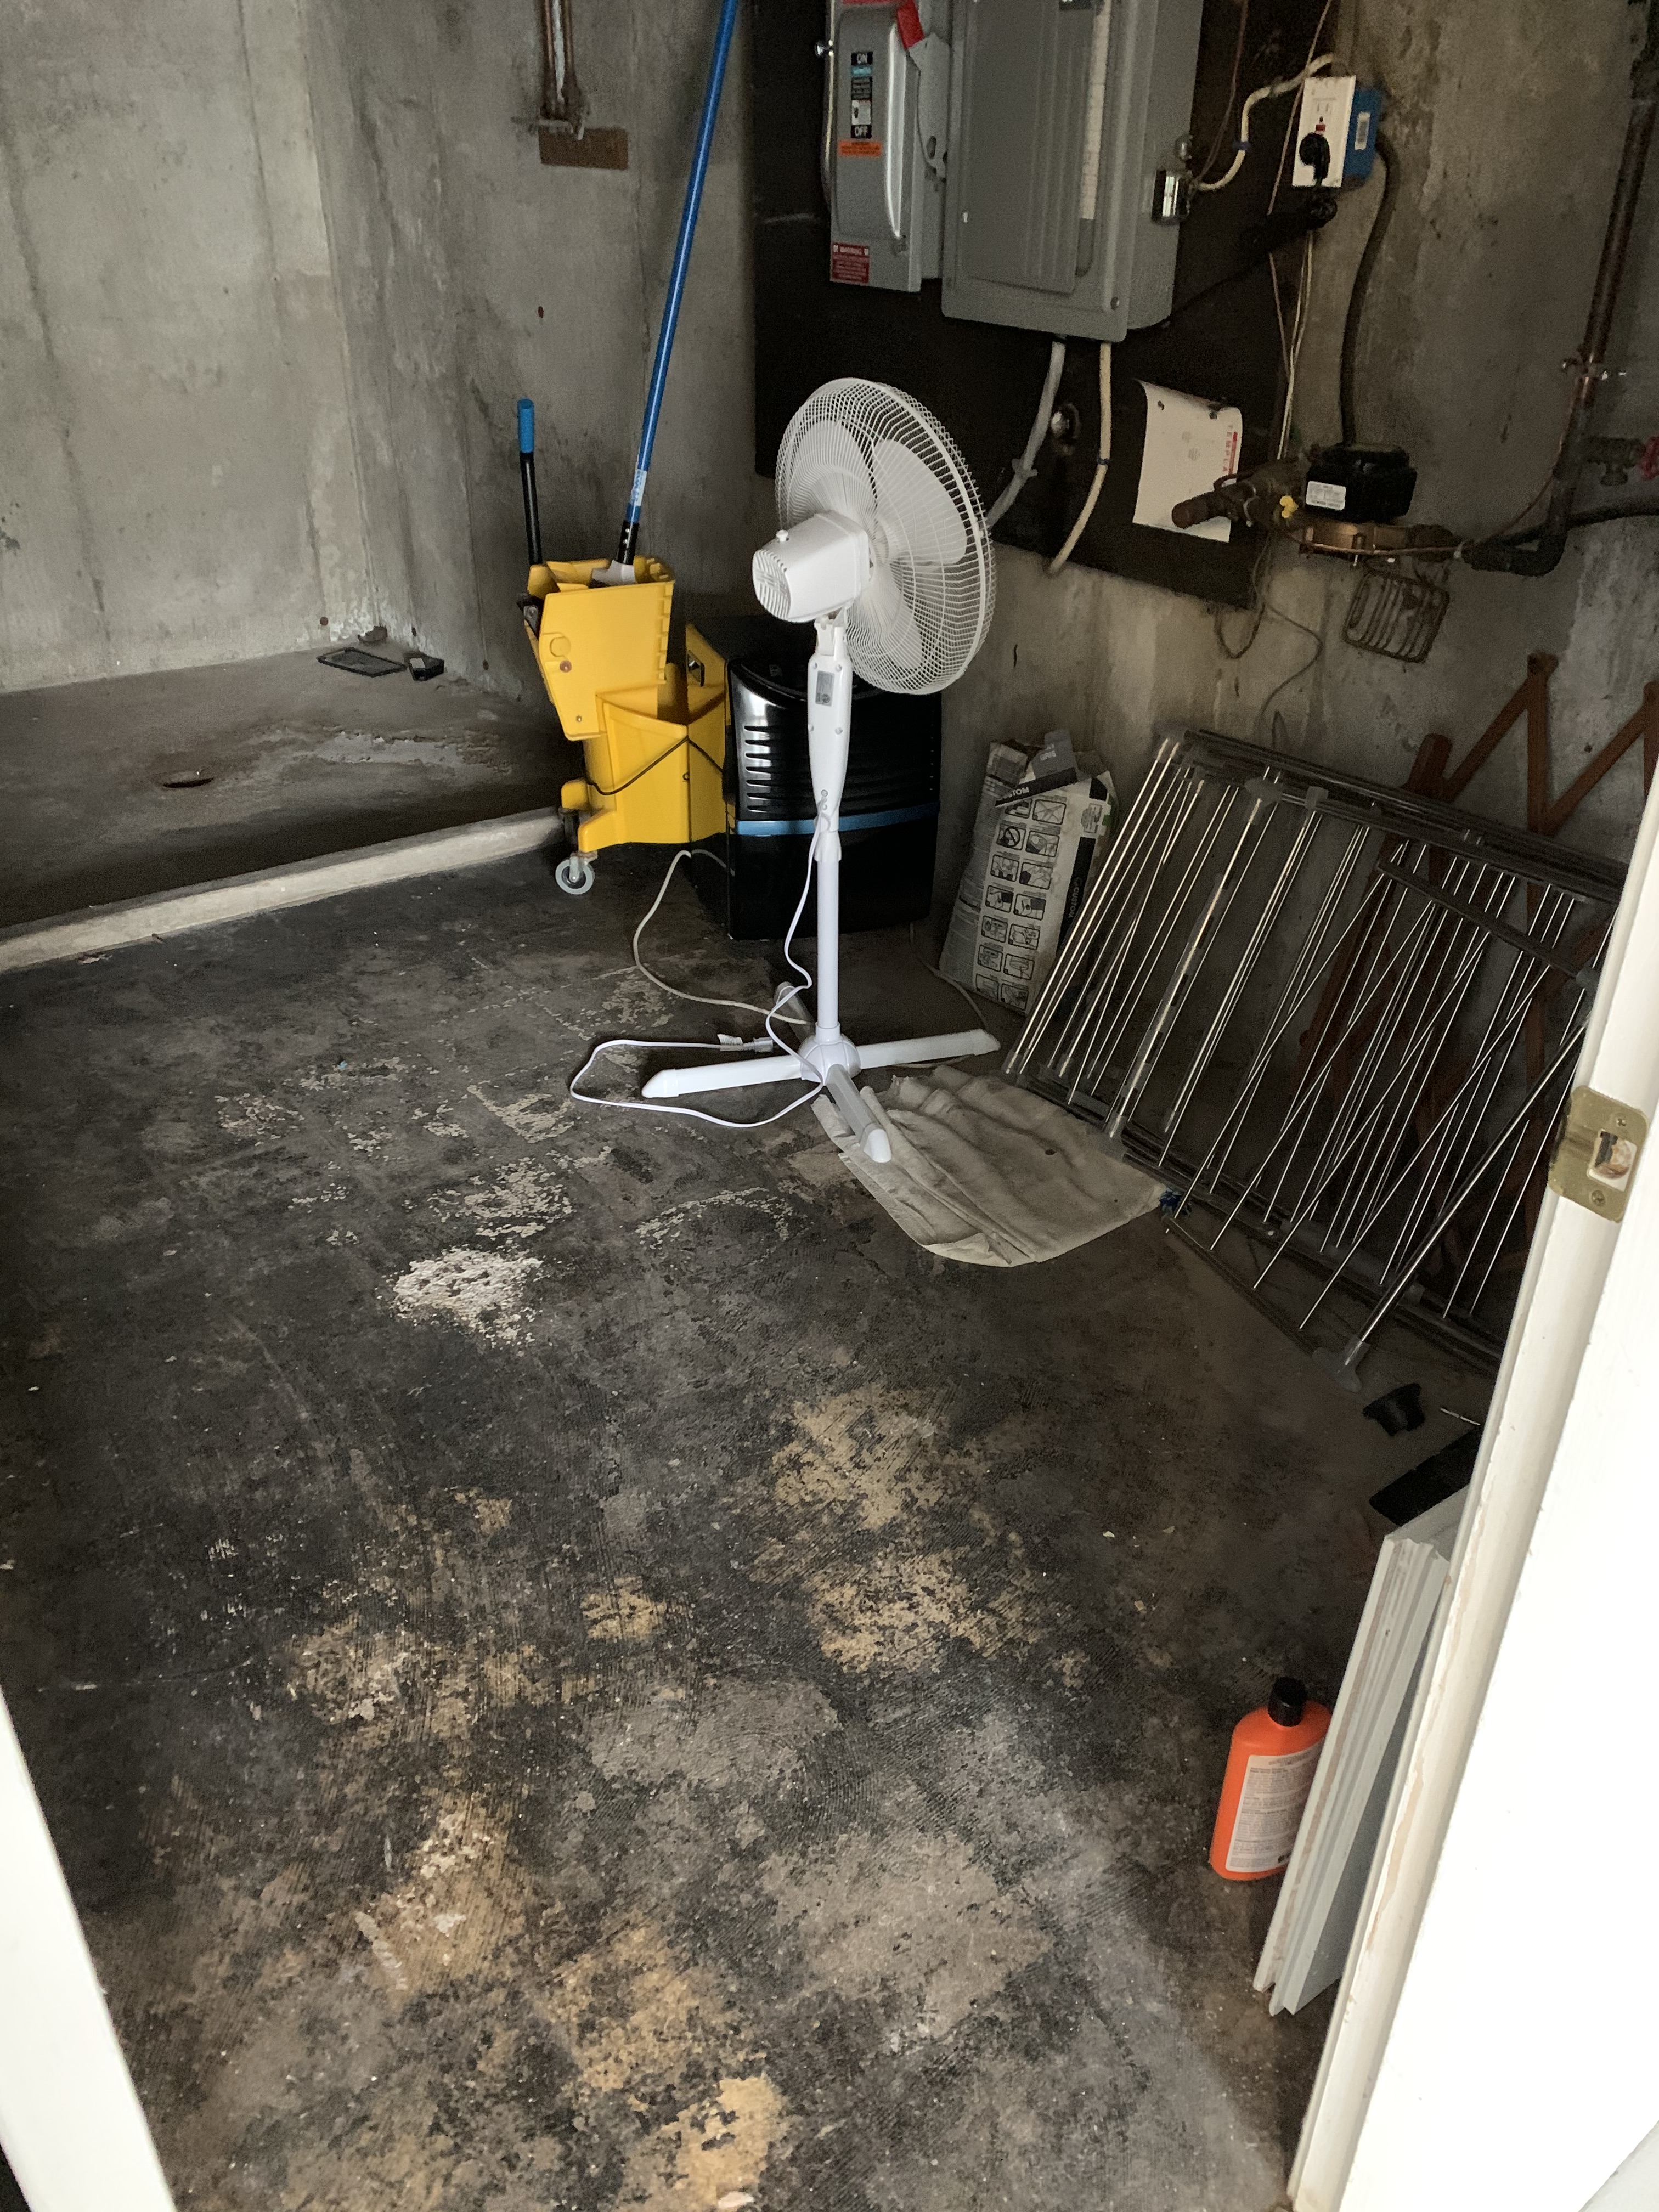
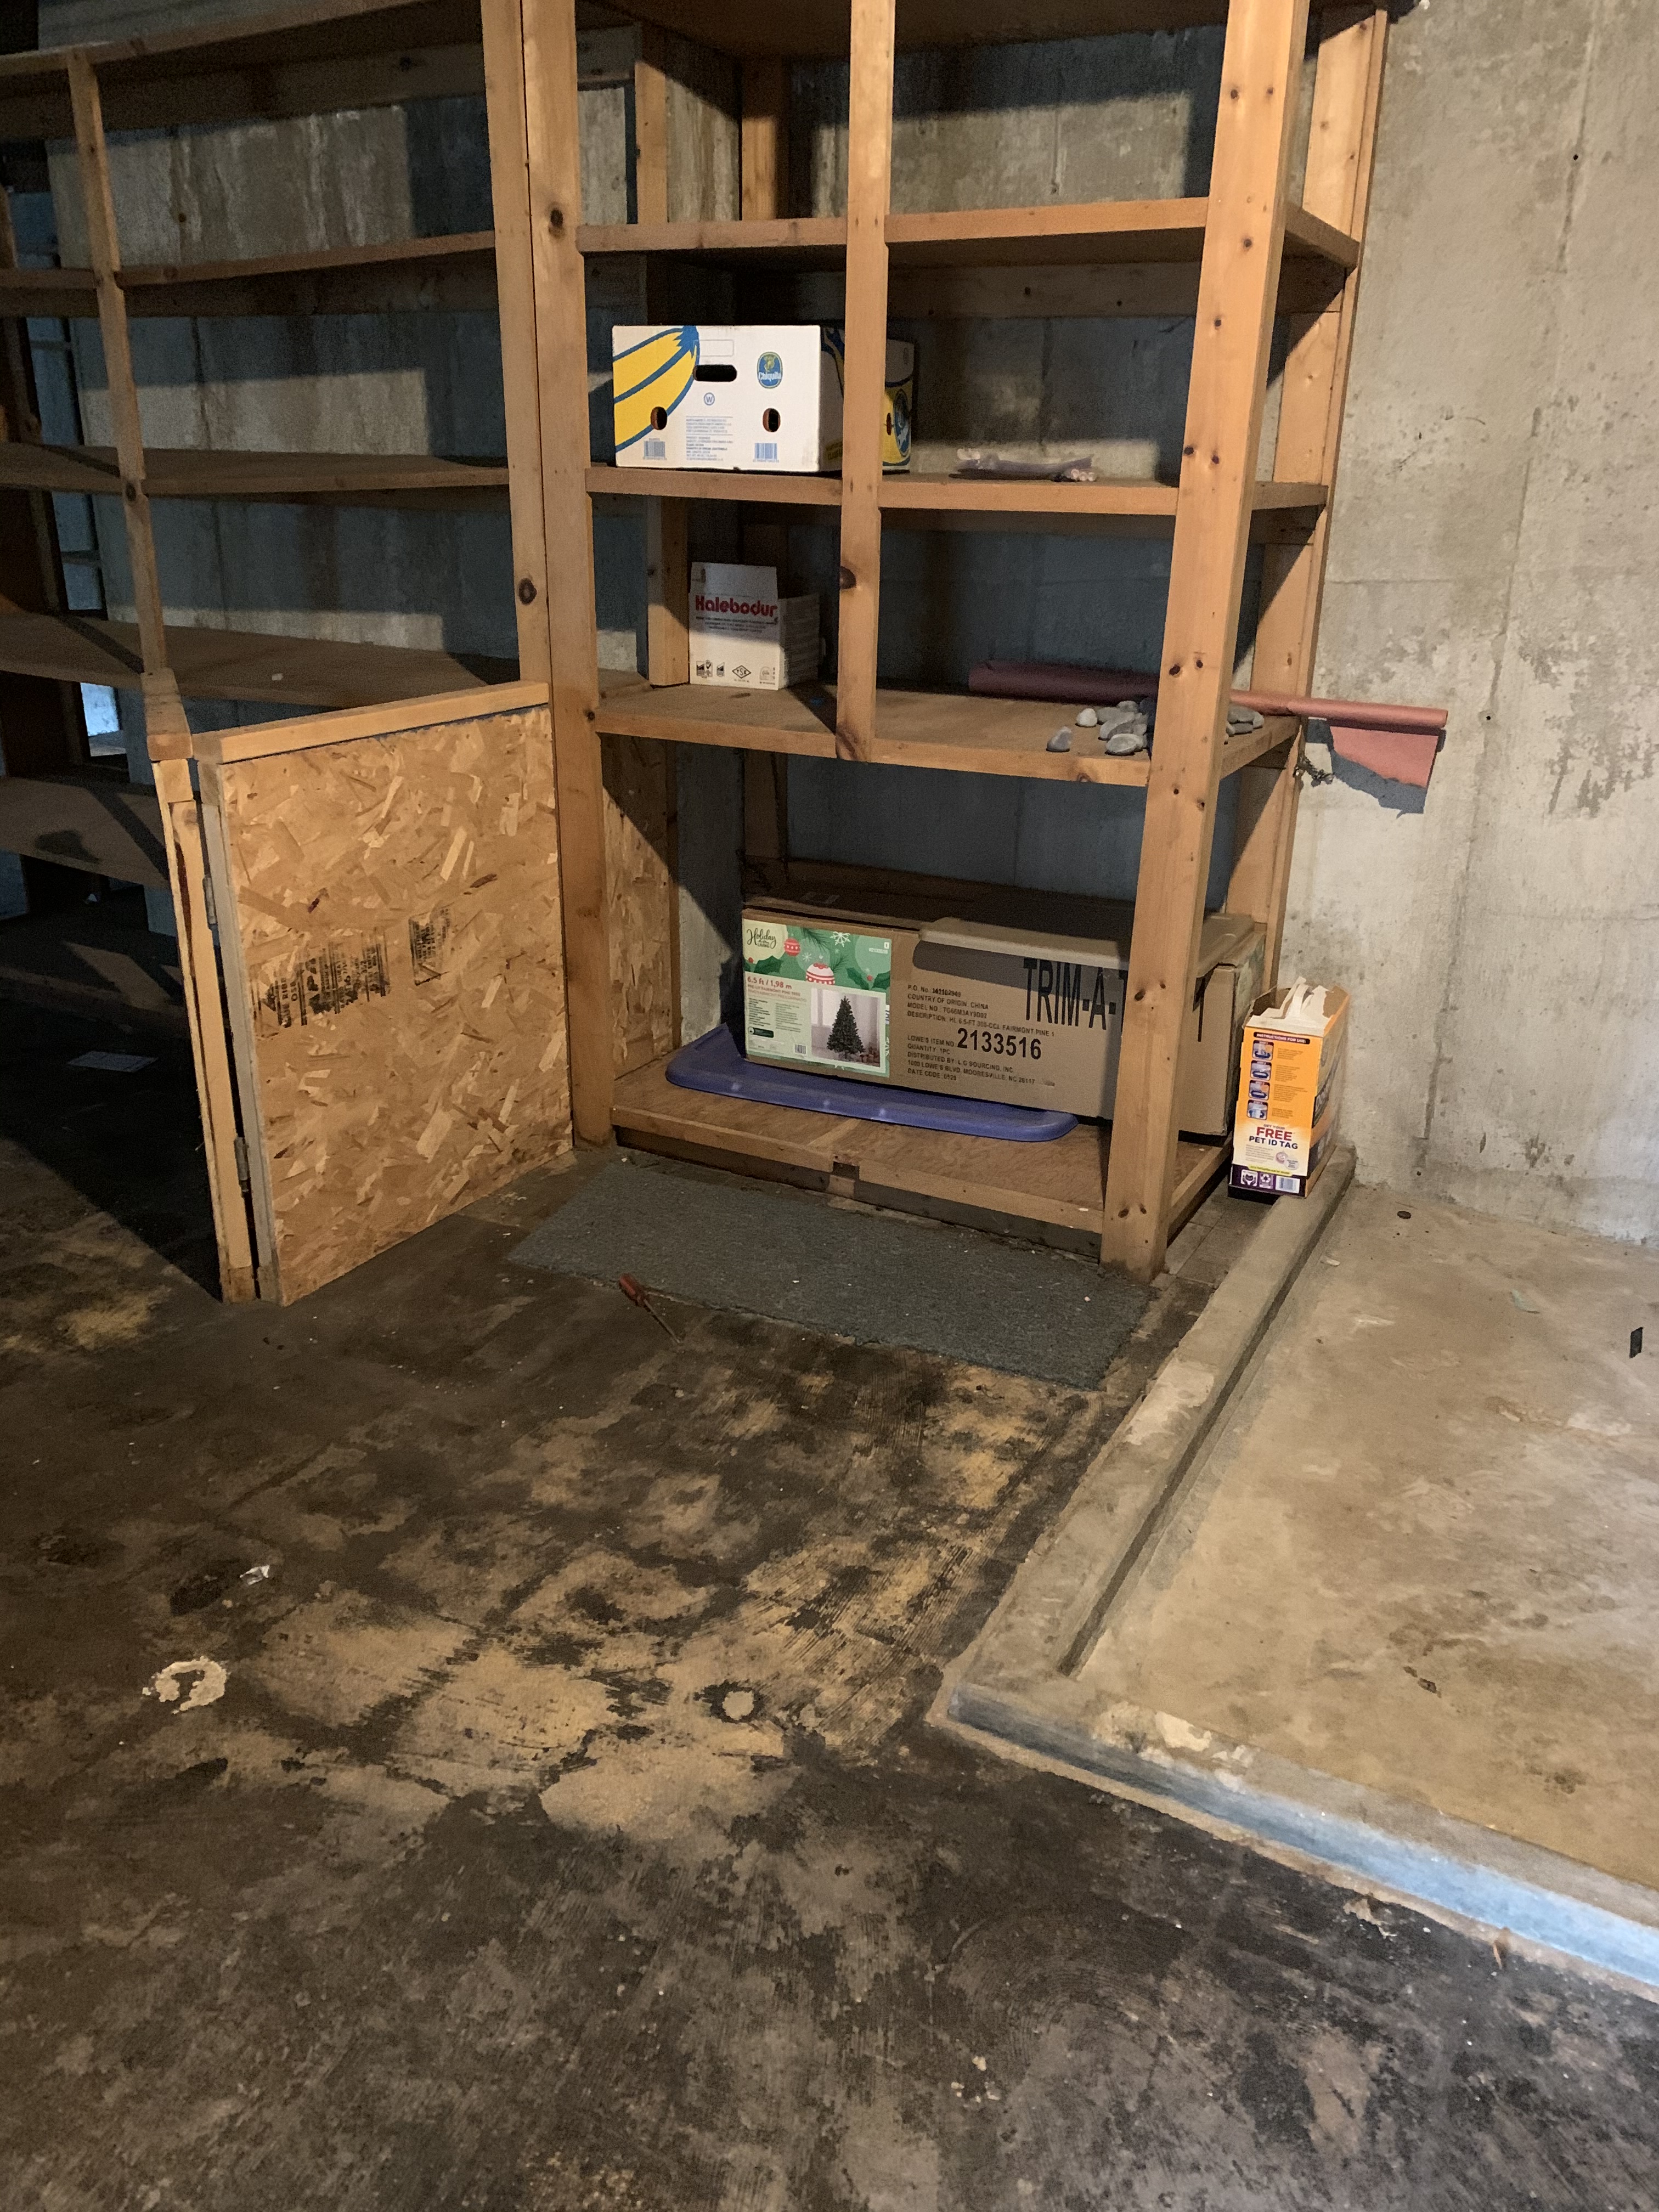
At first glance, the basement doesn’t look a whole lot different now than it did before. But if you head into the rear storage space, you’ll see the most radical makeover, because not only is that where the water heater, HVAC center and electric panel are located, and the oil tank was removed in favor of converting the baseboard heating to gas … The entire room was re-walled – those abutting the ground were fully spray foamed, peg board added for ease of organization. The strange dog shower (or whatever?) was removed and the entire floor was resurfaced. Finally, there are now a ton of racks for ease of storage.
In the causeway between the laundry stairs and the actual basement, which we call the Maps Room because all of the art pieces hung there were maps, we repainted everything and replaced the ceiling tiles. In the basement proper, we updated most of the ceiling tiles and zhuzhed up the entire room.
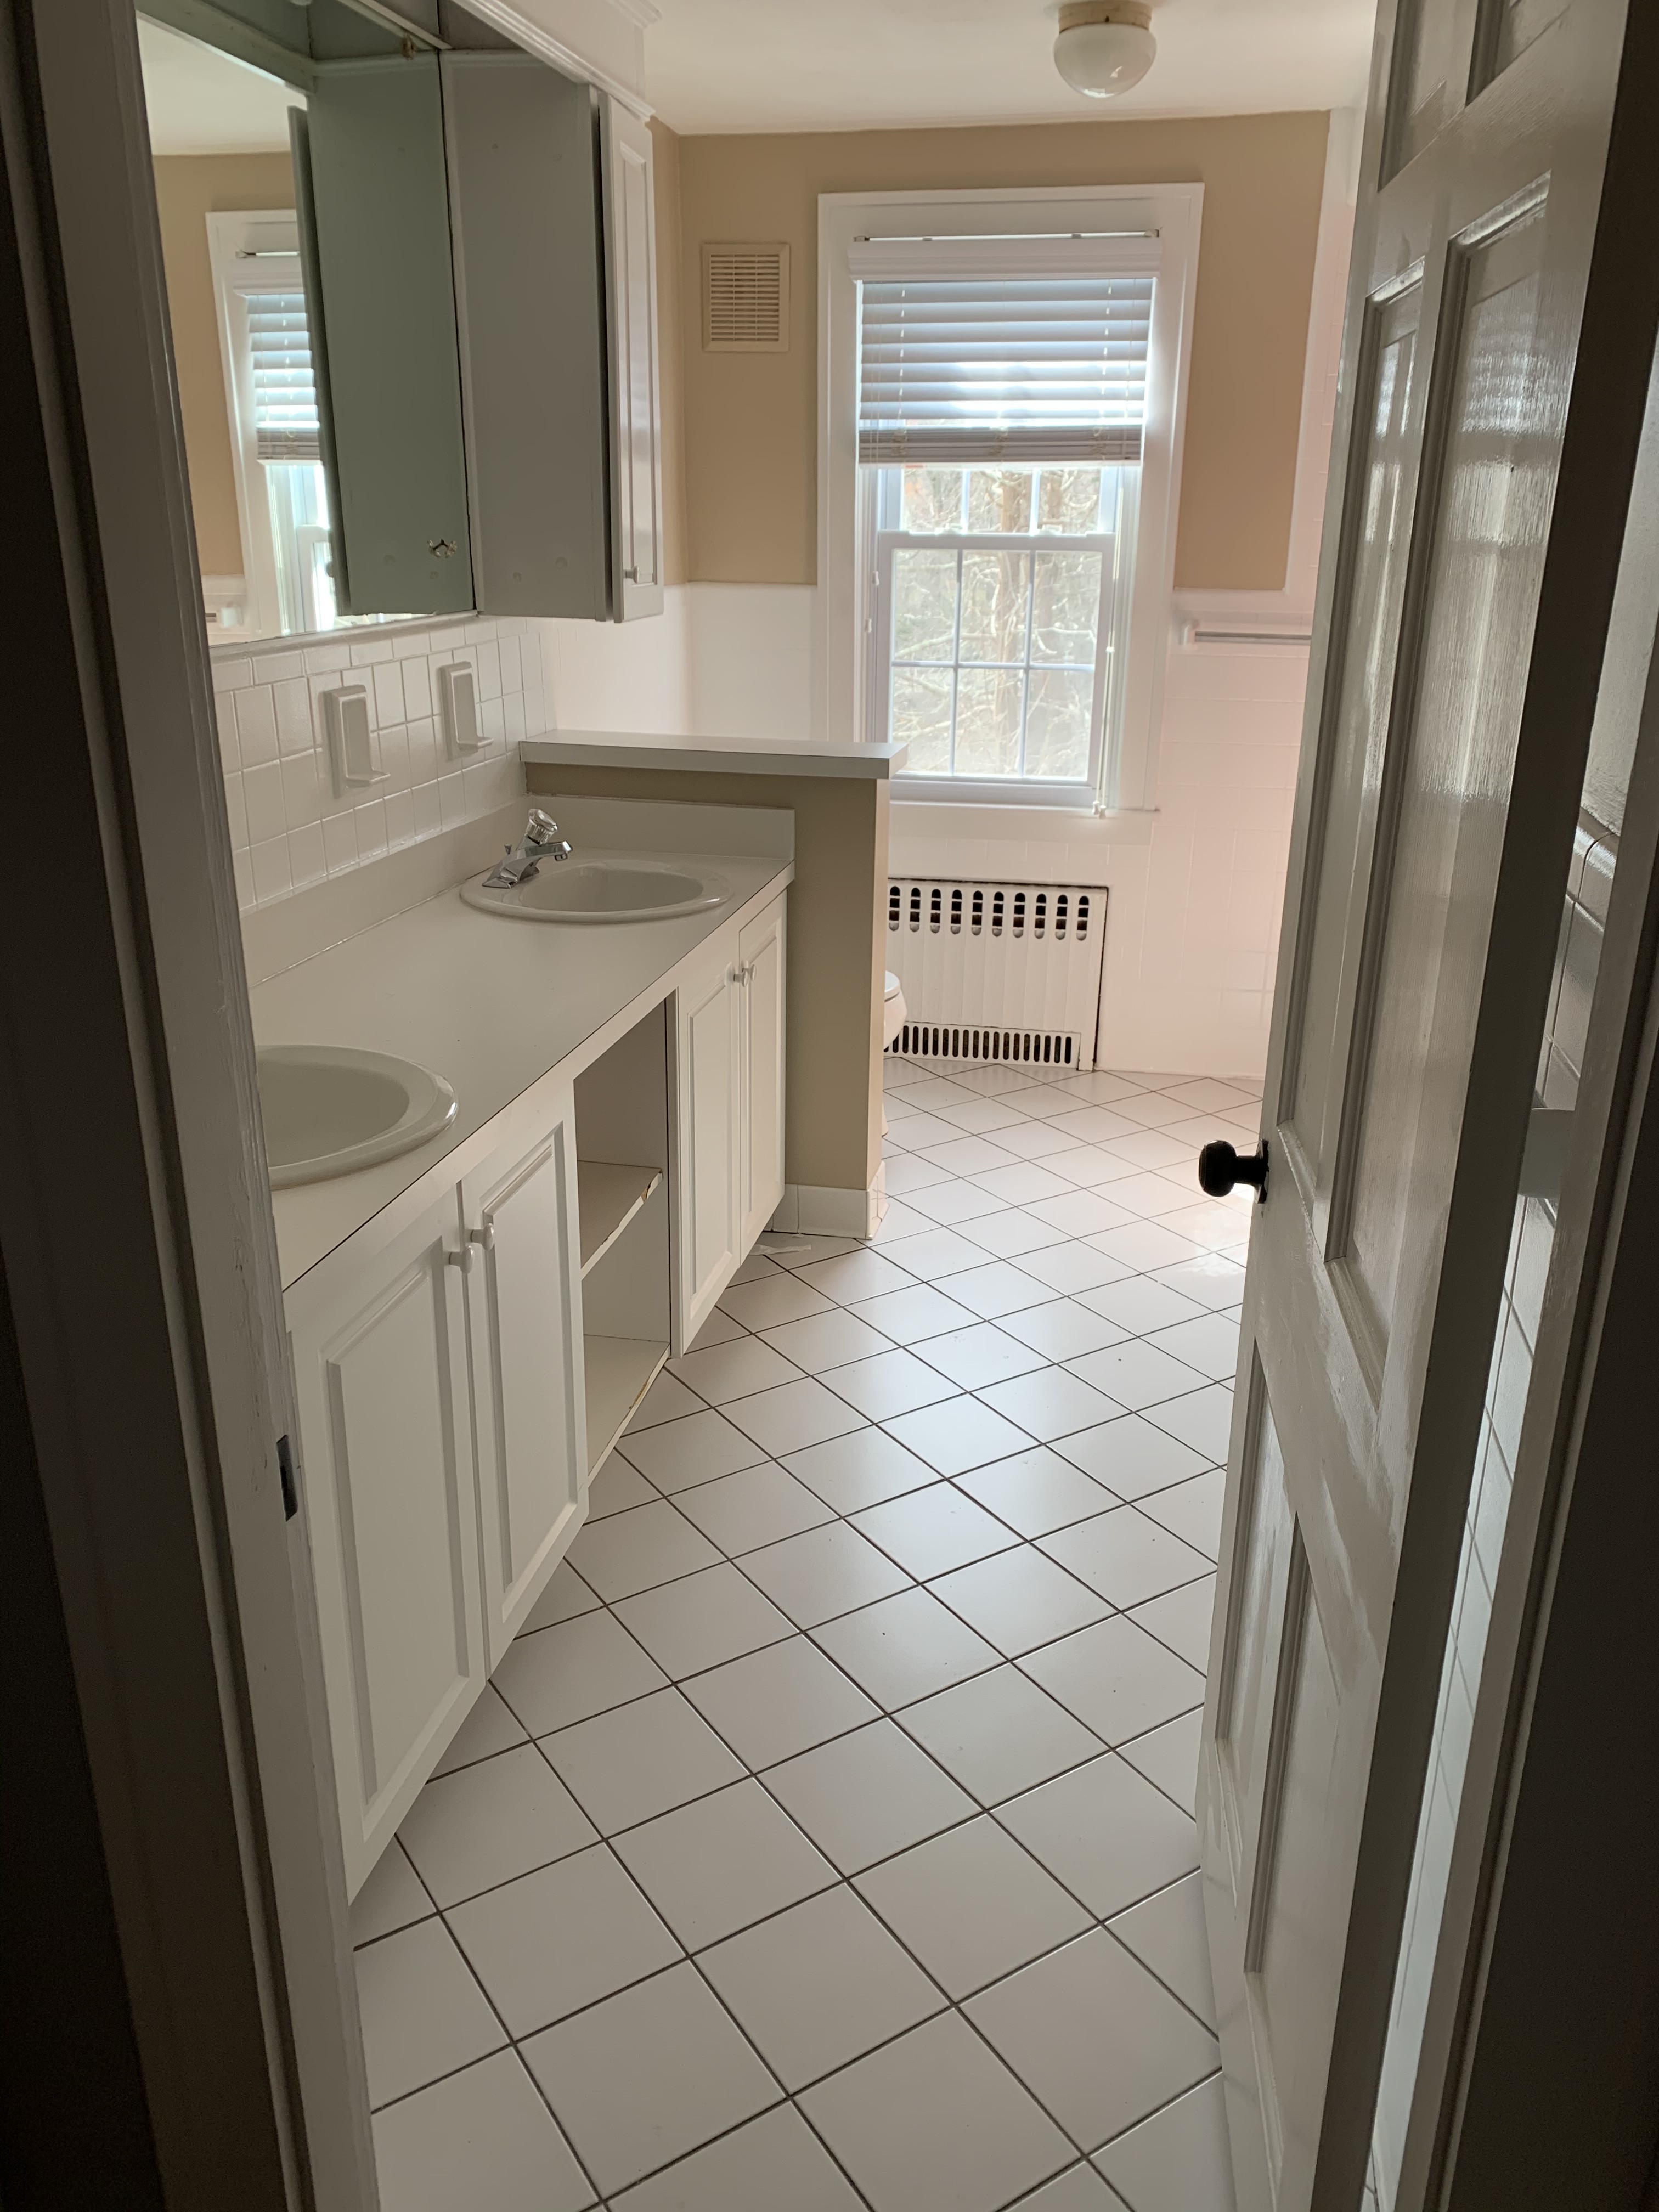
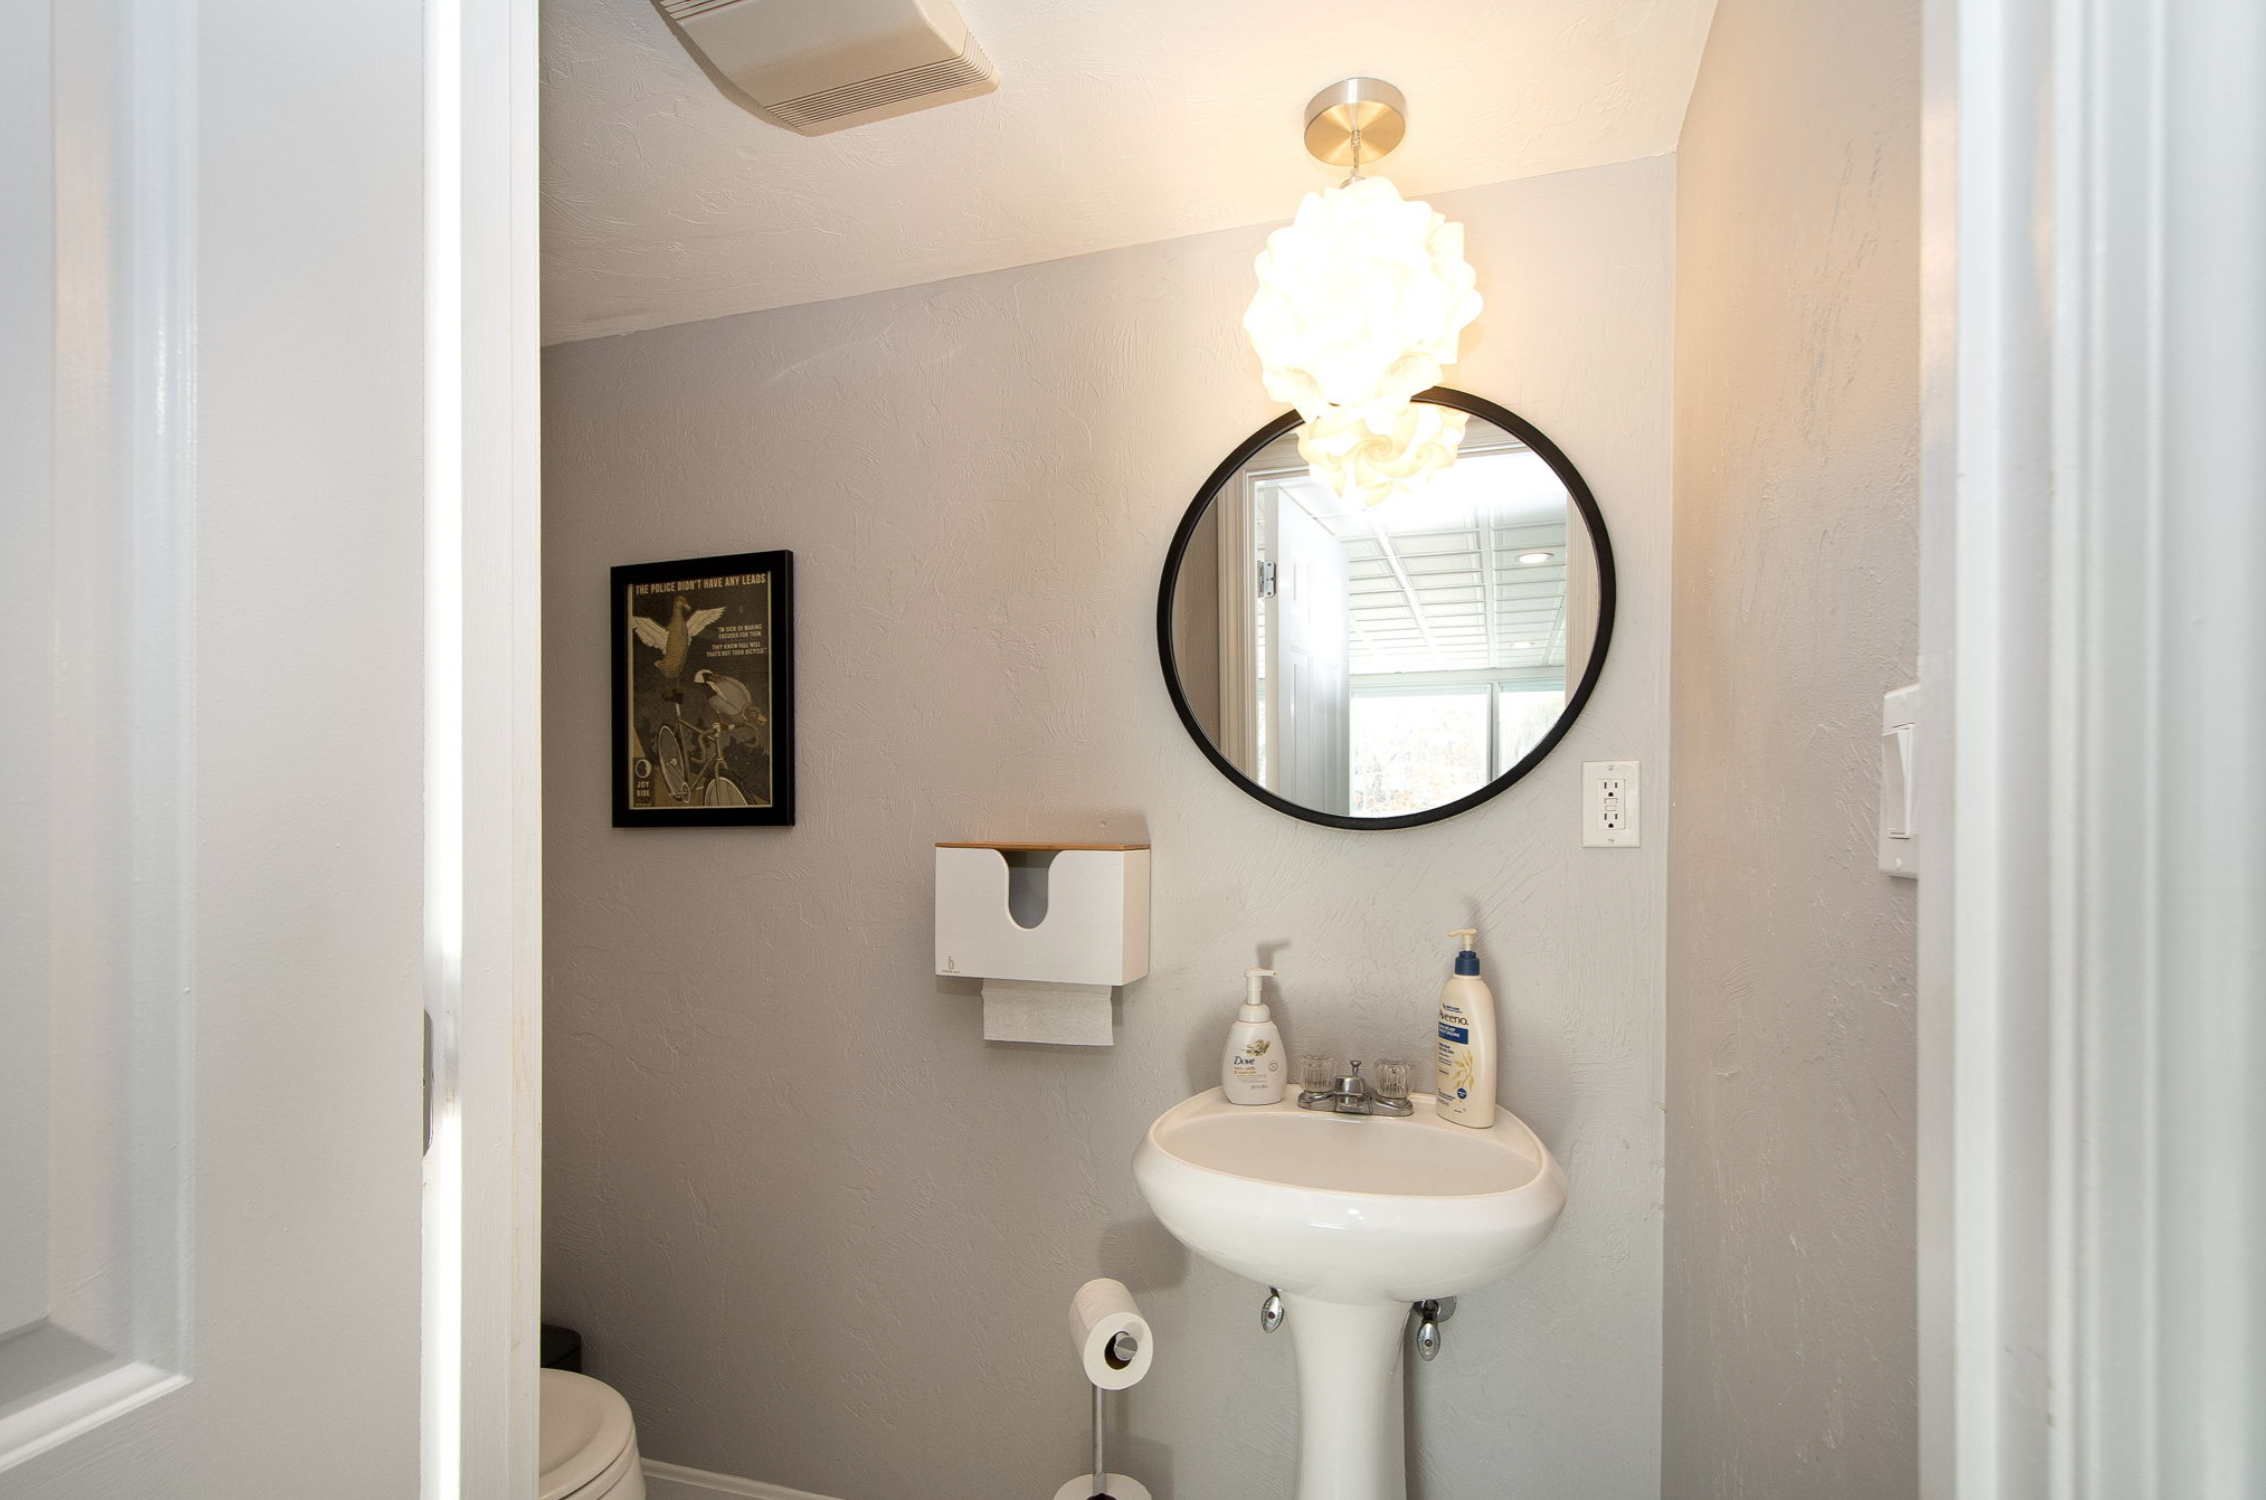
Let’s take a quick spin through the two half baths – one off the Maps Room on the lower floor, one off the laundry on the main floor. The basement makeover was mostly cosmetic – we replaced the light fixture, toilet and updated the decor. On the main floor, it was a full gut – except the odd cupboard door, which – well, there isn’t much to be done about it and it hides a TON of storage space!
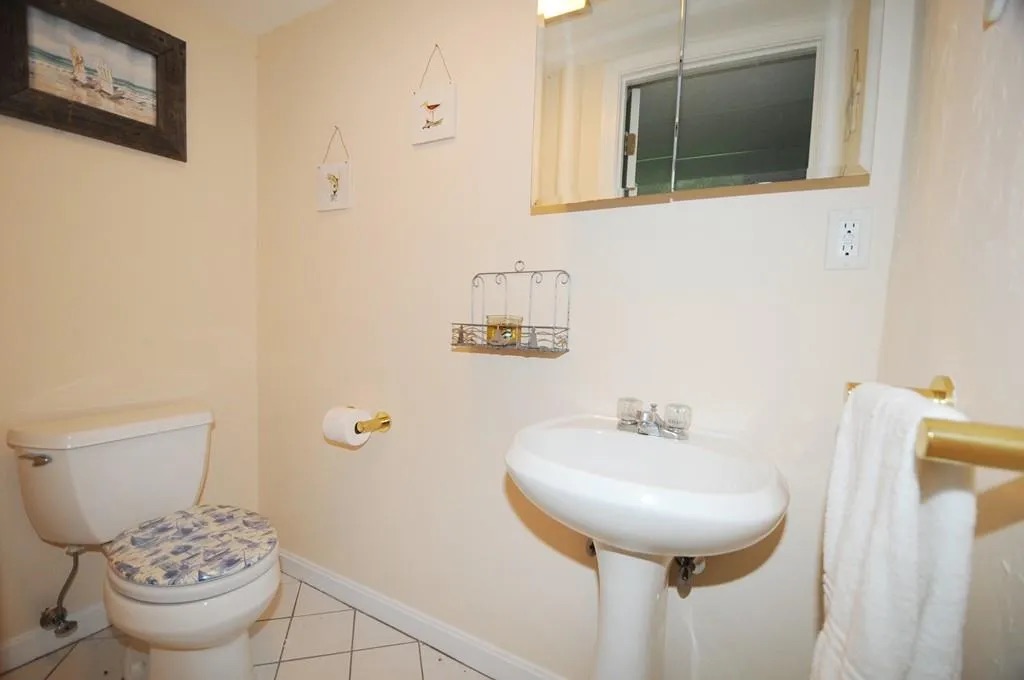
1/2 bath!
In addition to replacing everything (light fixture, fan, mirror, sink, toilet) in the main floor 1/2 bath, we also gave her a fresh coat of paint, and papered one of the walls for accent.
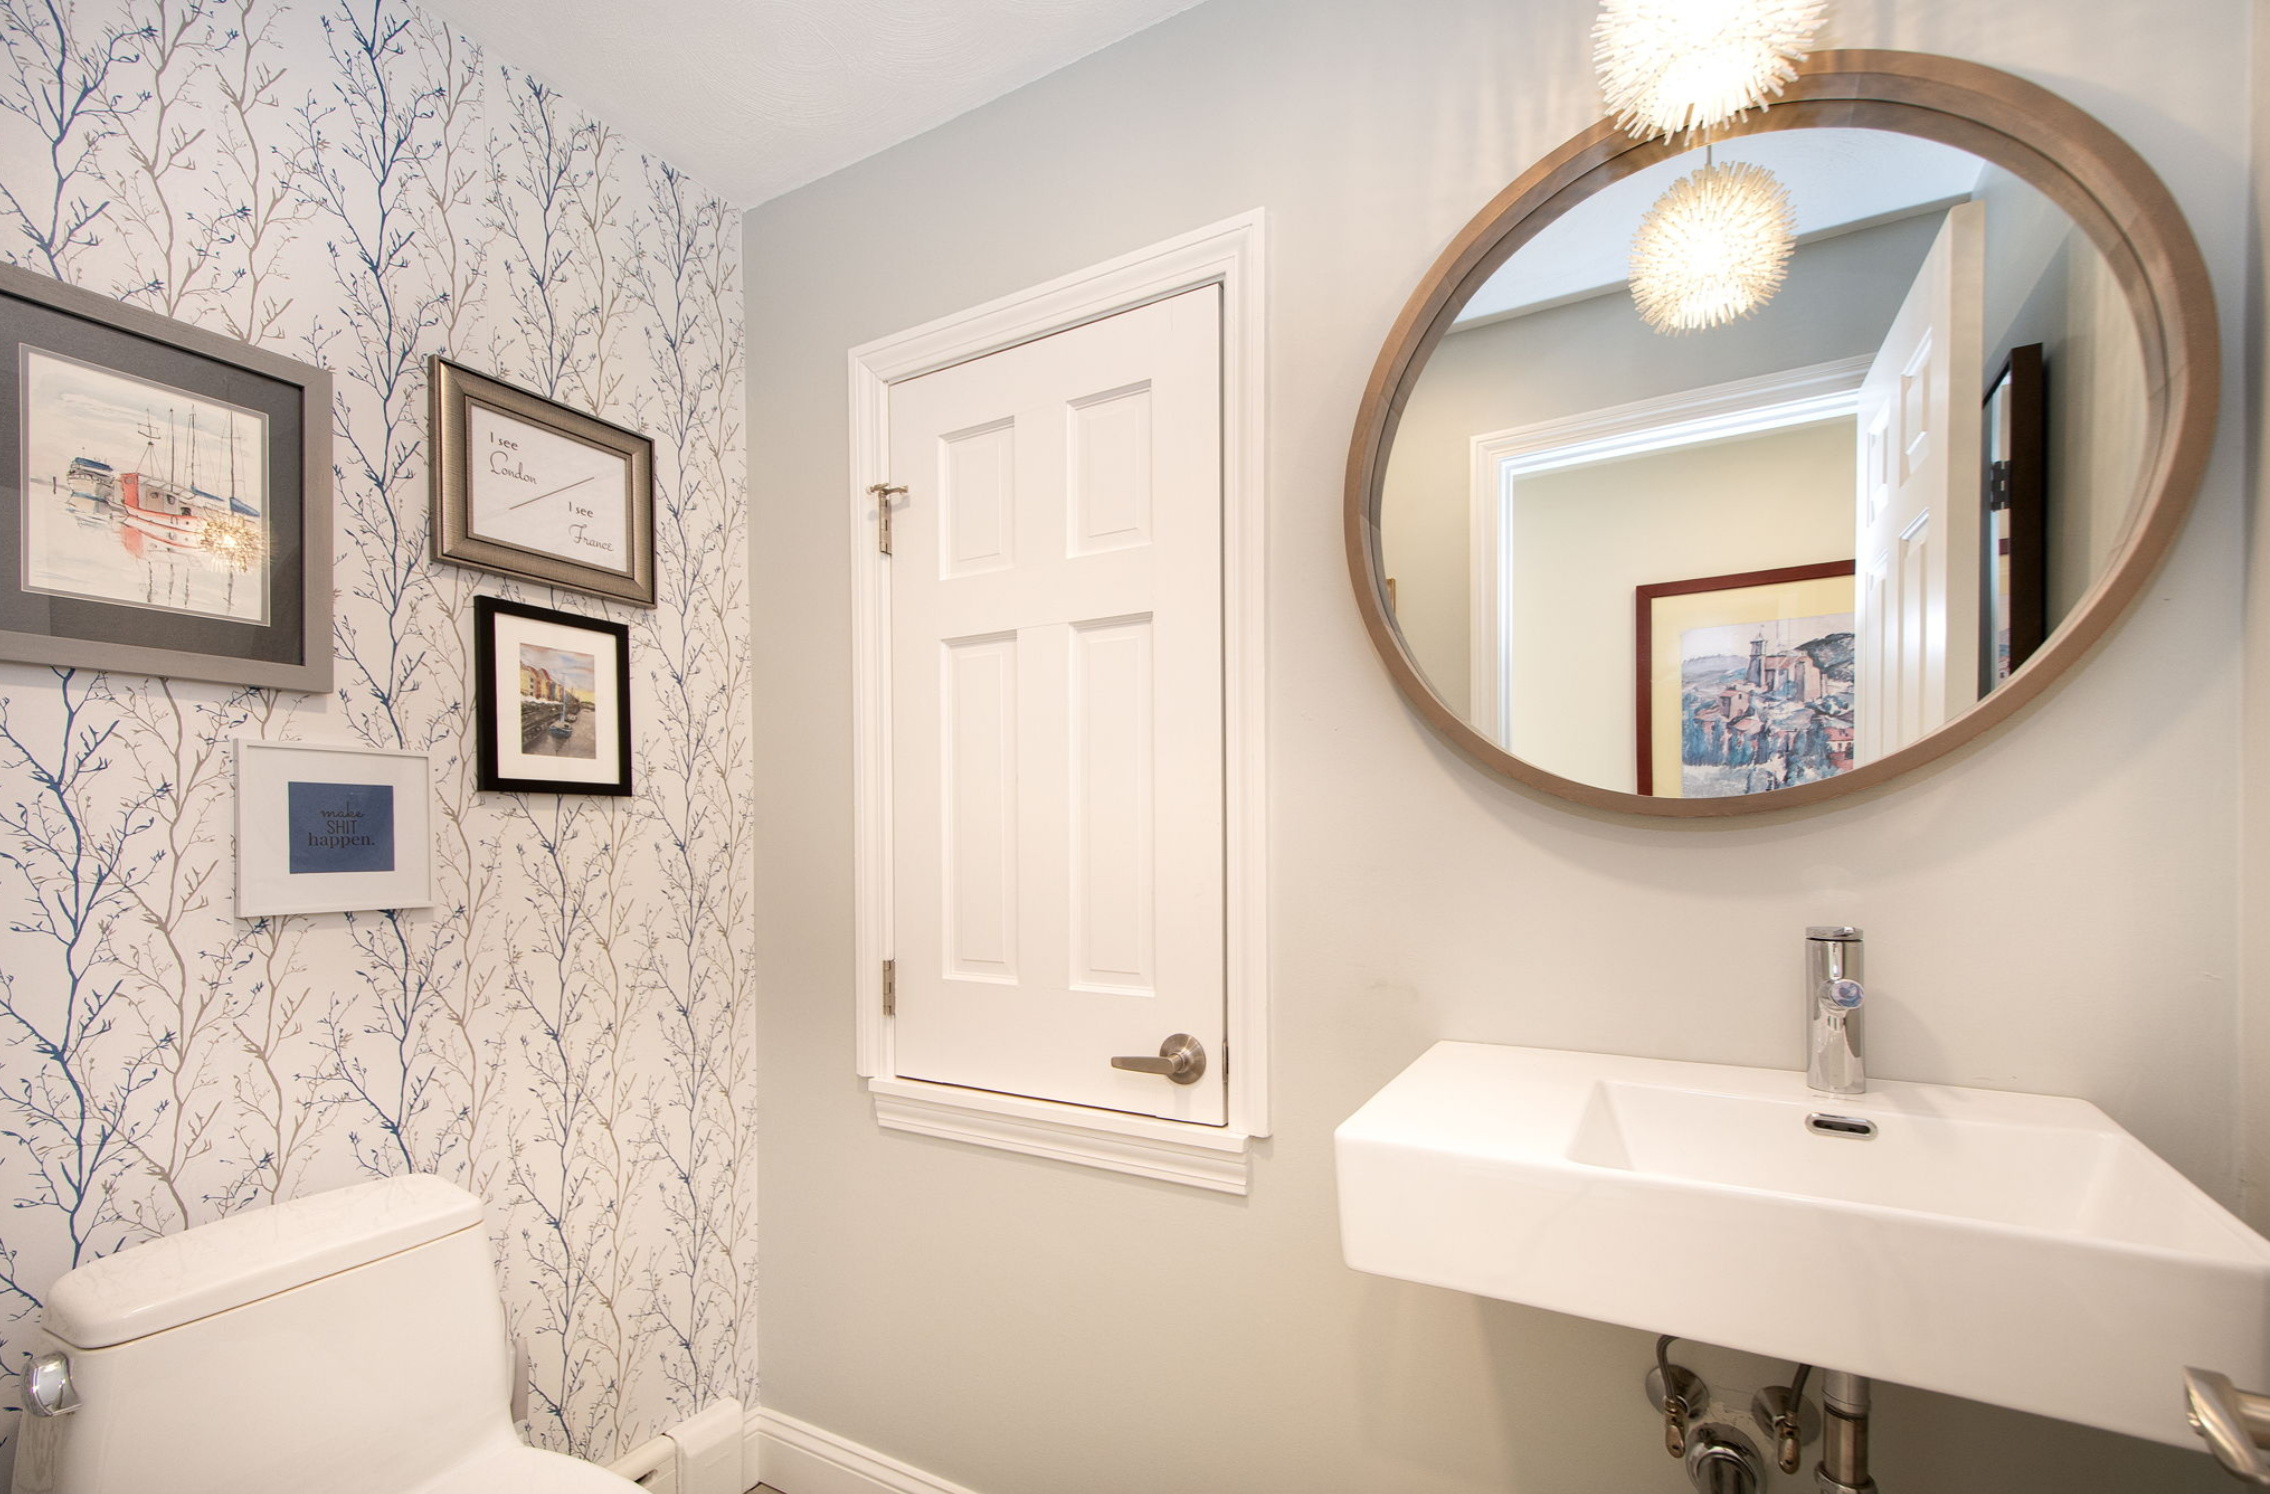
More makeovers to showcase soon…..